Campfire Cones
Campfire Cones are one of those recipes that instantly takes me back to sticky nights around a backyard fire, laughing with people who never once worried about the dishes. The first time I made Campfire Cones, a friend handed me a foil wrapped mystery and I remember the thrill of peeling back the foil to reveal bubbling chocolate and toasted marshmallow, the sweet steam rising into the cool night air. It felt like dessert and adventure rolled into one.
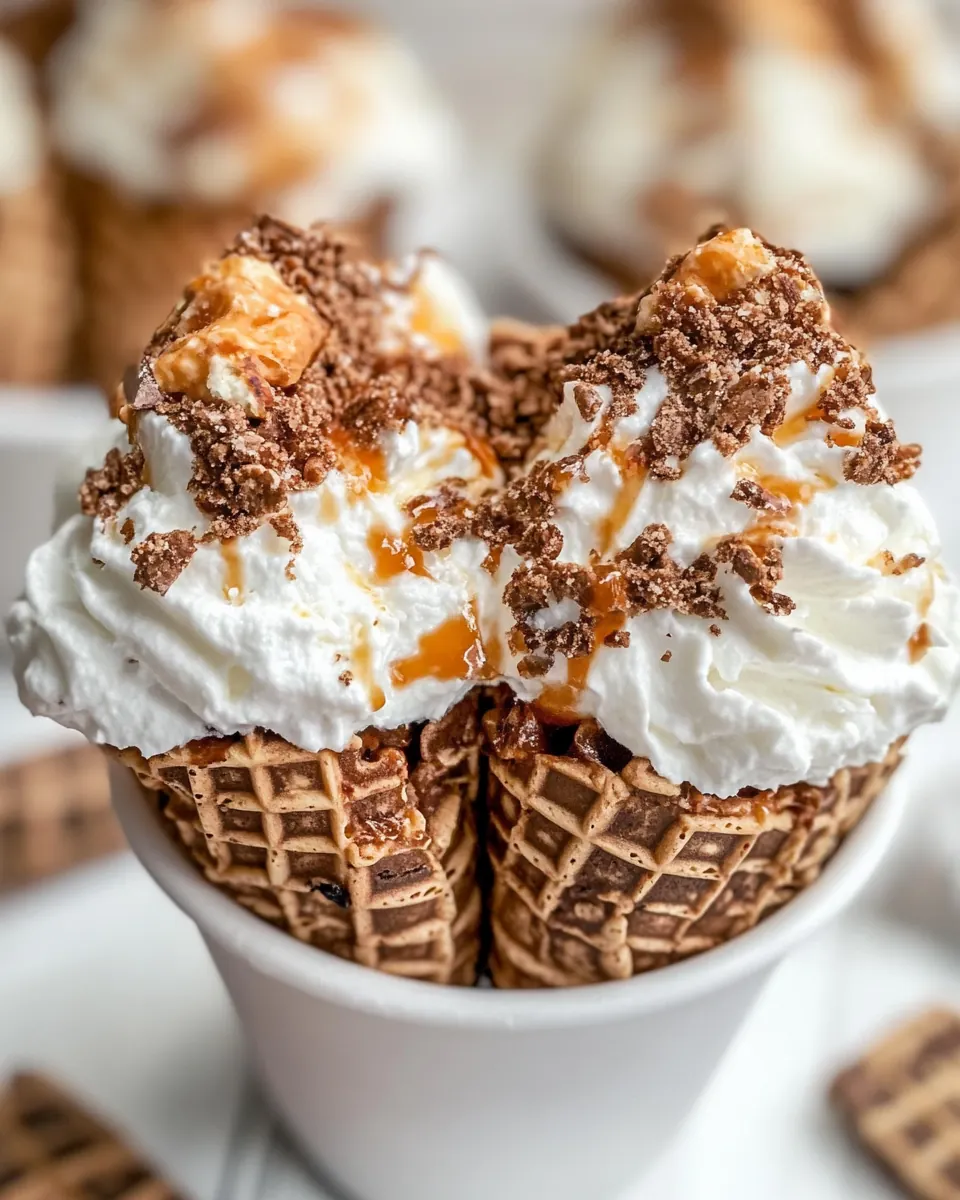
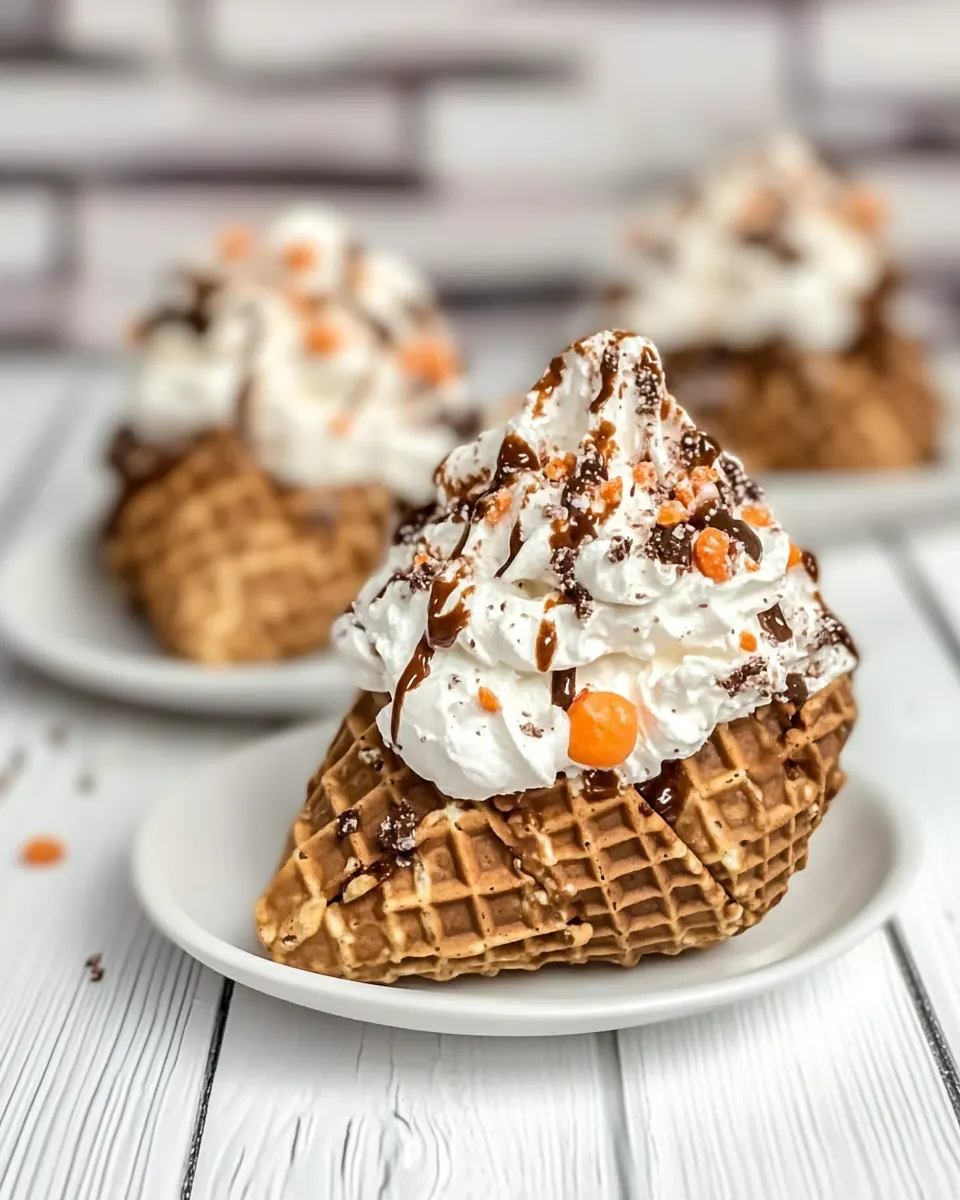
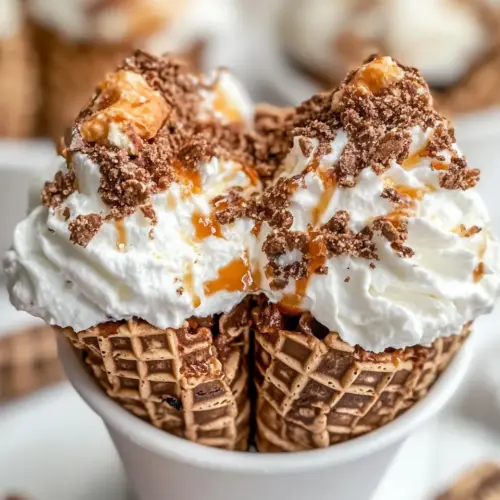
I often reach for Campfire Cones when I need an easy crowd pleaser, something that feels celebratory without a lot of fuss. I love how the crunchy waffle cones hold pockets of warm, melty chocolate chips and gooey mini marshmallows, and how crushed graham cracker pieces add a toasty texture that keeps every bite interesting. It’s playful, portable, and a little nostalgic.
Recipe Snapshot
12 mins
5 mins
7 mins
Easy
300 kcal
American
Gluten-Free, Low FODMAP
Desserts
Aluminum Foil, Oven, Grill, Campfire or Hot Coals
Why This Campfire Cones Is a Winner
Simple fun for any group
I adore how Campfire Cones turn a handful of pantry staples into an instant party. You do not need fancy equipment, and everyone can customize a cone to their own taste, which makes serving effortless and joyful.
Customizable and creative
One of my favorite things about this recipe is how forgiving it is. You can mix flavors, textures, and colors, and the cones still come out delicious, so I encourage experimentation when you are in a playful mood.
Fast and low stress
These cones heat quickly, so I reach for them when I want something warm and indulgent in a hurry. The short cook time means you get immediate rewards, and cleanup is minimal when everything is wrapped in foil.
Portable and perfect for outdoors
I keep coming back to Campfire Cones for camping or backyard gatherings because they travel well and can be heated over coals, on a grill, or in an oven. That versatility keeps my hosting relaxed and flexible.
Kid friendly and nostalgic
Watching little hands build their own cones is a highlight every single time. The ritual of stuffing, wrapping, and revealing a warm, sweet treasure is something I still smile about long after the last bite is gone.
Ingredients Overview for Campfire Cones
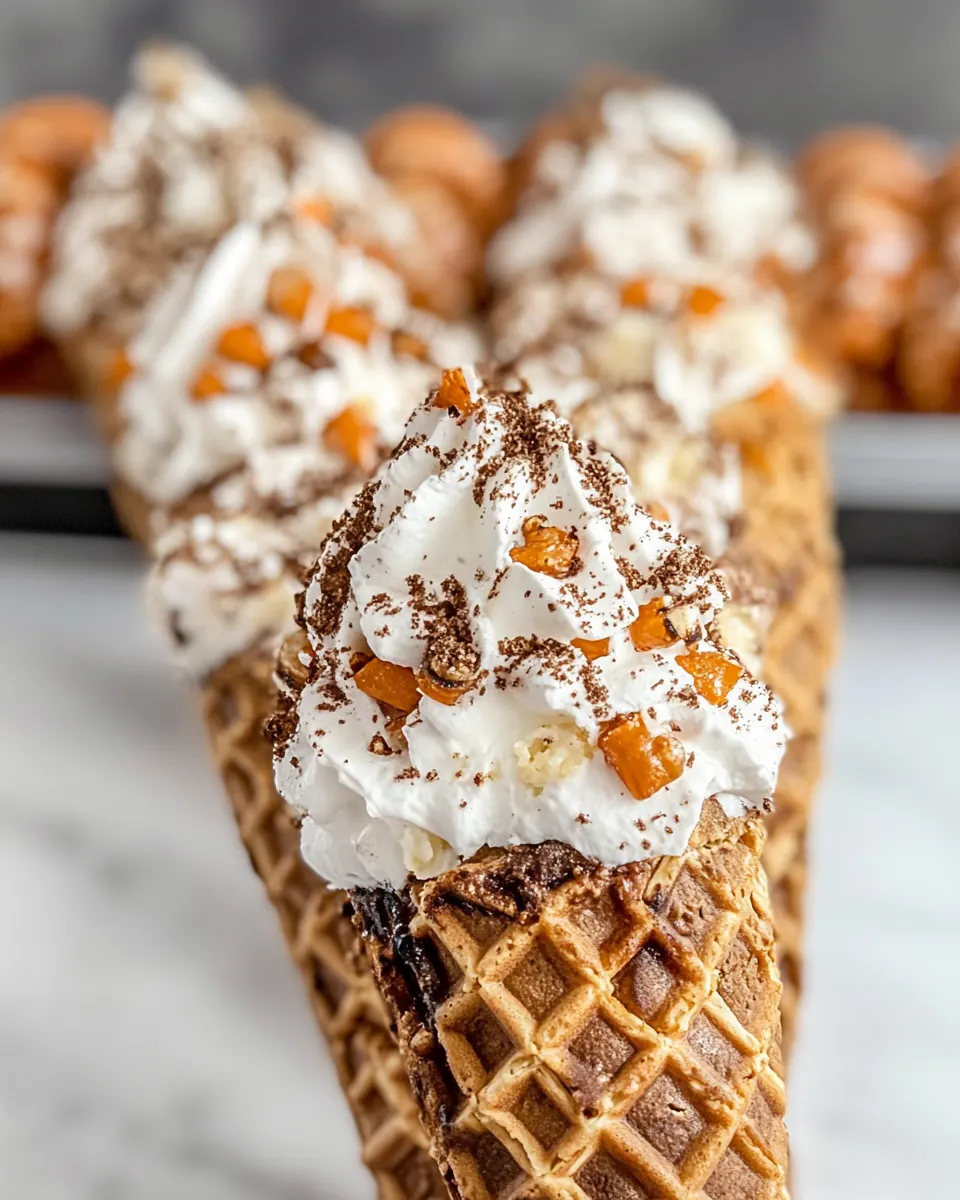
These ingredients are all about contrast and play. The crunchy waffle cones provide a crisp vessel, while the creamy and melty bits like peanut butter and chocolate chips create luxurious pockets. Tiny mini marshmallows give that classic toasted texture, and crushed graham cracker pieces add toasty, slightly salty balance. The optional toppings let you customize sweetness and texture so every cone can tell its own story.
- 1 waffle cones: Provide a crisp, handheld base for filling and grilling over a campfire; its cone shape contains fillings while allowing heat to melt ingredients inside. Offer a lightly sweet, crunchy texture that complements soft, gooey components and holds the structure during cooking. Store in a cool, dry place to maintain crispness before preparation.
- 1 tablespoon peanut butter: Spread a creamy layer of flavor and richness inside the cone to help bind dry ingredients and add a salty-sweet contrast. Melt slightly from residual heat to create pockets of smooth, nutty taste that pair well with chocolate and marshmallows. Use a thin layer to avoid overpowering other fillings.
- 1/4 cup mini marshmallows: Add fluffy, sweet pockets that puff and melt into gooey strands when warmed, creating classic s'mores-like texture. Provide lightness that contrasts with denser chocolate and graham pieces, and help fill gaps in the cone for even melting. Use an adequate amount so marshmallows soften but do not overflow during heating.
- 1/4 cup chocolate chips: Contribute rich, melted sweetness and smooth chocolatey ribbons when warmed inside the cone; chocolate chips fuse with other fillings for cohesive taste. Offer varying textures depending on type—semi-sweet, milk, or dark—enhancing overall richness. Place near the center to promote even melting from surrounding heat.
- 1/4 cup graham cracker pieces: Introduce crunchy, toasty graham flavor that mimics traditional s'mores and adds pleasant crumbly texture. Break into small pieces to distribute throughout the cone so each bite has a balance of sweetness and crunch. Combine with chocolate and marshmallows for familiar campfire flavors.
- toppings: M&Ms, Rolos, peanut butter cups, bananas, strawberries, coconut, brown sugar, butterscotch chips, nuts, anything your imagination can come up with (optional): Provide optional bursts of extra flavor, texture, and variety to customize cones according to preference; items like candies, fruits, and nuts broaden taste profiles. Allow creativity for mix-ins that add chewiness, caramel notes, fruit freshness, or tropical hints depending on chosen toppings. Use sparingly to prevent overfilling and ensure even heating.
- aluminum foil: Shield the filled cone from direct flame and hold warmth for gentle, even cooking when wrapped around the cone; foil prevents burning and helps ingredients melt together. Cradle the cone securely to retain shape and catch any melting drips for cleaner handling. Use heavy-duty foil for durability near coals or campfire embers.
Step by Step Guide for Campfire Cones
These directions give multiple ways to warm the cones, whether you are at home, by a grill, or gathered around a campfire. I like to prepare the cones and toppings ahead so assembling becomes a joyful, quick activity. Below I expand each direction into helpful, sensory rich guidance so you know exactly how it should look and feel at every point.
- Line each cone with peanut butter if you wish. Place a couple marshmallows on the bottom of the cone to the toppings don't melt out of the bottom of the cone. Then fill with your favorite toppings. I used chocolate chips, mini marshmallows, graham cracker pieces and peanut butter. Wrap each cone tightly with foil.: The warm aroma of peanut butter is nutty and inviting, and when spread inside the cone it creates a glue like barrier that helps keep other fillings from sliding out. I use the back of a spoon to smear a thin layer, feeling the slight resistance as it spreads, which tells me I have enough. This also adds a savory counterpoint to the sweet components, rounding the overall flavor. A mistake to avoid is applying too thin a layer, which will not prevent fillings from shifting, or too thick a layer, which can overwhelm the texture and make the cone heavy.
- Bake at 375 degrees Fahrenheit for 5-7 minutes.: Tucking a few mini marshmallows into the cone base creates a soft plug that puffs and becomes slightly sticky as it warms, audible in the faint pop and crackle of melting pockets. This creates a foundation that keeps chocolate and crumbs from seeping out. You want just enough to form a seal, so the cone still feels balanced in your hand. Do not overstuff the bottom because the marshmallow expansion can push other fillings out during cooking.
- Preheat the grill to medium high heat and place the cones on the grill grates for 5-10 minutes, turning occasionally.: Layering feels tactile and playful, with the glossy chocolate chips sitting beside pillowy marshmallows and crunchy graham cracker pieces . I alternate textures so each bite has contrast, pressing lightly to compact the fillings but not so much that the cone cracks. The visual cue is a full but not overflowing cone, with ingredients visible at the top. A common misstep is packing too tightly which prevents even melting and makes the cone hard to re wrap neatly.
- Heat the foil-wrapped cones over a campfire for about 3-5 minutes, or until the chocolate and marshmallows have melted.: In my trials this combination produced a perfect balance, with melted chocolate chips pooling around toasted mini marshmallows , while the graham cracker pieces kept the texture interesting and the peanut butter adding savory depth. When heated you will notice a sweet scent of toasted sugar and warm chocolate. If your fillings are cold from refrigeration, allow them to sit briefly so they meld more efficiently during heating. Avoid using cold wet fruit without accounting for the extra moisture they add.
- Wrap each cone tightly with foil: Wrapping in aluminum foil seals in heat and steam, and when I fold the foil it makes a muffled crinkle sound that tells me the cone is snug. This trapped heat ensures the chocolate chips soften and the mini marshmallows toast without burning. Make sure the foil is sealed all the way around, especially at the tip, so nothing leaks out. A loose wrap can expose fillings to direct flame or grill heat, which can scorch them quickly.
- Bake at 375 degrees Fahrenheit for 5-7 minutes: In an oven the air becomes evenly warm, and you will smell a gentle caramelizing of sugars as the mini marshmallows puff and the chocolate chips melt into glossy ribbons. The exterior of the waffle cones may warm and deepen slightly in color. Use the shorter time for softer melts and the longer time for more gooey melding. A common error is leaving them too long, which can dry out the cone and make the marshmallows tough rather than soft.
- Preheat the grill to medium high heat and place the cones on the grill grates for 5-10 minutes, turning occasionally: On a grill the sound is different, a faint hiss as the foil warms and smoke adds a subtle toasty note, while you turn each cone so heat kisses every side evenly. You are listening for a gentle sizzle through the foil and watching for a warm steam to escape when you peek, indicating the fillings are melty. Turn periodically to avoid hot spots and toasts forming on one side only. Avoid placing the cones directly over an open flame without foil, as that will char the cone quickly.
- Heat the foil-wrapped cones over a campfire for about 3-5 minutes, or until the chocolate and marshmallows have melted: Campfire heating is immediate and aromatic, with wood smoke layering over the sweet scents of melting chocolate chips and caramelizing mini marshmallows . Hold the cones at a safe distance from the embers and rotate them slowly, feeling warmth through the foil until you sense even heat. The cone should be hot to the touch through the foil but not overly scorchy, and the fillings should be visibly melted when you carefully unwrap. A frequent mistake is leaving them too close to coals, which can burn the foil and produce bitter flavors.
Ways to Adapt This Recipe

These adaptation ideas help you make Campfire Cones fit any occasion, dietary need, or taste preference. Below I expand tips into actionable list items so you can pick one and run with it.
- Turn into a fruit forward cone, add sliced fresh banana or strawberries among the fillings just before heating to introduce bright acidity and natural moisture. Place the fruit near the top so it warms without turning mushy, and enjoy the balance between warm chocolate and bright fruit. Keep in mind fruit releases juices as it heats, so eat sooner after cooking to keep the cone crisp.
- Make nut free, leave out any nut products and focus on chocolate, marshmallows, and graham crackers for a kids safe option. Replace peanut butter with a sun butter alternative if tolerated, or omit entirely and rely on the chocolate to provide richness. Double check all packaged toppings for potential cross contamination if serving to someone with allergies.
- Boost crunch, add chopped nuts or crushed cookies among the graham cracker pieces for extra texture. Scatter them sparingly so the cone does not become too dense or hard to bite through. Toast the nuts briefly beforehand to enhance their aroma, but avoid burning which creates a bitter note.
- Make ahead for convenience, assemble cones, wrap in clean foil, and store at room temperature for a few days or in the fridge for up to a week per the provided notes. Reheat briefly in an oven or over coals when ready to serve, ensuring the fillings soften without overcooking the cone. Do not freeze assembled cones as the cone texture will degrade.
- Use flavored chips, swap classic chocolate chips for butterscotch or buttermilk chips to shift the flavor profile subtly while keeping the same technique. These alternate chips melt differently so watch the heat closely and use slightly shorter heating times if they are faster melting.
- Serve as an interactive station, lay out fillings and let guests build their own cones. Provide labels for toppings and small scoops to keep things tidy. This turns dessert into an activity and reduces the work for the host, but keep allergen separation in mind when arranging options.
Perfect Pairings for Campfire Cones
Campfire Cones work beautifully with simple, complementary items that enhance the outdoor, casual vibe. Below I outline serving approaches, occasions, and storage tips so you can present them confidently.
- Casual gatherings, serve Campfire Cones at backyard barbecues or tailgate parties where guests can assemble and heat their own. They pair well with warm drinks or fruity punches and create a fun focal point for casual conversation.
- Camping nights, these are ideal for evenings around the fire, because they heat quickly and require minimal tools. Keep cones wrapped in foil until ready to warm, and rotate by the coals for even melting. They make a compact, satisfying dessert after a day of hiking or swimming.
- Kids parties, set up a toppings bar with safe, supervised options so children can create playful combinations. Use pre measured cups of mini marshmallows, chocolate chips, and graham cracker pieces to reduce mess and speed assembly, and encourage tasting without over stuffing to prevent spills.
- Storage and make ahead, you can assemble cones and store them wrapped in foil at room temperature for a few days or refrigerate for up to a week as noted. When you are ready to serve, reheat briefly in an oven or over a grill to revive the melty texture. Avoid freezing assembled cones since texture suffers upon thawing.
- Seasonal pairings, in summer serve with fresh berries and cool beverages to balance the warm sweetness. For cooler nights, pair them with warm, spiced drinks to amplify the cozy feeling of toasted marshmallow and melted chocolate.
- Presentation, unwrap each foil bundle at the table for dramatic reveal, or place them in small cups to catch any drips. Use small spoons for guests to scoop melted centers if the cone becomes very gooey, and provide napkins for sticky fingers.
FAQ
Conclusion
Campfire Cones bring together crunch, gooey melt, and playful customization into one approachable treat. They are special because they let you craft a warm dessert with minimal fuss, perfect for outdoor nights or stress free entertaining. Give them a try the next time you want something interactive and comforting, and invite friends or family to build their own so everyone gets a personalized sweet. You will likely find this becomes a go to dessert for casual gatherings and simple celebrations.
Campfire Cones
Equipment
- Aluminum Foil
- Oven
- Grill
- Campfire or Hot Coals
Ingredients
- 1 waffle cones Provide a crisp, handheld base for filling and grilling over a campfire; its cone shape contains fillings while allowing heat to melt ingredients inside. Offer a lightly sweet, crunchy texture that complements soft, gooey components and holds the structure during cooking. Store in a cool, dry place to maintain crispness before preparation.
- 1 tablespoon peanut butter Spread a creamy layer of flavor and richness inside the cone to help bind dry ingredients and add a salty-sweet contrast. Melt slightly from residual heat to create pockets of smooth, nutty taste that pair well with chocolate and marshmallows. Use a thin layer to avoid overpowering other fillings.
- 1/4 cup mini marshmallows Add fluffy, sweet pockets that puff and melt into gooey strands when warmed, creating classic s'mores-like texture. Provide lightness that contrasts with denser chocolate and graham pieces, and help fill gaps in the cone for even melting. Use an adequate amount so marshmallows soften but do not overflow during heating.
- 1/4 cup chocolate chips Contribute rich, melted sweetness and smooth chocolatey ribbons when warmed inside the cone; chocolate chips fuse with other fillings for cohesive taste. Offer varying textures depending on type—semi-sweet, milk, or dark—enhancing overall richness. Place near the center to promote even melting from surrounding heat.
- 1/4 cup graham cracker pieces Introduce crunchy, toasty graham flavor that mimics traditional s'mores and adds pleasant crumbly texture. Break into small pieces to distribute throughout the cone so each bite has a balance of sweetness and crunch. Combine with chocolate and marshmallows for familiar campfire flavors.
- Optional toppings: M&Ms, Rolos, peanut butter cups, bananas, strawberries, coconut, brown sugar, butterscotch chips, nuts, anything your imagination can come up with Provide optional bursts of extra flavor, texture, and variety to customize cones according to preference; items like candies, fruits, and nuts broaden taste profiles. Allow creativity for mix-ins that add chewiness, caramel notes, fruit freshness, or tropical hints depending on chosen toppings. Use sparingly to prevent overfilling and ensure even heating.
- aluminum foil Shield the filled cone from direct flame and hold warmth for gentle, even cooking when wrapped around the cone; foil prevents burning and helps ingredients melt together. Cradle the cone securely to retain shape and catch any melting drips for cleaner handling. Use heavy-duty foil for durability near coals or campfire embers.
Instructions
- Line each cone with peanut butter if you wish. Place a couple marshmallows on the bottom of the cone to the toppings don't melt out of the bottom of the cone. Then fill with your favorite toppings. I used chocolate chips, mini marshmallows, graham cracker pieces and peanut butter. Wrap each cone tightly with foil.: The warm aroma of peanut butter is nutty and inviting, and when spread inside the cone it creates a glue like barrier that helps keep other fillings from sliding out. I use the back of a spoon to smear a thin layer, feeling the slight resistance as it spreads, which tells me I have enough. This also adds a savory counterpoint to the sweet components, rounding the overall flavor. A mistake to avoid is applying too thin a layer, which will not prevent fillings from shifting, or too thick a layer, which can overwhelm the texture and make the cone heavy.
- Bake at 375 degrees Fahrenheit for 5-7 minutes.: Tucking a few mini marshmallows into the cone base creates a soft plug that puffs and becomes slightly sticky as it warms, audible in the faint pop and crackle of melting pockets. This creates a foundation that keeps chocolate and crumbs from seeping out. You want just enough to form a seal, so the cone still feels balanced in your hand. Do not overstuff the bottom because the marshmallow expansion can push other fillings out during cooking.
- Preheat the grill to medium high heat and place the cones on the grill grates for 5-10 minutes, turning occasionally.: Layering feels tactile and playful, with the glossy chocolate chips sitting beside pillowy marshmallows and crunchy graham cracker pieces . I alternate textures so each bite has contrast, pressing lightly to compact the fillings but not so much that the cone cracks. The visual cue is a full but not overflowing cone, with ingredients visible at the top. A common misstep is packing too tightly which prevents even melting and makes the cone hard to re wrap neatly.
- Heat the foil-wrapped cones over a campfire for about 3-5 minutes, or until the chocolate and marshmallows have melted.: In my trials this combination produced a perfect balance, with melted chocolate chips pooling around toasted mini marshmallows , while the graham cracker pieces kept the texture interesting and the peanut butter adding savory depth. When heated you will notice a sweet scent of toasted sugar and warm chocolate. If your fillings are cold from refrigeration, allow them to sit briefly so they meld more efficiently during heating. Avoid using cold wet fruit without accounting for the extra moisture they add.
- Wrap each cone tightly with foil: Wrapping in aluminum foil seals in heat and steam, and when I fold the foil it makes a muffled crinkle sound that tells me the cone is snug. This trapped heat ensures the chocolate chips soften and the mini marshmallows toast without burning. Make sure the foil is sealed all the way around, especially at the tip, so nothing leaks out. A loose wrap can expose fillings to direct flame or grill heat, which can scorch them quickly.
- Bake at 375 degrees Fahrenheit for 5-7 minutes: In an oven the air becomes evenly warm, and you will smell a gentle caramelizing of sugars as the mini marshmallows puff and the chocolate chips melt into glossy ribbons. The exterior of the waffle cones may warm and deepen slightly in color. Use the shorter time for softer melts and the longer time for more gooey melding. A common error is leaving them too long, which can dry out the cone and make the marshmallows tough rather than soft.
- Preheat the grill to medium high heat and place the cones on the grill grates for 5-10 minutes, turning occasionally: On a grill the sound is different, a faint hiss as the foil warms and smoke adds a subtle toasty note, while you turn each cone so heat kisses every side evenly. You are listening for a gentle sizzle through the foil and watching for a warm steam to escape when you peek, indicating the fillings are melty. Turn periodically to avoid hot spots and toasts forming on one side only. Avoid placing the cones directly over an open flame without foil, as that will char the cone quickly.
- Heat the foil-wrapped cones over a campfire for about 3-5 minutes, or until the chocolate and marshmallows have melted: Campfire heating is immediate and aromatic, with wood smoke layering over the sweet scents of melting chocolate chips and caramelizing mini marshmallows . Hold the cones at a safe distance from the embers and rotate them slowly, feeling warmth through the foil until you sense even heat. The cone should be hot to the touch through the foil but not overly scorchy, and the fillings should be visibly melted when you carefully unwrap. A frequent mistake is leaving them too close to coals, which can burn the foil and produce bitter flavors.
Notes
- Turn into a fruit forward cone, add sliced fresh banana or strawberries among the fillings just before heating to introduce bright acidity and natural moisture. Place the fruit near the top so it warms without turning mushy, and enjoy the balance between warm chocolate and bright fruit. Keep in mind fruit releases juices as it heats, so eat sooner after cooking to keep the cone crisp.
- Make nut free, leave out any nut products and focus on chocolate, marshmallows, and graham crackers for a kids safe option. Replace peanut butter with a sun butter alternative if tolerated, or omit entirely and rely on the chocolate to provide richness. Double check all packaged toppings for potential cross contamination if serving to someone with allergies.
- Boost crunch, add chopped nuts or crushed cookies among the graham cracker pieces for extra texture. Scatter them sparingly so the cone does not become too dense or hard to bite through. Toast the nuts briefly beforehand to enhance their aroma, but avoid burning which creates a bitter note.
- Make ahead for convenience, assemble cones, wrap in clean foil, and store at room temperature for a few days or in the fridge for up to a week per the provided notes. Reheat briefly in an oven or over coals when ready to serve, ensuring the fillings soften without overcooking the cone. Do not freeze assembled cones as the cone texture will degrade.
- Use flavored chips, swap classic chocolate chips for butterscotch or buttermilk chips to shift the flavor profile subtly while keeping the same technique. These alternate chips melt differently so watch the heat closely and use slightly shorter heating times if they are faster melting.
- Serve as an interactive station, lay out fillings and let guests build their own cones. Provide labels for toppings and small scoops to keep things tidy. This turns dessert into an activity and reduces the work for the host, but keep allergen separation in mind when arranging options.