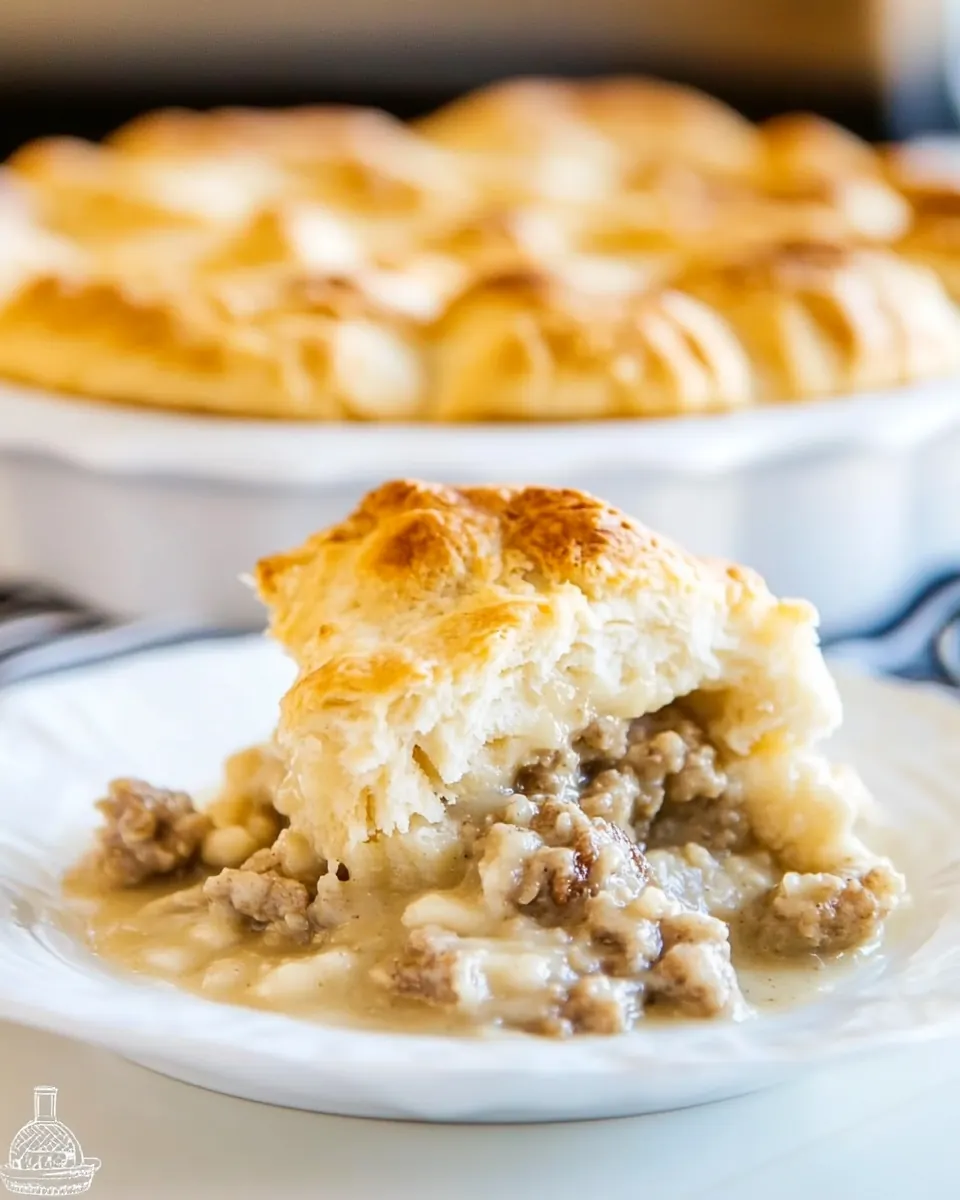
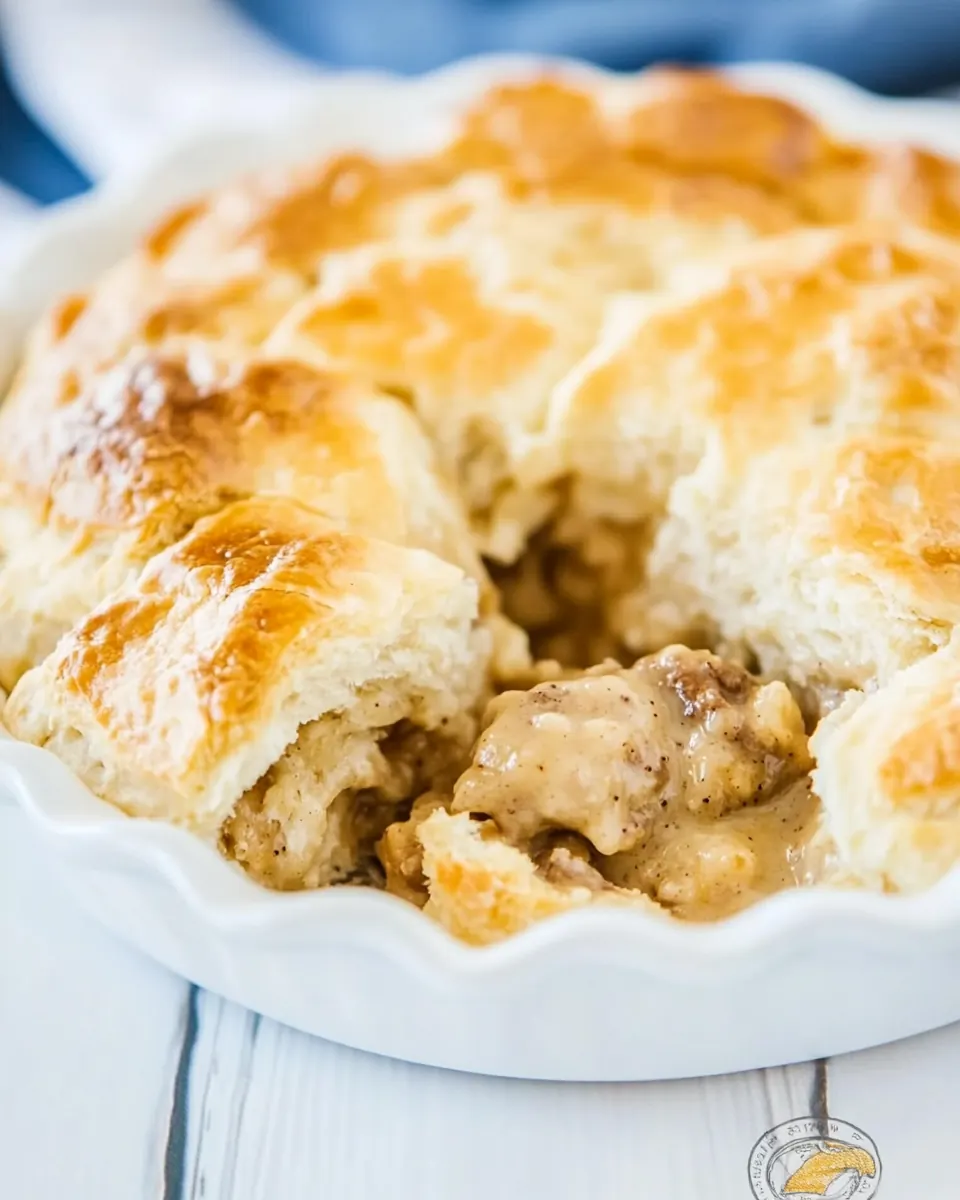
Biscuits and Gravy Pie
Biscuits and Gravy Pie has been a comfort staple in my kitchen ever since a friend brought one to a potluck years ago, and it changed how I think about savory pies. The first time I tasted the crown of flaky biscuits sitting over a pool of creamy, peppery gravy, I remember closing my eyes and savoring every bite, feeling both surprised and comforted. That contrast between crisp edges and soft center made me want to recreate it at home, adjusting little things until it felt like mine.
I started making Biscuits and Gravy Pie for slow Sunday mornings when the house still smelled like coffee and the radio played old favorites. Over time I learned to read the gravy by smell and the crust by touch, and I began inviting neighbors over to test tweaks. We talked and laughed while the pie baked, and I loved watching people break into the warm filling, steam curling up with a scent of sausage and warm milk. Those gatherings are why this dish means more to me than a recipe.
When I plate Biscuits and Gravy Pie, I think about rhythm: the way you spoon gravy, the satisfying tear of a biscuit, and how a single slice can feel like a cozy, full meal. If you like food that comforts and surprises in the same bite, you will find a lot to love here. I promise, once you try it, you will start inventing your own rituals around it.
Recipe Snapshot
43 mins
25 mins
18 mins
Medium
400 kcal
American
Gluten-Free, Low FODMAP
Dinner
Large Nonstick Skillet, 9-inch Pie Plate
The Charm of This Biscuits and Gravy Pie
Hearty, familiar flavors everyone knows
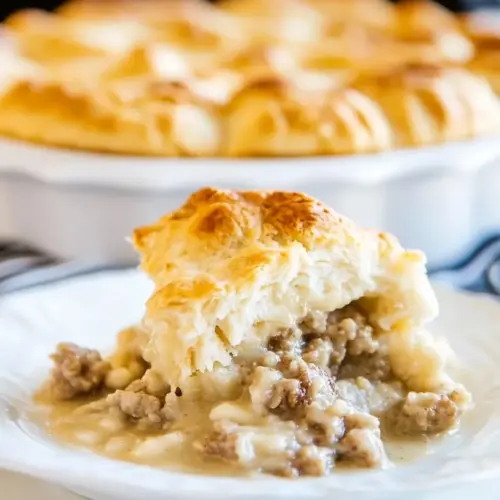
I grew up on Southern breakfasts, and the flavor profile here is instantly recognizable. The combination of browned sausage, creamy milk, and a touch of spice hits that nostalgic note while feeling elevated in pie form. I find this approach turns a simple breakfast into something you can serve for brunch, lunch, or a laid back dinner, and guests always ask for the recipe.
Textural contrast that keeps every bite interesting
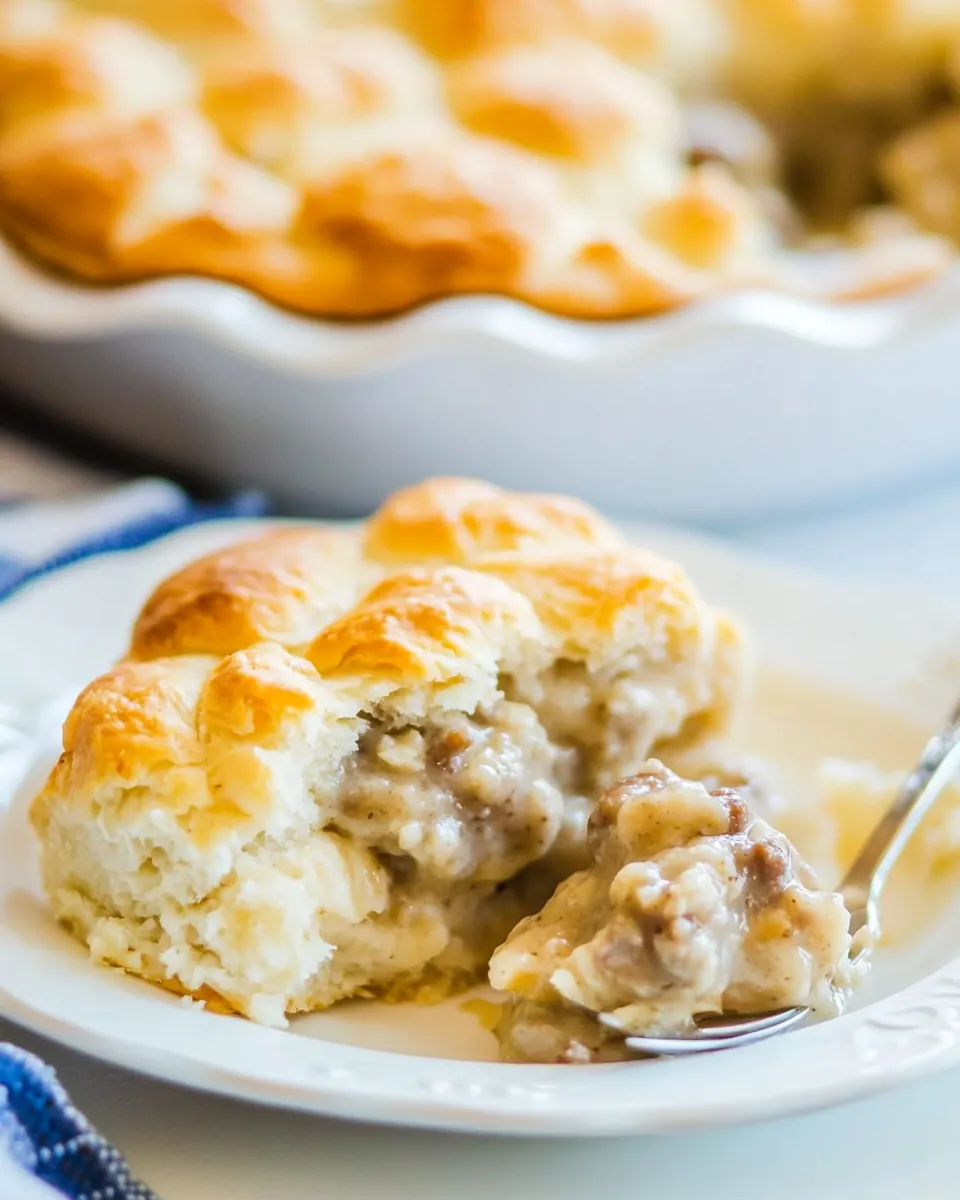
The interplay between flaky pie crust, pillowy biscuits, and silky gravy creates layers of texture. I love how the crust provides structure, while the biscuits soak up enough gravy to be tender without going soggy. When I slice into it, the way the gravy clings to the biscuit pieces is part of the magic, and that chew versus cream dynamic keeps people coming back for second helpings.
Simple ingredients, big payoff
One of the things I appreciate most is how straightforward the ingredient list is. With pantry basics like all purpose flour, milk, and seasonings, you get a dish that tastes rich and complex without requiring obscure items. I often make this when I want comfort food but I do not want to fuss for hours.
Flexible for gatherings
I often make Biscuits and Gravy Pie for groups because it scales well and travels easily. You can bake it ahead and rewarm gently. When I bring it to brunch, people love that it feels both homey and a little showy, especially when the top biscuits come out golden and slightly crisp.
Technique that builds confidence
Finally, this recipe teaches useful kitchen skills. Browning sausage properly, making a roux with flour, and bringing milk up to a simmer without scorching are techniques you will use again and again. I like that it is a learning recipe disguised as pure indulgence, and once you master it, you will feel ready to tackle other savory pies and gravies with confidence.
Ingredient List for Biscuits and Gravy Pie
These ingredients are the backbone of a rustic, satisfying pie. They work together by balancing fat, starch, and liquid so the gravy becomes luxuriously thick while the crust and biscuits provide structure and texture. The key players are the sausage for savory depth, the flour to thicken, and the milk to create that creamy mouthfeel that characterizes classic gravy.
- 1 pound breakfast sausage: Brown and crumble to render fat and provide the savory, meaty base for the gravy; cook until no pink remains and edges are slightly crisp for best texture in the pie.
- 1/3 cup all-purpose flour: Thicken the sausage drippings into a roux when combined with fat, creating body for the gravy; whisk in gradually to avoid lumps and cook briefly to remove raw flour taste.
- 3 cups whole milk: Simmer with the roux to create a creamy gravy; add gradually while whisking until smooth and cooked to a velvety consistency that coats the back of a spoon.
- salt and pepper: Season the gravy to taste by enhancing and balancing flavors; adjust quantities sparingly to avoid overpowering the delicate milk-based sauce.
- pinch of garlic powder: Add a subtle savory note and depth to the gravy; use a small pinch to complement the sausage without dominating other spices.
- pinch of cayenne pepper: Introduce a gentle heat and warmth to brighten the overall flavor profile; a pinch is enough to provide a lingering kick without overwhelming the dish.
- 1 refrigerated pie crust: Line the pie dish to form a flaky, buttery crust that contains the sausage gravy filling; press into the pan and crimp edges to seal before baking.
- 1 (5-count) Grands refrigerated biscuits: Create tender, flaky biscuit pieces to incorporate texture and layers within the pie; separate or tear biscuits before arranging in the crust for even distribution.
Directions for Biscuits and Gravy Pie
I like to think of these directions as a rhythm, from browning the sausage to baking the assembled pie. Follow the sequence carefully, and you will end up with a silky gravy and golden biscuits on top. Read each step before you begin so you can move smoothly through the process.
- Brown sausage in a nonstick skillet, breaking it apart as it cooks.: As the sausage hits the hot skillet you will hear a lively sizzle and smell a toasty, meaty aroma that signals flavor is developing. Use a sturdy spatula to break the meat into small crumbles so it browns evenly, creating plenty of little crispy bits that will add texture to the gravy. Browning rather than steaming the meat is important because it produces fond on the pan which deepens the overall taste. A common mistake is crowding the pan, which causes the meat to release juices and steam instead of brown; if that happens, work in batches or increase heat briefly to encourage browning. Keep an eye on color; you want a rich brown without charring, and if the pan starts to smoke, lower the heat and remove some fat if it seems excessive.
- When no pink is left, sprinkle flour over sausage. Cook and stir for 1 minute.: At this point the sizzling calms and the aroma becomes nuttier as the flour toasts. The quick cook time is meant to remove any raw flour taste while letting it absorb fat, forming the base of your roux. Stir constantly so the flour browns slightly and coats every bit of sausage , which helps the gravy thicken uniformly later. Overcooking the flour can make the roux taste bitter, so watch for a light golden hue and a pleasantly toasty smell. If lumps form in the pan, stir vigorously and break them up before proceeding, because lumps will create uneven texture in the gravy.
- Gradually stir in the milk. Bring to a simmer. Add salt and pepper to taste. Add garlic powder and cayenne pepper.: As you pour in the milk slowly, whisk or stir constantly so the mixture emulsifies and remains smooth. You will notice the liquid start to gloss over the meat and the aroma will shift toward creamy comfort. Bringing it to a gentle simmer is crucial, because it activates the thickening power of the roux; avoid a full boil since that can cause the milk to scald or separate. Season incrementally, tasting after each addition, because the sausage contributes saltiness on its own. A typical pitfall here is adding the entire milk at once, which can cause lumps. If that occurs, reduce heat and whisk energetically until smooth, then continue heating slowly.
- Simmer for 3 to 5 minutes to thicken. Remove from heat and let cool.: During the simmer the gravy will thicken and cling to the back of a spoon, releasing a cozy, creamy aroma that tells you it is nearly ready. This short simmer ensures the starch in the roux fully gelatinizes, giving you that luscious body without becoming gluey. Remove from heat as soon as the texture looks glossy and coats evenly, because overheating can overthicken or break the emulsion. Letting the gravy cool slightly is important for assembly; piping very hot gravy into the crust can lead to sogginess. A common mistake is simmering too long, which overreduces the liquid and concentrates the starch flavor, so keep close watch and test by lifting a spoon to see how it falls.
- Unroll pie dough and fit into a 9-inch pie plate. Crimp the edges, place a piece of parchment paper in the bottom and fill with dried beans. Place in a 450 degree oven for 6 to 8 minutes. Remove beans and parchment paper.: When you press the pie crust into the plate you will feel the cool, supple dough give way to the pan, and crimping creates a decorative seal. Blind baking with parchment and beans produces a dry, slightly firm shell that will hold up to the moist gravy; when the crust puffs and the edges take on a faint golden color you will know it is ready. Using a very hot oven jumpstarts the crust and sets it quickly, which prevents a soggy bottom later. The main mistake here is skipping blind baking, which often leads to a soggy base once gravy is added. Carefully remove the beans and parchment while the crust is warm so you do not dent the bottom.
- Transfer the sausage gravy into the pie crust. Place a whole biscuit on top of the gravy in the middle of the pie. Cut remaining biscuits to fit the empty spaces.: As you spoon the warm gravy into the pre baked pie crust , you will notice steam rise and a comforting scent fill the kitchen; distribute it so the base is evenly covered but not overflowing. Nestling a whole biscuit in the center and trimming others to fit creates pleasing slices and ensures each portion has biscuit to gravy ratio you expect. Lay the biscuits gently so they make contact with the gravy, allowing some absorption without sinking. Common errors include overfilling the crust, which can bubble over while baking, so leave a small margin at the top. If the biscuits are crowded, they will bake into a single dense mass rather than maintain their separate golden tops.
- Bake in 375 degree oven for 15 to 18 minutes.: During this bake the tops of the biscuits will puff and develop a rich golden brown, and the edges of the crust will crisp further, releasing a warm, toasty scent that signals doneness. The internal steam from the gravy helps finish cooking the biscuits while the oven creates a dry heat that browns and texturizes the exterior. Avoid opening the oven repeatedly, which lowers temperature and can prevent proper browning; instead use the oven light to check progress. A common pitfall is baking too long, which dries the biscuits and can make the gravy overly reduced, so aim for a golden top and bubbling edges as your cue to remove it. Let the pie rest briefly after baking so the gravy settles, making slicing cleaner and safer.
Tips for Success
These tips will help you make a flawless Biscuits and Gravy Pie every time. Read through them before you begin so you can set up mise en place and avoid common pitfalls.
- Brown in batches if needed If your skillet becomes crowded the sausage will steam instead of brown, so give it room to develop those caramelized bits that add depth to the gravy.
- Measure the flour accurately Too much will make the gravy pasty, while too little will leave it runny; spoon it into the cup and level it off for consistent results.
- Warm the milk slightly Bringing milk to near warm before adding helps it incorporate smoothly with the roux and reduces the risk of scorching on the pan.
- Reserve some sausage fat Use the rendered fat to make the roux for the best flavor, but if there is excess, remove a tablespoon or two so the gravy is not greasy.
- Use chilled pie crust Cold dough holds its shape better during blind baking and results in flakier texture; keep it refrigerated until the last moment.
- Check oven temperature An accurate oven ensures consistent browning of the biscuits and crust; use an oven thermometer if your oven runs hot or cold.
Serving Ideas for Biscuits and Gravy Pie
This pie transitions effortlessly from breakfast to dinner, and the following serving suggestions will help you present it beautifully. Consider the occasion and pace your sides to complement the rich gravy and tender biscuits.
- Casual weekend brunch Serve slices warm with a simple green salad dressed in a tangy vinaigrette to cut through the richness.
- Comforting family dinner Pair with roasted seasonal vegetables, like carrots or green beans, for a balanced plate that still feels homey.
- Potluck friendly Bring it to gatherings warm in an insulated carrier, and cut into squares so guests can enjoy a neat serving without utensils.
- Holiday breakfast table Place the pie among other brunch classics, and offer hot sauce and extra pepper on the side for guests who like more heat.
- Storage tips Cool completely, cover tightly, and refrigerate for up to three days; reheat gently in a 325 degree oven until warmed through to preserve texture.
- Seasonal pairing In colder months, serve with a cup of roasted vegetable soup or a simple fruit compote to add a bright counterpoint.
FAQ
Conclusion
Biscuits and Gravy Pie stands out because it marries familiar, comforting flavors with a clever pie format that brings texture and warmth to every bite. The combination of browned sausage, a creamy roux based gravy, and golden biscuits on a flaky crust makes it a show stopping centerpiece for brunch or a cozy dinner. Give it a try the next time you want something that feels both homey and a little special; I find it becomes a fast favorite among friends and family and a recipe I return to again and again.
Biscuits and Gravy Pie
Equipment
- Large Nonstick Skillet
- 9-inch pie plate
Ingredients
- 1 pound breakfast sausage Brown and crumble to render fat and provide the savory, meaty base for the gravy; cook until no pink remains and edges are slightly crisp for best texture in the pie.
- 1/3 cup all-purpose flour Thicken the sausage drippings into a roux when combined with fat, creating body for the gravy; whisk in gradually to avoid lumps and cook briefly to remove raw flour taste.
- 3 cups whole milk Simmer with the roux to create a creamy gravy; add gradually while whisking until smooth and cooked to a velvety consistency that coats the back of a spoon.
- salt and pepper Season the gravy to taste by enhancing and balancing flavors; adjust quantities sparingly to avoid overpowering the delicate milk-based sauce.
- pinch of garlic powder Add a subtle savory note and depth to the gravy; use a small pinch to complement the sausage without dominating other spices.
- pinch of cayenne pepper Introduce a gentle heat and warmth to brighten the overall flavor profile; a pinch is enough to provide a lingering kick without overwhelming the dish.
- 1 refrigerated pie crust Line the pie dish to form a flaky, buttery crust that contains the sausage gravy filling; press into the pan and crimp edges to seal before baking.
- 1 (5-count) Grands refrigerated biscuits Create tender, flaky biscuit pieces to incorporate texture and layers within the pie; separate or tear biscuits before arranging in the crust for even distribution.
Instructions
- Brown sausage in a nonstick skillet, breaking it apart as it cooks.: As the sausage hits the hot skillet you will hear a lively sizzle and smell a toasty, meaty aroma that signals flavor is developing. Use a sturdy spatula to break the meat into small crumbles so it browns evenly, creating plenty of little crispy bits that will add texture to the gravy. Browning rather than steaming the meat is important because it produces fond on the pan which deepens the overall taste. A common mistake is crowding the pan, which causes the meat to release juices and steam instead of brown; if that happens, work in batches or increase heat briefly to encourage browning. Keep an eye on color; you want a rich brown without charring, and if the pan starts to smoke, lower the heat and remove some fat if it seems excessive.
- When no pink is left, sprinkle flour over sausage. Cook and stir for 1 minute.: At this point the sizzling calms and the aroma becomes nuttier as the flour toasts. The quick cook time is meant to remove any raw flour taste while letting it absorb fat, forming the base of your roux. Stir constantly so the flour browns slightly and coats every bit of sausage , which helps the gravy thicken uniformly later. Overcooking the flour can make the roux taste bitter, so watch for a light golden hue and a pleasantly toasty smell. If lumps form in the pan, stir vigorously and break them up before proceeding, because lumps will create uneven texture in the gravy.
- Gradually stir in the milk. Bring to a simmer. Add salt and pepper to taste. Add garlic powder and cayenne pepper.: As you pour in the milk slowly, whisk or stir constantly so the mixture emulsifies and remains smooth. You will notice the liquid start to gloss over the meat and the aroma will shift toward creamy comfort. Bringing it to a gentle simmer is crucial, because it activates the thickening power of the roux; avoid a full boil since that can cause the milk to scald or separate. Season incrementally, tasting after each addition, because the sausage contributes saltiness on its own. A typical pitfall here is adding the entire milk at once, which can cause lumps. If that occurs, reduce heat and whisk energetically until smooth, then continue heating slowly.
- Simmer for 3 to 5 minutes to thicken. Remove from heat and let cool.: During the simmer the gravy will thicken and cling to the back of a spoon, releasing a cozy, creamy aroma that tells you it is nearly ready. This short simmer ensures the starch in the roux fully gelatinizes, giving you that luscious body without becoming gluey. Remove from heat as soon as the texture looks glossy and coats evenly, because overheating can overthicken or break the emulsion. Letting the gravy cool slightly is important for assembly; piping very hot gravy into the crust can lead to sogginess. A common mistake is simmering too long, which overreduces the liquid and concentrates the starch flavor, so keep close watch and test by lifting a spoon to see how it falls.
- Unroll pie dough and fit into a 9-inch pie plate. Crimp the edges, place a piece of parchment paper in the bottom and fill with dried beans. Place in a 450 degree oven for 6 to 8 minutes. Remove beans and parchment paper.: When you press the pie crust into the plate you will feel the cool, supple dough give way to the pan, and crimping creates a decorative seal. Blind baking with parchment and beans produces a dry, slightly firm shell that will hold up to the moist gravy; when the crust puffs and the edges take on a faint golden color you will know it is ready. Using a very hot oven jumpstarts the crust and sets it quickly, which prevents a soggy bottom later. The main mistake here is skipping blind baking, which often leads to a soggy base once gravy is added. Carefully remove the beans and parchment while the crust is warm so you do not dent the bottom.
- Transfer the sausage gravy into the pie crust. Place a whole biscuit on top of the gravy in the middle of the pie. Cut remaining biscuits to fit the empty spaces.: As you spoon the warm gravy into the pre baked pie crust , you will notice steam rise and a comforting scent fill the kitchen; distribute it so the base is evenly covered but not overflowing. Nestling a whole biscuit in the center and trimming others to fit creates pleasing slices and ensures each portion has biscuit to gravy ratio you expect. Lay the biscuits gently so they make contact with the gravy, allowing some absorption without sinking. Common errors include overfilling the crust, which can bubble over while baking, so leave a small margin at the top. If the biscuits are crowded, they will bake into a single dense mass rather than maintain their separate golden tops.
- Bake in 375 degree oven for 15 to 18 minutes.: During this bake the tops of the biscuits will puff and develop a rich golden brown, and the edges of the crust will crisp further, releasing a warm, toasty scent that signals doneness. The internal steam from the gravy helps finish cooking the biscuits while the oven creates a dry heat that browns and texturizes the exterior. Avoid opening the oven repeatedly, which lowers temperature and can prevent proper browning; instead use the oven light to check progress. A common pitfall is baking too long, which dries the biscuits and can make the gravy overly reduced, so aim for a golden top and bubbling edges as your cue to remove it. Let the pie rest briefly after baking so the gravy settles, making slicing cleaner and safer.
Notes
- Brown in batches if needed If your skillet becomes crowded the sausage will steam instead of brown, so give it room to develop those caramelized bits that add depth to the gravy.
- Measure the flour accurately Too much will make the gravy pasty, while too little will leave it runny; spoon it into the cup and level it off for consistent results.
- Warm the milk slightly Bringing milk to near warm before adding helps it incorporate smoothly with the roux and reduces the risk of scorching on the pan.
- Reserve some sausage fat Use the rendered fat to make the roux for the best flavor, but if there is excess, remove a tablespoon or two so the gravy is not greasy.
- Use chilled pie crust Cold dough holds its shape better during blind baking and results in flakier texture; keep it refrigerated until the last moment.
- Check oven temperature An accurate oven ensures consistent browning of the biscuits and crust; use an oven thermometer if your oven runs hot or cold.