
Best Boiled Green Beans
Best Boiled Green Beans are one of those simple dishes I return to again and again when I want something honest, fresh, and fuss free. The first time I made these for company, I was short on time and nervous about serving something so plain, but the bright snap and gentle buttered sheen won over everyone at the table. I remember leaning against the counter, stirring a small bowl of salt, and realizing how a few small decisions change the whole experience.
Another memory that sticks is prepping these with my grandmother on a warm spring morning, her habit of tapping each bean between her fingers to test for softness. We talked about life while the kitchen filled with a green, vegetal steam that smelled of the garden. That ritual of checking, tasting, and seasoning taught me that timing and confidence matter more than complicated technique. Over time I learned to respect the timing, the quick plunge into boiling water, and the gentle finish with unsalted butter or olive oil.
When I serve Best Boiled Green Beans at home now, I like to keep things relaxed and seasonal. These beans are an easy anchor for weeknight meals, and they also behave like a calm, dependable side for holiday spreads without stealing attention. I’ll often cook them just until they yield under a fork, then dress them lightly so the color and fresh snap remain center stage. There is something comforting about a dish that asks so little and gives so much, and this is that dish for me.
Recipe Snapshot
9 mins
5 mins
4 mins
Easy
120 kcal
American
Gluten-Free, Low FODMAP
Side Dishes
Calphalon 5-Quart Pot, Olive Oil
Why This Best Boiled Green Beans Works
Bright, clean flavor
I love how Best Boiled Green Beans let the natural sweetness of the green beans shine. A short simmer preserves the vegetal notes and allows the subtle grassy aroma to come forward, which feels fresher than heavy sauces. I find it rewarding to taste the beans at different moments during cooking so you learn the exact point of tenderness that suits your palate.
Ridiculously fast to make
I often reach for this recipe when time is tight. From wash to plate, the process moves quickly, so you can have a vibrant side ready while the main cooks. The minimal ingredient list simplifies prep and cleanup, which I appreciate after a long day. It’s a great option for last minute guests, because it won’t steal oven space or attention.
Flexible seasoning
I enjoy how forgiving these beans are with seasonings. Whether I finish them with a pat of unsalted butter or a drizzle of olive oil, the outcome is satisfying. Salt is the main enhancer here, and adjusting it allows you to match the rest of the meal. I like to encourage tasting as you go, because a tiny sprinkle can brighten the whole dish.
Family friendly and approachable
I make Best Boiled Green Beans for kids and adults alike, and they usually disappear fast. The texture is pleasant even to picky eaters when cooked just right, and you can adapt portion sizes easily. I remember serving them to a teenager who declared them the only vegetable worth eating that week, and that small endorsement stuck with me.
Seasonal and versatile
In spring, when the market shines with tender pods, this recipe feels especially right. The technique highlights quality produce, so when beans are at their peak, the outcome is almost celebratory. I value recipes that let seasonal ingredients speak for themselves, and these boiled beans do exactly that.
Best Boiled Green Beans Ingredients
These ingredients are intentionally minimal, because the goal is to celebrate the fresh snap of the green beans. The team here is small but purposeful: the beans provide texture and flavor, the unsalted butter or olive oil adds silk and mouthfeel, and salt lifts the natural sweetness. Together they create a balanced, simple side that complements many mains.
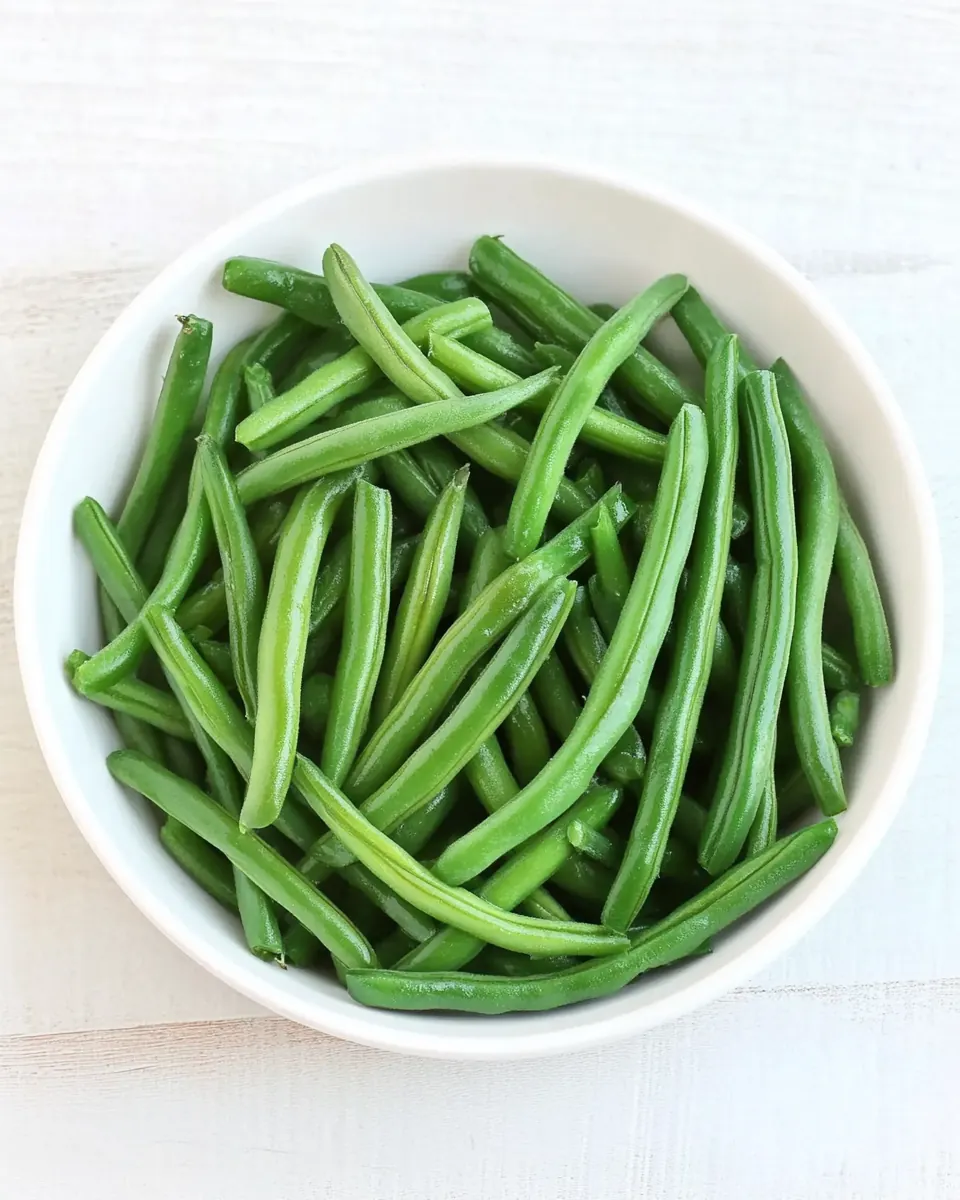
- 10 16 ounces green beans: Trimmed and cleaned to provide the main body of the dish, offering a crisp-tender texture and fresh vegetal flavor when boiled properly. Adds bright color and a pleasant snap that balances richer components. Can be adjusted in quantity to serve more or fewer people without altering technique significantly.
- 1 tablespoon unsalted butter or olive oil: Used to add richness and a silky mouthfeel while boosting flavor through gentle coating of the beans after cooking. Helps carry any additional seasonings and contributes a subtle buttery or fruity note depending on choice. Should be stirred in off heat so it melts and disperses evenly.
- Salt: Added to enhance and season the beans, bringing out natural flavors and balancing any bitterness from the vegetable. Can be included during cooking water or sprinkled after cooking to taste, adjusting concentration for low-sodium preferences. Plays a key role in making the final dish palatable and satisfying.
Step by Step Guide for Best Boiled Green Beans
This method is straightforward and comforting, and I will walk you through each touch point so the beans turn out perfect every time. Keep your senses engaged, because seeing, smelling, and tasting tell you when the beans are ready.
- Wash your green beans. Break off the ends and any brown parts. Break in half if very long.: As you rinse the green beans , you will smell a faint green, grassy scent that signals freshness. Run them under cool water while rubbing away any dirt, then feel for firmness to ensure they are crisp. Breaking off the ends removes the fibrous tips that can be tough to eat, and breaking very long beans in half makes for easier plating. A common mistake is skipping inspection, which can leave stringy pieces on the plate; take a few extra seconds to trim carefully.
- Bring a medium pot of water to a boil over high heat, then reduce to a simmer over medium-high heat. Add the beans and simmer for 4-6 minutes or until tender when poked with a fork.: While trimming, notice the subtle differences in texture between the stem end and the pod. Removing brown or blemished bits improves both appearance and mouthfeel. If you leave brown parts on, they can impart a slightly bitter note, so trim them away. One thing to avoid is over trimmimg, which wastes tender parts; focus only on the dry or discolored tips.
- Drain the water from the beans, then add butter or olive oil, and season to taste with salt. (I usually just add a little sprinkle.): Snapping long beans produces uniform lengths that cook evenly and look tidy on the plate. When you break them, listen for a crisp sound that tells you they are fresh. Shorter pieces are also easier to eat, especially for kids or guests who prefer bite sized vegetables. The mistake to watch for is making them too small, which can make the texture feel mushy after cooking; aim for two to three inch pieces.
- Bring a medium pot of water to a boil over high heat, then reduce to a simmer over medium high heat: As the water heats, you will notice rising steam and the first faint whistle of activity. Bringing the pot to a full boil ensures the water recovers temperature quickly when you add the beans, which helps maintain their color. Lowering to a lively simmer prevents aggressive rolling that can bruise the pods. A common error is not using enough water, which can cool too quickly and lead to uneven cooking, so use a medium sized pot with ample water volume.
- Add the beans and simmer for 4 to 6 minutes or until tender when poked with a fork: When the beans enter the water, listen for a renewed, gentle bubbling and watch the vibrant green intensify. Cooking for the lower end of the range yields a firmer bite, while waiting a bit longer softens them slightly. Test by poking with a fork, which should meet gentle resistance without a tough center. The scent will become greener and sweeter as they approach doneness. Avoid overcooking, which turns them dull and mushy; if you overshoot, a quick ice bath can halt cooking but it will still affect texture.
- Drain the water from the beans: Pouring the beans into a colander, you will hear the rush of water and see steam rise, and the beans will already look glossier. Drain thoroughly so excess water does not dilute the finishing butter or oil. Letting beans sit in hot water wastes their texture, so drain promptly. A common misstep is leaving them to steam in the pot, which continues to cook them; drain quickly for the best snap.
- Add butter or olive oil: Adding a tablespoon of unsalted butter or olive oil right after draining delivers an immediate silky coating and rounds the flavors. The fat also helps salt adhere and carry flavor across the tongue. Stir gently so the fat melts and envelopes each pod, creating a pleasant sheen. Avoid adding too much fat, which can make the beans feel greasy; start with the recommended amount and adjust next time if desired.
- Season to taste with salt: Finish with a careful sprinkle of salt , tasting as you go to find the perfect balance. Salt heightens natural sweetness and brings out aromatics in the beans, so modest additions go a long way. If you season while the beans are hot and wet, the salt dissolves quickly and distributes evenly. The usual trap is oversalting; taste a bean first before adding a second pinch.
- I usually just add a little sprinkle: A light final seasoning often suffices, leaving room for the main dish to shine alongside the beans. After that small sprinkle, take a bite to confirm the texture and seasoning. This restrained approach respects the ingredient and ensures compatibility across the whole meal. One mistake some people make is heavy handed seasoning, which masks the bean's delicate flavor—keep it subtle.
Recipe Variations about Best Boiled Green Beans
These variations let you tailor the simple base to different meals and preferences. I like to keep changes minimal, so each version preserves the bean’s fresh character while adding a distinct finishing note.
- Simple butter finish Add unsalted butter off the heat for a silkier mouthfeel that pairs well with roasted mains.
- Olive oil and lemon Use olive oil and a touch of citrus if you want a brighter, lighter profile without heaviness.
- Shorter cook for thinner beans If your beans are thin, reduce the simmer time by a minute to keep them from becoming limp.
- Baby friendly cut Cut into smaller pea size pieces for older babies around nine to twelve months, making them easier to chew and swallow.
- Alternative oils Swap in toasted sesame oil or avocado oil for a different flavor character while keeping the method identical.
- Make ahead note Cook and cool, then store in an airtight container for three to five days, reheating gently when ready to serve.
What Goes Well With This Best Boiled Green Beans
These beans are a flexible side that suits casual lunches and more formal dinners. I often pair them with protein forward mains, but they also sing alongside seasonal salads and grain bowls. For holiday settings, their bright color adds freshness to richer plates.
- Weeknight dinners Pair with roasted chicken or baked fish for a balanced, easy meal that feels put together without fuss.
- Holiday spreads Use as a lighter counterpoint to richer dishes, offering a crisp vegetable option on the table.
- Picnics and potlucks Serve at room temperature after finishing with oil or butter, so they travel well and hold flavor.
- Storage tips Store leftovers in an airtight container for three to five days in the fridge, and reheat briefly to serve warm.
- Seasonal pairings In spring, emphasize fresh herbs and citrus; in fall, consider heartier mains that complement the beans’ brightness.
FAQ
Conclusion
What makes this recipe special is its simplicity and ability to highlight fresh, seasonal flavor with very little fuss. The short simmer, quick drain, and gentle finish with butter or olive oil lets the natural sweetness and snap of the beans shine through. Give this recipe a try the next time you want a reliable, fast side that complements both casual weeknight dinners and more celebratory meals. I hope it becomes one of those dependable dishes you reach for again and again.
Best Boiled Green Beans
Equipment
- Calphalon 5-Quart Pot
- Olive Oil
Ingredients
- 10 -16 ounces green beans Trimmed and cleaned to provide the main body of the dish, offering a crisp-tender texture and fresh vegetal flavor when boiled properly. Adds bright color and a pleasant snap that balances richer components. Can be adjusted in quantity to serve more or fewer people without altering technique significantly.
- 1 tablespoon unsalted butter or olive oil Used to add richness and a silky mouthfeel while boosting flavor through gentle coating of the beans after cooking. Helps carry any additional seasonings and contributes a subtle buttery or fruity note depending on choice. Should be stirred in off heat so it melts and disperses evenly.
- Salt Added to enhance and season the beans, bringing out natural flavors and balancing any bitterness from the vegetable. Can be included during cooking water or sprinkled after cooking to taste, adjusting concentration for low-sodium preferences. Plays a key role in making the final dish palatable and satisfying.
Instructions
- Wash your green beans. Break off the ends and any brown parts. Break in half if very long.: As you rinse the green beans , you will smell a faint green, grassy scent that signals freshness. Run them under cool water while rubbing away any dirt, then feel for firmness to ensure they are crisp. Breaking off the ends removes the fibrous tips that can be tough to eat, and breaking very long beans in half makes for easier plating. A common mistake is skipping inspection, which can leave stringy pieces on the plate; take a few extra seconds to trim carefully.
- Bring a medium pot of water to a boil over high heat, then reduce to a simmer over medium-high heat. Add the beans and simmer for 4-6 minutes or until tender when poked with a fork.: While trimming, notice the subtle differences in texture between the stem end and the pod. Removing brown or blemished bits improves both appearance and mouthfeel. If you leave brown parts on, they can impart a slightly bitter note, so trim them away. One thing to avoid is over trimmimg, which wastes tender parts; focus only on the dry or discolored tips.
- Drain the water from the beans, then add butter or olive oil, and season to taste with salt. (I usually just add a little sprinkle.): Snapping long beans produces uniform lengths that cook evenly and look tidy on the plate. When you break them, listen for a crisp sound that tells you they are fresh. Shorter pieces are also easier to eat, especially for kids or guests who prefer bite sized vegetables. The mistake to watch for is making them too small, which can make the texture feel mushy after cooking; aim for two to three inch pieces.
- Bring a medium pot of water to a boil over high heat, then reduce to a simmer over medium high heat: As the water heats, you will notice rising steam and the first faint whistle of activity. Bringing the pot to a full boil ensures the water recovers temperature quickly when you add the beans, which helps maintain their color. Lowering to a lively simmer prevents aggressive rolling that can bruise the pods. A common error is not using enough water, which can cool too quickly and lead to uneven cooking, so use a medium sized pot with ample water volume.
- Add the beans and simmer for 4 to 6 minutes or until tender when poked with a fork: When the beans enter the water, listen for a renewed, gentle bubbling and watch the vibrant green intensify. Cooking for the lower end of the range yields a firmer bite, while waiting a bit longer softens them slightly. Test by poking with a fork, which should meet gentle resistance without a tough center. The scent will become greener and sweeter as they approach doneness. Avoid overcooking, which turns them dull and mushy; if you overshoot, a quick ice bath can halt cooking but it will still affect texture.
- Drain the water from the beans: Pouring the beans into a colander, you will hear the rush of water and see steam rise, and the beans will already look glossier. Drain thoroughly so excess water does not dilute the finishing butter or oil. Letting beans sit in hot water wastes their texture, so drain promptly. A common misstep is leaving them to steam in the pot, which continues to cook them; drain quickly for the best snap.
- Add butter or olive oil: Adding a tablespoon of unsalted butter or olive oil right after draining delivers an immediate silky coating and rounds the flavors. The fat also helps salt adhere and carry flavor across the tongue. Stir gently so the fat melts and envelopes each pod, creating a pleasant sheen. Avoid adding too much fat, which can make the beans feel greasy; start with the recommended amount and adjust next time if desired.
- Season to taste with salt: Finish with a careful sprinkle of salt , tasting as you go to find the perfect balance. Salt heightens natural sweetness and brings out aromatics in the beans, so modest additions go a long way. If you season while the beans are hot and wet, the salt dissolves quickly and distributes evenly. The usual trap is oversalting; taste a bean first before adding a second pinch.
- I usually just add a little sprinkle: A light final seasoning often suffices, leaving room for the main dish to shine alongside the beans. After that small sprinkle, take a bite to confirm the texture and seasoning. This restrained approach respects the ingredient and ensures compatibility across the whole meal. One mistake some people make is heavy handed seasoning, which masks the bean's delicate flavor—keep it subtle.
Notes
- Simple butter finish Add unsalted butter off the heat for a silkier mouthfeel that pairs well with roasted mains.
- Olive oil and lemon Use olive oil and a touch of citrus if you want a brighter, lighter profile without heaviness.
- Shorter cook for thinner beans If your beans are thin, reduce the simmer time by a minute to keep them from becoming limp.
- Baby friendly cut Cut into smaller pea size pieces for older babies around nine to twelve months, making them easier to chew and swallow.
- Alternative oils Swap in toasted sesame oil or avocado oil for a different flavor character while keeping the method identical.
- Make ahead note Cook and cool, then store in an airtight container for three to five days, reheating gently when ready to serve.