No Bake Peanut Butter Pie
No Bake Peanut Butter Pie has always been my go to when I want something that tastes decadent without turning on the oven. The very first time I made this I was juggling a busy weeknight with friends dropping by, and the simplicity of stirring a few bowls while sharing laughter felt like magic. That first bite, rich, creamy, and with a familiar peanut butter warmth, instantly became a crowd pleaser in my circle.
Over the years I’ve tweaked little things to suit late night cravings and summer gatherings, and every version keeps the same charm: a silky filling set inside a crunchy crust, finished with fluffy whipped topping. I love how No Bake Peanut Butter Pie feels celebratory, yet approachable, whether plated for a holiday table or sliced for an impromptu coffee break. You can make it ahead, which saves you the frantic minute before guests arrive, and it travels well for potlucks.
There is comfort in how predictable the results are, which is why this dessert sits in my rotation. I still remember testing textures to get that perfect spoonable firmness without feeling stodgy, and how small swaps changed the personality of the pie from classic to playful. Each time I serve No Bake Peanut Butter Pie, someone asks for the recipe, and I smile because it really is that easy to love.
Recipe Snapshot
10 mins
10 mins
Easy
350 kcal
American
Gluten-Free, Low FODMAP
Desserts
Whisk, Mixing bowl, Spatula, Pie dish, Refrigerator
Why This No Bake Peanut Butter Pie Hits Different
Instantly crowd friendly
I always reach for No Bake Peanut Butter Pie when I want a dessert that disappears fast. It requires almost zero hands on time, and the combination of creamy peanut butter and airy whipped topping makes a texture contrast that guests adore. Because I can prepare it ahead, I rarely feel rushed, and that relaxed pace means I enjoy my company more.
Flexible and forgiving
This recipe forgives small timing hiccups, and that is a huge reason I keep making it. If the filling needs a bit more time to set in the fridge, it still tastes great, and swapping crunchy or creamy peanut butter subtly changes the mouthfeel without breaking the recipe. I love recipes that don’t require precision, and this one lets you follow the spirit more than the letter.
Textural delight
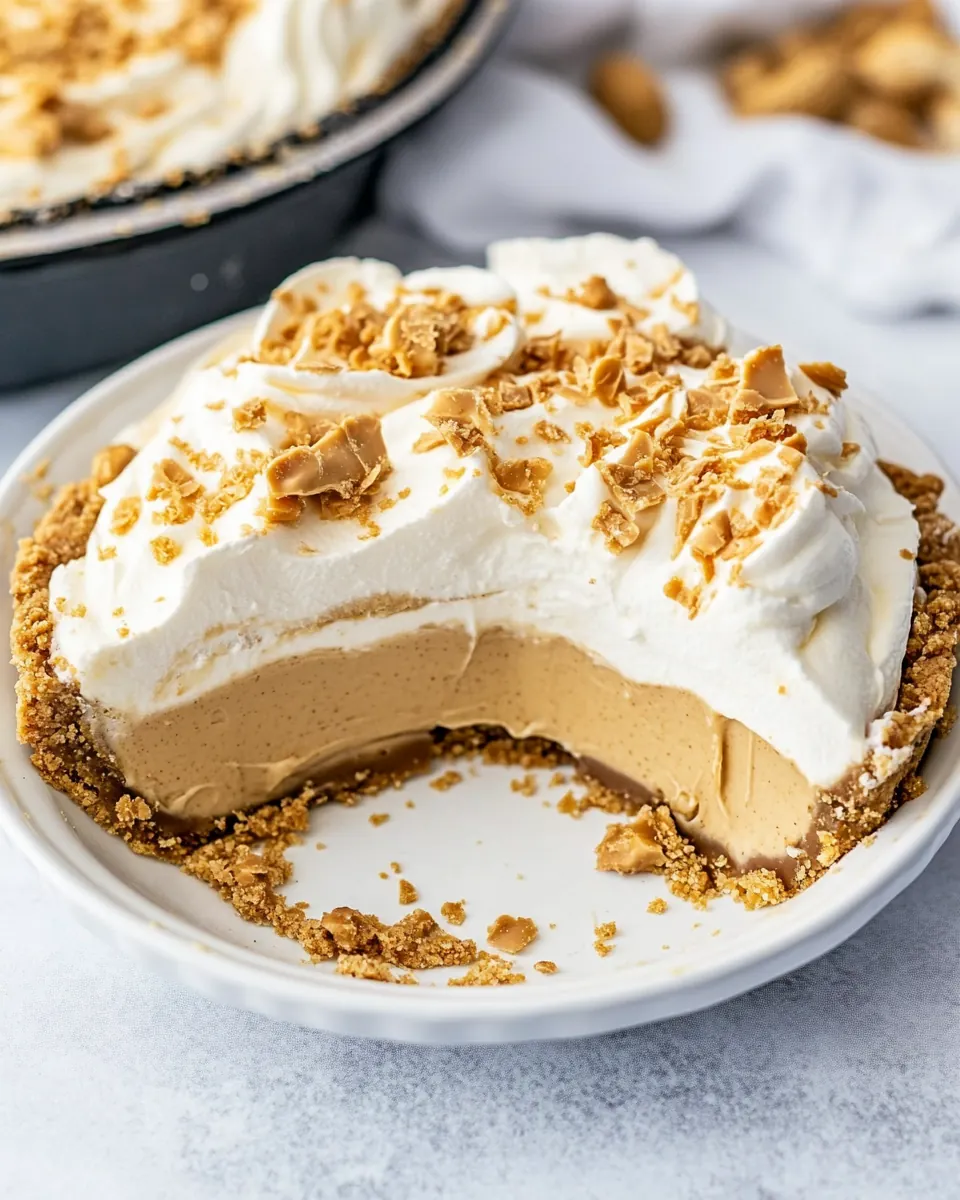
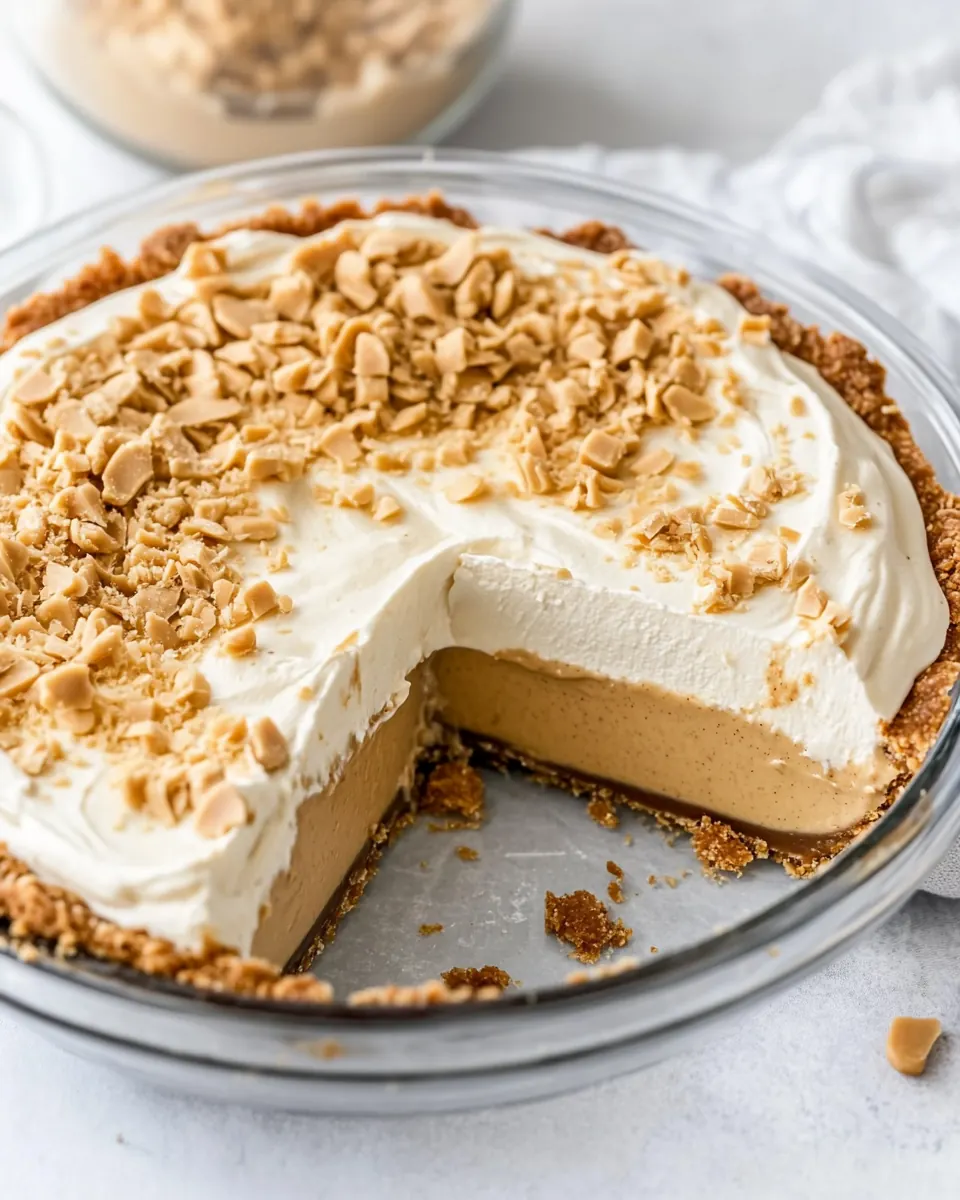
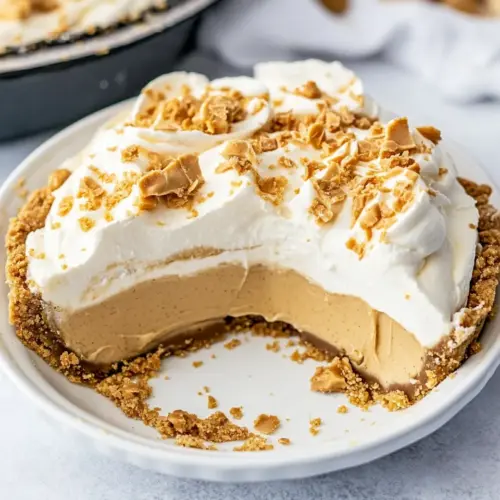
The contrast between a crisp graham cracker crust and the satiny peanut butter filling is the reason people keep coming back for seconds. I pay attention to how the crust holds up after chilling, and when it’s done right you get a clean slice with a pleasant snap. That balance of crunchy and silky is what makes this pie feel special.
Kid friendly, grown up approved
Families love this because kids recognize the flavors instantly, while adults appreciate how restrained the sweetness can be when you use a quality instant pudding and adjust the peanut butter level. I often mention that it is a safe bet for mixed crowds because it reads familiar and festive at the same time.
Make ahead convenience
One of my favorite reasons to make No Bake Peanut Butter Pie is how well it stores. Chill it and it improves in flavor as the filling sets, and you can even freeze slices for later enjoyment. That convenience factor makes it a recipe I recommend to busy hosts, weeknight bakers, and anyone who values a simple finish to a meal.
Shopping List for No Bake Peanut Butter Pie
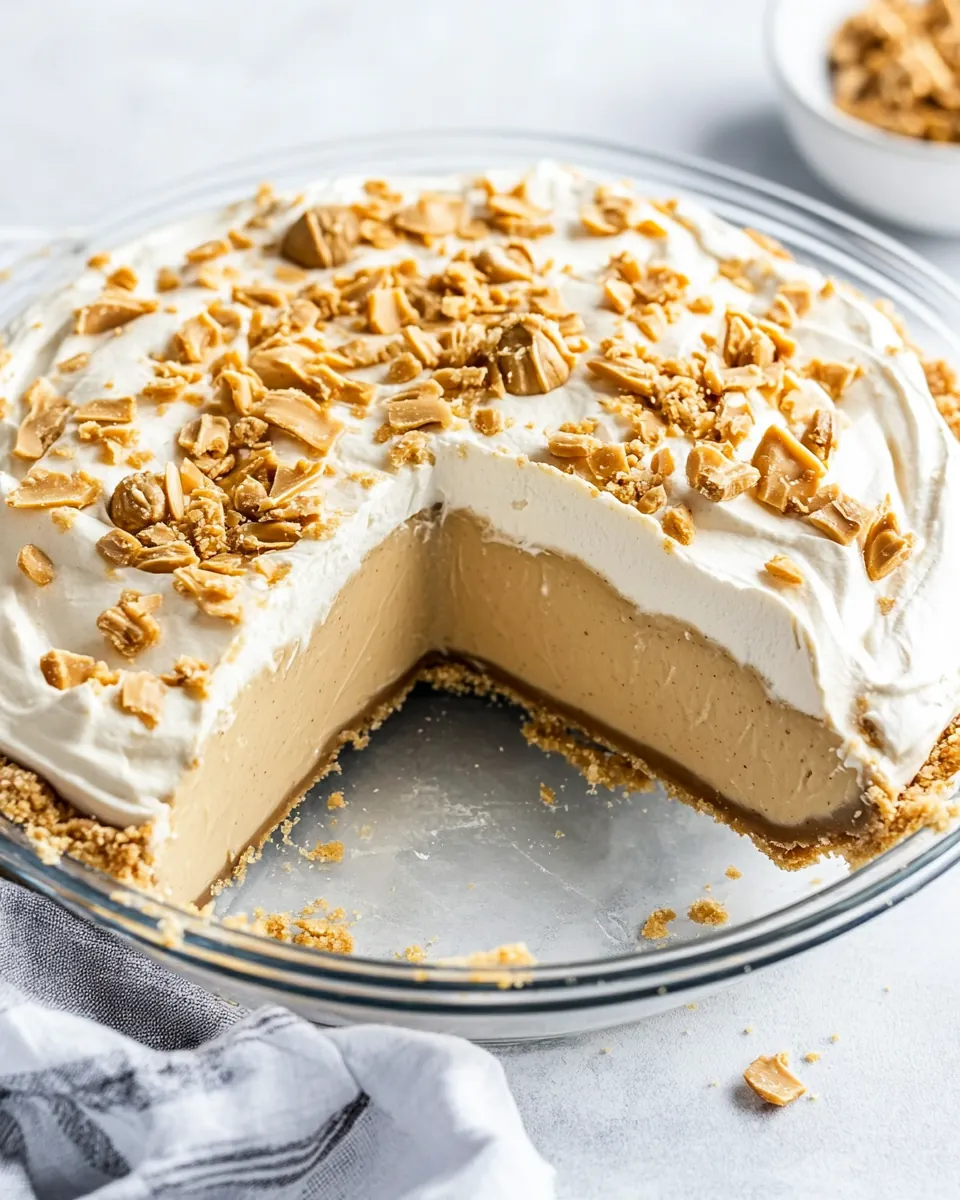
These ingredients are intentionally straightforward, designed to work together so you get a luscious, stable filling and a crisp shell. The graham cracker crust gives a toasty base, the instant pudding and milk set the filling quickly, peanut butter delivers nutty richness, and the whipped topping brings lightness. Together they create a dessert that slices cleanly and tastes indulgent without fuss.
- 19 inch graham cracker crust from scratch or store bought, see note: Provide a sturdy sweet base for the pie and can be homemade or purchased ready-made; presses into the pan to hold the filling and adds a crunchy texture contrast to the creamy filling.
- 13.4 ounces box instant vanilla pudding mix see note: Create instant structure and vanilla flavor in the filling while thickening quickly when mixed with milk; dissolves into a smooth custard-like base that stabilizes the whipped topping and peanut butter.
- 3/4 cup (200 g) peanut butter creamy or chunky: Add rich, nutty flavor and creamy texture to the filling while contributing body and a slightly savory balance; can be smooth or chunky to vary mouthfeel and richness.
- 1 1/4 cup (296 ml) milk see note: Contribute liquid to hydrate and activate the instant pudding mix, determining the final consistency of the filling; use the specified amount for correct set and creaminess.
- 1 teaspoon vanilla extract: Provide aromatic sweetness that enhances the vanilla pudding and peanut butter flavors; small amount rounds out the filling’s overall flavor profile without overpowering it.
- 28 ounce containers whipped topping divided: Supply light, airy volume and creamy texture to lighten the dense peanut butter–pudding mixture; reserve a portion as garnish or for layering to create a fluffy, stable pie topping.
No Bake Peanut Butter Pie Instructions

These familiar steps are quick to follow, and they reward a little patience in chilling. Read through once before you start and line up your ingredients so mixing and folding feel effortless. The directions below will guide your senses as much as your hands, so tune into texture and aroma as you work.
- Whisk pudding mix, milk, peanut butter, and vanilla together. Fold in one container of whipped topping. Pour into prepared pie crust. Cover with plastic wrap. Chill for at least 2 hours.: Warm aromas of peanut butter become more pronounced as the mixture smooths, and you should feel the whisk breaking down any tiny lumps so the batter looks glossy. The sound is a steady, light whisking rhythm, and visually you want a homogeneous pale tan that reflects light slightly. This step matters because a smooth base prevents graininess in the final filling, ensuring each bite is creamy. If the mixture separates or looks curdled, continue whisking patiently and scrape the sides of the bowl, adding a splash more milk if it seems too stiff. Common mistake to avoid: rushing and leaving undissolved pudding streaks which will create uneven pockets of texture.
- Before serving: top with additional whipped topping.: As you gently fold, you will notice the batter lighten and develop a softer sheen, almost like clouds melding into the pudding base. The visual cue to stop folding is when streaks of white disappear into an even, airy tan color without streaks. The technique preserves trapped air, making the filling light instead of dense, and that lightness contrasts beautifully with the crunchy crust. Troubleshooting note: if you overfold the mixture will slump and lose volume, so use a wide spatula and fold with gentle sweeping motions rather than stirring aggressively.
- Store in refrigerator for up to 3 days. Pie can also be frozen for a cold treat or to store.: Pouring the filling in, you will hear a quiet thud as the mixture settles into the graham cracker crust , and you should see the surface self level as the filling finds the edges. Press the filling gently with the back of a spoon if you need to coax it to the rim, but avoid compressing the air out. This step sets the geometry for neat slices and ensures an even set across the pie. A common error is overfilling, which can cause overflow when chilled, so stop just shy of the rim.
- Cover with plastic wrap: The wrap traps moisture and prevents the pie from absorbing fridge aromas, and you will want the wrap to barely touch the filling surface to avoid blemishes. The sealed environment helps the pudding set into a sliceable texture, and it keeps the topping fresh. If droplets collect on the wrap, that is normal, but if they run onto the crust it may soften edges excessively. Avoid pressing the wrap into the filling which will leave imprints on the top.
- Chill for at least 2 hours: During chilling the filling firms and the flavors marry, and you will notice the filling go from silky loose to sliceable with a gentle jiggle. The cool, clean smell of the fridge will calm the creaminess and allow the peanut butter to sit beautifully with the vanilla. This period is crucial because insufficient chilling yields a runny slice, so be patient and let the structure set fully. A typical mistake is cutting too early which gives you sloppy portions instead of clean wedges.
- Before serving: top with additional whipped topping : Adding the reserved whipped topping creates visual contrast and a soft pillow on each slice, and you can pipe or dollop depending on your mood. The cold topping should feel featherlight against the denser filling and will slightly melt into the surface for a glossy finish. This finishing touch makes every forkful alternately creamy and fluffy, enhancing the eating experience. Avoid applying the topping too early or it may weep; add it just before serving for best texture.
- Store in refrigerator for up to 3 days: Keeping the pie chilled preserves the texture and flavor, and you will notice the edges firming slightly over time which can be desirable. Cover the pie lightly with plastic or place it in an airtight container to prevent fridge odors from altering the taste. If you see any weeping on the surface, blot it gently before adding fresh whipped topping. A storage mistake is leaving the pie uncovered which dries the crust and dulls the filling aromas.
- Pie can also be frozen for a cold treat or to store: Freezing yields a firmer, almost ice cream like texture that some people adore, and it makes the dessert travel ready. Wrap tightly to avoid freezer burn and thaw in the refrigerator for gentler melting. When partially thawed the pie slices are easier to cut cleanly. Avoid refreezing after thawing which negatively affects texture, and label with a date so you use it within a reasonable window.
Recipe Variations about No Bake Peanut Butter Pie
This short intro covers how small swaps change character without altering the base technique. Below, each tip highlights a first phrase in bold to make choices easy and actionable. Use these ideas to adapt texture, sweetness, and presentation while keeping the recipe simple.
- Use a different crust Swap to an Oreo crust or a shortbread crust for a chocolatey or buttery foundation. Each crust shifts the flavor balance, with Oreo adding a bold chocolate contrast and shortbread giving a tender, biscuit like base that pairs beautifully with the nutty filling.
- Chunky versus creamy peanut butter Choosing chunky adds little pockets of crunch that play against the smooth pudding, while creamy yields a velvety filling. Both are valid; pick based on whether you want a textural surprise in every bite.
- Adjust sweetness If your peanut butter is already sweetened, reduce the amount of added sugar in related notes or choose a lower sugar instant pudding to keep the profile balanced and avoid cloying richness.
- Make mini versions Prepare the filling in small jars or tart pans for individual servings that are travel friendly. These set faster and make portion control simple for gatherings.
- Freeze for a different texture Frozen slices become a cool, firm treat that resembles semifreddo. Freeze fully for a few hours and slice with a warm knife for clean portions, but do not refreeze after thawing.
- Play with toppings Use a sprinkle of chopped nuts on the whipped topping for a visual and textural accent, but add them just before serving so they keep their crunch.
Perfect Matches for No Bake Peanut Butter Pie
This section explores occasions, pairings, and practical serving ideas for your pie. Think about temperature contrasts, complementary textures, and the social context where this dessert shines. Below are many ways to present and store the pie so it fits different events and seasons.
- Serve chilled for summer gatherings When the weather is warm, keep the pie cold and serve with bright, chilled drinks. The cold filling is especially refreshing on warm afternoons and pairs well with mint or citrus flavored beverages.
- Bring to potlucks and parties Because it travels well, this pie is an excellent potluck option. Transport in a sturdy pie carrier and add the final whipped topping at the venue to keep it looking fresh and fluffy.
- Holiday table friendly For family dinners choose a classic presentation with piped whipped topping rosettes. The familiar flavors make it accessible across age groups, and it complements richer holiday mains without overpowering them.
- Storage tips Refrigerate in an airtight container for up to three days for best texture. For longer storage wrap tightly and freeze, then thaw in the refrigerator to maintain structure. Label with the date to ensure freshness.
- Occasion pairings This pie is versatile for casual lunches, evening dessert after a weeknight meal, or Ramadan iftar when you want a quick, satisfying finish. It works equally well as a celebratory dessert or a simple sweet end to a family dinner.
- Seasonal twists In cooler months serve slightly warmer accompaniments like a warm coffee to contrast the chilled pie, while in spring and summer emphasize cold or lightly acidic complements to brighten the palate.
FAQ
Conclusion
No Bake Peanut Butter Pie stands out because it delivers a rich, peanut buttery filling and a crisp crust without needing to turn on the oven. It is forgiving, travel friendly, and reliably crowd pleasing, which makes it one of my favorite quick desserts to bring to gatherings or keep on hand for sweet cravings. I encourage you to give it a try the next time you want an impressive but simple dessert, and enjoy how little effort yields delicious results that guests will ask about again and again.
No Bake Peanut Butter Pie
Equipment
- Whisk
- Mixing Bowl
- Spatula
- Pie Dish
- Refrigerator
Ingredients
- 19 -inch graham cracker crust from scratch or store bought, see note Provide a sturdy sweet base for the pie and can be homemade or purchased ready-made; presses into the pan to hold the filling and adds a crunchy texture contrast to the creamy filling.
- 13.4 ounces box instant vanilla pudding mix see note Create instant structure and vanilla flavor in the filling while thickening quickly when mixed with milk; dissolves into a smooth custard-like base that stabilizes the whipped topping and peanut butter.
- 3/4 cup (200 g) peanut butter creamy or chunky Add rich, nutty flavor and creamy texture to the filling while contributing body and a slightly savory balance; can be smooth or chunky to vary mouthfeel and richness.
- 1 1/4 cup (296 ml) milk see note Contribute liquid to hydrate and activate the instant pudding mix, determining the final consistency of the filling; use the specified amount for correct set and creaminess.
- 1 teaspoon vanilla extract Provide aromatic sweetness that enhances the vanilla pudding and peanut butter flavors; small amount rounds out the filling’s overall flavor profile without overpowering it.
- 28 -ounce containers whipped topping divided Supply light, airy volume and creamy texture to lighten the dense peanut butter-pudding mixture; reserve a portion as garnish or for layering to create a fluffy, stable pie topping.
Instructions
- Whisk pudding mix, milk, peanut butter, and vanilla together. Fold in one container of whipped topping. Pour into prepared pie crust. Cover with plastic wrap. Chill for at least 2 hours.: Warm aromas of peanut butter become more pronounced as the mixture smooths, and you should feel the whisk breaking down any tiny lumps so the batter looks glossy. The sound is a steady, light whisking rhythm, and visually you want a homogeneous pale tan that reflects light slightly. This step matters because a smooth base prevents graininess in the final filling, ensuring each bite is creamy. If the mixture separates or looks curdled, continue whisking patiently and scrape the sides of the bowl, adding a splash more milk if it seems too stiff. Common mistake to avoid: rushing and leaving undissolved pudding streaks which will create uneven pockets of texture.
- Before serving: top with additional whipped topping.: As you gently fold, you will notice the batter lighten and develop a softer sheen, almost like clouds melding into the pudding base. The visual cue to stop folding is when streaks of white disappear into an even, airy tan color without streaks. The technique preserves trapped air, making the filling light instead of dense, and that lightness contrasts beautifully with the crunchy crust. Troubleshooting note: if you overfold the mixture will slump and lose volume, so use a wide spatula and fold with gentle sweeping motions rather than stirring aggressively.
- Store in refrigerator for up to 3 days. Pie can also be frozen for a cold treat or to store.: Pouring the filling in, you will hear a quiet thud as the mixture settles into the graham cracker crust , and you should see the surface self level as the filling finds the edges. Press the filling gently with the back of a spoon if you need to coax it to the rim, but avoid compressing the air out. This step sets the geometry for neat slices and ensures an even set across the pie. A common error is overfilling, which can cause overflow when chilled, so stop just shy of the rim.
- Cover with plastic wrap: The wrap traps moisture and prevents the pie from absorbing fridge aromas, and you will want the wrap to barely touch the filling surface to avoid blemishes. The sealed environment helps the pudding set into a sliceable texture, and it keeps the topping fresh. If droplets collect on the wrap, that is normal, but if they run onto the crust it may soften edges excessively. Avoid pressing the wrap into the filling which will leave imprints on the top.
- Chill for at least 2 hours: During chilling the filling firms and the flavors marry, and you will notice the filling go from silky loose to sliceable with a gentle jiggle. The cool, clean smell of the fridge will calm the creaminess and allow the peanut butter to sit beautifully with the vanilla. This period is crucial because insufficient chilling yields a runny slice, so be patient and let the structure set fully. A typical mistake is cutting too early which gives you sloppy portions instead of clean wedges.
- Before serving: top with additional whipped topping : Adding the reserved whipped topping creates visual contrast and a soft pillow on each slice, and you can pipe or dollop depending on your mood. The cold topping should feel featherlight against the denser filling and will slightly melt into the surface for a glossy finish. This finishing touch makes every forkful alternately creamy and fluffy, enhancing the eating experience. Avoid applying the topping too early or it may weep; add it just before serving for best texture.
- Store in refrigerator for up to 3 days: Keeping the pie chilled preserves the texture and flavor, and you will notice the edges firming slightly over time which can be desirable. Cover the pie lightly with plastic or place it in an airtight container to prevent fridge odors from altering the taste. If you see any weeping on the surface, blot it gently before adding fresh whipped topping. A storage mistake is leaving the pie uncovered which dries the crust and dulls the filling aromas.
- Pie can also be frozen for a cold treat or to store: Freezing yields a firmer, almost ice cream like texture that some people adore, and it makes the dessert travel ready. Wrap tightly to avoid freezer burn and thaw in the refrigerator for gentler melting. When partially thawed the pie slices are easier to cut cleanly. Avoid refreezing after thawing which negatively affects texture, and label with a date so you use it within a reasonable window.
Notes
- Use a different crust Swap to an Oreo crust or a shortbread crust for a chocolatey or buttery foundation. Each crust shifts the flavor balance, with Oreo adding a bold chocolate contrast and shortbread giving a tender, biscuit like base that pairs beautifully with the nutty filling.
- Chunky versus creamy peanut butter Choosing chunky adds little pockets of crunch that play against the smooth pudding, while creamy yields a velvety filling. Both are valid; pick based on whether you want a textural surprise in every bite.
- Adjust sweetness If your peanut butter is already sweetened, reduce the amount of added sugar in related notes or choose a lower sugar instant pudding to keep the profile balanced and avoid cloying richness.
- Make mini versions Prepare the filling in small jars or tart pans for individual servings that are travel friendly. These set faster and make portion control simple for gatherings.
- Freeze for a different texture Frozen slices become a cool, firm treat that resembles semifreddo. Freeze fully for a few hours and slice with a warm knife for clean portions, but do not refreeze after thawing.
- Play with toppings Use a sprinkle of chopped nuts on the whipped topping for a visual and textural accent, but add them just before serving so they keep their crunch.