
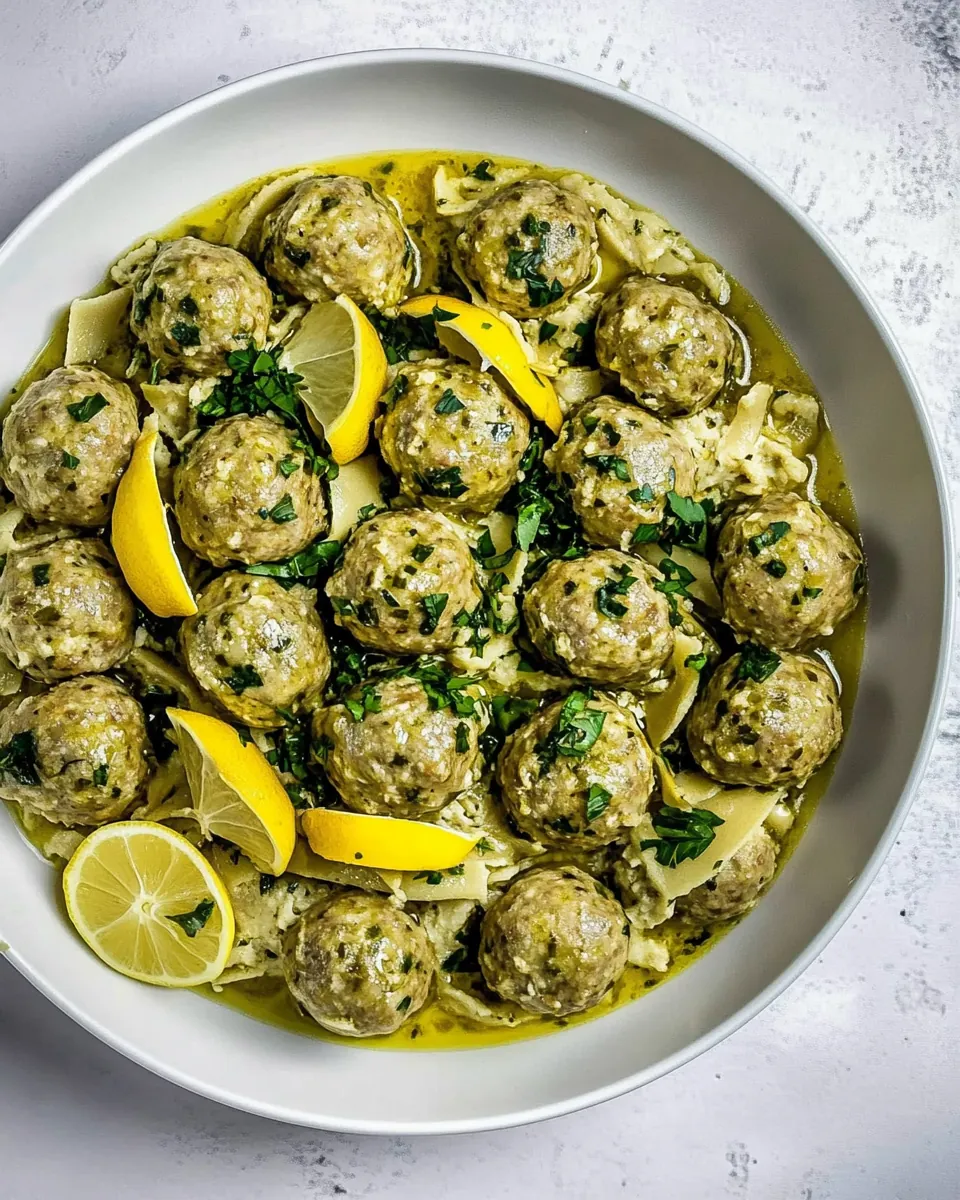
Chicken Piccata Meatballs
Chicken Piccata Meatballs are one of those dishes I turn to when I want something bright, comforting, and a little bit special without a lot of fuss.
The first time I made Chicken Piccata Meatballs was after a busy week when I needed dinner that felt like a warm hug but tasted lively enough to lift my spirits. I had leftover chicken and a lemon that had been sitting on the counter, and the idea came together when I thought to combine them into meatballs and bathe them in a tangy caper sauce. The kitchen filled with the sharp citrus aroma as the garlic sizzled in the pan, and I remember thinking how such simple ingredients could create something so memorable. That night we ate standing at the counter, forks in hand, and declared it an instant favorite.
Since then I’ve tweaked the balance of herbs and panko to get a tender interior with a light, pleasing crust, and I always make a little extra sauce for tossing with pasta. It’s become my go to when I want an easy weeknight supper that still impresses guests. You’ll notice the sauce has a pleasing tang from lemon juice and a salty pop from capers, which together cut through the richness of butter and cream. The contrast is what keeps people coming back for seconds, and I promise it feels far more elegant than the effort involved.
Recipe Snapshot
40 mins
15 mins
25 mins
Medium
350 kcal
Italian
Gluten-Free, Keto
Dinner
Capers Non Pareil, Panko Bread Crumbs, Dried Penne Pasta
Why This Chicken Piccata Meatballs Hits Different
Bright, distinctive flavor
I love how Chicken Piccata Meatballs balance acidity and richness. The interplay of lemon and capers with butter and a touch of cream creates a lively sauce that highlights, rather than hides, the delicate taste of the chicken. When I serve this, the room often fills with that citrusy lift that makes everyone sit up and take notice.
Comforting yet light
These meatballs deliver a comforting mouthfeel because of the tender ground chicken and panko, while the sauce keeps the dish from feeling heavy. I especially appreciate that it works well for weeknights when you want to keep things simple, but still want a plate that feels thoughtfully assembled.
Fast, approachable technique
I find the method approachable for cooks at any level. Forming meatballs is therapeutic for me, and baking them keeps the hands cleaner than pan frying. The sauce comes together quickly on the stovetop, so dinner is on the table with minimal stress. I like that you can chat with guests while the meatballs finish in the oven, rather than hovering at the stove.
Versatile serving options
One of the best things about this recipe is how flexible it is. I’ll often toss the meatballs and sauce with pasta for a casual supper, or serve them over greens for a lighter option. The components all play nicely with each other, so you can adjust portions and pairings based on what you have on hand.
Family friendly with elevated flavor
Kids tend to like the tender texture of these meatballs, and adults appreciate the bright sauce. I’ve made them for gatherings where they vanish quickly, and they also reheat well for leftovers. For me, that combination of ease and flavor is the real win.
What You Need for Chicken Piccata Meatballs
These ingredients are chosen to create tender meatballs and a bright, assertive sauce. The key players are the ground chicken and the citrus components, which form the backbone of the flavor, while binding agents like the egg and panko breadcrumbs keep the meatballs tender and cohesive. Finishing elements such as capers and butter give the sauce its signature savory tang and silky mouthfeel.
- 1 pound ground chicken: Provide lean, tender protein for the meatballs and bind with other ingredients to create a delicate texture; season well as ground chicken is mild and benefits from added flavors. Handle gently when mixing to avoid tough meatballs and cook until just done to retain juiciness.
- 1 large egg: Bind wet ingredients and add richness to the meatball mixture while helping emulsify for a cohesive texture; whisk briefly to combine yolk and white for even distribution. Beat lightly before adding to the mix to prevent overworking the meat.
- 1 lemon, zested: Add bright citrus aroma and intense lemon flavor to the meatballs while enhancing the final sauce with fragrant oils from the peel; zest finely to avoid bitter pith. Incorporate just the outer yellow layer to achieve a concentrated lemon presence.
- 1 clove garlic, grated: Contribute a pungent, savory note and depth to both meatballs and sauce when grated finely; garlic's aroma becomes integrated and mellow when cooked. Use a microplane or fine grater to distribute the garlic evenly without large chunks.
- 1/2 cup panko breadcrumbs: Introduce dry binder and light crunch to the meatball mixture while absorbing excess moisture for proper shape and texture; choose fine panko for a lighter crumb. Measure accurately to maintain the right moisture balance and prevent dense meatballs.
- 1/4 cup grated Parmesan cheese: Deliver a savory, umami-rich taste and subtle saltiness while enhancing the overall savory profile of the meatballs; grate finely for even mixing. Use real Parmesan for depth and avoid over-salting since cheese contributes sodium.
- 2 tablespoons minced parsley: Provide fresh herbal brightness and a pop of green color to the mixture and finished dish while balancing richness; chop finely to release fragrance. Add toward the end of mixing to preserve fresh herb flavor.
- 2 tablespoons olive oil: Offer a cooking fat for searing meatballs to develop a golden crust and impart Mediterranean fruitiness; heat to shimmering before adding meatballs. Use enough to prevent sticking but not so much that meat becomes greasy.
- 1 teaspoon kosher salt: Enhance overall flavor and help season the meat mixture effectively while drawing out other aromatics; use kosher salt for even distribution and clean taste. Adjust carefully based on other salty ingredients like Parmesan and capers.
- 1/2 teaspoon black pepper: Add mild heat and earthy background flavor to the meat and sauce, balancing the acidity from lemon and capers; grind fresh for best aroma. Use measured amounts to avoid overpowering the delicate chicken.
- 2 tablespoons unsalted butter: Provide rich, silky flavor and help create a glossy, emulsified pan sauce when melted with other fats; brown briefly for nutty depth. Add near the end to enrich the sauce without separating.
- 1 tablespoon olive oil: Supply additional oil for sautéing aromatics and finishing the sauce with smoothness while preventing butter from burning when cooking garlic. Use a measured amount to control the sauce's mouthfeel.
- 3 cloves garlic, minced: Deliver a fragrant, savory base to the sauce with sharp garlic flavor that mellows when sautéed; mince finely for quick, even cooking. Cook briefly until aromatic to avoid bitterness from overcooking.
- 1 1/2 cups chicken stock: Form the liquid foundation of the sauce, adding savory backbone and simmering power to reduce and concentrate flavors; choose low-sodium stock to control salt. Simmer gently to meld flavors without becoming thin or overly salty.
- 1/2 cup lemon juice: Contribute bright acidity and pronounced citrus tang to the sauce, balancing richness and elevating flavors; use freshly squeezed lemon for best brightness. Add gradually and taste to achieve desired lemon intensity.
- 3 tablespoons capers: Introduce briny, tangy pops of flavor to the sauce, cutting through richness and adding texture contrast; drain if particularly salty. Stir in toward the end to preserve their shape and piquant character.
- 1 tablespoon caper brine: Provide additional saline, tangy depth from the pickling liquid to intensify caper flavor and help season the sauce without extra salt; add sparingly. Adjust to taste because brine potency varies by jar.
- 2 tablespoons heavy cream: Bring a touch of creaminess and roundness to the sauce, softening acidity and tying flavors together while preventing a thin mouthfeel; whisk in gently off heat if needed to avoid curdling. Use sparingly to keep the sauce light and bright.
- 8 ounces cooked pasta: Serve as a starchy base to absorb the sauce and complete the meal, offering comforting texture and substance; toss with sauce just before serving to coat evenly. Use cooked pasta at room temperature to avoid overcooking when reheated in the sauce.
Cooking Method for Chicken Piccata Meatballs
These instructions move from assembling the meatballs to baking them and finishing in a bright, reduced sauce. The method keeps things tidy and efficient, using the oven for gentle cooking and the stovetop for building flavor. Below each cleaned step I expand on the sensory cues, reasons behind techniques, and troubleshooting to help you get consistent results.
- Preheat your oven to 350 degrees F and spray an 8×8 baking pan or sheet pan with non-stick spray, set aside.: As the oven warms, you will smell the faint warm air and the kitchen will start to feel cozy, signaling that the meatballs will cook evenly without direct pan contact; using a greased pan prevents sticking and preserves the meatballs shape during baking. The even dry heat of a 350 degrees F oven cooks the meat through gently while allowing the exterior to set without overbrowning, which is crucial for delicate ground chicken . A typical mistake is using an oven that is too hot, which can brown the outside before the center reaches the safe internal temperature, so use an oven thermometer if your oven runs hot or cold. Keep the meatballs spaced so hot air circulates and they cook uniformly.
- In a large mixing bowl add all the meatball ingredients and mix together until well blended.: As you combine the ground chicken , egg , grated garlic , panko breadcrumbs , Parmesan cheese , minced parsley , lemon zest , olive oil , kosher salt, and black pepper you will notice the mixture becoming tacky and cohesive, with lemon oils releasing a bright citrus perfume. Gently folding the ingredients distributes seasoning and keeps air in the mixture, which helps maintain tenderness when baked. Overmixing is the common pitfall here, as vigorous handling develops the proteins and yields dense, rubbery meatballs; stop mixing as soon as everything is evenly combined. If the mix feels too wet, add a tablespoon of panko breadcrumbs at a time to adjust texture.
- Shape into 2 tablespoon-sized balls and add to the prepared dish.: Rolling each portion into uniform 2 tablespoon-sized meatballs ensures they cook at the same rate; as you form them, they should feel springy but hold their shape, with flecks of parsley and Parmesan cheese visible. Keeping sizes consistent prevents some meatballs from overcooking while others are underdone. A mistake to avoid is packing them too tightly, which leads to denser meatballs; aim for a gentle, even roll. Place them onto the greased pan spaced a little apart so hot air can circulate for even baking.
- Add to the oven and bake for 20 minutes or until the internal temperature is 165 degrees F.: As they bake, the surface will firm and take on a pale golden tint, and you may notice a faint roasted aroma from the lemon zest and Parmesan cheese . The internal temperature of 165 degrees F guarantees food safety for poultry while preserving juiciness; use an instant read thermometer inserted into the center to verify doneness. Avoid leaving them in much longer than needed, which will dry them out, and avoid opening the oven frequently, which lowers the oven temperature and affects cooking time. If you see any dark spots on top too early, your oven may be too hot, so rotate the pan halfway through if needed.
- While the meatballs bake start your sauce.: Beginning the sauce while the meatballs bake is efficient and ensures everything comes together hot. The kitchen will fill with the aroma of melting butter and sizzling garlic , signaling that flavor is building. Starting the sauce early also allows time for reduction so it reaches the right concentration by the time the meatballs are ready. A common mistake is rushing the reduction, which results in a watery sauce; be patient and keep a gentle simmer to concentrate flavors without oversalting.
- In a large saute pan add butter and olive oil and set over medium-high heat.: When the butter melts and the olive oil shimmers you will get a glossy, fragrant fat base perfect for releasing aromatic compounds from the garlic . The oil protects the butter from burning and the combined fats give the sauce both flavor and heat tolerance. If the pan is too hot the butter can brown too quickly, introducing a toasty flavor that can overshadow the lemon; maintain medium-high to medium heat for controlled flavor development. Swirl the pan so the fats coat the bottom evenly for consistent sautéing.
- When the oil is hot add the garlic and cook for 30 seconds or until fragrant.: As the minced garlic hits the pan it will hiss and release an aromatic steam; cook just until fragrant and slightly softened to avoid bitterness. You should see the garlic change from raw to glossy, but not brown. The quick sauté unlocks the savory, sweet qualities of garlic that underpin the sauce. Overcooking is the frequent error here; burnt garlic has a sharp, acrid taste that detracts from the delicate lemon and caper notes, so remove the pan from direct heat if it begins to color too quickly.
- Add in the chicken stock, lemon juice, capers, and caper brine.: When you pour in the chicken stock and bright lemon juice , and add the salty pop of capers and their brine, the pan will release steam and a tangy aroma that balances the butter. The stock brings depth while the lemon juice provides acidity to cut richness, and the capers add delightful saline bursts. Stir to combine and bring the mixture up to a gentle simmer; this is when the individual flavors begin to sing together. Do not let the sauce boil hard, which can toughen the cream later and cause excess evaporation of nuanced flavors.
- Bring to a gentle simmer and cook for about 5 minutes to help reduce the sauce a little.: As the sauce simmers you will notice it thicken slightly and the flavors concentrate, with the lemon becoming more integrated and the capers imparting briny highlights; the reduced volume results in a more clingy sauce. This short reduction time creates a balanced sauce that will coat meatballs and pasta without being watery. A common pitfall is not reducing long enough, which leaves a thin sauce that does not adhere well, or reducing too long, which makes it overly salty or sharp. Keep the heat moderate and watch the consistency closely.
- Add the pasta and meatballs to the sauce and toss to combine.: When you add the cooked pasta and baked meatballs to the pan the sauce will cling and gloss the surfaces, creating a unified dish; tossing distributes the sauce into crevices and warms everything through. You should hear gentle sizzling and see the sauce lightly coating the pasta and pooling around the meatballs, with the capers scattered for bursts of flavor. Tossing also helps the starches from the pasta meld slightly with the sauce for better adhesion. Avoid tossing too vigorously which can break meatballs; use tongs or a large spoon and fold gently until everything is evenly coated and heated.
Tips and Variations

I like to think of these tips as small changes that make a big difference to texture and flavor. Below are practical suggestions and simple variations that keep the recipe reliable and interesting for different occasions.
- Measure your meatballs: Use a tablespoon or small scoop to portion uniform 2 tablespoon meatballs so they cook consistently and present nicely.
- Keep it light: If you prefer a lighter sauce, reduce the heavy cream by half and finish with a little extra lemon juice to maintain brightness without adding richness.
- Prevent sticking: Spray the pan lightly and leave space between meatballs so hot air circulates and they don’t steam on the pan surface.
- Control salt: Because capers and Parmesan cheese are salty, taste the sauce before adding extra salt and adjust incrementally.
- Freshness matters: Use fresh lemon juice and freshly grated Parmesan cheese for the most vibrant flavor; bottled substitutes can mute the overall profile.
Side Dish Ideas for Chicken Piccata Meatballs
This dish pairs beautifully with simple, complementary sides that let the bright piccata sauce shine. Below I list several serving ideas, seasonal pairings, and storage tips you can use to plan a full meal for different occasions.
- Classic pasta: Toss pasta with the sauce and meatballs; long shapes like penne or spaghetti trap sauce and make every bite saucy and satisfying.
- Light salad: Serve alongside a crisp green salad dressed simply with olive oil and lemon to echo the dish’s citrus notes and add refreshing contrast.
- Vegetable sides: Roasted or steamed vegetables such as green beans or asparagus add texture and balance the richness of the sauce for a well rounded plate.
- Occasions: This recipe fits weeknight dinners, casual entertaining, or even a special Ramadan if you want a meal that is both comforting and elegant for breaking fast.
- Storage: Keep leftovers refrigerated in an airtight container for up to three days; reheat gently in a skillet over low heat with a splash of stock to revive the sauce.
- Seasonal pairing: In spring and summer, highlight fresh herbs and lemon zest; in cooler months, serve with heartier sides like warm roasted root vegetables for a comforting finish.
FAQ
Conclusion
What makes this recipe special is the bright contrast between tender chicken meatballs and the lively piccata sauce, with lemon and capers cutting through buttery richness. Give it a try on a weeknight when you want a dish that feels both homey and a little elevated; it’s the sort of meal that disappears quickly and earns compliments with very little effort. I hope you enjoy making and sharing these meatballs as much as I do, and that they become a reliable favorite in your dinner rotation.
Chicken Piccata Meatballs
Equipment
- Capers Non Pareil
- Panko Bread Crumbs
- Dried Penne Pasta
Ingredients
- 1 pound ground chicken Provide lean, tender protein for the meatballs and bind with other ingredients to create a delicate texture; season well as ground chicken is mild and benefits from added flavors. Handle gently when mixing to avoid tough meatballs and cook until just done to retain juiciness.
- 1 large egg Bind wet ingredients and add richness to the meatball mixture while helping emulsify for a cohesive texture; whisk briefly to combine yolk and white for even distribution. Beat lightly before adding to the mix to prevent overworking the meat.
- 1 lemon, zested Add bright citrus aroma and intense lemon flavor to the meatballs while enhancing the final sauce with fragrant oils from the peel; zest finely to avoid bitter pith. Incorporate just the outer yellow layer to achieve a concentrated lemon presence.
- 1 clove garlic, grated Contribute a pungent, savory note and depth to both meatballs and sauce when grated finely; garlic's aroma becomes integrated and mellow when cooked. Use a microplane or fine grater to distribute the garlic evenly without large chunks.
- 1/2 cup panko breadcrumbs Introduce dry binder and light crunch to the meatball mixture while absorbing excess moisture for proper shape and texture; choose fine panko for a lighter crumb. Measure accurately to maintain the right moisture balance and prevent dense meatballs.
- 1/4 cup grated Parmesan cheese Deliver a savory, umami-rich taste and subtle saltiness while enhancing the overall savory profile of the meatballs; grate finely for even mixing. Use real Parmesan for depth and avoid over-salting since cheese contributes sodium.
- 2 tablespoons minced parsley Provide fresh herbal brightness and a pop of green color to the mixture and finished dish while balancing richness; chop finely to release fragrance. Add toward the end of mixing to preserve fresh herb flavor.
- 2 tablespoons olive oil Offer a cooking fat for searing meatballs to develop a golden crust and impart Mediterranean fruitiness; heat to shimmering before adding meatballs. Use enough to prevent sticking but not so much that meat becomes greasy.
- 1 teaspoon kosher salt Enhance overall flavor and help season the meat mixture effectively while drawing out other aromatics; use kosher salt for even distribution and clean taste. Adjust carefully based on other salty ingredients like Parmesan and capers.
- 1/2 teaspoon black pepper Add mild heat and earthy background flavor to the meat and sauce, balancing the acidity from lemon and capers; grind fresh for best aroma. Use measured amounts to avoid overpowering the delicate chicken.
- 2 tablespoons unsalted butter Provide rich, silky flavor and help create a glossy, emulsified pan sauce when melted with other fats; brown briefly for nutty depth. Add near the end to enrich the sauce without separating.
- 1 tablespoon olive oil Supply additional oil for sautéing aromatics and finishing the sauce with smoothness while preventing butter from burning when cooking garlic. Use a measured amount to control the sauce's mouthfeel.
- 3 cloves garlic, minced Deliver a fragrant, savory base to the sauce with sharp garlic flavor that mellows when sautéed; mince finely for quick, even cooking. Cook briefly until aromatic to avoid bitterness from overcooking.
- 1 -1/2 cups chicken stock Form the liquid foundation of the sauce, adding savory backbone and simmering power to reduce and concentrate flavors; choose low-sodium stock to control salt. Simmer gently to meld flavors without becoming thin or overly salty.
- 1/2 cup lemon juice Contribute bright acidity and pronounced citrus tang to the sauce, balancing richness and elevating flavors; use freshly squeezed lemon for best brightness. Add gradually and taste to achieve desired lemon intensity.
- 3 tablespoons capers Introduce briny, tangy pops of flavor to the sauce, cutting through richness and adding texture contrast; drain if particularly salty. Stir in toward the end to preserve their shape and piquant character.
- 1 tablespoon caper brine Provide additional saline, tangy depth from the pickling liquid to intensify caper flavor and help season the sauce without extra salt; add sparingly. Adjust to taste because brine potency varies by jar.
- 2 tablespoons heavy cream Bring a touch of creaminess and roundness to the sauce, softening acidity and tying flavors together while preventing a thin mouthfeel; whisk in gently off heat if needed to avoid curdling. Use sparingly to keep the sauce light and bright.
- 8 ounces cooked pasta Serve as a starchy base to absorb the sauce and complete the meal, offering comforting texture and substance; toss with sauce just before serving to coat evenly. Use cooked pasta at room temperature to avoid overcooking when reheated in the sauce.
Instructions
- Preheat your oven to 350 degrees F and spray an 8×8 baking pan or sheet pan with non-stick spray, set aside.: As the oven warms, you will smell the faint warm air and the kitchen will start to feel cozy, signaling that the meatballs will cook evenly without direct pan contact; using a greased pan prevents sticking and preserves the meatballs shape during baking. The even dry heat of a 350 degrees F oven cooks the meat through gently while allowing the exterior to set without overbrowning, which is crucial for delicate ground chicken . A typical mistake is using an oven that is too hot, which can brown the outside before the center reaches the safe internal temperature, so use an oven thermometer if your oven runs hot or cold. Keep the meatballs spaced so hot air circulates and they cook uniformly.
- In a large mixing bowl add all the meatball ingredients and mix together until well blended.: As you combine the ground chicken , egg , grated garlic , panko breadcrumbs , Parmesan cheese , minced parsley , lemon zest , olive oil , kosher salt, and black pepper you will notice the mixture becoming tacky and cohesive, with lemon oils releasing a bright citrus perfume. Gently folding the ingredients distributes seasoning and keeps air in the mixture, which helps maintain tenderness when baked. Overmixing is the common pitfall here, as vigorous handling develops the proteins and yields dense, rubbery meatballs; stop mixing as soon as everything is evenly combined. If the mix feels too wet, add a tablespoon of panko breadcrumbs at a time to adjust texture.
- Shape into 2 tablespoon-sized balls and add to the prepared dish.: Rolling each portion into uniform 2 tablespoon-sized meatballs ensures they cook at the same rate; as you form them, they should feel springy but hold their shape, with flecks of parsley and Parmesan cheese visible. Keeping sizes consistent prevents some meatballs from overcooking while others are underdone. A mistake to avoid is packing them too tightly, which leads to denser meatballs; aim for a gentle, even roll. Place them onto the greased pan spaced a little apart so hot air can circulate for even baking.
- Add to the oven and bake for 20 minutes or until the internal temperature is 165 degrees F.: As they bake, the surface will firm and take on a pale golden tint, and you may notice a faint roasted aroma from the lemon zest and Parmesan cheese . The internal temperature of 165 degrees F guarantees food safety for poultry while preserving juiciness; use an instant read thermometer inserted into the center to verify doneness. Avoid leaving them in much longer than needed, which will dry them out, and avoid opening the oven frequently, which lowers the oven temperature and affects cooking time. If you see any dark spots on top too early, your oven may be too hot, so rotate the pan halfway through if needed.
- While the meatballs bake start your sauce.: Beginning the sauce while the meatballs bake is efficient and ensures everything comes together hot. The kitchen will fill with the aroma of melting butter and sizzling garlic , signaling that flavor is building. Starting the sauce early also allows time for reduction so it reaches the right concentration by the time the meatballs are ready. A common mistake is rushing the reduction, which results in a watery sauce; be patient and keep a gentle simmer to concentrate flavors without oversalting.
- In a large saute pan add butter and olive oil and set over medium-high heat.: When the butter melts and the olive oil shimmers you will get a glossy, fragrant fat base perfect for releasing aromatic compounds from the garlic . The oil protects the butter from burning and the combined fats give the sauce both flavor and heat tolerance. If the pan is too hot the butter can brown too quickly, introducing a toasty flavor that can overshadow the lemon; maintain medium-high to medium heat for controlled flavor development. Swirl the pan so the fats coat the bottom evenly for consistent sautéing.
- When the oil is hot add the garlic and cook for 30 seconds or until fragrant.: As the minced garlic hits the pan it will hiss and release an aromatic steam; cook just until fragrant and slightly softened to avoid bitterness. You should see the garlic change from raw to glossy, but not brown. The quick sauté unlocks the savory, sweet qualities of garlic that underpin the sauce. Overcooking is the frequent error here; burnt garlic has a sharp, acrid taste that detracts from the delicate lemon and caper notes, so remove the pan from direct heat if it begins to color too quickly.
- Add in the chicken stock, lemon juice, capers, and caper brine.: When you pour in the chicken stock and bright lemon juice , and add the salty pop of capers and their brine, the pan will release steam and a tangy aroma that balances the butter. The stock brings depth while the lemon juice provides acidity to cut richness, and the capers add delightful saline bursts. Stir to combine and bring the mixture up to a gentle simmer; this is when the individual flavors begin to sing together. Do not let the sauce boil hard, which can toughen the cream later and cause excess evaporation of nuanced flavors.
- Bring to a gentle simmer and cook for about 5 minutes to help reduce the sauce a little.: As the sauce simmers you will notice it thicken slightly and the flavors concentrate, with the lemon becoming more integrated and the capers imparting briny highlights; the reduced volume results in a more clingy sauce. This short reduction time creates a balanced sauce that will coat meatballs and pasta without being watery. A common pitfall is not reducing long enough, which leaves a thin sauce that does not adhere well, or reducing too long, which makes it overly salty or sharp. Keep the heat moderate and watch the consistency closely.
- Add the pasta and meatballs to the sauce and toss to combine.: When you add the cooked pasta and baked meatballs to the pan the sauce will cling and gloss the surfaces, creating a unified dish; tossing distributes the sauce into crevices and warms everything through. You should hear gentle sizzling and see the sauce lightly coating the pasta and pooling around the meatballs, with the capers scattered for bursts of flavor. Tossing also helps the starches from the pasta meld slightly with the sauce for better adhesion. Avoid tossing too vigorously which can break meatballs; use tongs or a large spoon and fold gently until everything is evenly coated and heated.
Notes
- Measure your meatballs: Use a tablespoon or small scoop to portion uniform 2 tablespoon meatballs so they cook consistently and present nicely.
- Keep it light: If you prefer a lighter sauce, reduce the heavy cream by half and finish with a little extra lemon juice to maintain brightness without adding richness.
- Prevent sticking: Spray the pan lightly and leave space between meatballs so hot air circulates and they don’t steam on the pan surface.
- Control salt: Because capers and Parmesan cheese are salty, taste the sauce before adding extra salt and adjust incrementally.
- Freshness matters: Use fresh lemon juice and freshly grated Parmesan cheese for the most vibrant flavor; bottled substitutes can mute the overall profile.