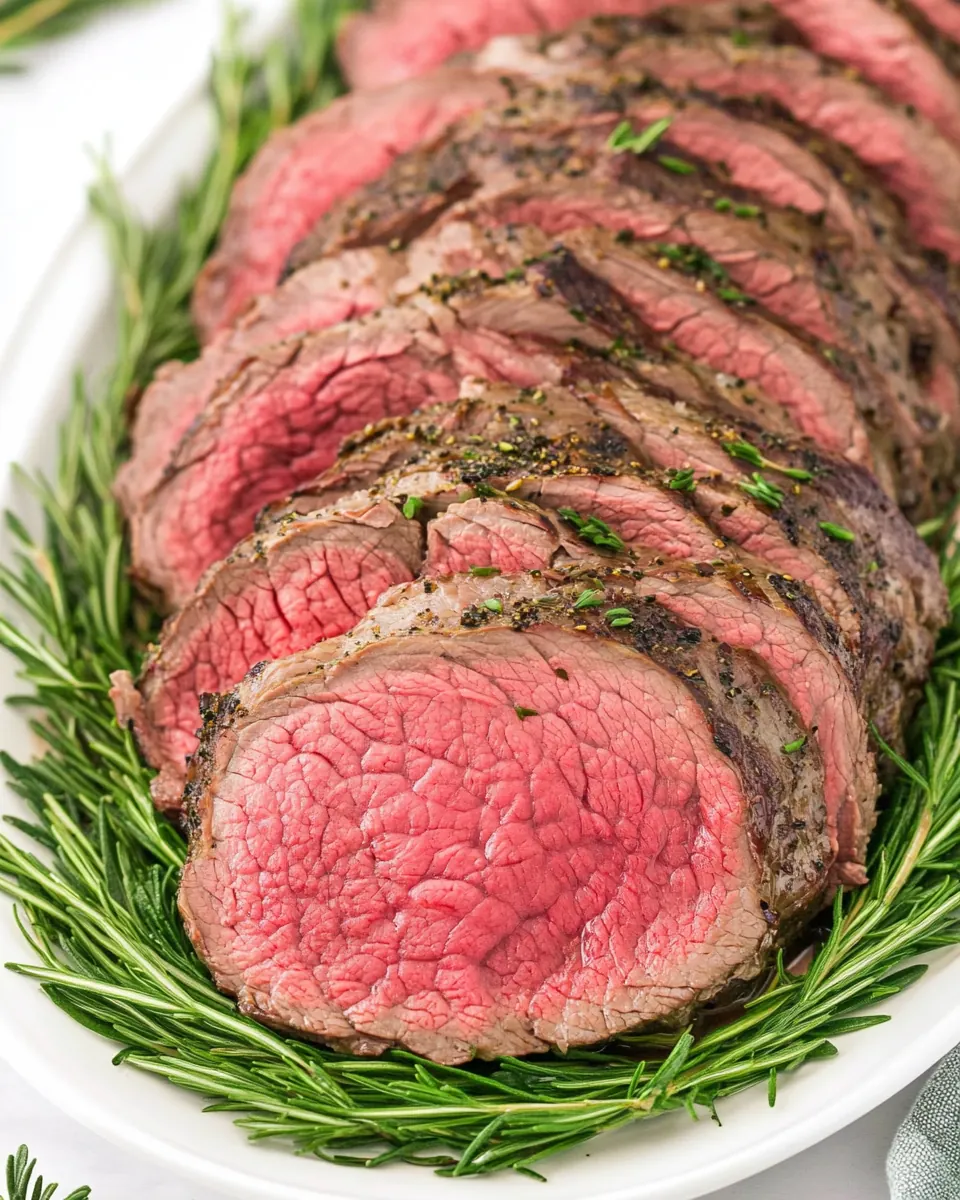
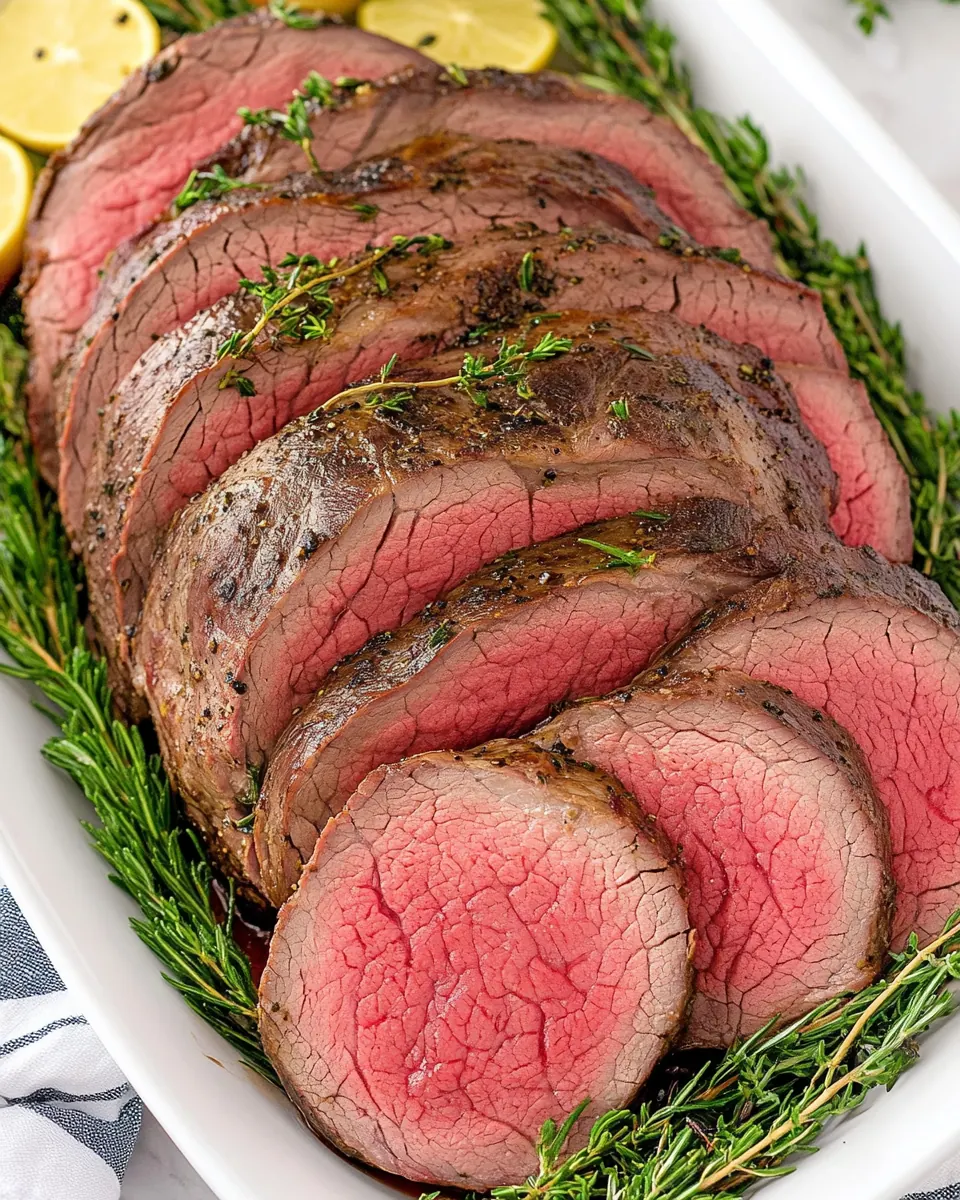
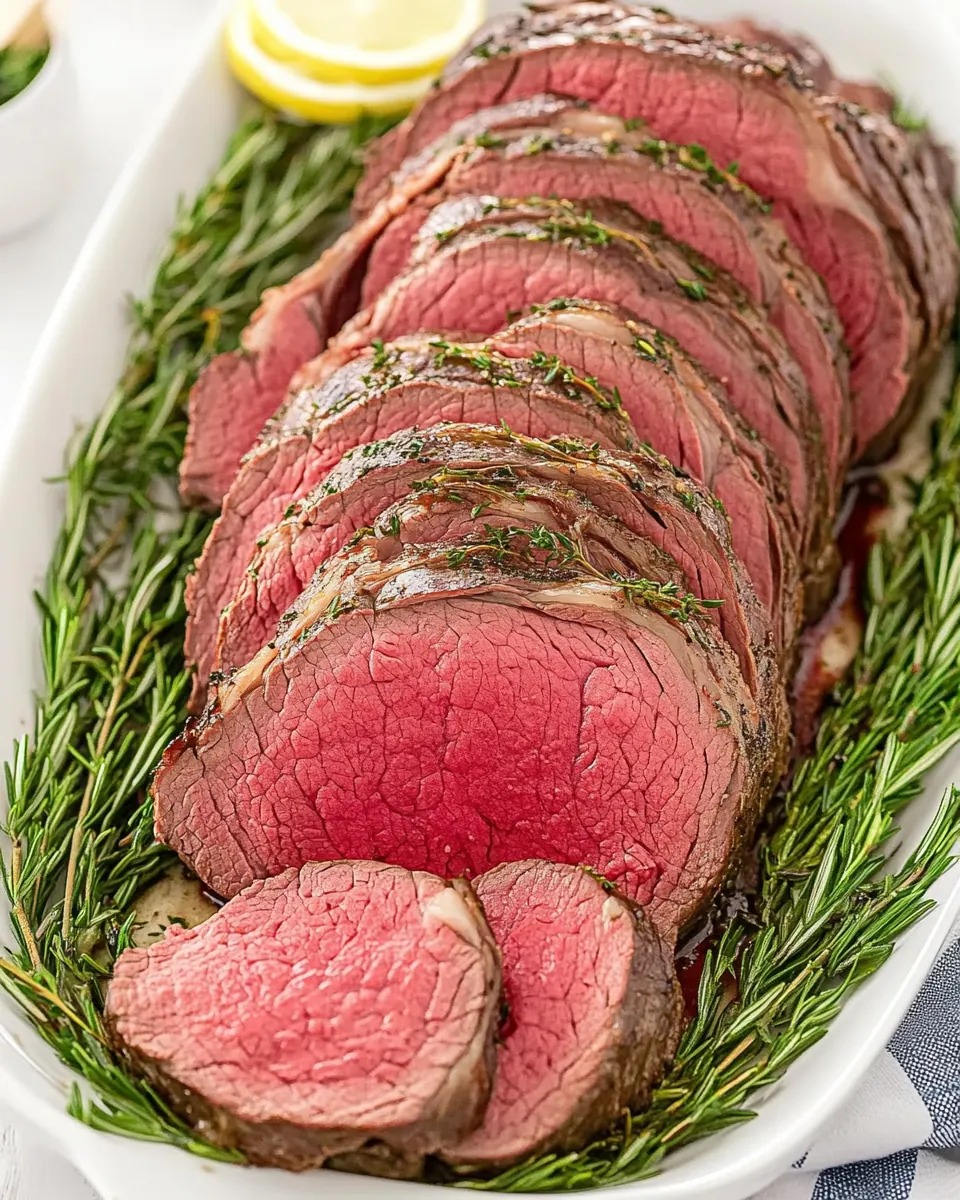
Beef Tenderloin Roast
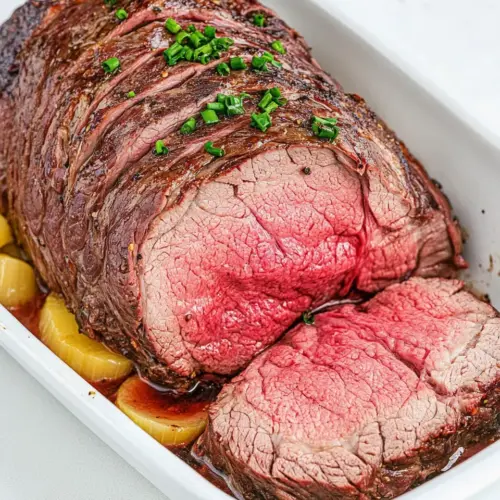
Beef Tenderloin Roast is the kind of centerpiece I turn to when I want a simple showstopper that still feels intimate and carefully made. The first time I roasted a beef tenderloin for a close group of friends, I remember the hush that fell when I carved it at the table, the tender pink center glinting under the warm kitchen light. From that moment on, this roast became my go to for special dinners when I want something elegant without fuss.
I learned early that success with Beef Tenderloin Roast comes from respecting the meat and letting small touches do the heavy lifting. I love the ritual of bringing the roast to room temperature, the soft thud when I pat on butter, and the brief sear that gives a caramelized crust. Every step feels purposeful, and the payoff is a fork tender slice that tastes like you spent hours, even when you did not.
Recipe Snapshot
1 hr 45 mins
45 mins
60 mins
Medium
450 kcal
American
Keto, Gluten-Free
Dinner
Oven, Skillet, Baking sheet, Rack, Instant read thermometer
What We Adore About This Beef Tenderloin Roast
Perfect centerpiece appeal
I often choose Beef Tenderloin Roast because it reads as restaurant quality on the table. The tenderloin has a refined shape and a buttery texture that slices beautifully, so even modest plating looks elevated. I love how few additions are needed to make it sing, which is a huge relief when I am juggling sides and timing.
Reliable tenderness
One reason I keep coming back to this roast is the consistent tenderness you get from the center cut. When you follow the simple timing and rest the meat properly, the texture is uniformly soft and melts in the mouth. I value that reliability, especially when feeding guests who expect a comfortable, classic bite.
Flexible seasoning and finishes
The straightforward seasoning of salt, pepper, and butter lets the beef shine. I like this freedom because it allows me to pair the roast with different sauces or accompaniments without clashing. That flexibility makes it a recipe I return to for holidays and intimate dinners alike.
Impressive without complexity
What I appreciate most is how impressive the result feels, while the technique remains approachable. There is no complicated brining, no marathon prep, just measured steps that reward good timing. For busy hosts who want to look like they planned every detail, this roast delivers quietly, and I always feel a little proud carving it.
Great for leftovers and variety
Finally, I love how the leftovers transform into other meals. Thin slices become star sandwich filling, and cubes are fantastic in a quick stir or salad. That versatility keeps me cooking this roast again and again, because it stretches across several meals in the week after a special dinner.
Ingredients to Make Beef Tenderloin Roast
I believe simple, quality ingredients are the backbone of a memorable roast. For Beef Tenderloin Roast, each item plays a clear role: the beef is the star, butter adds silk and helps brown the exterior, and salt and pepper elevate and define flavor. This small cast of players works together to create a dish that feels luxurious yet unforced.
- 2 pounds beef tenderloin center cut is best: Roast to tender, even doneness by choosing a center-cut tenderloin and allow it to rest before slicing; its lean, fine-grained texture benefits from quick, high-heat searing to develop a flavorful crust while preserving a juicy interior.
- 4 tablespoons butter room temperature, divided use: Soften at room temperature and spread onto the meat to promote browning and add richness; dividing its use lets some butter baste during roasting and reserves some for finishing to enhance mouthfeel and flavor.
- 1/2 teaspoon kosher salt: Season evenly across the surface to enhance the beef's natural flavor and help create a balanced savory profile; kosher salt also aids in forming a crust when combined with high-heat cooking.
- 1/2 teaspoon ground black pepper: Crack fresh into the seasoning mix to provide bright, sharp heat and aromatic depth; ground black pepper pairs with salt to lift the roast's flavors without overpowering the natural beef taste.
Cooking Method for Beef Tenderloin Roast
This roast calls for mindful pacing and attention to tactile cues. I like to narrate the process so you feel confident at each moment, from bringing the meat to room temperature to the final resting period. Follow the steps, pay attention to color and feel, and trust a good thermometer more than exact minutes alone.
- Take the beef tenderloin out of the refrigerator about 45 minutes to 1 hour before roasting to bring it to room temperature.: As the meat warms, the fibers relax and the interior cooks more evenly, yielding a tender, evenly colored roast with fewer gray bands. You will notice the roast lose its chill, and when you press it lightly it should feel less cold and slightly springy rather than rock hard. This step also shortens overall cook time and reduces the risk of an overdone exterior and underdone center. A common mistake is skipping this rest and placing a cold roast straight into the oven, which can result in uneven doneness and a tight texture.
- Preheat the oven to 300°F.: A moderate oven temperature encourages gentle, even cooking throughout the roast, building a uniform pink interior without an overly crusty exterior. When the oven reaches temperature, the ambient heat will slowly transfer into the roast, producing predictable internal rise. You should hear the oven fan cycle or see the preheat indicator confirm the set point before sliding the meat in. Avoid cranking the oven to very high heat for the entire roast, as that risks drying the exterior before the center reaches the right temperature.
- Spread 2 tablespoons of butter on the roast and season liberally with salt and pepper.: Butter adheres seasoning and facilitates browning during the final sear while adding richness to each bite. As you spread the softened butter, it should glide across the surface and create a thin sheen that will encourage even coloration. The salt and pepper will stick to this surface and form a simple, flavorful crust when seared. One pitfall is applying cold butter that slides off; using room temperature butter ensures even coverage and seasoning adhesion.
- Place the roast on a rack on top of a baking sheet and bake for 20 to 25 minutes per pound for rare, or about 30 to 35 minutes per pound for medium rare, checking the internal temperature with a thermometer. When the roast reaches the desired temperature, remove it from the oven.: A rack promotes air circulation so the roast cooks evenly on all sides. As it bakes, you will notice the outer surface firm up and develop a subtle brown tint. Use an instant read thermometer inserted into the thickest part of the roast to hit your target, and watch the internal temp climb steadily. A frequent error is relying on time alone rather than temperature; ovens vary and meat size differs, so the thermometer is essential for reliability.
- Heat 2 tablespoons of butter in a skillet over medium-high heat. Place the roast in the skillet and sear all sides until it is evenly browned.: Searing after roasting creates a pronounced, flavorful crust through the Maillard reaction, adding complexity and texture to each slice. You should hear a satisfying sizzle as the butter and meat meet, and the aroma will shift to nutty and toasty notes. Turn the roast to brown each face evenly, aiming for a deep caramelized color without burning. Be cautious of overheating the pan, which can char the surface quickly and impart bitterness; moderate heat and steady movement are key to an even sear.
- Remove the roast from the skillet and allow it to rest for 15 minutes before slicing and serving.: Resting lets the meat's juices redistribute back into the fibers, producing moist, tender slices rather than a pool of juices on the cutting board. During this period the internal temperature may rise a few degrees, and the crust will settle and firm just enough to slice cleanly. You can tent the roast loosely with foil to keep it warm, but avoid wrapping tightly which can steam the crust. A common oversight is slicing too soon, which causes the juices to run out and yields a drier result.
Tips for Success
I like to think of these tips as small investments that protect the quality of each slice. They focus on timing, temperature, and technique to make the most of the ingredient list and keep the process calm and predictable.
- Room temperature matters Prepare the roast ahead so it warms for about 45 minutes to 1 hour, which promotes even cooking and a tender interior.
- Trust the thermometer Rely on an instant read thermometer to hit rare or medium rare accurately, rather than strictly following minutes per pound.
- Butter strategically Use softened butter to help seasoning adhere and to create a richer surface for the final sear.
- Moderate pan heat When searing, use medium high heat and watch for a steady sizzle, avoiding scorching the butter which leads to bitterness.
- Rest before slicing Allow at least 15 minutes of rest to keep juices inside the roast and ensure clean, moist slices.
Serve This Beef Tenderloin Roast With
This roast pairs well with simple, complementary sides and lends itself to a range of occasions. Whether you are setting a festive table for winter entertaining or a quiet dinner for family, choose sides that support the beef without overwhelming it.
- Classic roasted vegetables Roasted root vegetables or seasonal vegetables bring sweetness and texture that contrast with the tender roast, making plate balance satisfying for a winter meal or holiday gathering.
- Light pan sauce or jus A simple jus made from pan drippings or a lightly reduced stock complements the beef, adding moisture and concentrated flavor without masking the meat.
- Special occasion timing This roast is ideal for formal dinners, festive holidays, or celebratory meals where a refined main is desired, and it presents well for carving at the table.
- Storage tips Wrap leftover slices tightly and refrigerate up to three days, using them in sandwiches or quick reheated plates to preserve texture and flavor.
- Seasonal pairings In winter, pair with roasted root vegetables and a hearty grain; in milder months, serve with a bright salad to lighten the plate.
FAQ
Conclusion
This Beef Tenderloin Roast shines because it combines minimal seasoning with careful technique to produce a tender, impressive centerpiece. Give it a try the next time you want a straightforward yet elegant main that feeds a crowd without overcomplicating the kitchen. Serve it simply, rest it well, and enjoy the rewarding experience of carving and sharing a roast that feels special and satisfying.
Beef Tenderloin Roast
Equipment
- Oven
- Skillet
- Baking Sheet
- Rack
- Instant read thermometer
Ingredients
- 2 pounds beef tenderloin center cut is best Roast to tender, even doneness by choosing a center-cut tenderloin and allow it to rest before slicing; its lean, fine-grained texture benefits from quick, high-heat searing to develop a flavorful crust while preserving a juicy interior.
- 4 tablespoons butter room temperature, divided use Soften at room temperature and spread onto the meat to promote browning and add richness; dividing its use lets some butter baste during roasting and reserves some for finishing to enhance mouthfeel and flavor.
- 1/2 teaspoon kosher salt Season evenly across the surface to enhance the beef's natural flavor and help create a balanced savory profile; kosher salt also aids in forming a crust when combined with high-heat cooking.
- 1/2 teaspoon ground black pepper Crack fresh into the seasoning mix to provide bright, sharp heat and aromatic depth; ground black pepper pairs with salt to lift the roast's flavors without overpowering the natural beef taste.
Instructions
- Take the beef tenderloin out of the refrigerator about 45 minutes to 1 hour before roasting to bring it to room temperature.: As the meat warms, the fibers relax and the interior cooks more evenly, yielding a tender, evenly colored roast with fewer gray bands. You will notice the roast lose its chill, and when you press it lightly it should feel less cold and slightly springy rather than rock hard. This step also shortens overall cook time and reduces the risk of an overdone exterior and underdone center. A common mistake is skipping this rest and placing a cold roast straight into the oven, which can result in uneven doneness and a tight texture.
- Preheat the oven to 300°F.: A moderate oven temperature encourages gentle, even cooking throughout the roast, building a uniform pink interior without an overly crusty exterior. When the oven reaches temperature, the ambient heat will slowly transfer into the roast, producing predictable internal rise. You should hear the oven fan cycle or see the preheat indicator confirm the set point before sliding the meat in. Avoid cranking the oven to very high heat for the entire roast, as that risks drying the exterior before the center reaches the right temperature.
- Spread 2 tablespoons of butter on the roast and season liberally with salt and pepper.: Butter adheres seasoning and facilitates browning during the final sear while adding richness to each bite. As you spread the softened butter, it should glide across the surface and create a thin sheen that will encourage even coloration. The salt and pepper will stick to this surface and form a simple, flavorful crust when seared. One pitfall is applying cold butter that slides off; using room temperature butter ensures even coverage and seasoning adhesion.
- Place the roast on a rack on top of a baking sheet and bake for 20 to 25 minutes per pound for rare, or about 30 to 35 minutes per pound for medium rare, checking the internal temperature with a thermometer. When the roast reaches the desired temperature, remove it from the oven.: A rack promotes air circulation so the roast cooks evenly on all sides. As it bakes, you will notice the outer surface firm up and develop a subtle brown tint. Use an instant read thermometer inserted into the thickest part of the roast to hit your target, and watch the internal temp climb steadily. A frequent error is relying on time alone rather than temperature; ovens vary and meat size differs, so the thermometer is essential for reliability.
- Heat 2 tablespoons of butter in a skillet over medium-high heat. Place the roast in the skillet and sear all sides until it is evenly browned.: Searing after roasting creates a pronounced, flavorful crust through the Maillard reaction, adding complexity and texture to each slice. You should hear a satisfying sizzle as the butter and meat meet, and the aroma will shift to nutty and toasty notes. Turn the roast to brown each face evenly, aiming for a deep caramelized color without burning. Be cautious of overheating the pan, which can char the surface quickly and impart bitterness; moderate heat and steady movement are key to an even sear.
- Remove the roast from the skillet and allow it to rest for 15 minutes before slicing and serving.: Resting lets the meat's juices redistribute back into the fibers, producing moist, tender slices rather than a pool of juices on the cutting board. During this period the internal temperature may rise a few degrees, and the crust will settle and firm just enough to slice cleanly. You can tent the roast loosely with foil to keep it warm, but avoid wrapping tightly which can steam the crust. A common oversight is slicing too soon, which causes the juices to run out and yields a drier result.
Notes
- Room temperature matters Prepare the roast ahead so it warms for about 45 minutes to 1 hour, which promotes even cooking and a tender interior.
- Trust the thermometer Rely on an instant read thermometer to hit rare or medium rare accurately, rather than strictly following minutes per pound.
- Butter strategically Use softened butter to help seasoning adhere and to create a richer surface for the final sear.
- Moderate pan heat When searing, use medium high heat and watch for a steady sizzle, avoiding scorching the butter which leads to bitterness.
- Rest before slicing Allow at least 15 minutes of rest to keep juices inside the roast and ensure clean, moist slices.