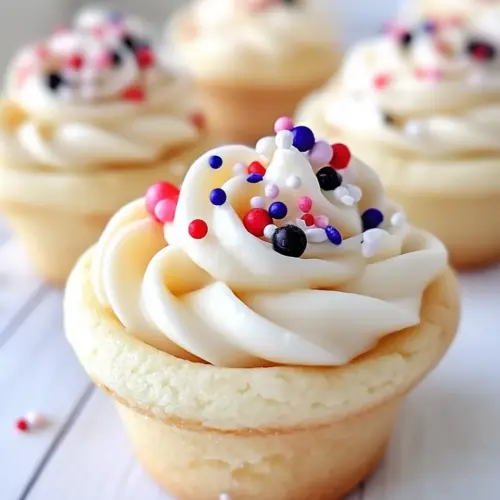
Sugar Cookie Cups
Sugar Cookie Cups are crisp little cookie shells filled with a creamy, tangy cream cheese filling and topped with fresh fruit, offering a mix of textures and bright flavors. These easy to assemble treats are perfect for parties and make ahead desserts, delivering a pretty, handheld bite that everyone will love. Make them for your next gathering for an effortless, impressive dessert.
Equipment
- Muffin Tin
- Nonstick spray
- Mixing Bowl
- Sharp Knife
- Spoon or tart shaper
Ingredients
- 16.5 oz . refrigerated sugar cookie dough Used as the base dough to form the cookie cups; press into muffin tins to create a sturdy shell that bakes golden and slightly crisp on the edges while remaining tender inside.
- 8 oz . cream cheese softened Blended into the filling to create a rich, creamy texture; beat until smooth so it combines seamlessly with butter and powdered sugar for a silky, tangy filling.
- 1/4 cup butter softened Whipped with cream cheese to add richness and smoothness to the filling; soften well so it incorporates easily and yields a spreadable consistency.
- 2 cups powdered sugar Sweetens and stabilizes the filling while providing a smooth, dustable texture; sift or add gradually to prevent lumps and reach desired sweetness and thickness.
- 1 teaspoon vanilla Adds a warm, aromatic note to the filling; use pure vanilla extract for a clean flavor that enhances the sweetness and balances the tang of cream cheese.
- Pinch salt Balances sweetness and enhances flavor depth; a small pinch rounds out the filling’s taste and prevents it from being overly sweet.
- Fresh fruit such as strawberries, blackberries, blueberries, and kiwi — washed, peeled if needed, and cut into bite-sized pieces Provides fresh, juicy topping and bright, contrasting flavors and colors; prepare by washing, peeling if needed, and cutting into bite-sized pieces to arrange atop each filled cookie cup.
- Additional powdered sugar for dusting optional Optional finishing touch to add visual appeal and a delicate extra sweetness; lightly dust over assembled cookie cups just before serving for a bakery-style presentation.
Instructions
- Preheat your oven to 350°F and grease a regular-size muffin tin (12 cups) with nonstick spray. Set aside.: Warm air fills the kitchen as the oven climbs to 350°F , and a light spray of oil on the muffin tin helps the edges release cleanly once baked. You should smell a faint toasty note as the oven nears temperature, which tells you it is ready. This step is important because a properly heated oven produces even browning; without it the cups may bake unevenly. A common mistake is skipping the greasing, which can cause the cookie cups to stick and break when you try to remove them.
- Let the sugar cookie dough sit out at room temperature for about 20 minutes to soften slightly. Use a sharp knife to slice the dough into 12 even pieces, about 1 inch thick.: As the dough softens it becomes pillowy and easier to slice, with a gentle, buttery aroma. Evenly sized slices ensure consistent baking time and uniform cups, so aim for pieces that look similar in height. If you rush and the dough is still cold, it will crack when you press it; if it is too warm it becomes sticky. A dull knife can drag the dough, so a sharp knife gives cleaner cuts.
- Press each dough slice into the bottom of a muffin cup. Use a tart shaper or the back of a spoon to press the dough up the sides, creating a cup shape.: You will feel the dough spread and thin as you press, and the surface should look smooth and even against the tin. Press gently but firmly to form a uniform wall that will hold the filling, watching for thin spots that could leak. The tactile feedback is important, you should hear a faint sigh as excess air escapes and see the dough adhere to the tin. One mistake is over thinning the walls, which leads to fragile cups that may crack; aim for consistent thickness.
- Bake for 10 to 12 minutes, or until the edges are golden brown. Let them cool completely in the muffin tin before removing.: During baking you will notice the aroma shift to a warm, buttery scent and the edges turning a pale golden color, which signals readiness. The bottoms should look set and not doughy. Cooling in the tin lets the cups firm up, preventing collapse when you remove them; if you try to unmold while warm they might deform. A common error is underbaking, leaving a raw interior that makes the base dense rather than crisp.
- In a medium bowl, beat together the cream cheese and butter until smooth. Add powdered sugar, vanilla, and a pinch of salt. Beat again until the filling is fluffy and creamy.: As you beat the cream cheese and butter , the mixture should turn glossy and smooth, with a light, tangy scent. Adding the powdered sugar slowly prevents a grainy texture and lets you control sweetness. The finished filling should be airy and hold soft peaks, indicating it will pipe or spoon nicely. Overworking the mixture can incorporate too much air, making it loose, while under mixing leaves lumps; aim for a consistently smooth texture.
- Spoon the cream cheese filling into each cooled cookie cup. Use the back of a spoon to gently smooth out the tops. Top each filled cookie cup with a mix of fresh fruit. Chill in the refrigerator for about 1 hour before serving.: The contrast between the cool, creamy filling and room temperature shells is delightful, and you should feel a slight chill when you touch the filled cups. Arranging the fruit creates glossy pops of color and a burst of tartness with each bite. Chilling firms the filling so it does not ooze during serving; skip this and the cups may be messy. A common oversight is adding wet fruit that releases juice, which can make the shell soggy, so pat fruit dry before topping.
- Optional: Dust with powdered sugar right before serving for an extra finish.: Dust with powdered sugar right before serving for an extra finish. : A light dusting of powdered sugar adds a soft visual cue and a whisper of sweetness, and it should settle gently on the fruit and edges without melting. Do this at the last moment to preserve the delicate white powder. If you dust too early the sugar will dissolve and disappear, so wait until you are ready to present them.
Notes
- Make ahead: Bake the cookie shells up to one day ahead and store them in an airtight container at room temperature so they stay crisp. Fill and chill before serving.
- Filling swaps: Try whipped topping mixed with instant pudding for a lighter, no bake filling, or fold in a small amount of marshmallow fluff for extra lift and sweetness.
- Fruit choices: Use firm, ripe fruit like berries and diced kiwi for color and texture; avoid overly ripe fruit that will release juice and make shells soggy.
- Presentation: Pipe the filling for a clean look and arrange fruit deliberately, placing larger pieces first then tucking smaller berries to fill gaps.
- Serving temperature: Serve chilled or slightly cool from the fridge, as this accentuates the creamy filling and keeps the shells crisp during eating.