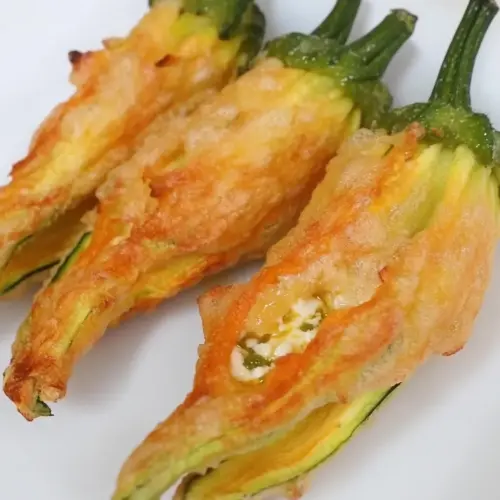
Stuffed Zucchini Flowers with Feta and Capers
Stuffed Zucchini Flowers with Feta and Capers are airy, crispy bites filled with creamy, salty cheese and bright caper pops. Lightly battered and fried until golden, these easy summer treats make a perfect easy weeknight dinner starter or elegant appetizer. They are quick to assemble and impressive on the plate, a reason to try them the next time zucchini season arrives.
Equipment
- Deep fryer or heavy pot
- Thermometer
- Mixing Bowls
- Whisk
- Wire Rack
Ingredients
- 10 zucchini flowers Hand-stuff and present delicate blossoms for a visually striking main or appetizer; hollow centers hold the filling and support even cooking. Ensure petals are intact and gently cleaned to preserve fragile structure and prevent tearing during stuffing.
- 3 1/2 oz feta cheese (or Persian feta cheese) Crumble tangy white cheese to provide a salty, creamy contrast that binds filling ingredients and adds depth of flavor. Use a crumbly variety like Persian feta to maintain texture without becoming overly dense when mixed with egg.
- 1 1/2 tbsp Spanish capers Rinse briny small buds and chop if desired to introduce bursts of salty, floral acidity that cut through the richness of the cheese. Scatter or fold capers into the filling to contribute bright, piquant notes and a pleasant textural pop.
- sea salt flakes Flake to taste and sprinkle sparingly to enhance and balance flavors without overpowering the delicate flower and cheese mixture. Add at the end of seasoning adjustments to accentuate savory elements.
- freshly ground pepper Grind freshly to taste to lift and balance savory components with subtle heat and aromatic complexity. Use light seasoning to avoid masking the floral and briny flavors of the blossoms and capers.
- 1 egg Beat briefly to bind the feta and capers into a cohesive filling that sets during cooking and adds a silkier mouthfeel. Incorporate just enough to hold ingredients together while preserving some crumble for texture.
- 1 1/2 cups plain flour Sift or whisk to create a base for a light batter that coats the stuffed flowers and crisps when fried. Use measured amounts to control batter thickness and achieve an even, airy crust.
- 1 -2 cups cold sparkling water Whisk cold and fizzy to aerate and thin the batter for an ultra-light, crisp frying finish; adjust quantity to reach the desired consistency. Keep chilled to maintain carbonation and ensure the coating puffs up quickly in hot oil.
- cooking oil Heat neutral oil to the correct frying temperature to achieve a golden, crisp exterior while cooking the filling through gently. Use enough oil for shallow or deep frying and monitor temperature to prevent burning or undercooking.
Instructions
- Preheat the oil to 180° C (350° F).: The moment the oil reaches the correct temperature you will notice a faint shimmer and a steady ripple across the surface, signaling it is ready for frying. Using a thermometer is the most reliable way to hit 180° C 350° F , which ensures the batter seals quickly and becomes crisp without soaking up oil. If the oil is too cool the coating will absorb grease and feel heavy, if it is too hot the batter may darken before the inside cooks. A common mistake is guessing the heat, so watch for consistent bubbling when a small drop of batter hits the oil.
- Combine the yolk, feta, capers, and a touch of salt and pepper in a mixing bowl and mix until it is slightly pasty.: As you blend the crumbled feta cheese with the egg yolk and chopped capers , the mixture should become cohesive yet still slightly textured. You will smell the tang of the feta cheese and the bright saline of the capers , which tells you the ratio is right. This pasty consistency keeps the filling from leaking when fried. Overmixing can make it too loose, while under-mixing leaves large chunks that may not heat evenly; aim for a spreadable, not runny, texture.
- Depending on the length of the zucchini stem, you may need to cut some off but leave approx 4 cm (2 inches) attached to the flower.: Trimming the stems creates a neat handle and makes the flowers easier to hold while stuffing and dipping. Leave about 4 cm 2 inches so you can grip without bruising the petals. Cut with a sharp pair of kitchen scissors for a clean edge. A common oversight is leaving stems too long or cutting them too short, which either makes dipping awkward or risks tearing the bloom.
- Gently open up the zucchini flowers and, using a teaspoon, gently spoon the cheese mixture into the flowers, filling to approx 2/3 rds.: When you open each zucchini flower , you should see a narrow cavity ready for the filling; spoon in small amounts so you can feel when the petal shoulders begin to bulge. Filling to roughly 2 3 rds prevents the mixture from spilling during frying while still delivering a satisfying center. The tactile feedback of the petals stretching slightly is key. Overstuffing is the main error here, which leads to leaks and uneven frying.
- Gently push the remaining air out of the flowers and squeeze the tips of the petals back together.: Pressing out air helps the petals sit close and form a neat package that keeps the filling contained. You may hear a soft sigh as trapped pockets release, and the petals should rest snugly together. This step matters because air pockets will expand in the oil and cause splattering or burst seams. Be careful not to compress the filling, which can force it out the seams.
- Sift the flour into a large mixing bowl, add a pinch of salt and pepper, and make a well in the center.: Sifting the plain flour aerates it, giving a finer batter texture that fries lighter. The well creates a controlled spot to add liquid, helping you whisk without forming lumps. You should see a soft powdery cloud when sifting, a good indicator that the batter will be smooth. A common mistake is skipping the sift which can leave granular bits in the batter.
- Slowly pour some of the soda water into the well and whisk as you add, slowly moving the whisk out from the well to incorporate more flour until the entire mixture is fluid and thick (it may not require all the soda water, so add it slowly).: Pouring cold sparkling water in stages and whisking outward creates a glossy, slightly viscous batter that clings to the flowers. The sound changes from heavy splashes to lighter, airy whisking and you will feel the batter transform from stiff to fluid. The goal is a consistency that coats but does not run off immediately. Adding too much liquid at once yields a thin batter that will not adhere properly, so add slowly and stop when the texture is right.
- Whisk the egg white until frothy and fold into the batter mixture.: Whipping the egg white until foamy introduces air that makes the final crust light and delicate. The foam will hold small bubbles that expand and crisp in the oil, giving a crisp shell around the filling. Folding rather than beating preserves those bubbles; you should see streaks of white gently disappear into the batter without collapsing. Overbeating or aggressive mixing will deflate the foam, producing a denser coating.
- Whether your flowers are stuffed or not, the process is the same.: This reminder frees you to make both stuffed and plain flowers with identical handling, which simplifies the workflow. The sensory cue here is that both will take the batter similarly and sizzle the same when introduced to hot cooking oil . Treat each flower with the same gentle handling to avoid tearing. A common slip is assuming unstuffed flowers cook faster; watch visual cues rather than timing alone.
- Holding on to the stem, drag the flowers through the batter until liberally covered (do not batter the stem). Hold the flower end and lower it into the deep fryer until the batter has sealed (a few seconds), and then drop the stem in as well. Cook until golden, they may require turning once.: As you dip each zucchini flower you will feel the batter cling like a soft coat, and the surface will look smooth and slightly bubbly. Lowering the flower tip first allows the batter edge to seal against the hot oil, creating a snug shell; you should hear an immediate gentle sizzle. After a few seconds the stem can follow and you will see the batter begin to set and color. Turn once for even browning, aiming for a deep golden hue. If you crowd the fryer the temperature will drop and the coating will absorb oil, resulting in sogginess, so fry in batches.
- Remove, drain, season with some sea salt, and serve. Serve un-stuffed flowers with a wedge of lemon.: When you lift the flowers from the oil they should glisten briefly and feel crisp to the touch, a sign the oil was correct. Drain them on paper or a rack to prevent steaming that softens the crust. Sprinkle a few flakes of sea salt right away to enhance the flavors, and offer a lemon wedge for those who prefer a bright squeeze. A frequent oversight is letting fried flowers sit too long before serving, which robs them of their optimal crunch, so serve promptly.
Notes
- Chill the batter: Keep the batter bowl in the fridge for a few minutes before frying to ensure the mixture is cold, which helps the coating stay crisp and light when it meets hot oil.
- Test with a scrap: Fry a small spoonful of batter first to confirm the oil temperature and batter consistency, adjusting heat if it browns too fast or absorbs oil.
- Control portion size: Use a teaspoon for the filling so each zucchini flower gets an even amount and you avoid overstuffing that causes leaking during frying.
- Work in batches: Fry in small batches to maintain oil temperature, giving each flower enough room to brown evenly without sticking together.
- Serve immediately: Fried flowers are best hot and crisp, so time your frying to finish just before serving to guests for the best texture and flavor.