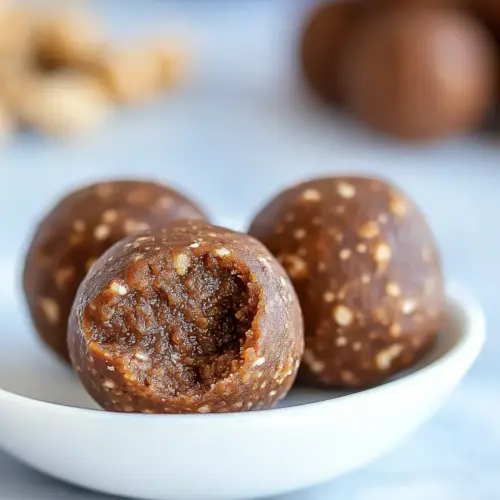
Peanut Butter Fudge Protein Energy Balls
Peanut Butter Fudge Protein Energy Balls are fudgy, chocolatey bites made from dates, peanut butter, and oats. They are creamy yet chewy, easy to make, and perfect for an easy weeknight snack or pre workout boost. Make a batch to keep on hand for steady energy and a guilt free sweet treat.
Equipment
- Food Processor
- Mixing Bowl
Ingredients
- 9 each dates, Medjool Soak and sweeten to provide natural binding and caramel-like sweetness while adding chewiness to the energy balls; pit removal is assumed and blending creates a sticky base that helps hold the mixture together.
- 1/3 cup oats, dry Add texture and bulk while absorbing moisture from the dates; grinding or pulsing gives a hearty body, slight nuttiness, and helps form a pliable dough for rolling.
- 1/2 cup sunflower seeds Contribute mild, creamy nuttiness and healthy fats; when processed they help thicken the mixture, improve mouthfeel, and add protein and a subtle crunch.
- 3 tablespoon cocoa powder, unsweetened Provide deep chocolate flavor and slight bitterness to balance sweetness; incorporate evenly to distribute cocoa taste without adding sugar, enhancing the dessert-like profile.
- 1/2 cup peanut butter, all-natural Bind ingredients together while imparting rich, savory nuttiness and healthy fats; choose creamy, all-natural style for smoother texture and better cohesion in the balls.
- 4 tablespoon mini chocolate chips Sprinkle small bursts of chocolate sweetness and texture contrast; fold in gently so chips remain intact and create occasional pockets of melty chocolate.
- 1/2 teaspoon vanilla extract Add aromatic sweetness and round out flavors with a hint of floral warmth; a small amount enhances overall flavor complexity without overpowering the other components.
Instructions
- Place the oats and sunflower seeds in a food processor, and blend until you get a fine flour-like consistency (it may take a few minutes.) Transfer to a mixing bowl.: The moment you pulse the oats and sunflower seeds you will notice a toasty, nutty aroma rising from the bowl, and the texture will shift from flaky to powdery under the blade. This step creates a flour like base that helps absorb moisture and gives structure, so aim for an even, sandy texture with tiny specks of seed remaining. If you stop too early you may end up with a lumpy dough that does not bind well. One common mistake is running the processor continuously on high without pausing, which can heat the seeds and release oils, making the mixture clump. Pulse in short bursts, scrape the sides occasionally, and watch the color change to a slightly deeper tan which signals progress.
- Place the dates (without pits) into the food processor and blend until a sticky paste forms. Add the sticky ball of date paste to the mixing bowl.: Once the mix resembles a fine meal the scent becomes more pronounced and the particles move like soft sand when stirred. Transferring to a bowl prevents over processing and provides a workspace to combine wetter elements. Use a wide bowl so you can fold ingredients easily with your hands. A frequent error here is leaving every crumb in the processor which can lead to uneven distribution when you add the sticky components, so scrape thoroughly to collect the flour like base.
- Add cocoa powder, peanut butter, vanilla, and mini chocolate chips to the mixing bowl. Use your hands to combine all the ingredients thoroughly.: As you process the dates , the machine will turn them into a glossy, tacky paste that smells intensely caramelized and sweet. That paste is essential because it acts as the glue for the balls, binding the dry base and the peanut butter . If your dates are firm, let them sit in warm water for a few minutes then drain to soften, but be careful not to leave excess water. A typical slip up is adding liquid directly to the processor which risks creating a soggy mixture that will not form; instead, rehydrate dates separately and drain well before processing.
- Gently shape the dough into balls, using about two tablespoons of dough per ball.: When the paste hits the dry base you will immediately notice the mixture begin to consolidate, clinging together in glossy clumps. This is the visual cue that binding is starting to happen. Use a spoon or clean hands to combine thoroughly so pockets of dry flour are eliminated. If you rush this and do not fully incorporate the paste, the dough will crumble when you try to form balls. A slow, patient folding motion ensures the paste coats each particle and creates a consistent matrix.
- Enjoy. Store leftovers in the fridge or freezer.: Once those additions are folded in, the bowl fills with a deeper, chocolatey scent from the cocoa powder and a warm nuttiness from the peanut butter . The texture should be pliable and slightly sticky, not wet. The mini chocolate chips add visual pops and small melty pockets when bitten, so fold them in gently at the end to maintain their shape. If the dough feels dry, it usually means the dates were not processed enough; if it’s too wet, add a touch more processed oats . Avoid overmixing which can make the dough oily as the peanut butter separates.
- Use your hands to combine all the ingredients thoroughly: Working with your hands lets you feel the dough and judge its readiness. The mixture should press together smoothly and hold its shape. Your hands will warm the dough slightly, making it more malleable and revealing whether it needs a smidge more oats or a few extra pulses of sunflower seeds . A common oversight is using utensils exclusively and missing small dry pockets; fingers help detect and eliminate those inconsistencies. Wash your hands first and consider lightly dampening them to reduce sticking while rolling.
- Gently shape the dough into balls using about two tablespoons of dough per ball: When you roll the balls you will see the surface compact and take on a matte finish, and the interior will remain fudgy. Rolling with consistent pressure produces uniform bites that set evenly in the fridge. If the dough sticks to your palms excessively, chill it briefly to firm up the fats and make rolling cleaner. A mistake here is compressing too hard which yields dense, rock like balls instead of tender, fudgy ones. Aim for gentle, confident rolls that create smooth spheres.
- Enjoy. Store leftovers in the fridge or freezer: Fresh from the roll they have a pleasantly firm exterior and a tender, fudgy center that yields slightly when bitten. Refrigeration firms them further and melds the flavors overnight, while freezing offers long term storage and a firmer texture for grab and go snacks. Beware storing at room temperature for extended periods, which can soften the peanut butter and cause the balls to lose shape. Place them in an airtight container with parchment between layers to prevent sticking.
Notes
- Keep the texture fudgy: Chill the dough for 10 to 15 minutes if it feels too sticky to handle, this firms the mixture and makes rolling cleaner without changing flavor.
- Revive dry dates: If your dates are tough, soak them in warm water for 10 minutes then drain thoroughly to restore pliability before pulsing in the food processor.
- Watch your processor: Pulse the oats and sunflower seeds in short bursts to avoid heating and releasing oils which can alter the texture and taste of the base.
- Chocolate chips last: Fold in the mini chocolate chips at the end by hand to keep them intact, they add tiny melty pockets rather than blending away into the dough.
- Storage strategy: Store in an airtight container in the fridge for up to two weeks, or freeze for up to three months. Separate layers with parchment to prevent sticking.