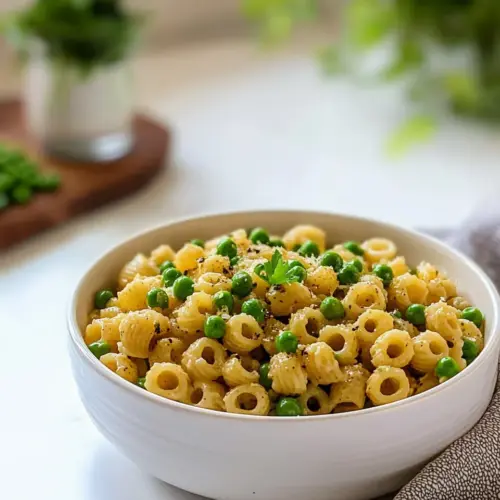
Pasta With Peas
Pasta With Peas is a creamy, bright, and easy weeknight dinner that combines tender pasta with sweet frozen peas and savory Parmesan cheese. The one pot method creates a glossy sauce while keeping cleanup minimal. Perfect for spring meals or casual dinners, it delivers comfort with a fresh finish and is quick enough to make any busy evening feel special.
Equipment
- Large Pot
- Wooden Spoon
Ingredients
- 3 tablespoons extra-virgin olive oil Adds richness and a fruity, peppery flavor to the dish while providing a silky mouthfeel when sautéing aromatics or finishing the pasta; use to coat the pasta and help distribute flavors evenly across the ingredients.
- 1 small onion diced Provides a sweet, aromatic base when diced and softened, releasing natural sugars that build savory depth; cook gently in the oil until translucent to avoid bitterness and ensure even texture throughout the dish.
- 1 pound frozen peas Contributes bright color, sweet vegetal flavor, and textural contrast; thaw or add directly while cooking the pasta so peas heat through and retain a tender, slightly firm bite.
- 2 cups low-sodium vegetable broth Supplies a savory cooking liquid that infuses the pasta and peas with subtle vegetable flavor; use low-sodium broth to control overall saltiness and adjust seasoning at the end.
- 8 ounces small pasta shapes e.g., shells, elbows Serves as the starch backbone that carries sauce and other flavors; choose small shapes to trap peas and sauce for balanced bites and cook to al dente for optimal texture.
- 1/2 cup grated Parmesan cheese Lends a salty, umami-rich finish and creamy mouthfeel when stirred into the hot pasta; add gradually off the heat to prevent clumping and enhance overall savory balance.
- 1 -2 tablespoons fresh lemon juice optional Brightens the dish with acidity and lifts flavors with fresh citrus notes; add sparingly at the end to taste for a lively contrast to the richness of cheese and oil.
- Kosher salt and black pepper to taste Balances and enhances flavors while controlling seasoning levels; season gradually during cooking and finish with adjustments to taste to avoid over-salting.
- Red pepper flakes to taste optional Introduces a touch of heat and additional savory complexity when desired; sprinkle lightly for a gentle kick or omit entirely for a milder profile.
- Fresh chopped basil for garnish Provides fresh herbal aroma and a clean, bright finish when sprinkled over the plated dish; use chopped leaves as a final garnish to add color and fragrance.
Instructions
- Heat the olive oil in a large pot over medium heat. Add the diced onion and cook until softened and translucent.: The moment the oil starts to shimmer and gives off a faint fruity aroma, you know the pan is ready. You will hear a gentle sizzle when you add ingredients, and the oil will look glossy without smoking. This step matters because properly warmed extra-virgin olive oil helps the onion soften evenly, releasing sweet notes that form the flavor base. A common mistake is using too high heat which causes the oil to burn and become bitter, so maintain medium heat. If the oil smokes, reduce the temperature and let it cool slightly before proceeding. Pay attention to the pan surface clarity and the scent, they are your cues.
- Add the frozen peas and vegetable broth to the pot. Increase the heat to bring the mixture to a boil.: As the diced onion warms, you will notice its aroma shift from sharp to sweet, and the pieces will become glossy and nearly see-through. Stir frequently to ensure even cooking and to avoid browning, which would introduce caramelized notes that change the dish's intended brightness. The reason this step is important is that softened onion blends seamlessly into the broth and coats the pasta , creating a rounded foundation. The usual error is to rush this step; undercooked onion gives a raw bite, while overcooked onion turns brown and overly sweet, both of which alter balance. Look for translucence and a tender texture when pressing a piece between fingers.
- Stir in the pasta and a pinch of salt. Reduce heat to a simmer, cover, and cook until the pasta is al dente and most of the liquid is absorbed, about 7-10 minutes.: When the frozen peas meet the warm oil and softened onion , you will see the pot brighten instantly as the green pops against the pale base. Pour in the vegetable broth and listen for the gentle hiss as cool liquid hits the hot pan. This liquid will carry flavor into the pasta and cook the peas simultaneously, producing a light, green-infused broth. The why here is crucial: adding broth at this point ensures the peas heat through in a flavorful medium rather than boiling in plain water. A common slip is adding broth that is too cold which can slow the simmer, so if possible use room temperature or warm broth. Watch that the peas remain firm to the bite, not overcooked and mushy.
- Remove from heat. Stir in the grated Parmesan cheese until melted and evenly distributed. If using, squeeze in lemon juice and stir to combine.: Watch the surface of the broth as it transitions from still to lively, with small bubbles forming along the edges then breaking across the surface. The audible change to a rolling bubble tells you the pot is ready for the next addition. This vigorous heat jump matters because it ensures the pasta will start cooking quickly and evenly. A frequent mistake is not waiting for a true boil, which can lead to uneven pasta texture. Keep an eye on the pot to avoid an aggressive boil that splatters, lowering the heat just enough to control the action while keeping it at a steady boil.
- Season with salt and black pepper to taste. Serve immediately with crushed red pepper flakes and fresh basil as garnish.: As you add the dry pasta , stir immediately to prevent sticking, and distribute the shapes so they sit evenly in the liquid. The pasta will sink then gradually swell as it absorbs the flavorful broth. Adding a measured pinch of Kosher salt at this stage seasons the interior of the pasta as it cooks. The technique matters because stirring prevents clumping and helps the pasta cook uniformly. People sometimes skip stirring and end up with stuck together shapes. If you notice resistance when stirring, use a wooden spoon to separate them gently.
- Reduce heat to a simmer, cover, and cook until the pasta is al dente and most of the liquid is absorbed about 7 to 10 minutes: Lowering to a simmer softens the cooking action so the pasta can hydrate without violent movement. You will see the liquid reduce and cling to the pasta, forming a glossy, slightly creamy surface. The al dente texture should be tender with a slight chew, not mushy, which preserves the best mouthfeel. This step is important because finishing with some residual liquid allows the Parmesan cheese to emulsify into a cohesive coating. A common mistake is overcooking, which yields a limp texture; set a timer and taste intermittently as the time window approaches. Keep the lid slightly ajar if the pot threatens to foam over.
- Remove from heat: When you take the pot off the burner, the residual heat will carry final equilibration, so timing here affects texture. The surface will settle and steam will continue to circulate for a moment, softening the pasta a touch more. This pause is helpful because adding Parmesan cheese off the heat prevents graininess and allows for a smooth incorporation. A typical misstep is leaving the pot on heat while adding cheese which can cause the dairy to clump. Set the pot on a heatproof surface and proceed intentionally.
- Stir in the grated Parmesan cheese until melted and evenly distributed: As you fold in the Parmesan cheese , you will feel the sauce thicken and see a glossy sheen develop on the pasta . The scent will take on nutty, savory notes and the texture will become luxurious. This action matters because the cheese binds with the starchy cooking liquid to create a cohesive coating that clings to every piece. One common error is adding cold cheese straight from the fridge which can cool the dish and resist melting; allow the cheese to come to room temperature if possible. Stir briskly and evenly until the sauce looks silky.
- If using squeeze in lemon juice and stir to combine: A bright citrus note will lift the dish instantly; as the lemon mixes in you will notice a fresh, tangy aroma that balances the savory Parmesan cheese . The acidity sharpens the flavors and cuts through the oil, making each bite more lively. This finishing touch is important because it prevents the dish from feeling flat. The mistake people make is adding too much lemon which can dominate, so taste and add gradually. After stirring, take a small taste to ensure brightness without overt tartness.
- Season with salt and black pepper to taste: Final seasoning rounds out the layers developed during cooking. Add Kosher salt carefully, tasting between additions, and finish with freshly ground black pepper for gentle heat. This step is essential for balance; seasoning ties together the savory and sweet elements. A frequent error is over-salting early on, so I recommend seasoning at the end when flavors concentrate. Adjust gradually until the dish sings.
- Serve immediately with crushed red pepper flakes and fresh basil as garnish: The final presentation adds color, aroma, and optional heat. As you plate, the steam will lift the fragrance of basil and the flakes will provide visual contrast. Serving right away preserves the texture and warmth; delays can cause the pasta to thicken as it cools. A common problem is garnishing too early which wilts delicate herbs, so add them just before serving for maximum freshness.
Notes
- Choose the right pasta shape Select small shapes like shells or elbows because they trap the glossy sauce and peas in their curves, creating a balanced bite. That little pocket of sauce makes each forkful more satisfying and helps distribute the Parmesan cheese evenly.
- Control the salt Start with low-sodium vegetable broth so you can season precisely at the end. Broth and Parmesan cheese add saltiness as the liquid reduces, so taste before adding more Kosher salt.
- Keep peas slightly firm Cook frozen peas until bright and tender but not mushy. They should have a slight pop that contrasts with the pasta, so watch the simmer closely during the last minutes.
- Warm the cheese Allow grated Parmesan cheese to come to room temperature if possible, and add it off the heat so it melts into a silky sheen rather than clumping. This keeps the sauce smooth and glossy.
- Add lemon sparingly If using lemon juice, start with one tablespoon and add more only if needed. A little acidity brightens without overpowering the harmonious savory profile provided by Parmesan cheese.