Easy Microwave Caramels
Easy Microwave Caramels are a quick, creamy, and chewy treat that come together with pantry staples in minutes. These caramels deliver buttery depth and toasted sugar notes with minimal effort, making them perfect for gifting or last minute desserts. The method is simple enough for beginners and reliable enough for seasoned cooks, offering a sweet reason to make something homemade today.
Equipment
- Microwave-safe Bowl
- 8-inch square baking pan
- Parchment Paper
- Wooden Spoon
- Sharp Knife
Ingredients
- 1/2 cup unsalted butter Provide rich, creamy fat that gives caramels a smooth, velvety texture and helps prevent crystallization when melted with sugars. Contribute a subtle dairy flavor that balances sweetness and improves mouthfeel, while also aiding in the caramelization process during heating.
- 1/2 cup white sugar Add crystalline sweetness and structure that helps the caramel set as it cools; sugar dissolves and then re-crystallizes to form the candy’s body. Promote Maillard and caramelization reactions when heated with butter and condensed milk, contributing to flavor and color development.
- 1/2 cup brown sugar Deliver deep, molasses-like sweetness and moisture that enhances flavor complexity and prevents the caramels from becoming grainy. Interact with white sugar to modify texture and lower the mixture’s freezing point, yielding a chewier final candy.
- 1/2 cup corn syrup Provide invert-sugar-like properties that inhibit sucrose crystallization and keep caramels smooth and pliable. Supply a glossy sheen and stable texture while helping to control the candy’s final chewiness and preventing graininess.
- 1/2 cup sweetened condensed milk Contribute concentrated milky sweetness and fat that thickens the mixture and promotes a creamy, tender bite in the finished caramels. Supply lactose and proteins that aid browning and enrich flavor while reducing the amount of added liquid needed.
- 1/4 teaspoons salt Enhance overall flavor by balancing sweetness with a mild savory note that rounds out the caramel profile and heightens perceived sweetness. Help regulate taste so the rich sugars and dairy don’t become cloying, even in a small amount.
- 1/2 teaspoon vanilla extract Add a sweet aromatic accent that brightens and rounds the caramel flavor, providing a familiar dessert note when stirred in at the end. Complement the deeper caramel and brown sugar tones while contributing a pleasant, fragrant finish.
Instructions
- Line an 8" square baking pan with a sheet of parchment paper. Set aside, so it’s ready as soon as the caramel mixture is done.: The room will smell neutral at this point, but preparing the pan ahead is practical and prevents frantic moves when the caramel is hot and glossy. Make sure the parchment lies flat, creasing it slightly to fit the corners for an even surface, and leave an overhang on two sides to make lifting the set caramel easy. If you skip this, the caramel will adhere to the pan and be much harder to remove. A common mistake is using non-microwave safe containers later, so keep the pan prep separate and ready. Visual cue to look for are the straight edges and a smooth interior, which will yield neat slices once cooled.
- Make sure the bowl you will be making the caramels in is microwave safe and clean and dry. Place butter (chopped into tablespoon-size pieces) in the bowl and microwave for 1 minute. It will be almost all melted. Add white and brown sugar, corn syrup, sweetened condensed milk and salt and stir well.: You will notice the butter melting into a golden pool with a gentle sizzle at the edges, and the aromas of butter will start to fill the kitchen. Dryness of the bowl matters because water droplets can change the way the sugars heat. Chop the butter into uniform pieces so it melts evenly during that first minute. When you add the sugars and sweetened condensed milk , the mixture will look granular at first, but stirring begins the dissolution process. A typical misstep is not stirring enough after adding ingredients, which can leave pockets of unmelted sugar and lead to grainy texture. Watch for the mixture to start to look homogeneous and glossy before moving to the next microwave stage.
- Place mixture in a bowl into the microwave and cook for 2 minutes. Stir well. Set timer to cook for 4 minutes, but stop it every 1 minute and 30 seconds to stir the mixture. It will bubble up and rise up in the bowl, so stir it until it calms down.: During these cycles you will see vigorous bubbling, sometimes rising toward the rim, with steam releasing as the sugars concentrate. The sound is active and lively, almost like a gentle roar, and the color deepens toward amber. Stirring frequently prevents hot spots and scorching, and it also calms the foam so the bowl does not boil over. If you do not stir often, the mixture can overheat in one spot and catch, producing a burnt note. A useful sensory cue is the consistency: after stirring it should become thicker and slower to flow, and the aroma will change from sweet milky to toasty caramel. Be careful when reaching into the microwave, as the bowl and contents are very hot.
- Once done, carefully remove the bowl with caramel from the microwave, stir in vanilla extract and pour mixture into prepared pan. Let cool completely in room temperature.: The caramel at this point will be glossy and thick, and you will feel a warm, cozy aroma when you lift the bowl. Add the vanilla extract off heat to preserve its fragrance, and stir gently until it is evenly distributed. When pouring into the parchment lined pan, do it slowly to avoid splashes and to achieve an even layer. The visual cue to know it is ready to pour is a smooth, slow ribbon when you lift the spoon; the mixture should not be runny. Common mistakes include pouring into a warm pan or trying to speed cooling in the fridge which can change the set; let it cool at room temperature for the ideal texture. If bubbles appear on the surface, a gentle tap on the counter can help them dissipate.
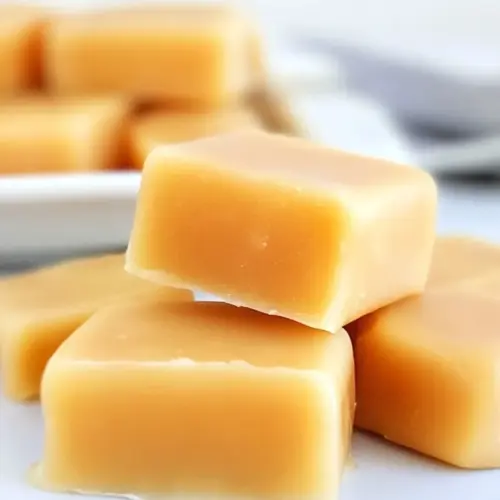
- Once the caramel is cooled, lift up the parchment paper and set on a cutting board. Slice caramel into squares and wrap each one individually.: Cooling transforms the glossy liquid into a firm but tender sheet that yields clean edges when sliced. Use a sharp knife and wipe it between cuts for neat squares. The texture should be slightly chewy, yielding under gentle pressure with a satisfying pull. If you cut too early, the caramel will deform and stick, and if you cut too late, it can be overly hard. Wrapping each piece in wax paper keeps them from sticking together and makes them great for gifting. A frequent slip is not letting the caramel reach full room temperature before slicing, which leads to sticky, messy pieces instead of tidy squares.
Notes
- Handle hot bowls with care. Use a thick kitchen mitten or oven glove when stirring the mixture to avoid burns, and brace the bowl with one hand so it does not spin while you stir with the other. The bowl and caramel will remain extremely hot for several minutes after microwaving.
- Keep a wooden spoon for stirring. A wooden spoon will not conduct heat the way metal can, and its texture helps you gauge thickness as you stir. Wooden spoons also give you better control while folding in the final vanilla extract.
- Wrap each piece for gifting. Cut wax paper to 4 by 3 inches and roll each caramel into a neat package. This keeps pieces separate and makes them portable for sharing with friends and neighbors.
- Measure carefully for consistent results. Accurate cup measurements ensure the sugar balance is correct, which affects both the flavor and the set of the caramel. Slight variations can make the difference between chewy and overly firm candies.
- Let the caramel set fully at room temperature. Rushing the cooling process, such as using a refrigerator, can make the texture uneven and harder to slice cleanly. Aim for a fully cooled, stable consistency before cutting.