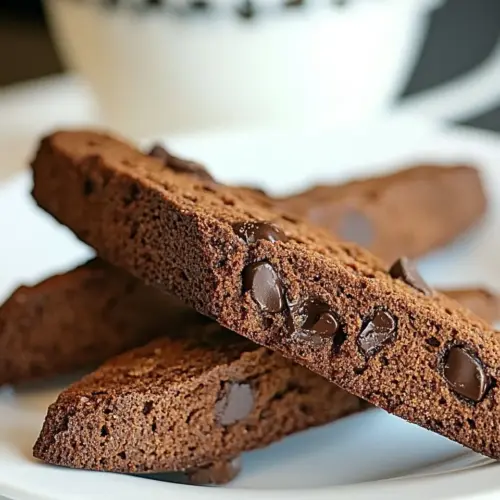
Chocolate Chocolate Chip Biscotti
Chocolate Chocolate Chip Biscotti are crispy twice baked cookies with deep cocoa flavor and pockets of melted dark chocolate. These easy to make treats combine crunchy texture and rich chocolate notes, perfect for coffee dunking or gifting. They are an ideal easy afternoon bake that stores well, making them a go to for snacks and small gatherings.
Equipment
- Oven
- Baking Sheet
- Parchment Paper
- Large Bowl
- Serrated Knife
Ingredients
- 1 2/3 cup all purpose flour Provides structure and bulk to the biscotti, forming the gluten network that holds other ingredients together. Sifts to remove lumps and ensures even incorporation for a uniform dough texture.
- 1/2 cup good quality unsweetened cocoa powder, got mine at Trader Joe's Adds deep chocolate flavor and a rich, slightly bitter backbone to balance sweetness. Whiskes into dry ingredients to distribute evenly and intensify overall cocoa color and taste.
- 1 1/2 tsp baking powder Leavens the dense biscotti dough by releasing gas during baking, helping create slight lift and a tender crumb. Properly measured and mixed with the flour prevents uneven rising or chemical aftertastes.
- pinch of salt Enhances flavor by brightening and balancing sweetness, while also strengthening gluten slightly to affect texture. A pinch is sufficient to keep the chocolate notes clear without making the cookie salty.
- 3/4 cup superfine sugar, you can put sugar in food processor Sweetens the dough and contributes to crispness after twice-baking, with superfine texture dissolving quickly for smooth batter. Grinding granulated sugar in a food processor yields the recommended fineness for even distribution.
- 3/4 cup dark chocolate chips Provides pockets of intense melted chocolate in the finished biscotti and contributes pleasant textural contrast. Folding into the dough near the end prevents excessive melting and maintains chip shape through baking.
- 2 large eggs Binds ingredients and adds moisture and richness, helping the biscotti hold together during shaping and initial bake. Whisked until combined, eggs also contribute to browning and slight tenderness in the crumb.
- 1 large egg white Further reduces moisture and helps set the biscotti during baking while contributing to a glossy, cohesive texture. Beaten egg white can be brushed or mixed in to fine-tune dough consistency and final surface sheen.
Instructions
- Preheat oven to 375°.: The kitchen fills with a warm, anticipatory scent as the oven comes up to temperature, and that steady heat is essential so the loaves cook evenly from the start. When the oven is fully hot the initial set of the dough happens at the right pace, which prevents a soggy center. A common mistake is not waiting for the oven to reach the target temp, which can lengthen the bake and give uneven texture, so I always use an oven thermometer to confirm accuracy.
- Line two baking sheets with parchment paper.: Lining sheets reduces sticking and helps the underside of the biscotti to brown evenly, producing a clean release and easy cleanup. You will notice a gentle hissing as parchment settles and traps slight steam, which prevents burning and allows for even heat transfer. Avoid crowding the sheets later; if you try to fit too many pieces they will bake inconsistently, so use a second round if necessary.
- Combine flour, cocoa powder, baking powder, salt and sugar in a large bowl.: As you whisk these dry elements together you will see the mixture turn uniformly cocoa rich and smell that roasted chocolate aroma, a sign the flavors are marrying. Blending dry ingredients distributes leavening and salt evenly, so each bite has balance. A mistake I see often is failing to sift or whisk, leaving pockets of baking powder or salt that create uneven rise and sudden salty bites.
- Add chocolate chips and mix.: Folding in the dark chocolate chips should be gentle to avoid crushing them, and you will get a visual of dark flecks throughout the dough which promises molten pockets when baked. The chips also add weight and texture, creating little craters of melted chocolate that contrast the crisp exterior. Overworking at this point can warm the chips and make the dough greasy, so mix just until evenly distributed.
- Gradually add eggs and egg whites to the mixture and combine to make a dough. (If dough is too dry add one more egg white): As you incorporate the eggs the mixture comes together, becoming glossy and cohesive; you will notice the scent of cooked egg fading as the chocolate aroma intensifies. Adding eggs slowly prevents a lumpy, overly wet dough, and gives you control over consistency. If the dough is too dry add one more egg white, but take care because excess liquid will yield a spread rather than a holdable loaf, which is a common error.
- Divide the dough into two or three loaves.: Shaping into loaves allows for even baking and makes slicing manageable. You will feel the dough’s resistance and a slight tackiness that indicates proper hydration, and the compact loaves will hold their shape during the first bake. If you make loaves too thin they may overbake, and if too thick they may not dry properly, so aim for uniform width for consistent results.
- Place on the lined baking sheets and bake 20 minutes. (If the dough is too sticky to form with your hands, you can use a wooden spatula to transfer it onto the baking sheets): During this bake the dough will set and release a concentrated chocolate aroma, and the surfaces will firm to a matte finish signaling readiness. This stage cooks the interior enough to allow safe slicing later. A common pitfall is underbaking, which makes slicing difficult and leads to collapsed slices during the second bake, so watch for the set surface and gentle spring back when touched.
- When cool enough to handle, gently cut the loaves on the angle into 1/2 inch slices (a serrated bread knife works good for this).: Angled cuts reveal the marbled interior and create those classic oblong biscotti shapes; you will hear a soft sawing sound as the serrated knife moves through without squashing the crumb. Cooling slightly firms the loaf and reduces crumbling, so resist the urge to slice too hot. Slicing while too warm causes misshapen pieces and excessive crumbs, which is a frequent mistake for impatient bakers.
- Return to the baking sheets fitting as many as you can. You may need to do this in batches.: Arranging the slices cut side up exposes more surface to heat, encouraging crispness. You will see the edges begin to brown and the chocolate chips settle into comfortable pockets, a visual cue that the second bake is working. Avoid overcrowding which can trap steam and prevent proper drying, forcing you into multiple batches but ensuring even results.
- Bake the biscotti for another 3-4 minutes on each side. (less time for if you like it softer): The second bake is where the biscotti gain their firm, lasting crunch; flip them and bake again until edges are toasted and the slices sound crisp when tapped. Pay attention to aroma and color, because a little extra time makes them drier and crisper while too long will push them into bitter territory. A typical error is leaving them in too long in pursuit of crunch, which makes them overly hard and less pleasant to eat, so test a slice midway to find your preferred texture.
Notes
- Measure flour correctly: Spoon the all purpose flour into the measuring cup and level with a knife to avoid dense dough that will not hold shape.
- Sift cocoa for smoothness: Sifting the unsweetened cocoa powder removes lumps and distributes color and flavor evenly, preventing streaks in the dough.
- Pulse sugar if needed: If you only have granulated sugar, pulse briefly in a food processor to approximate the superfine texture so it dissolves quickly into the dough.
- Keep chips whole: Fold in the dark chocolate chips gently to preserve pockets of melted chocolate in the baked slices rather than streaks of melted chocolate throughout.
- Warm eggs to room temperature: Cold eggs can slow incorporation and create uneven dough, so set them out a bit before starting.
- Test oven temperature: Use an oven thermometer to confirm your oven reaches and holds 375°, since many ovens run hot or cold and that affects bake times.