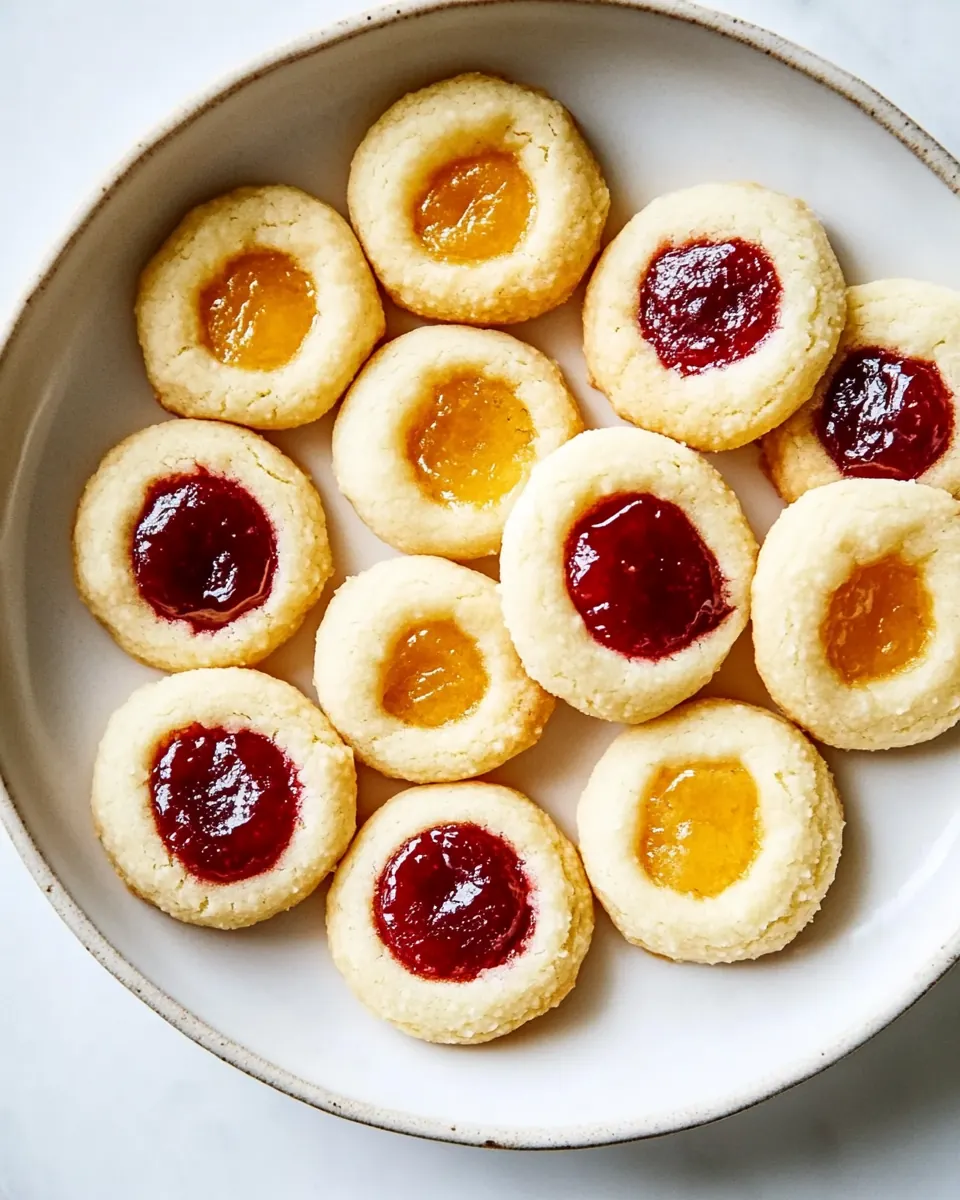
Thumbprint Cookies
Thumbprint Cookies are the kind of cookie that always takes me back to a sunlit kitchen table loaded with little jars of jam and the happy chaos of holiday baking.
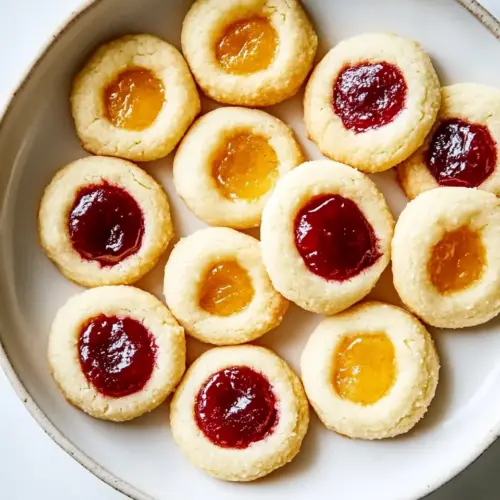
I still remember the first time I made Thumbprint Cookies for a neighbor who had just moved in, clutching a tin that smelled like warm butter and bright fruit. The dough was forgiving, the process oddly calming, and the result was a tray of cookies that felt comforting and festive at once. Over the years I’ve adapted tiny tricks that make each cookie tender, with just the right pocket of jam in the center so every bite has a pop of sweetness.
When friends ask for a reliable treat to bring to gatherings, I always suggest Thumbprint Cookies. They travel well, they freeze beautifully at the dough stage, and the variety of jams you can use keeps the recipe endlessly interesting. I often find myself swapping jams from jar to jar depending on the season, but the base dough remains the same reliable canvas.
Recipe Snapshot
60 mins
40 mins
20 mins
Medium
120 kcal
American
Gluten-Free, Low FODMAP
Desserts
Stand mixer, Paddle attachment, Electric mixer, Baking sheets, Parchment paper, Wire cooling racks
What’s Great About This Thumbprint Cookies
They are endlessly adaptable
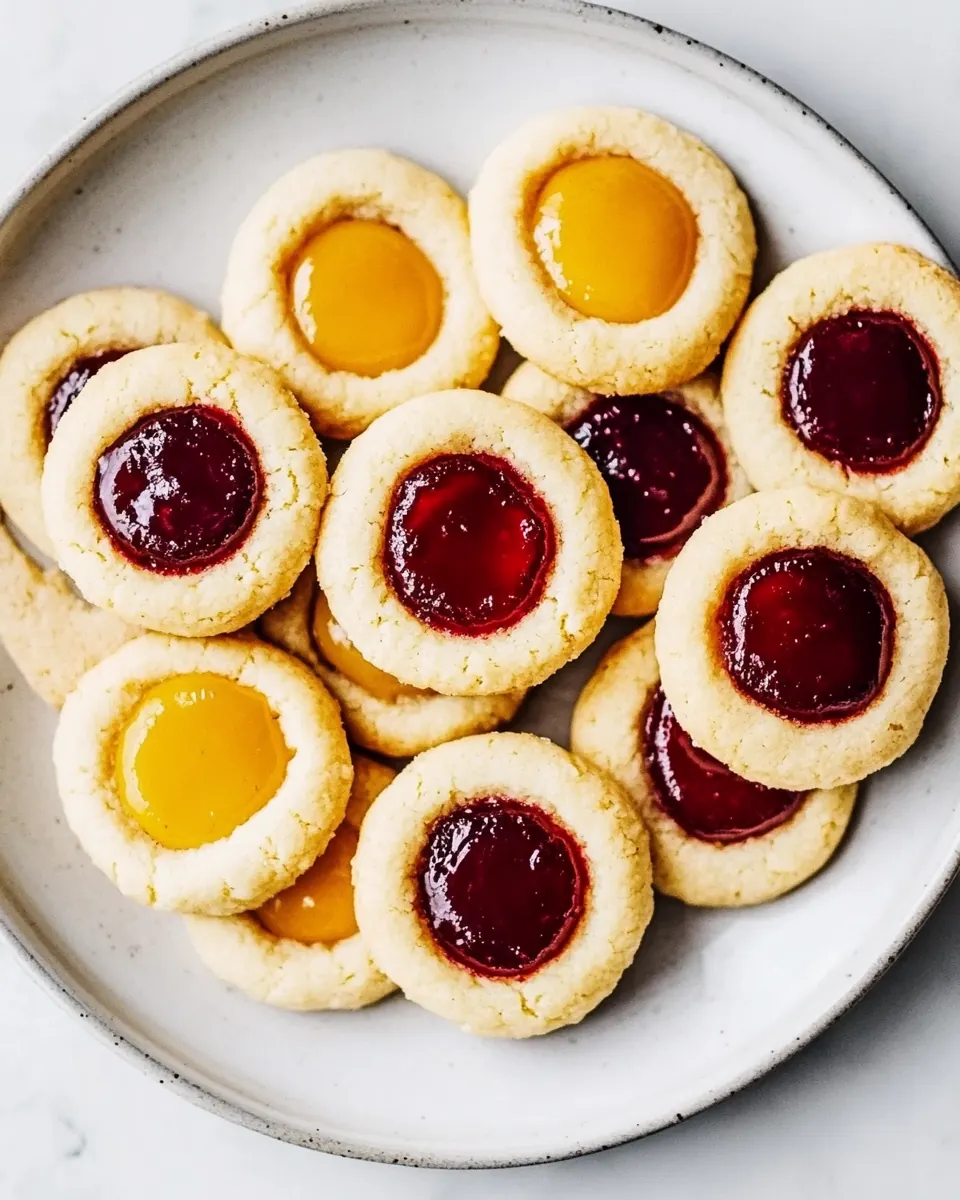
I love how Thumbprint Cookies let you play with flavors without changing technique. One dough handles raspberry one week and apricot the next, so you can match the jam to the season or mood.
Perfect balance of texture
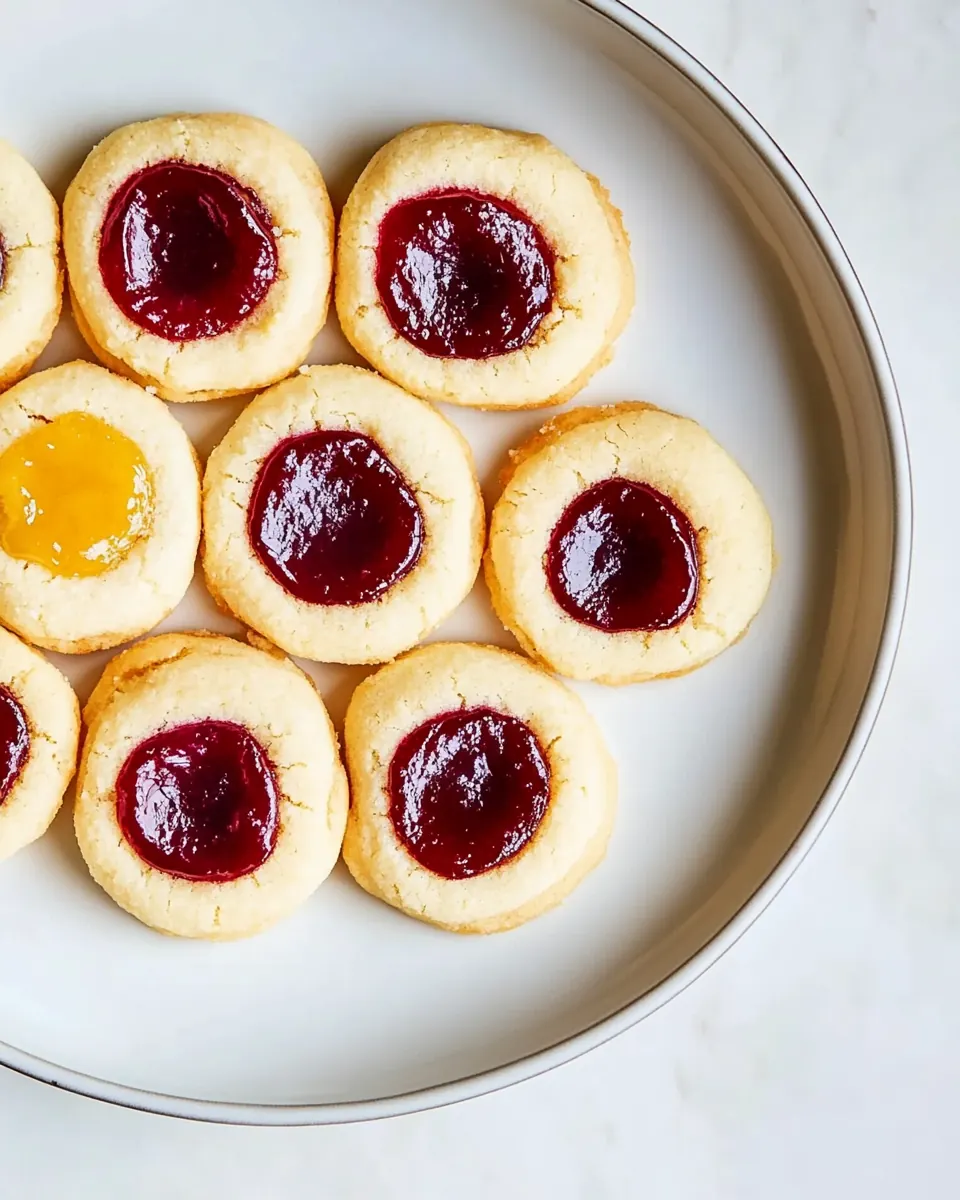
The tender crumb of the cookie contrasts with the glossy, slightly sticky jam in the center. I always aim for a cookie that is soft but holds its shape, and that thumb indentation is central to achieving that balance.
Great for gifting and gatherings
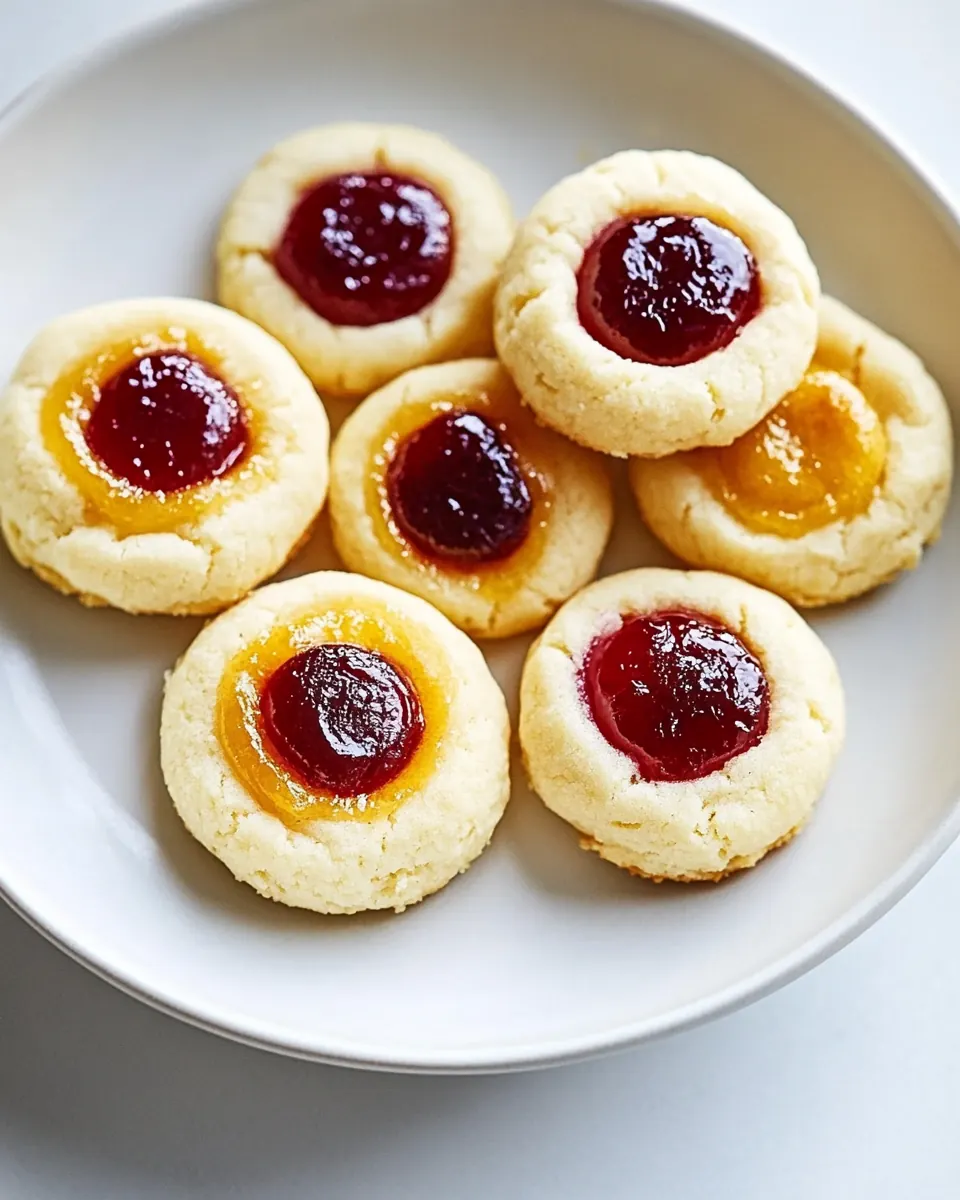
These cookies stack neatly in a tin and look charming on a plate. I’ve learned that leaving a little space between them in the box prevents smudged jam, and people appreciate a homemade jar of preserves paired with the treats.
Beginner friendly, chef approved
Even novice bakers can succeed with Thumbprint Cookies. The techniques are straightforward, but there are small professional tips you can use to elevate the result, like chilling the dough to make shaping easier and preventing excessive spreading.
Freezer friendly workflow
I value recipes that fit a busy life, and these cookies are ideal because you can freeze unbaked dough balls. That means mornings when you need something homemade, you can bake directly from frozen for a fresh tray without starting from scratch.
Shopping List for Thumbprint Cookies
These ingredients form a classic, simple lineup that focuses on butter, flour, and a touch of jam to finish. The key players are the butter for richness and flakiness, the all purpose flour for structure, and the jam for bright flavor. Each item has a clear job, and together they create a cookie that is tender, buttery, and slightly chewy around the edges.
- 1 cup butter softened (2 sticks, see note 1): Cream until light and fluffy to provide richness and a tender crumb while helping bind the dough together and create a delicate texture in the cookies. Soften fully for easier creaming with sugar and to incorporate air, which contributes to a light bite. Measure by cup and ensure room temperature to avoid greasy or dense dough.
- 1/2 cup granulated sugar: Beat with sugar until pale to dissolve crystals and help aerate the dough for a slightly lighter cookie. Contribute sweetness and structure during creaming with butter, helping to distribute flavor evenly. Adjust slightly if you prefer less sweetness but maintain balance for proper texture.
- 2 egg yolks: Mix gently to add fat without the water content of whole eggs, which keeps the dough tender and prevents excess spread during baking. Provide richness and help emulsify the batter for a cohesive dough that holds shape when pressed for thumbprints. Separate yolks from whites carefully to avoid thinning the dough.
- 1 teaspoon vanilla extract: Stir in to enhance overall flavor with a warm, aromatic note that complements butter and jam, rounding out the cookie profile. Add during creaming to distribute evenly and boost perception of sweetness and depth. Use pure extract for the cleanest flavor impact.
- 2 1/4 cups all-purpose flour: Sift or whisk in to form the bulk structure of the cookies, supplying gluten that gives chew and stability while allowing shaping and pressing for thumbprints. Combine with the leavening to ensure even texture and prevent toughness; measure accurately for consistent results. Handle minimally once added to avoid overdeveloping gluten.
- 1 teaspoon baking powder: Fold in to provide lift and lightness by releasing tiny gas bubbles during baking, preventing dense or overly compact cookies. Combine evenly with dry ingredients to ensure uniform rise and proper texture without creating irregular hollows. Use measured amounts to maintain intended cookie shape.
- 1/4 cup jam or preserves (see note 2): Spoon into the center wells to add concentrated sweetness and bright flavor as a filling that contrasts soft, buttery dough. Choose smooth or slightly chunky preserves for desired texture and gently press into each indentation before baking or after slight cooling. Use modest amounts to avoid overflow while achieving a flavorful center.
How to Prepare Thumbprint Cookies
Making these cookies is a relaxed, rewarding process. The steps are simple, but attention to texture, chilling, and filling will give you consistent, picture perfect results every time.
- In a stand mixer with the paddle attachment at medium speed, or with an electric mixer, beat butter, sugar, egg yolks, and vanilla until smooth.: The moment you start mixing you'll notice the aroma of butter and vanilla extract becoming prominent, a warm, cozy scent that tells you the base flavors are marrying. The sound shifts from distinct clanks to a smooth, rhythmic hum as the paddle softens the mixture, and visually you'll see the mixture go from chalky to glossy and slightly lighter in color. This creaming step is important because it traps tiny air pockets that make the final cookie tender rather than dense. A common mistake is to rush this stage, leaving clumps of sugar or under creamed butter , which leads to uneven texture; if that happens briefly stop and scrape the bowl down, then continue until fully smooth.
- Gradually add flour and baking powder until combined. Cover and chill at least 30 minutes.: As you add the all purpose flour and baking powder you will hear the mixer change tone again, and the dough will start to look more like a soft, cohesive mass. Adding the flour in stages prevents overworking the dough, which keeps the cookies tender instead of tough. The dough should be pliable and slightly dense, not sticky; if it feels overly sticky chill it briefly to firm up. A typical pitfall here is adding too much flour at once, which can dry the dough and make the cookies crumbly, so take your time and stop mixing as soon as there are no streaks of flour left.
- Place rack in middle of oven and preheat to 350 degrees. Line two baking sheets with parchment paper or silicone mats.: Once the dough is formed, you'll notice it becomes easier to handle after a chill, because the butter firms up and the gluten relaxes. The chilled dough will hold shapes better and the thumb impressions will stay defined instead of flattening out. The sensory change is subtle but crucial, the dough feels cooler and denser to the touch. Avoid skipping this chill period, because warm dough spreads in the oven and makes shallow or merging thumbprints; if you're short on time even a 20 minute chill helps.
- Shape dough into 1-inch balls and place on prepared baking sheets 2 inches apart. Using your thumb, make an indentation in the center of each cookie (if the dough is sticky, wet your thumb between cookies).: Preheating ensures immediate, even heat that encourages a gentle rise and helps edges set quickly. You'll know the oven is ready when it holds a steady temperature and the air carries a faint warm, dry scent. Positioning the rack in the middle gives balanced heat so the bottoms do not brown too quickly while the tops finish. A common oversight is not allowing the oven to fully preheat, which can cause uneven baking and underdone centers.
- Bake until light golden brown around the edges, about 11 to 14 minutes, rotating baking sheets after 6 minutes. Remove from oven and immediately transfer to wire cooling racks. Spoon 1/4 teaspoon jam into the indentation on each baked cookie.: The sound of parchment rustling and the tactile smoothness of a silicone mat signal you're ready to shape. Lining pans prevents sticking and ensures the underside of each cookie browns evenly. If you skip liners, cookies can stick or brown irregularly, so always prepare your sheet pans ahead of time.
- Shape dough into 1-inch balls and place on prepared baking sheets 2 inches apart: Rolling the dough into even balls ensures uniform baking and consistent appearance. As you roll, the dough should be slightly cool and smooth; the touch is soft, not tacky. Spacing is important so cookies have room to expand without touching; otherwise they can fuse into one larger, misshapen cookie. If your dough warms while rolling, chill the tray for a few minutes to firm them up before baking.
- Using your thumb, make an indentation in the center of each cookie (if the dough is sticky, wet your thumb between cookies): The indentation should be a clear well that will hold the jam later, and you'll feel the dough give slightly with a satisfying soft press. If your thumb sticks, a quick rinse makes the movement clean and prevents puckered edges. This step determines the final look, so be gentle to avoid tearing the dough, which can cause jam to leak during baking.
- Bake until light golden brown around the edges, about 11 to 14 minutes, rotating baking sheets after 6 minutes: In the oven you'll hear a faint settling sound and smell a warm, buttery aroma as the cookies take color. The visual cue to stop baking is a light golden rim with a set top, not deep brown. Rotating the sheets halfway helps even browning, since oven heat can vary across racks. Overbaking will dry them out quickly, so if the edges look just golden remove them promptly and let carryover heat finish the centers.
- Remove from oven and immediately transfer to wire cooling racks: The cookies will be slightly soft when they come out, and moving them to a wire rack allows air to circulate so they set without becoming soggy. The surface will cool and the base will firm up as steam escapes, leaving a tender interior. Leaving them on hot pans risks continued browning and a tougher edge, so transfer right away to avoid overcooking.
- Spoon 1/4 teaspoon jam into the indentation on each baked cookie: When you add the jam you will see it sit glossy and vibrant in the well, a bright contrast to the pale cookie. Use a small spoon for restraint so the jam does not overflow, and scoop gently to avoid breaking the cookie. A typical mistake is overfilling, which causes sticky edges and a messy presentation; keep the portion small and neat for the best results.
Helpful Notes about Thumbprint Cookies
These notes expand on storage, make ahead methods, and simple tricks that save time. I rely on them whenever I plan batches for gifts or parties.
- Softening butter safely Use room temperature butter that yields slightly under finger pressure, or warm briefly at low microwave power in short bursts to avoid melting.
- Freezing dough for later Roll chilled dough into balls and freeze on a tray until solid, then bag them for up to one month; bake from frozen adding a minute or two if needed.
- Portion control for uniform cookies Use a 1 inch scoop or a teaspoon and roll to ensure even size so all cookies bake at the same rate.
- Jam selection matters Choose viscous preserves like raspberry, strawberry, apricot, or orange marmalade to keep the filling neat and flavorful.
- Make ahead tips Dough can be refrigerated up to three days; portion it as directed straight from the fridge for easy baking.
What to Pair With Thumbprint Cookies
These cookies are versatile for gatherings, gifts, and casual tea times. They work well with warm beverages and can be plated for holiday trays or casual dessert spreads.
- Afternoon tea pairing Serve with a pot of hot tea and a small plate to let the jam shine as a light treat during conversation.
- Holiday cookie tray Mix thumbprints with other small cookies for a festive assortment that looks colorful and inviting.
- Gift packaging Stack in a tin with parchment layers and a ribbon; the sturdy texture travels well and presents beautifully.
- Occasion suitability Ideal for family gatherings, potlucks, or celebration platters where bite sized treats are appreciated.
- Storage recommendations Store in an airtight container for up to one week, separating layers with parchment to avoid smudging the jam.
- Seasonal pairings Choose fruit preserves that match the season, like strawberry in summer or orange marmalade in winter for a bright contrast.
FAQ
Conclusion
These Thumbprint Cookies shine because of their simple, buttery dough and the bright splash of jam that finishes each bite. Try them when you want a make ahead cookie that is both approachable and special, perfect for gifts, cookie swaps, or a relaxed afternoon treat. I hope you enjoy the ritual of rolling, pressing, and filling as much as I do; the process is soothing and the results are reliably crowd pleasing, so give them a go and see which jam becomes your signature.
Thumbprint Cookies
Equipment
- Stand mixer
- Paddle attachment
- Electric Mixer
- Baking Sheets
- Parchment Paper
- Wire cooling racks
Ingredients
- 1 cup butter softened (2 sticks, see note 1) Cream until light and fluffy to provide richness and a tender crumb while helping bind the dough together and create a delicate texture in the cookies. Soften fully for easier creaming with sugar and to incorporate air, which contributes to a light bite. Measure by cup and ensure room temperature to avoid greasy or dense dough.
- 1/2 cup granulated sugar Beat with sugar until pale to dissolve crystals and help aerate the dough for a slightly lighter cookie. Contribute sweetness and structure during creaming with butter, helping to distribute flavor evenly. Adjust slightly if you prefer less sweetness but maintain balance for proper texture.
- 2 egg yolks Mix gently to add fat without the water content of whole eggs, which keeps the dough tender and prevents excess spread during baking. Provide richness and help emulsify the batter for a cohesive dough that holds shape when pressed for thumbprints. Separate yolks from whites carefully to avoid thinning the dough.
- 1 teaspoon vanilla extract Stir in to enhance overall flavor with a warm, aromatic note that complements butter and jam, rounding out the cookie profile. Add during creaming to distribute evenly and boost perception of sweetness and depth. Use pure extract for the cleanest flavor impact.
- 2 1/4 cups all-purpose flour Sift or whisk in to form the bulk structure of the cookies, supplying gluten that gives chew and stability while allowing shaping and pressing for thumbprints. Combine with the leavening to ensure even texture and prevent toughness; measure accurately for consistent results. Handle minimally once added to avoid overdeveloping gluten.
- 1 teaspoon baking powder Fold in to provide lift and lightness by releasing tiny gas bubbles during baking, preventing dense or overly compact cookies. Combine evenly with dry ingredients to ensure uniform rise and proper texture without creating irregular hollows. Use measured amounts to maintain intended cookie shape.
- 1/4 cup jam or preserves (see note 2) Spoon into the center wells to add concentrated sweetness and bright flavor as a filling that contrasts soft, buttery dough. Choose smooth or slightly chunky preserves for desired texture and gently press into each indentation before baking or after slight cooling. Use modest amounts to avoid overflow while achieving a flavorful center.
Instructions
- In a stand mixer with the paddle attachment at medium speed, or with an electric mixer, beat butter, sugar, egg yolks, and vanilla until smooth.: The moment you start mixing you'll notice the aroma of butter and vanilla extract becoming prominent, a warm, cozy scent that tells you the base flavors are marrying. The sound shifts from distinct clanks to a smooth, rhythmic hum as the paddle softens the mixture, and visually you'll see the mixture go from chalky to glossy and slightly lighter in color. This creaming step is important because it traps tiny air pockets that make the final cookie tender rather than dense. A common mistake is to rush this stage, leaving clumps of sugar or under creamed butter , which leads to uneven texture; if that happens briefly stop and scrape the bowl down, then continue until fully smooth.
- Gradually add flour and baking powder until combined. Cover and chill at least 30 minutes.: As you add the all purpose flour and baking powder you will hear the mixer change tone again, and the dough will start to look more like a soft, cohesive mass. Adding the flour in stages prevents overworking the dough, which keeps the cookies tender instead of tough. The dough should be pliable and slightly dense, not sticky; if it feels overly sticky chill it briefly to firm up. A typical pitfall here is adding too much flour at once, which can dry the dough and make the cookies crumbly, so take your time and stop mixing as soon as there are no streaks of flour left.
- Place rack in middle of oven and preheat to 350 degrees. Line two baking sheets with parchment paper or silicone mats.: Once the dough is formed, you'll notice it becomes easier to handle after a chill, because the butter firms up and the gluten relaxes. The chilled dough will hold shapes better and the thumb impressions will stay defined instead of flattening out. The sensory change is subtle but crucial, the dough feels cooler and denser to the touch. Avoid skipping this chill period, because warm dough spreads in the oven and makes shallow or merging thumbprints; if you're short on time even a 20 minute chill helps.
- Shape dough into 1-inch balls and place on prepared baking sheets 2 inches apart. Using your thumb, make an indentation in the center of each cookie (if the dough is sticky, wet your thumb between cookies).: Preheating ensures immediate, even heat that encourages a gentle rise and helps edges set quickly. You'll know the oven is ready when it holds a steady temperature and the air carries a faint warm, dry scent. Positioning the rack in the middle gives balanced heat so the bottoms do not brown too quickly while the tops finish. A common oversight is not allowing the oven to fully preheat, which can cause uneven baking and underdone centers.
- Bake until light golden brown around the edges, about 11 to 14 minutes, rotating baking sheets after 6 minutes. Remove from oven and immediately transfer to wire cooling racks. Spoon 1/4 teaspoon jam into the indentation on each baked cookie.: The sound of parchment rustling and the tactile smoothness of a silicone mat signal you're ready to shape. Lining pans prevents sticking and ensures the underside of each cookie browns evenly. If you skip liners, cookies can stick or brown irregularly, so always prepare your sheet pans ahead of time.
- Shape dough into 1-inch balls and place on prepared baking sheets 2 inches apart: Rolling the dough into even balls ensures uniform baking and consistent appearance. As you roll, the dough should be slightly cool and smooth; the touch is soft, not tacky. Spacing is important so cookies have room to expand without touching; otherwise they can fuse into one larger, misshapen cookie. If your dough warms while rolling, chill the tray for a few minutes to firm them up before baking.
- Using your thumb, make an indentation in the center of each cookie (if the dough is sticky, wet your thumb between cookies): The indentation should be a clear well that will hold the jam later, and you'll feel the dough give slightly with a satisfying soft press. If your thumb sticks, a quick rinse makes the movement clean and prevents puckered edges. This step determines the final look, so be gentle to avoid tearing the dough, which can cause jam to leak during baking.
- Bake until light golden brown around the edges, about 11 to 14 minutes, rotating baking sheets after 6 minutes: In the oven you'll hear a faint settling sound and smell a warm, buttery aroma as the cookies take color. The visual cue to stop baking is a light golden rim with a set top, not deep brown. Rotating the sheets halfway helps even browning, since oven heat can vary across racks. Overbaking will dry them out quickly, so if the edges look just golden remove them promptly and let carryover heat finish the centers.
- Remove from oven and immediately transfer to wire cooling racks: The cookies will be slightly soft when they come out, and moving them to a wire rack allows air to circulate so they set without becoming soggy. The surface will cool and the base will firm up as steam escapes, leaving a tender interior. Leaving them on hot pans risks continued browning and a tougher edge, so transfer right away to avoid overcooking.
- Spoon 1/4 teaspoon jam into the indentation on each baked cookie: When you add the jam you will see it sit glossy and vibrant in the well, a bright contrast to the pale cookie. Use a small spoon for restraint so the jam does not overflow, and scoop gently to avoid breaking the cookie. A typical mistake is overfilling, which causes sticky edges and a messy presentation; keep the portion small and neat for the best results.
Notes
- Softening butter safely Use room temperature butter that yields slightly under finger pressure, or warm briefly at low microwave power in short bursts to avoid melting.
- Freezing dough for later Roll chilled dough into balls and freeze on a tray until solid, then bag them for up to one month; bake from frozen adding a minute or two if needed.
- Portion control for uniform cookies Use a 1 inch scoop or a teaspoon and roll to ensure even size so all cookies bake at the same rate.
- Jam selection matters Choose viscous preserves like raspberry, strawberry, apricot, or orange marmalade to keep the filling neat and flavorful.
- Make ahead tips Dough can be refrigerated up to three days; portion it as directed straight from the fridge for easy baking.