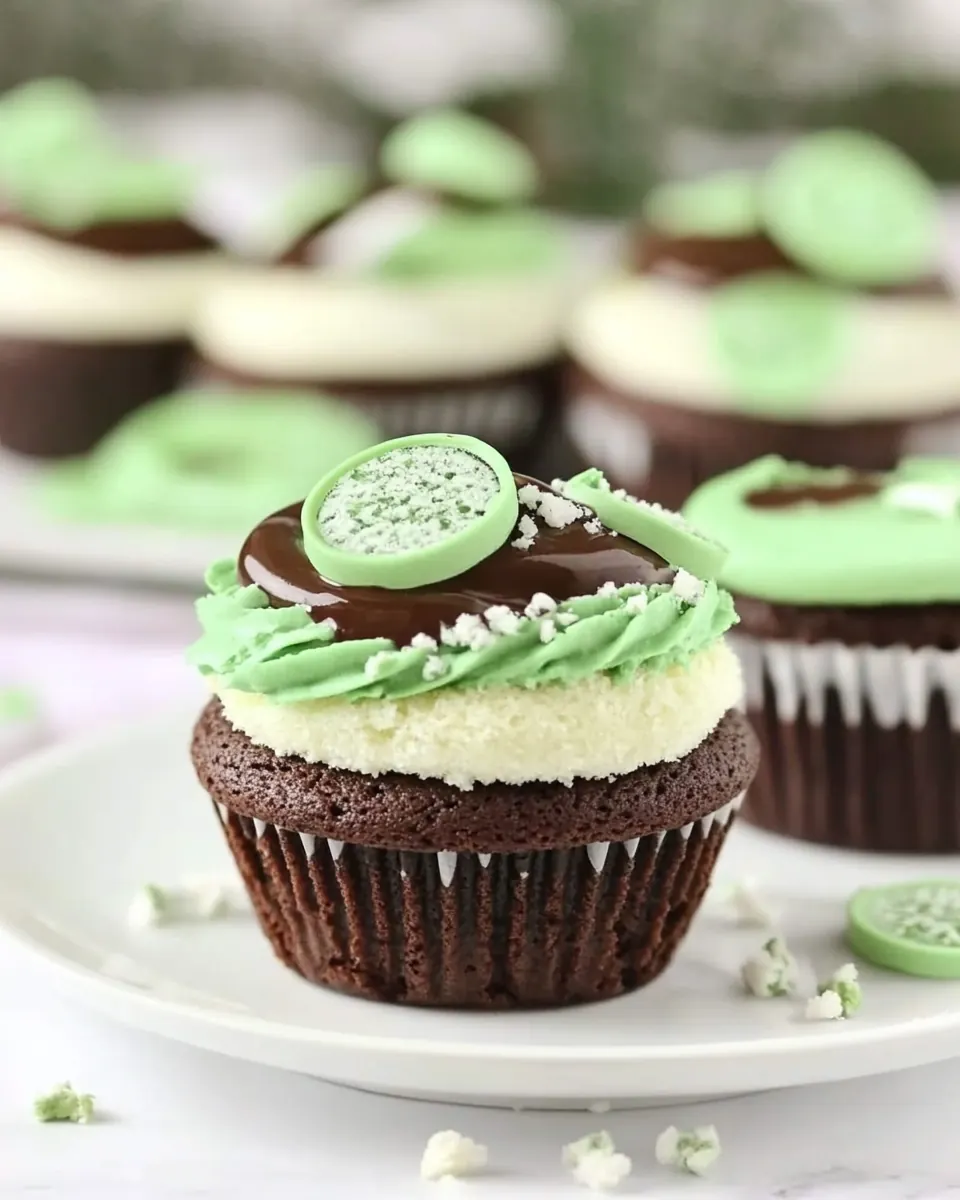
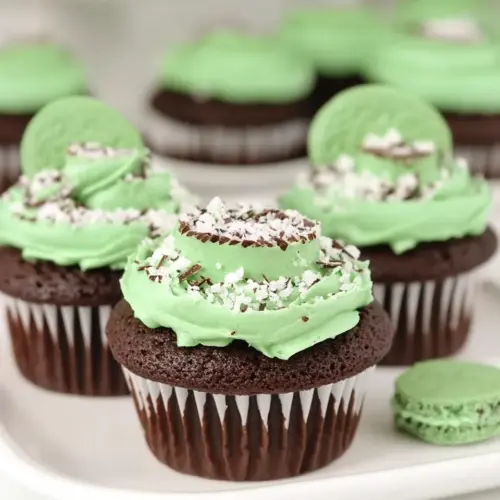
Thin Mint Cupcakes
Thin Mint Cupcakes began as a weekend baking experiment the first time I wanted to marry chocolate and mint in a playful, nostalgic way. I had a box of the cookies tucked away after a movie night, and I remember thinking about how their crisp, cool bite would translate into soft cake and pillowy frosting. That first bite, warm cake meeting a chilled mint finish, convinced me this was a combination worth perfecting.
Over the years I’ve adjusted the balance between chocolate and mint, testing tiny tweaks so the mint never overwhelms the cocoa, and vice versa. When I make Thin Mint Cupcakes for friends, I love watching that moment when someone discovers the thin mint crumb on top, they smile, and ask for the recipe. Baking these taught me to trust simple techniques, like not over mixing the batter and letting ganache rest until it is glossy but still pourable. Those small choices shape texture and flavor in ways that matter.
What I enjoy most about these cupcakes is how versatile they are. They work for a small gathering, a bake sale, or an indulgent treat after a long day. I often plate a few with coffee or a glass of milk and let the contrast carry the experience. Over time, they became my go to when I want something that feels both familiar and a little special. I hope as you read through this, you feel encouraged to make them your own and that they bring the same cozy satisfaction they’ve brought me.
Recipe Snapshot
45 mins
25 mins
20 mins
Medium
250 kcal
American
Gluten-Free, Low FODMAP
Desserts
Mixing bowls, Whisk, Spatula, Cupcake pan, Cupcake liners, Microwave proof bowl, Electric mixer, Measuring cups
Why Try This Thin Mint Cupcakes
Classic Flavor Harmony
I love how Thin Mint Cupcakes bring together bold chocolate and bright mint. The cake base uses unsweetened cocoa powder and chocolate chips that create a deep, slightly bitter backbone, while the mint extract brightens the finish without turning the whole thing into a candy. I often find myself savoring that first forkful because the flavors are layered, not one dimensional.
Textural Contrast
One of the reasons I make these again and again is texture. The recipe pairs a tender, moist cupcake crumb with a glossy ganache and a light, fluffy buttercream. That contrast between soft cake and smooth chocolate coating, capped by creamy frosting, keeps every bite interesting. When I bite into one, I appreciate how each component plays a role in the mouthfeel.
Accessible Techniques
I’m a believer in recipes that welcome bakers at all levels. These Thin Mint Cupcakes use straightforward steps like whisking, folding, and melting, which are approachable yet teach useful skills. I especially enjoy that the ganache is forgiving, and the buttercream comes together quickly even for a home baker. That means you can impress guests without fussing over advanced pastry tools.
Customizable Mint Intensity
Mint extract strength varies by brand, so I like that this recipe encourages gradual addition. You can nudge the mint forward or keep it subtle, depending on your audience. I often make one batch with a lighter mint for kids and another slightly stronger for adults, and both disappear just as fast.
Perfect for Celebrations
These cupcakes feel festive without being complicated, so I reach for them for birthdays, potlucks, or when I want a themed dessert. The green tint in the frosting and cookie crumb topping make them especially fun for seasonal events. I find they hold up well on a dessert table, and they travel nicely to gatherings, which is always a plus.
What to Gather for Thin Mint Cupcakes
The ingredients here are chosen to deliver a rich chocolate foundation and a bright mint finish. The key players are the flour and cocoa powder for structure and chocolate depth, the eggs and buttermilk for moisture and tenderness, and the combination of butter and powdered sugar for a silky buttercream that carries the mint. Each item supports texture, flavor, or stability so the cupcakes feel balanced from first bite to last.
- 2 eggs: Whisk vigorously to provide structure and help the batter rise and set while contributing moisture and richness to the cupcakes.
- 1/2 cup granulated sugar: Sweeten evenly and assist in caramelization during baking, helping to balance flavors and contribute tenderness to the crumb.
- 1/2 cup brown sugar: Impart deep, molasses-like sweetness and added moisture while enhancing the cake's chewiness and complexity of flavor.
- 1/3 cup vegetable oil: Add fat that tenderizes the crumb, increases moistness, and carries flavor throughout the batter for a soft cupcake texture.
- 2 teaspoons vanilla extract: Provide aromatic depth and enhance other flavors; stir into wet ingredients to distribute a pleasant, rounded vanilla note.
- 3/4 cup flour: Give bulk and structure to the cupcakes, forming the gluten network that traps gases and supports the cake as it bakes.
- 1/2 cup unsweetened cocoa powder: Deliver chocolate flavor and a slight dryness that intensifies cocoa notes while contributing a tender, velvety crumb.
- 1/2 teaspoon baking soda: Act as a leavening agent component that reacts with acids to produce carbon dioxide, helping the cupcakes rise and lighten.
- 3/4 teaspoon baking powder: Provide additional leavening power to create lift and a finer crumb, balancing rise with the baking soda for optimal texture.
- 1/4 teaspoons salt: Enhance overall flavor balance by elevating sweetness and suppressing bitterness, while slightly strengthening gluten for structure.
- 1/2 cup buttermilk or milk: Moisturize the batter and react with leavening agents when using buttermilk; add creaminess and help dissolve sugars for even texture.
- 2/3 cup chocolate chips: Melt during baking to create pockets of concentrated chocolate flavor and add bursts of gooey richness within the cupcakes.
- 3 tablespoons heavy whipping cream: Enrich the frosting or ganache by adding body, creaminess, and a glossy texture while helping stabilize the final consistency.
- 3/4 cup butter softened: Provide fat and structure in frostings, allowing aeration when whipped and lending a smooth, rich mouthfeel to the topping.
- 1 teaspoon vanilla extract: Enhance and support vanilla flavor when added to icings or batters, contributing subtle sweetness and aromatic complexity.
- 1 1/2 teaspoons mint or peppermint extract add this gradually to taste as the intensity of mint extract varies from brand to brand: Contribute a bright, cooling mint character that defines the Thin Mint profile; add gradually to control intensity and avoid overpowering.
- 2 3 cups powdered sugar: Sweeten and thicken frostings, providing stability and structure while dissolving to create a smooth, spreadable consistency.
- green food dye: Tint frostings or batter to achieve the signature green color associated with Thin Mint treats, used sparingly for desired shade.
The Method for Thin Mint Cupcakes
These directions walk you from warming the oven to piping the final frosting, with tips that help you hit the right textures and flavors. I’ll guide you through how each stage should look and feel so you can bake confidently and avoid common missteps.
- Preheat oven to 350°F and line pans with cupcake liners.: You will notice a warm, dry scent as the oven comes up to temperature, which primes the air for even baking and predictable rise. Properly lined pans prevent sticking and make removal simple, and an oven thermometer helps confirm the true heat. A frequent error is skipping liners or using cold pans, which can lead to uneven bottoms or cupcakes that stick, so line tins and let the oven fully preheat before baking.
- In a large bowl, whisk eggs, sugar, brown sugar, oil and vanilla extract together.: As you whisk, the mixture will become lighter in color and slightly thicker, with the sugars dissolving into the oil and eggs creating a glossy emulsion. This step builds structure, trapping air that supports a tender crumb. Watch for overbeating, which can create a tough texture, so whisk until everything is homogenous and slightly aerated.
- In a separate bowl, combine flour, cocoa powder, baking soda, baking powder and salt. Pour in half of these dry ingredients into the oil mixture and stir.: Dry ingredients will look even and lump free after whisking, and sifting them together helps distribute leaveners and cocoa evenly so pockets of baking powder do not create tunnels. I prefer to whisk until the mixture is uniformly colored. A common mistake is not mixing dry ingredients well, which can cause uneven rise or bitter pockets of cocoa.
- Add milk and gently stir again and then add the rest of the dry ingredients. Be careful not to over mix.: When you fold in the first half of the dry mix the batter will gain body, and you will hear a thicker, wetter sound as the spatula moves through. This staging reduces the chance of over mixing, because adding all at once often requires more stirring. Avoid vigorous stirring here, which develops gluten and leads to a denser cupcake.
- Fill cupcake liners half full and bake for 15-20 minutes or until an inserted knife comes out clean. Let cool.: The batter becomes silkier once the milk is incorporated, and you should stop stirring as soon as the flour disappears to keep the crumb light. The visual cue is a smooth batter without streaks of flour but still slightly lumpy. Resist the urge to perfect it, because over mixing is the quickest way to dry, chewy cupcakes.
- Place chocolate chips and whipping cream in a small microwave-proof bowl and microwave for 40 seconds. Remove and stir and continue to microwave until smooth.: While baking you will smell warm chocolate and notice the tops set and spring back when touched. Bake time produces a tender center, and the knife test ensures doneness without over baking. A common problem is overbaking for a few extra minutes, which dries the cake, so start checking at the early end of the range and remove when just done.
- Dip cooled cupcakes into the ganache and turn right side up to let set.: Heating creates a glossy ganache that smells rich and chocolate forward, and stirring helps the chips melt evenly into the cream for a silky texture. Allowing the mixture to sit briefly after heating ensures the residual heat finishes melting any remaining pieces. Avoid boiling the cream or overheating, which can scorch the chocolate and ruin the glossy finish.
- Beat butter until smooth.: Dipping gives a thin, shiny chocolate shell that cools into a smooth coating, adding a textural contrast to the soft cake. When the ganache sets, it will lose sheen slightly and form a tactile layer. A common error is dipping warm cupcakes, which can make the ganache slide off, so be sure the cakes are cooled completely before dipping.
- Add vanilla and mint extract and beat again.: Whipped butter should become pale and silky in texture, with a faint sweet dairy aroma. This is the base of your frosting, and achieving a smooth consistency ensures the powdered sugar will incorporate seamlessly. If the butter is too soft, the frosting will be runny; if too firm, it will be lumpy, so aim for room temperature.
- Slowly add in powdered sugar until you reach your desired consistency (add milk if it becomes too thick).: Once extracts are added, smell the mixture to gauge balance, because these aromatics shape the frosting profile. Mixing them in allows the flavors to disperse evenly; I often pause here and taste a tiny bit of butter to check the mint intensity. Be mindful that adding too much mint can overpower the chocolate, so add gradually.
- Add as much green food dye as desired.: As powdered sugar is incorporated the frosting thickens and sweetens, producing a pipeable texture. If the frosting becomes too dense, a splash of milk loosens it, but add sparingly to avoid a runny finish. Over sweetening can mask the mint, so aim for balance and stop once the buttercream holds peaks for piping.
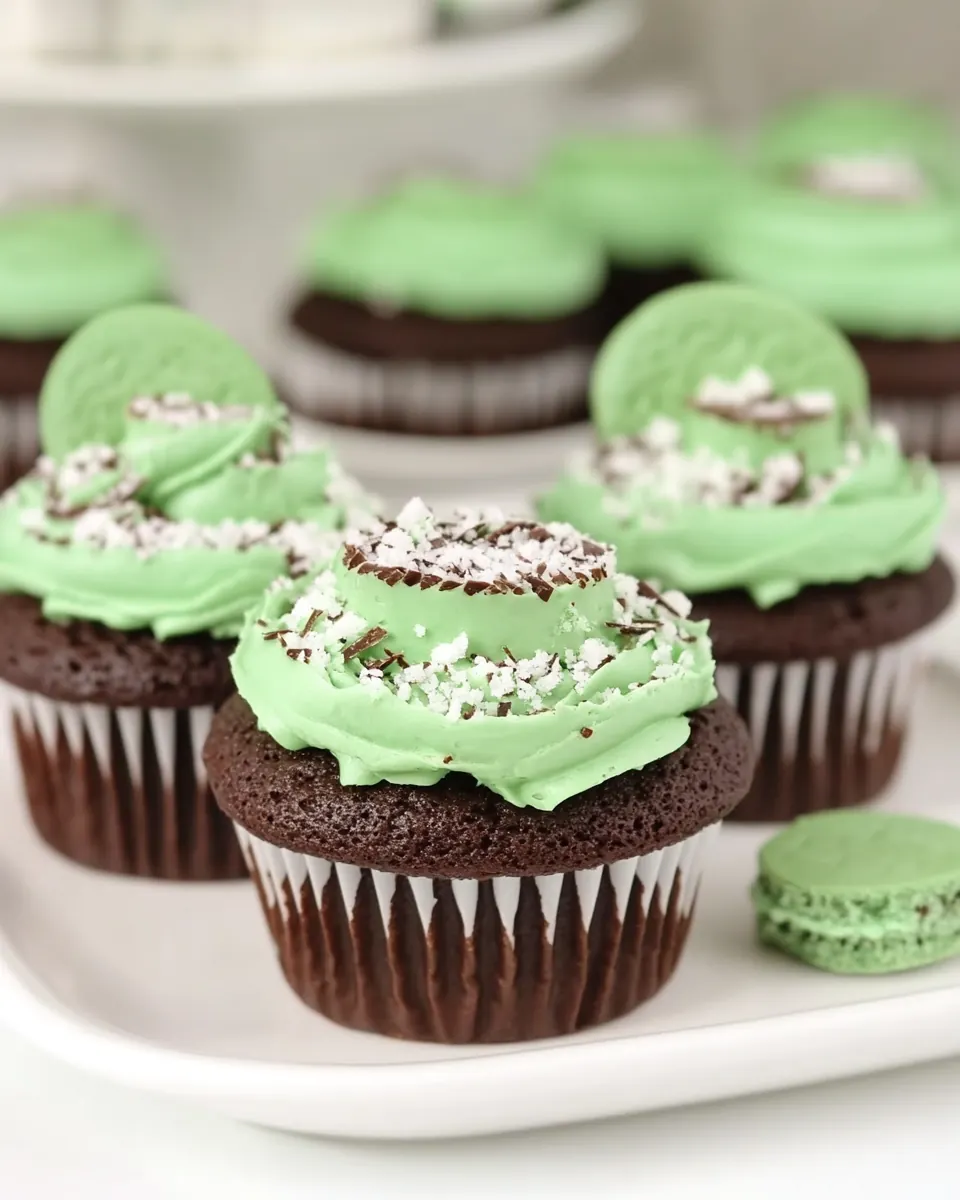
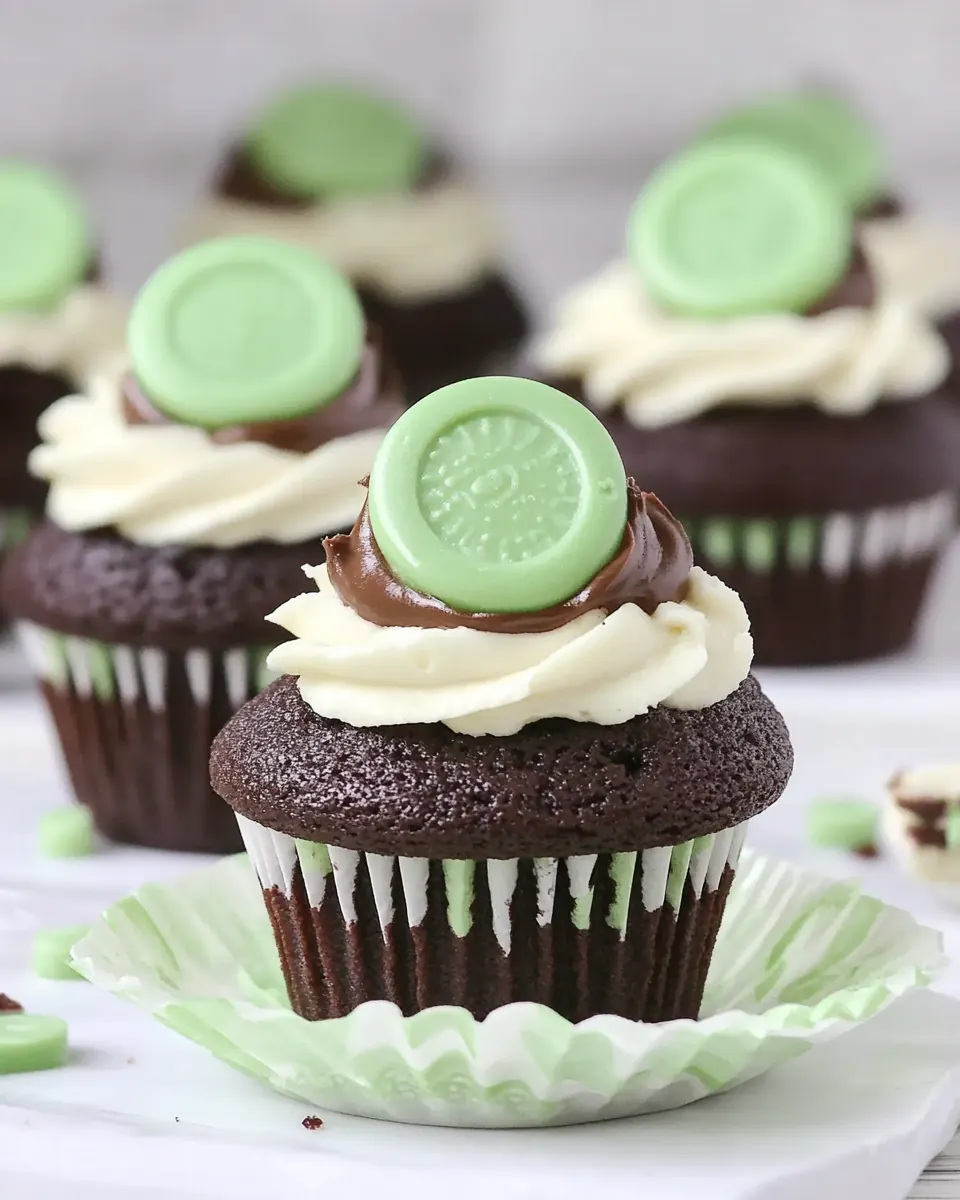
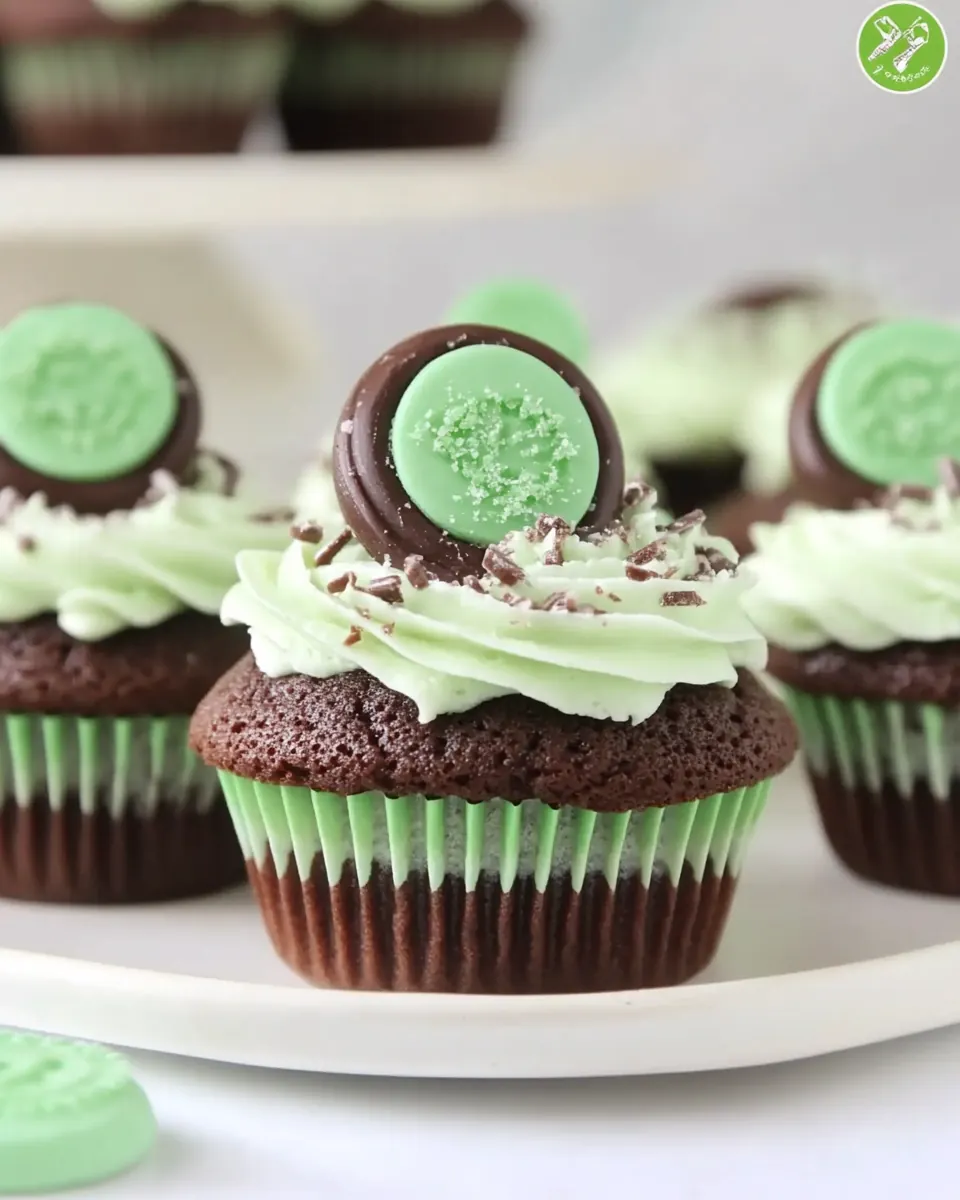
- Pipe on over ganache and top cupcakes with Thin Mints! I crushed a few cookies and used them as "sprinkles".: Adding dye transforms the visual appeal, and gel color gives vibrant results without adding liquid, which would loosen the frosting. Mix until the color is uniform and adjust in tiny amounts to avoid overshooting the shade. A mistake is using liquid dye that thins the frosting, so prefer gels for control.
- Pipe on over ganache and top cupcakes with Thin Mints I crushed a few cookies and used them as "sprinkles": Piping creates a neat, elevated look and a pleasing creamy contrast to the ganache, and the crushed cookies add crunch and a direct tie to the Thin Mint inspiration. Press lightly when piping to keep the frosting texture intact, and sprinkle crumbs immediately so they adhere. Avoid piling too many crumbs on one cupcake, which can overwhelm the delicate frosting structure.
Recipe Variations about Thin Mint Cupcakes
These variations let you tailor the recipe to your preferences or the occasion, whether you want a more intense chocolate presence or a gentler mint. Each tip starts with a highlighted suggestion followed by practical notes for execution. Pick a couple and make them your signature version.
- Double Chocolate: Fold extra chocolate chips into the batter for pockets of molten chocolate, but be careful not to add so many that the cupcakes sink during baking.
- Subtle Mint: Start with half the recommended mint extract and add more to the buttercream only after tasting, keeping the mint as an accent rather than the lead flavor.
- Stronger Ganache: Increase the ratio of chocolate chips to heavy whipping cream to create a firmer ganache coating, which will set more solidly on the cupcakes.
- Vegan Friendly: Replace eggs with a flax egg and use a plant based butter and dairy free chocolate, noting that texture will be slightly different and may require a touch more liquid.
- Cookie Crumb Topping: Reserve a few Thin Mints and crush them to sprinkle on top right after piping so they stick to the buttercream for a decorative, crunchy finish.
Serving This Thin Mint Cupcakes
These cupcakes are playful and celebratory, making them great for parties, bake sales, or a sweet finish to a dinner. Below are serving ideas along with storage and pairing tips, all presented as a list so you can quickly choose what suits your occasion.
- Party Platter: Arrange on a tiered stand and garnish with a few extra cookie crumbs for visual impact during birthday parties or gatherings.
- Tea Time: Serve with a mug of hot chocolate or coffee for an afternoon treat, balancing the mint with a warm beverage.
- Holiday Treat: These make a festive option for seasonal events; add green frosting intensity to match the holiday theme and display on a decorative platter.
- Storage: Keep unfrosted cupcakes in an airtight container for up to three days, or refrigerate frosted cupcakes if your environment is warm, bringing them to room temperature before serving for best texture.
- Make Ahead: Bake and freeze unfrosted cupcakes, then thaw and dip in ganache before piping the buttercream, which helps for busy schedules and ensures freshness.
- Occasions: Ideal for bake sales, classroom parties, or casual gatherings where a nostalgic, mint chocolate treat will be appreciated by many.
- Portioning: Serve one cupcake per person for dessert, or offer mini versions for tasting events to let guests try multiple flavors without filling up.
FAQ
Conclusion
These Thin Mint Cupcakes stand out because they combine deep chocolate with bright mint in a perfectly balanced, crowd pleasing format. Try them if you want a dessert that feels nostalgic yet polished, and expect compliments when you bring them to gatherings. I hope you have fun making them, and that they become a favorite treat to bake for friends and family.
Thin Mint Cupcakes
Equipment
- Mixing Bowls
- Whisk
- Spatula
- Cupcake Pan
- cupcake liners
- Microwave proof bowl
- Electric Mixer
- Measuring Cups
Ingredients
- 2 eggs Whisk vigorously to provide structure and help the batter rise and set while contributing moisture and richness to the cupcakes.
- 1/2 cup granulated sugar Sweeten evenly and assist in caramelization during baking, helping to balance flavors and contribute tenderness to the crumb.
- 1/2 cup brown sugar Impart deep, molasses-like sweetness and added moisture while enhancing the cake's chewiness and complexity of flavor.
- 1/3 cup vegetable oil Add fat that tenderizes the crumb, increases moistness, and carries flavor throughout the batter for a soft cupcake texture.
- 2 teaspoons vanilla extract Provide aromatic depth and enhance other flavors; stir into wet ingredients to distribute a pleasant, rounded vanilla note.
- 3/4 cup flour Give bulk and structure to the cupcakes, forming the gluten network that traps gases and supports the cake as it bakes.
- 1/2 cup unsweetened cocoa powder Deliver chocolate flavor and a slight dryness that intensifies cocoa notes while contributing a tender, velvety crumb.
- 1/2 teaspoon baking soda Act as a leavening agent component that reacts with acids to produce carbon dioxide, helping the cupcakes rise and lighten.
- 3/4 teaspoon baking powder Provide additional leavening power to create lift and a finer crumb, balancing rise with the baking soda for optimal texture.
- 1/4 teaspoons salt Enhance overall flavor balance by elevating sweetness and suppressing bitterness, while slightly strengthening gluten for structure.
- 1/2 cup buttermilk or milk Moisturize the batter and react with leavening agents when using buttermilk; add creaminess and help dissolve sugars for even texture.
- 2/3 cup chocolate chips Melt during baking to create pockets of concentrated chocolate flavor and add bursts of gooey richness within the cupcakes.
- 3 tablespoons heavy whipping cream Enrich the frosting or ganache by adding body, creaminess, and a glossy texture while helping stabilize the final consistency.
- 3/4 cup butter softened Provide fat and structure in frostings, allowing aeration when whipped and lending a smooth, rich mouthfeel to the topping.
- 1 teaspoon vanilla extract Enhance and support vanilla flavor when added to icings or batters, contributing subtle sweetness and aromatic complexity.
- 1 -1/2 teaspoons mint or peppermint extract add this gradually to taste as the intensity of mint extract varies from brand to brand Contribute a bright, cooling mint character that defines the Thin Mint profile; add gradually to control intensity and avoid overpowering.
- 2 -3 cups powdered sugar Sweeten and thicken frostings, providing stability and structure while dissolving to create a smooth, spreadable consistency.
- green food dye Tint frostings or batter to achieve the signature green color associated with Thin Mint treats, used sparingly for desired shade.
Instructions
- Preheat oven to 350°F and line pans with cupcake liners.: You will notice a warm, dry scent as the oven comes up to temperature, which primes the air for even baking and predictable rise. Properly lined pans prevent sticking and make removal simple, and an oven thermometer helps confirm the true heat. A frequent error is skipping liners or using cold pans, which can lead to uneven bottoms or cupcakes that stick, so line tins and let the oven fully preheat before baking.
- In a large bowl, whisk eggs, sugar, brown sugar, oil and vanilla extract together.: As you whisk, the mixture will become lighter in color and slightly thicker, with the sugars dissolving into the oil and eggs creating a glossy emulsion. This step builds structure, trapping air that supports a tender crumb. Watch for overbeating, which can create a tough texture, so whisk until everything is homogenous and slightly aerated.
- In a separate bowl, combine flour, cocoa powder, baking soda, baking powder and salt. Pour in half of these dry ingredients into the oil mixture and stir.: Dry ingredients will look even and lump free after whisking, and sifting them together helps distribute leaveners and cocoa evenly so pockets of baking powder do not create tunnels. I prefer to whisk until the mixture is uniformly colored. A common mistake is not mixing dry ingredients well, which can cause uneven rise or bitter pockets of cocoa.
- Add milk and gently stir again and then add the rest of the dry ingredients. Be careful not to over mix.: When you fold in the first half of the dry mix the batter will gain body, and you will hear a thicker, wetter sound as the spatula moves through. This staging reduces the chance of over mixing, because adding all at once often requires more stirring. Avoid vigorous stirring here, which develops gluten and leads to a denser cupcake.
- Fill cupcake liners half full and bake for 15-20 minutes or until an inserted knife comes out clean. Let cool.: The batter becomes silkier once the milk is incorporated, and you should stop stirring as soon as the flour disappears to keep the crumb light. The visual cue is a smooth batter without streaks of flour but still slightly lumpy. Resist the urge to perfect it, because over mixing is the quickest way to dry, chewy cupcakes.
- Place chocolate chips and whipping cream in a small microwave-proof bowl and microwave for 40 seconds. Remove and stir and continue to microwave until smooth.: While baking you will smell warm chocolate and notice the tops set and spring back when touched. Bake time produces a tender center, and the knife test ensures doneness without over baking. A common problem is overbaking for a few extra minutes, which dries the cake, so start checking at the early end of the range and remove when just done.
- Dip cooled cupcakes into the ganache and turn right side up to let set.: Heating creates a glossy ganache that smells rich and chocolate forward, and stirring helps the chips melt evenly into the cream for a silky texture. Allowing the mixture to sit briefly after heating ensures the residual heat finishes melting any remaining pieces. Avoid boiling the cream or overheating, which can scorch the chocolate and ruin the glossy finish.
- Beat butter until smooth.: Dipping gives a thin, shiny chocolate shell that cools into a smooth coating, adding a textural contrast to the soft cake. When the ganache sets, it will lose sheen slightly and form a tactile layer. A common error is dipping warm cupcakes, which can make the ganache slide off, so be sure the cakes are cooled completely before dipping.
- Add vanilla and mint extract and beat again.: Whipped butter should become pale and silky in texture, with a faint sweet dairy aroma. This is the base of your frosting, and achieving a smooth consistency ensures the powdered sugar will incorporate seamlessly. If the butter is too soft, the frosting will be runny; if too firm, it will be lumpy, so aim for room temperature.
- Slowly add in powdered sugar until you reach your desired consistency (add milk if it becomes too thick).: Once extracts are added, smell the mixture to gauge balance, because these aromatics shape the frosting profile. Mixing them in allows the flavors to disperse evenly; I often pause here and taste a tiny bit of butter to check the mint intensity. Be mindful that adding too much mint can overpower the chocolate, so add gradually.
- Add as much green food dye as desired.: As powdered sugar is incorporated the frosting thickens and sweetens, producing a pipeable texture. If the frosting becomes too dense, a splash of milk loosens it, but add sparingly to avoid a runny finish. Over sweetening can mask the mint, so aim for balance and stop once the buttercream holds peaks for piping.
- Pipe on over ganache and top cupcakes with Thin Mints! I crushed a few cookies and used them as "sprinkles".: Adding dye transforms the visual appeal, and gel color gives vibrant results without adding liquid, which would loosen the frosting. Mix until the color is uniform and adjust in tiny amounts to avoid overshooting the shade. A mistake is using liquid dye that thins the frosting, so prefer gels for control.
- Pipe on over ganache and top cupcakes with Thin Mints I crushed a few cookies and used them as "sprinkles": Piping creates a neat, elevated look and a pleasing creamy contrast to the ganache, and the crushed cookies add crunch and a direct tie to the Thin Mint inspiration. Press lightly when piping to keep the frosting texture intact, and sprinkle crumbs immediately so they adhere. Avoid piling too many crumbs on one cupcake, which can overwhelm the delicate frosting structure.
Notes
- Double Chocolate: Fold extra chocolate chips into the batter for pockets of molten chocolate, but be careful not to add so many that the cupcakes sink during baking.
- Subtle Mint: Start with half the recommended mint extract and add more to the buttercream only after tasting, keeping the mint as an accent rather than the lead flavor.
- Stronger Ganache: Increase the ratio of chocolate chips to heavy whipping cream to create a firmer ganache coating, which will set more solidly on the cupcakes.
- Vegan Friendly: Replace eggs with a flax egg and use a plant based butter and dairy free chocolate, noting that texture will be slightly different and may require a touch more liquid.
- Cookie Crumb Topping: Reserve a few Thin Mints and crush them to sprinkle on top right after piping so they stick to the buttercream for a decorative, crunchy finish.