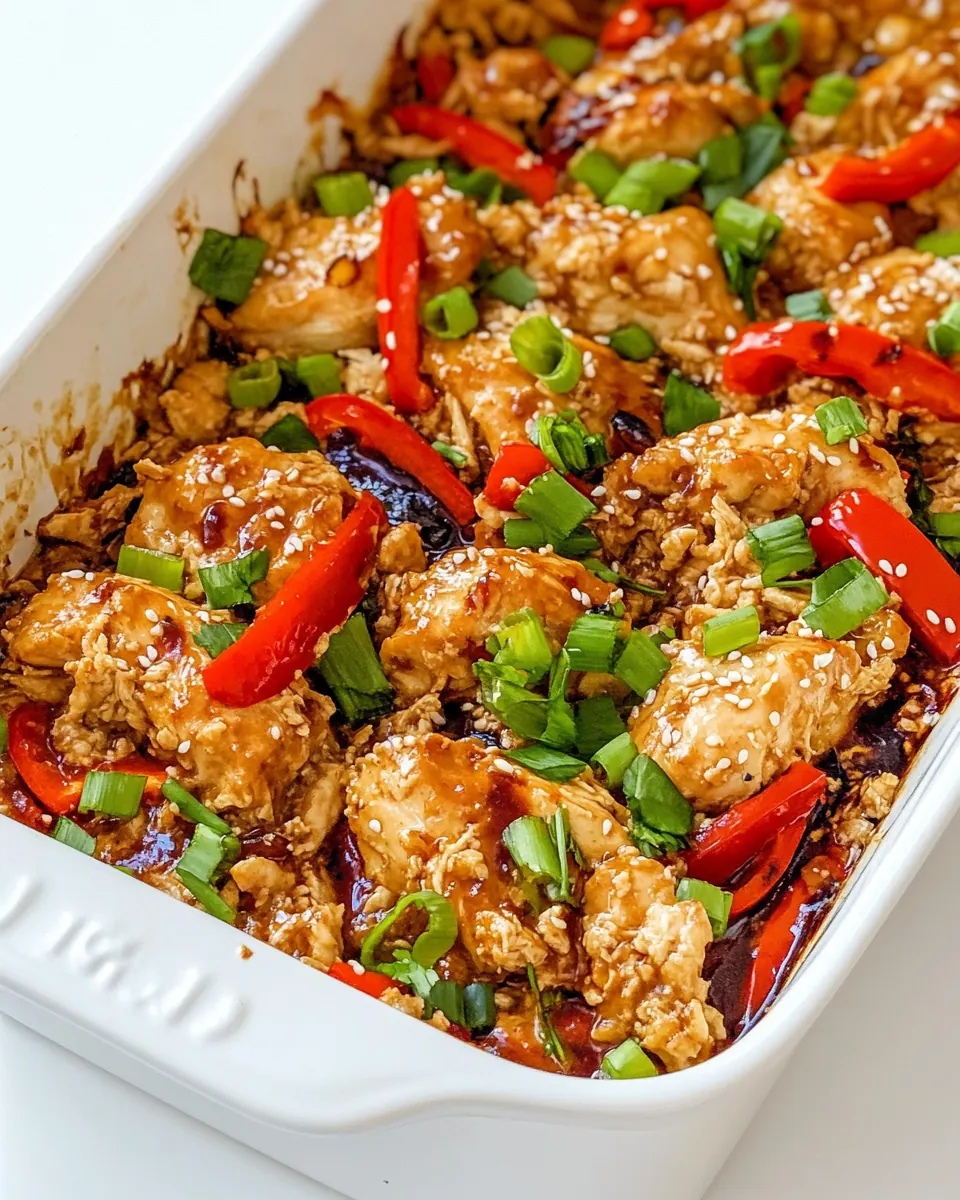
Teriyaki Chicken Casserole
Teriyaki Chicken Casserole has been a weeknight lifesaver in my kitchen, a dish I reach for when the week feels long and everyone needs something comforting and honest on their plate. The first time I made this, the house smelled like sweet soy and warm rice, and my kids came in from their homework like magnets to the kitchen. I remember standing by the oven, stirring the rice while the sauce bubbled slightly at the edges, and thinking how this simple mix of chicken, sauce, and rice felt like a dinner hug.
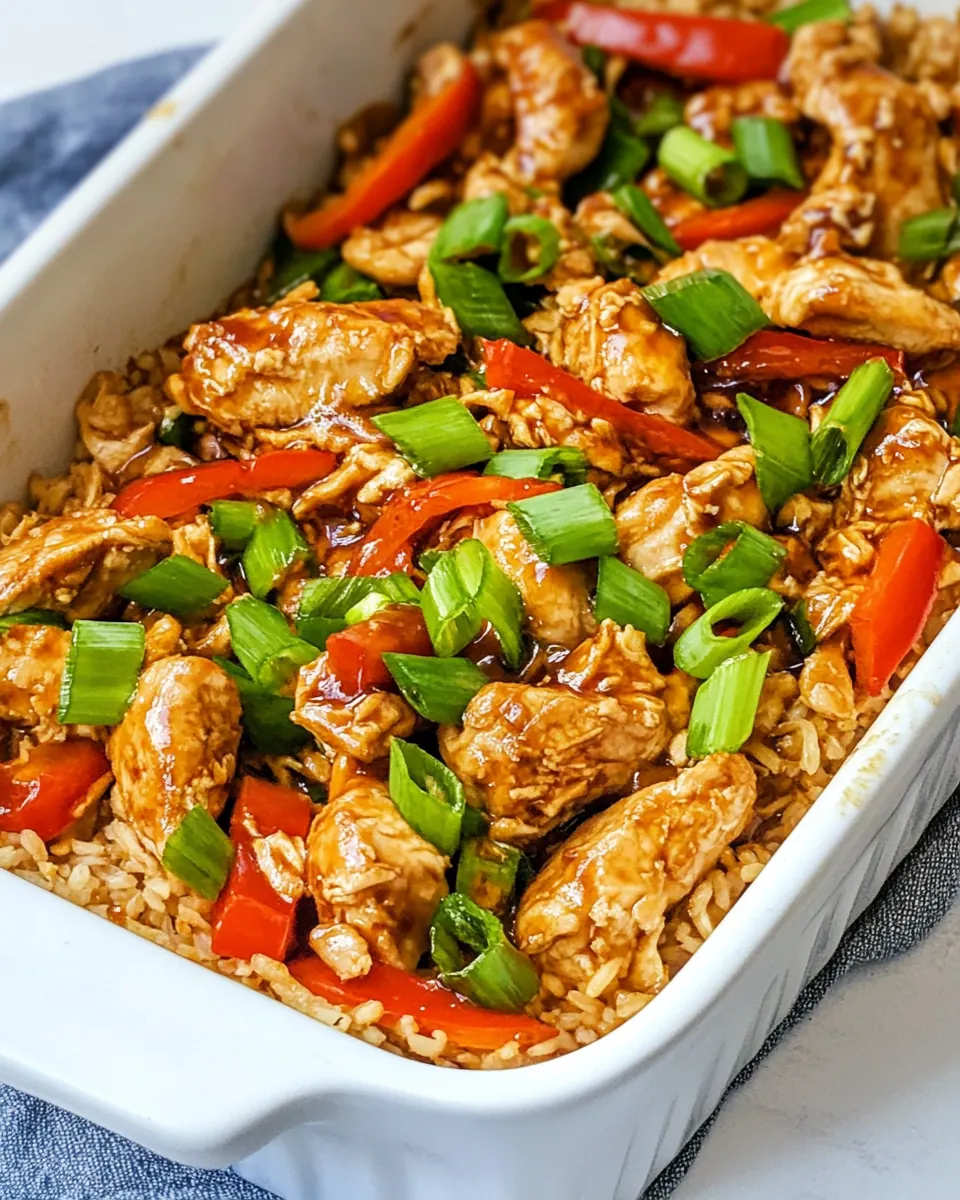
Over the years I’ve tweaked the balance of sauce to rice until it felt just right for our family, not too saucy, yet never dry. I like how the vegetables keep a bright note, and how shredding the chicken and letting it soak up sauce gives the casserole a comforting texture that everyone fights over. When friends ask for something easy to feed a crowd, this is what I make, because it comes together with pantry-friendly items and tastes like I put a lot more effort into it than I actually did. The mix of sticky teriyaki and tender chicken turns plain rice into something joyful.
Recipe Snapshot
45 mins
5 mins
40 mins
Medium
450 kcal
American
Gluten-Free, Low FODMAP
Dinner
9×13 inch baking pan, Aluminum foil, Instant read thermometer
What Makes This Teriyaki Chicken Casserole Special
Flavor that balances sweet and savory
I love how the sweet notes of the teriyaki sauce play against the savory backbone of the chicken, creating a layered taste that feels both familiar and interesting. I find myself adjusting the sauce amount depending on mood, and that flexibility is a big reason this recipe gets repeated in my house.
Effortless weeknight assembly
What makes me come back to Teriyaki Chicken Casserole is the low friction of assembly. You do a little prep, layer your pan, and the oven does most of the work. That ease makes it perfect on evenings when time is short but standards are not.
Family friendly crowd pleaser
When I take this to gatherings, it disappears fast. The familiarity of rice and chicken dressed in a glossy sauce appeals to picky eaters and adventurous ones alike. I like that it scales without complicated changes.
Flexible with ingredients
This casserole adapts well to what I have on hand. If I have extra veggies, I throw them in. If the rice is leftover, it becomes a bonus shortcut. That adaptability is why I always keep a jar of good teriyaki nearby.
Comfort with a question of texture
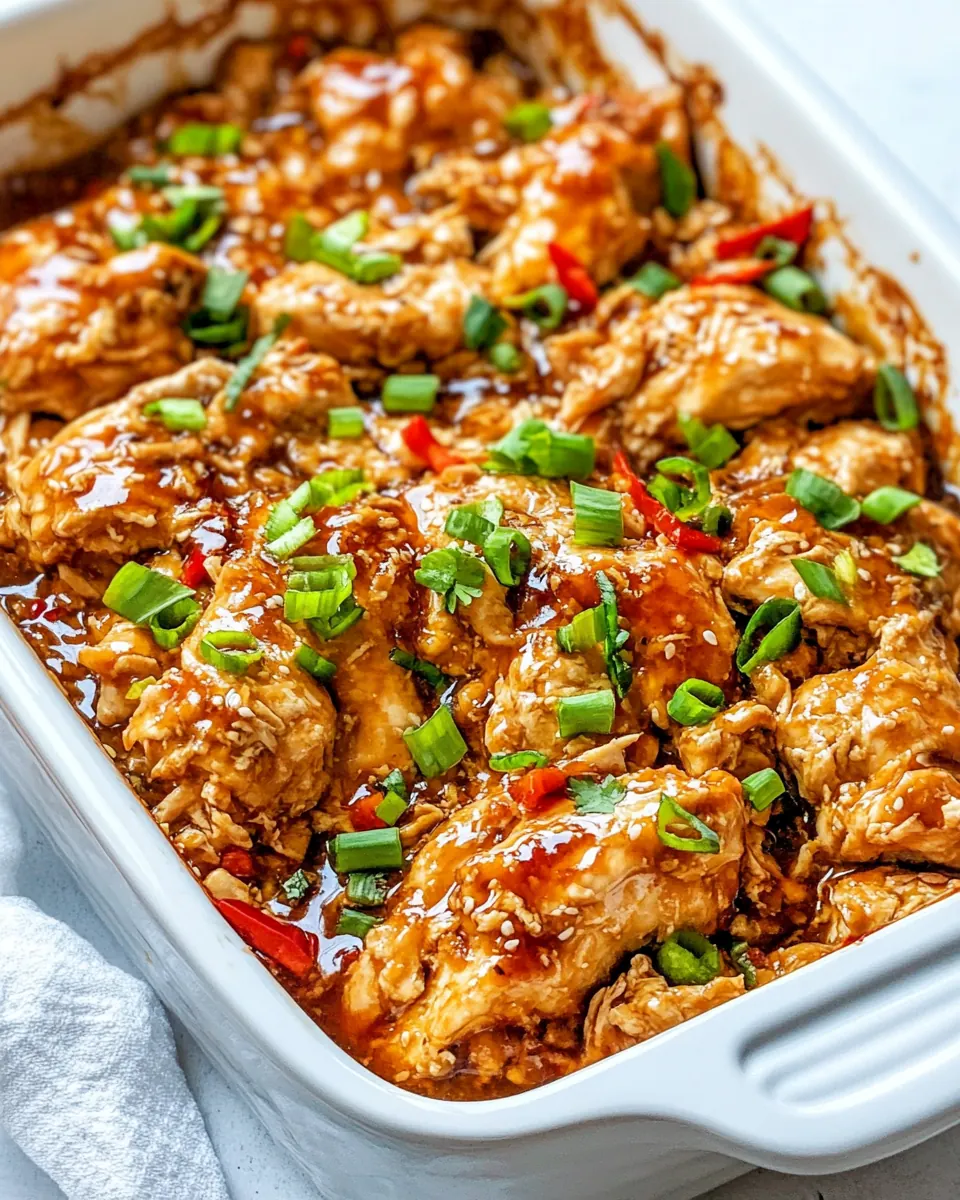
I appreciate the contrast between the tender shredded chicken and the slight bite of stir fry vegetables, which keeps every spoonful interesting. The brief return to the oven at the end melds flavors and warms everything through, which makes all the difference.
What to Buy for Teriyaki Chicken Casserole
These ingredients are deliberately simple and complementary. The casserole relies on three key players: the chicken for protein and bulk, the teriyaki sauce for its glossy, sweet savory character, and the rice as the hearty, neutral base that soaks up flavor. Vegetables add color and texture while small seasonings like salt and pepper and a spray of olive oil help with caramelization and seasoning.
- 1 pound boneless, skinless chicken breasts: Trim and slice into bite-sized pieces to ensure even cooking; provides the primary protein and texture for the casserole. Absorbs teriyaki sauce and browns nicely when seared, contributing savory richness to the dish.
- 12 ounces pre-cut fresh stir-fry vegetables, see notes: Use as-is from the package without chopping for convenience; supplies a mix of crunchy, colorful vegetables that add nutrients and variety. Stir-fry vegetables wilt and meld with sauce during baking, balancing the protein and starch components.
- 1 cup teriyaki sauce, more for top: Pour over the chicken and vegetables to coat them thoroughly; acts as the main seasoning and glazing agent that delivers sweet-salty teriyaki flavor. Adds moisture and caramelizes on top when baked, enhancing color and depth.
- 3 cups cooked rice: Serve as the starchy base for the casserole and distribute the flavors throughout the dish; provides bulk and a neutral backdrop for the saucy mixture. Helps soak up excess sauce so the casserole holds together when served.
- olive oil spray: Lightly coat the pan to prevent sticking and promote even browning; contributes negligible flavor but makes cleanup easier. Creates a nonstick surface so chicken and vegetables can sear before baking without adhering to the dish.
- salt and pepper: Season to taste to enhance overall flavor balance; used sparingly to bring out natural flavors and adjust saltiness. Sprinkle during cooking and before serving to fine-tune the savory profile of the casserole.
How to Assemble Teriyaki Chicken Casserole
This casserole comes together in a few thoughtful stages that let flavors develop while keeping the process relaxed. I like to set up everything in advance, so when it is time to layer and bake, there are no surprises. Follow the sequence and watch for visual cues and aromas to know you are on track.
- Preheat the oven to 400ºF. Spray the bottom of a 9×13" pan with olive oil cooking spray.: As the oven warms, you will notice a faint toasty smell, a sign the heat is ready to transform raw ingredients into cohesive comfort food. Preheating ensures even baking from the start, so the chicken will cook at the right pace without drying. Avoid skipping preheat, because putting the pan into a cold oven changes the timing and can lead to uneven doneness.
- Place the chicken breasts in the middle of the pan. Add the vegetables along the sides. Spray the chicken and vegetables with olive oil. Then sprinkle salt and pepper over top of the chicken and vegetables.: When the chicken hits the pan you may hear a faint sizzle from the oil, which is a good sign. The visual balance of meat centered and vegetables around helps them roast rather than steam. The oil encourages gentle browning and the seasoning builds a base of flavor. A common error is piling vegetables on top of the chicken , which traps steam and prevents browning, so arrange them as instructed.
- Pour 3/4-1 cup teriyaki sauce over chicken and cover pan with foil.: As the sauce wets the surface, you will see it darken and coat the proteins and vegetables, releasing an inviting sweet soy aroma. Covering with foil traps steam which helps the chicken cook through without drying out and lets the sauce penetrate. Too much sauce at this stage can make the dish soggy, so use the recommended range and reserve some for finishing.
- Bake covered with foil for 25 minutes or until chicken is cooked through and no longer pink inside (165 degrees).: While baking you might catch a warm, caramelized fragrance as edges begin to cook. The foil keeps moisture in so the chicken stays tender; checking internal temperature is the most reliable way to confirm doneness. Avoid overbaking, which will dry the meat; testing a piece early is better than waiting too long.
- Remove pan from oven and remove chicken and allow to rest 5 minutes. Stir vegetables and place back in oven for 10 minutes, or until fork tender.: Resting allows juices to redistribute, making shredded chicken moist and flavorful. When you stir the vegetables and return them to the oven, listen for a softer sizzle and look for gently blistered edges, a sign they are caramelizing slightly. A mistake here is shredding immediately without resting, which causes juices to run out and leaves the meat dry.
- Shred chicken and then add back to the pan with the cooked rice. Drizzle an extra 1/4-1/2 cup sauce over top and gently stir to combine. Bake an additional 5 minutes.: The shredded chicken should be moist and pull apart easily, and mixing it with warm rice helps the grains absorb sauce. Drizzling more teriyaki at this stage refreshes the glossy finish and deepens flavor. Stir gently to avoid breaking rice grains; vigorous stirring can make the texture gluey.
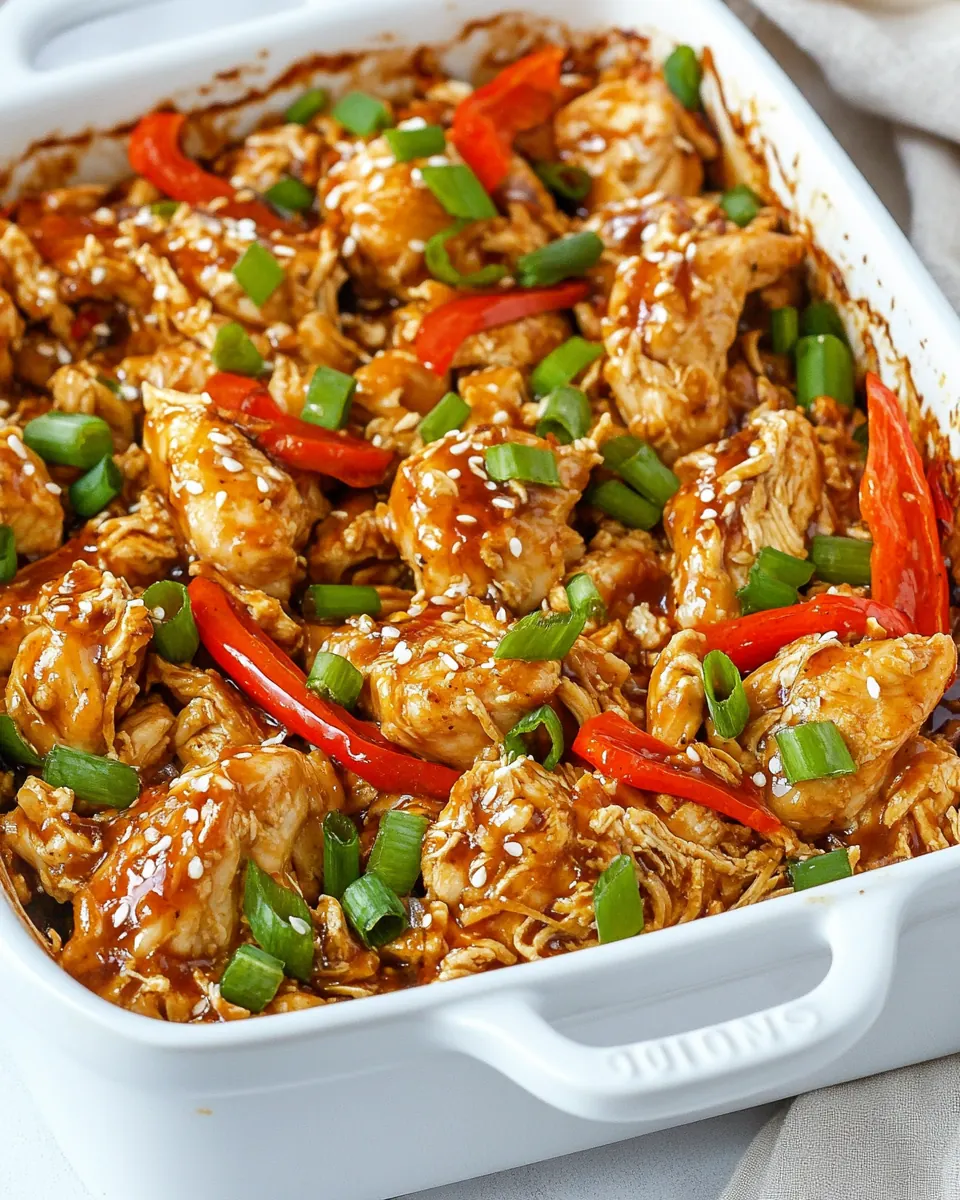
- Dish into bowls and serve with extra teriyaki sauce and sprinkle with sesame seeds and sliced green onions if desired.: Served hot, the casserole emits a sweet soy aroma while the rice steams up, inviting you to dive in. The optional garnishes add visual contrast and a bright finish. Be mindful that adding garnishes too early can wilt them, so add just before serving for the best texture.
Tips for Success
A few focused tips will help you get the best texture and flavor from Teriyaki Chicken Casserole. These practical notes reflect what I have learned from making this dish dozens of times, and they will help you avoid common pitfalls.
- Temperature matters: Ensure your oven is fully preheated to 400ºF so the chicken cooks evenly and the vegetables roast properly.
- Don’t skip the rest: Allow the chicken to rest five minutes after baking, so it retains juices and shreds cleanly, preventing dryness.
- Reserve sauce: Save some teriyaki to drizzle at the end for a shiny finish and a stronger flavor boost without making the casserole soggy.
- Even pieces: Use similar sized chicken breasts so they cook uniformly, avoiding overcooked edges and undercooked centers.
- Rice texture: Use cooked rice that is slightly dry or day old if possible, which helps the casserole stay fluffy rather than mushy.
- Veggie prep: If vegetables look watery, give them a quick roast separately to prevent diluting the sauce in the main pan.
Serving Suggestions
This casserole is versatile on the table and can be dressed up or kept casual depending on the occasion. I like to present it in bowls during a simple family dinner, or in a big dish for potlucks where people can help themselves. Leftovers reheat nicely, making it great for meal prep.
- Family dinner: Serve warm bowls topped with extra teriyaki, sesame seeds, and sliced green onions for a comforting weeknight meal.
- Casual gatherings: Place the casserole in a shallow baking dish on the table with serving spoons, letting guests add extra sauce as they like.
- Meal prep: Portion into airtight containers and refrigerate for up to three days for ready lunches or easy dinners.
- Seasonal pairing: This dish fits all seasons, from bright spring meals to cozy winter dinners, because the flavors are familiar and adaptable.
- Occasions: Works well for lunch, dinner, or anytime you need a hearty, easy to serve option that feeds a small crowd.
- Storage tips: Cool completely before covering, then store in a covered container in the refrigerator for up to three days to preserve texture.
FAQ
Conclusion
This Teriyaki Chicken Casserole stands out because it combines simple pantry ingredients into a flavorful, comforting meal that feels greater than the sum of its parts. Give it a try the next time you need an easy, crowd pleasing dinner that still tastes thoughtfully prepared. It’s forgiving, adaptable, and reliably delicious, so I hope you enjoy making and sharing it as much as I do.
Teriyaki Chicken Casserole
Equipment
- 9x13-inch Baking Pan
- Aluminum Foil
- Instant read thermometer
Ingredients
- 1 pound boneless, skinless chicken breasts Trim and slice into bite-sized pieces to ensure even cooking; provides the primary protein and texture for the casserole. Absorbs teriyaki sauce and browns nicely when seared, contributing savory richness to the dish.
- 12 ounces pre-cut fresh stir-fry vegetables, see notes Use as-is from the package without chopping for convenience; supplies a mix of crunchy, colorful vegetables that add nutrients and variety. Stir-fry vegetables wilt and meld with sauce during baking, balancing the protein and starch components.
- 1 cup teriyaki sauce, more for top Pour over the chicken and vegetables to coat them thoroughly; acts as the main seasoning and glazing agent that delivers sweet-salty teriyaki flavor. Adds moisture and caramelizes on top when baked, enhancing color and depth.
- 3 cups cooked rice Serve as the starchy base for the casserole and distribute the flavors throughout the dish; provides bulk and a neutral backdrop for the saucy mixture. Helps soak up excess sauce so the casserole holds together when served.
- olive oil spray Lightly coat the pan to prevent sticking and promote even browning; contributes negligible flavor but makes cleanup easier. Creates a nonstick surface so chicken and vegetables can sear before baking without adhering to the dish.
- salt and pepper Season to taste to enhance overall flavor balance; used sparingly to bring out natural flavors and adjust saltiness. Sprinkle during cooking and before serving to fine-tune the savory profile of the casserole.
Instructions
- Preheat the oven to 400ºF. Spray the bottom of a 9×13" pan with olive oil cooking spray.: As the oven warms, you will notice a faint toasty smell, a sign the heat is ready to transform raw ingredients into cohesive comfort food. Preheating ensures even baking from the start, so the chicken will cook at the right pace without drying. Avoid skipping preheat, because putting the pan into a cold oven changes the timing and can lead to uneven doneness.
- Place the chicken breasts in the middle of the pan. Add the vegetables along the sides. Spray the chicken and vegetables with olive oil. Then sprinkle salt and pepper over top of the chicken and vegetables.: When the chicken hits the pan you may hear a faint sizzle from the oil, which is a good sign. The visual balance of meat centered and vegetables around helps them roast rather than steam. The oil encourages gentle browning and the seasoning builds a base of flavor. A common error is piling vegetables on top of the chicken , which traps steam and prevents browning, so arrange them as instructed.
- Pour 3/4-1 cup teriyaki sauce over chicken and cover pan with foil.: As the sauce wets the surface, you will see it darken and coat the proteins and vegetables, releasing an inviting sweet soy aroma. Covering with foil traps steam which helps the chicken cook through without drying out and lets the sauce penetrate. Too much sauce at this stage can make the dish soggy, so use the recommended range and reserve some for finishing.
- Bake covered with foil for 25 minutes or until chicken is cooked through and no longer pink inside (165 degrees).: While baking you might catch a warm, caramelized fragrance as edges begin to cook. The foil keeps moisture in so the chicken stays tender; checking internal temperature is the most reliable way to confirm doneness. Avoid overbaking, which will dry the meat; testing a piece early is better than waiting too long.
- Remove pan from oven and remove chicken and allow to rest 5 minutes. Stir vegetables and place back in oven for 10 minutes, or until fork tender.: Resting allows juices to redistribute, making shredded chicken moist and flavorful. When you stir the vegetables and return them to the oven, listen for a softer sizzle and look for gently blistered edges, a sign they are caramelizing slightly. A mistake here is shredding immediately without resting, which causes juices to run out and leaves the meat dry.
- Shred chicken and then add back to the pan with the cooked rice. Drizzle an extra 1/4-1/2 cup sauce over top and gently stir to combine. Bake an additional 5 minutes.: The shredded chicken should be moist and pull apart easily, and mixing it with warm rice helps the grains absorb sauce. Drizzling more teriyaki at this stage refreshes the glossy finish and deepens flavor. Stir gently to avoid breaking rice grains; vigorous stirring can make the texture gluey.
- Dish into bowls and serve with extra teriyaki sauce and sprinkle with sesame seeds and sliced green onions if desired.: Served hot, the casserole emits a sweet soy aroma while the rice steams up, inviting you to dive in. The optional garnishes add visual contrast and a bright finish. Be mindful that adding garnishes too early can wilt them, so add just before serving for the best texture.
Notes
- Temperature matters: Ensure your oven is fully preheated to 400ºF so the chicken cooks evenly and the vegetables roast properly.
- Don’t skip the rest: Allow the chicken to rest five minutes after baking, so it retains juices and shreds cleanly, preventing dryness.
- Reserve sauce: Save some teriyaki to drizzle at the end for a shiny finish and a stronger flavor boost without making the casserole soggy.
- Even pieces: Use similar sized chicken breasts so they cook uniformly, avoiding overcooked edges and undercooked centers.
- Rice texture: Use cooked rice that is slightly dry or day old if possible, which helps the casserole stay fluffy rather than mushy.
- Veggie prep: If vegetables look watery, give them a quick roast separately to prevent diluting the sauce in the main pan.