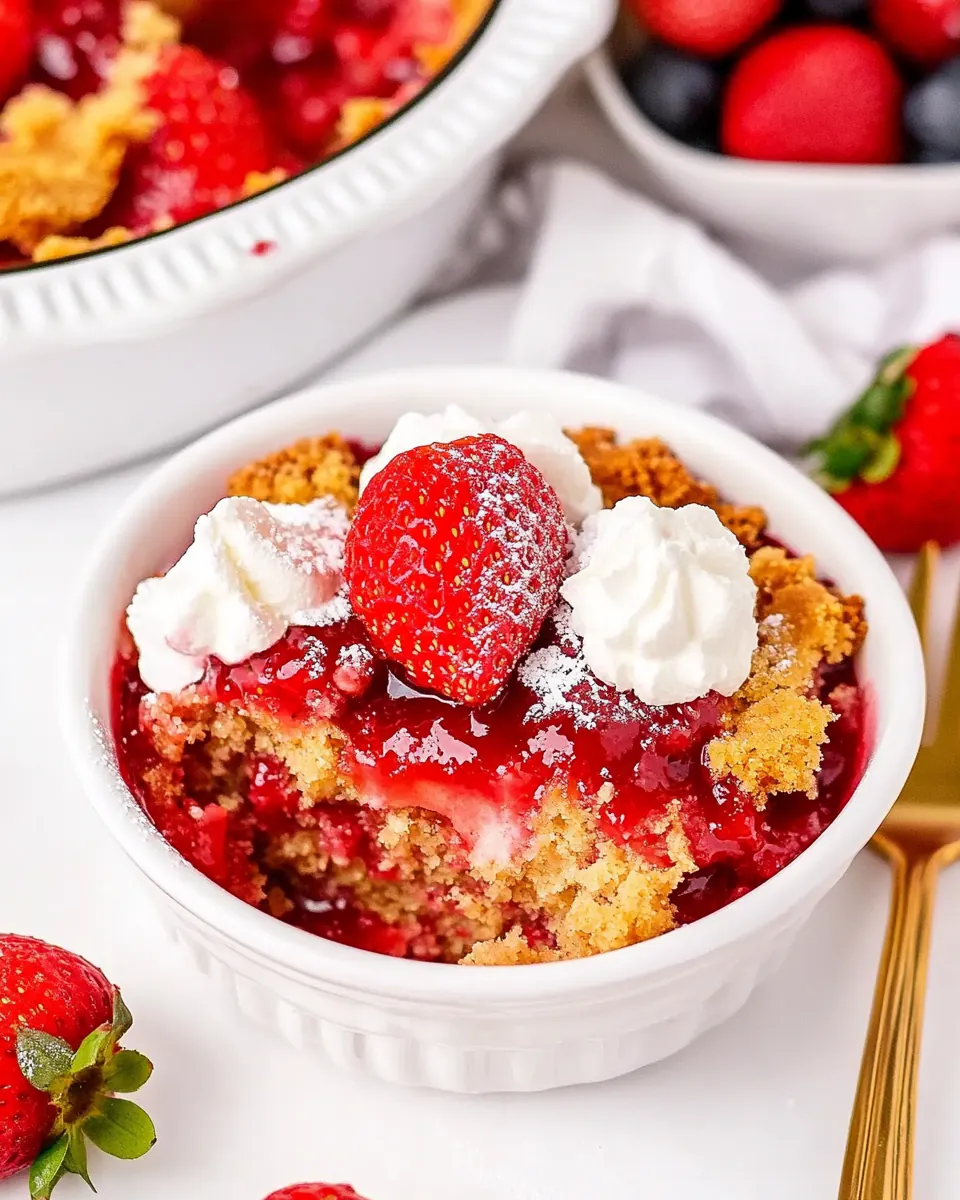
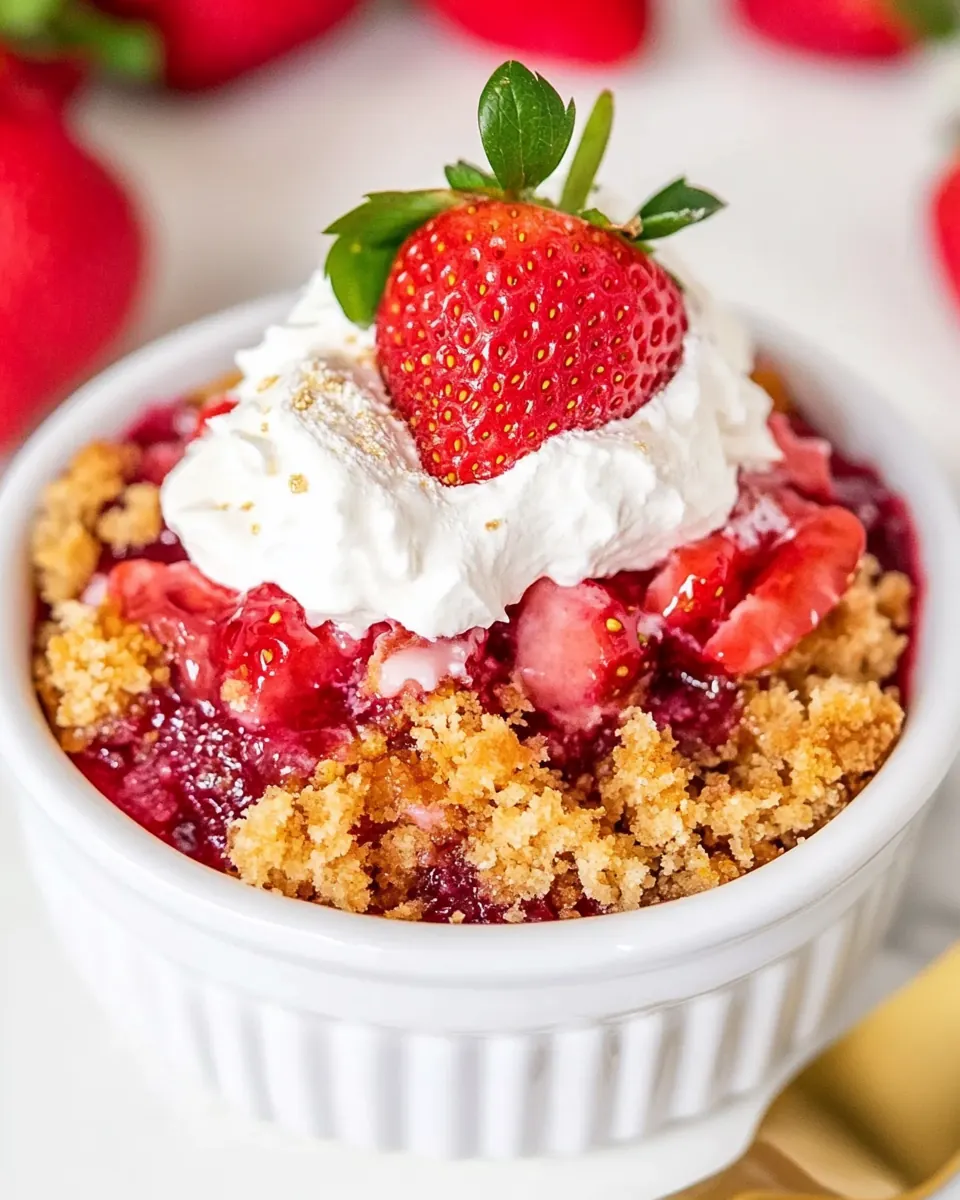
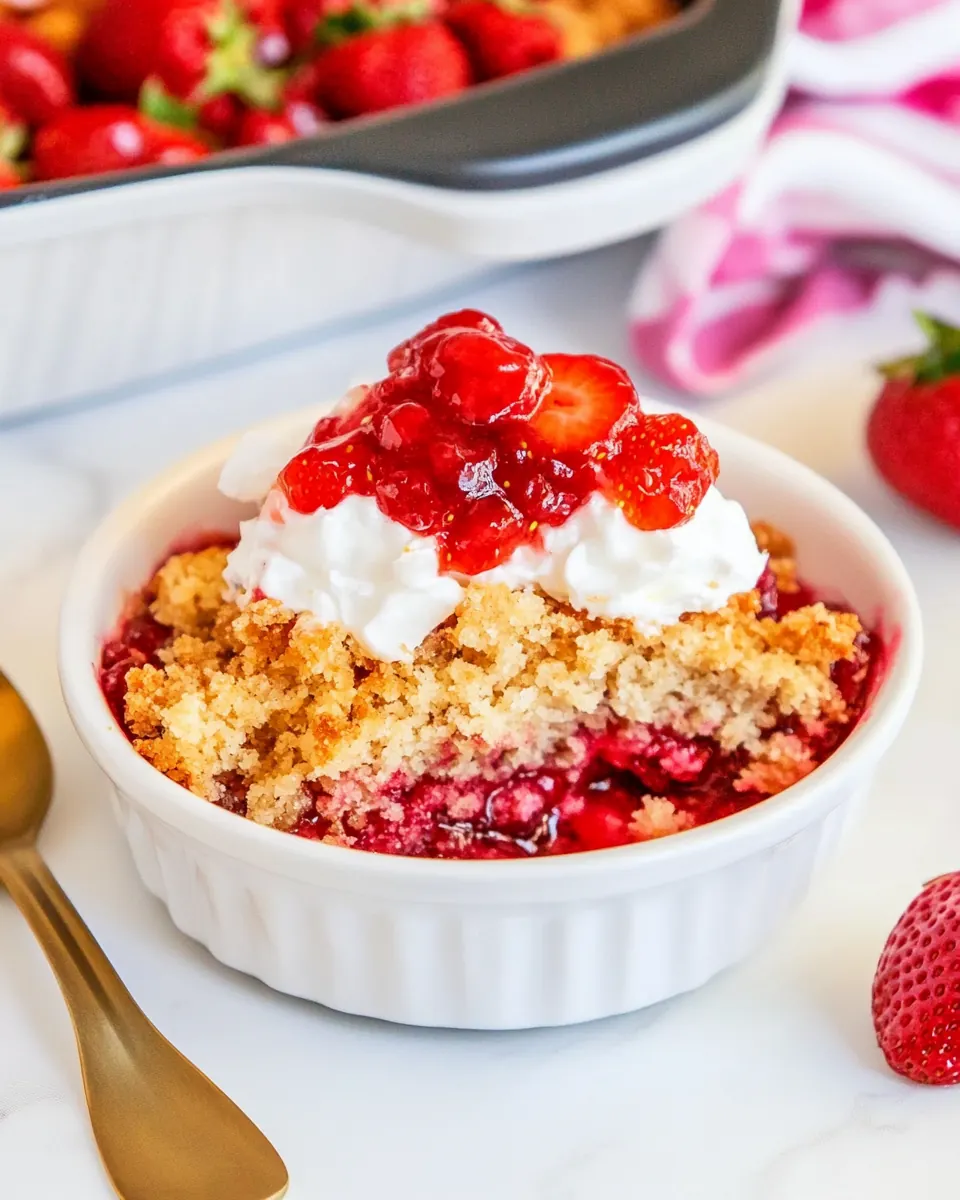
Strawberry Dump Cake
Strawberry Dump Cake has been my go to when I need a dessert that feels celebratory without a lot of fuss. The first time I made it, I was short on time and even shorter on patience, yet the warm, jammy strawberry filling bubbling around a crisp, cakey top convinced everyone on the porch to linger a little longer. I remember the sound of the filling as it started to bubble, and how the kitchen filled with a sweet, bright scent that felt like summer in a bowl.
Since then, I make Strawberry Dump Cake whenever strawberries are abundant or when someone asks for something homey and nostalgic. It is one of those recipes that invites improvisation, yet always turns out comforting. I often think of it as a shortcut to happy memories, the kind of dessert you can pull together while the rest of the meal is finishing, and still have time to sit down and enjoy the first warm spoonful with a friend.
There was one evening when I brought a pan to a potluck and watched strangers go from curious to delighted after the first bite. I love that this recipe balances a simple pantry ingredient with the bright flash of strawberry pie filling. It feels elegant enough for company, and simple enough for a weeknight. Every time I bake it, I tinker slightly, but the core technique stays the same, and it yields reliable results that taste like summer.
Recipe Snapshot
60 mins
5 mins
55 mins
Medium
250 kcal
American
Keto, Gluten-Free
Desserts
9×13 baking pan, Oven, Spatula
Why You Need This Strawberry Dump Cake
Reliable Comfort Food
I love that Strawberry Dump Cake is almost foolproof. With just a few pantry staples, you end up with a dessert that is comforting and crowd pleasing. I say this from experience, having turned out a golden top and bubbling filling even when I was running late. The ease is real, and it makes me reach for this recipe when I want a quick win.
Bold, Bright Flavor
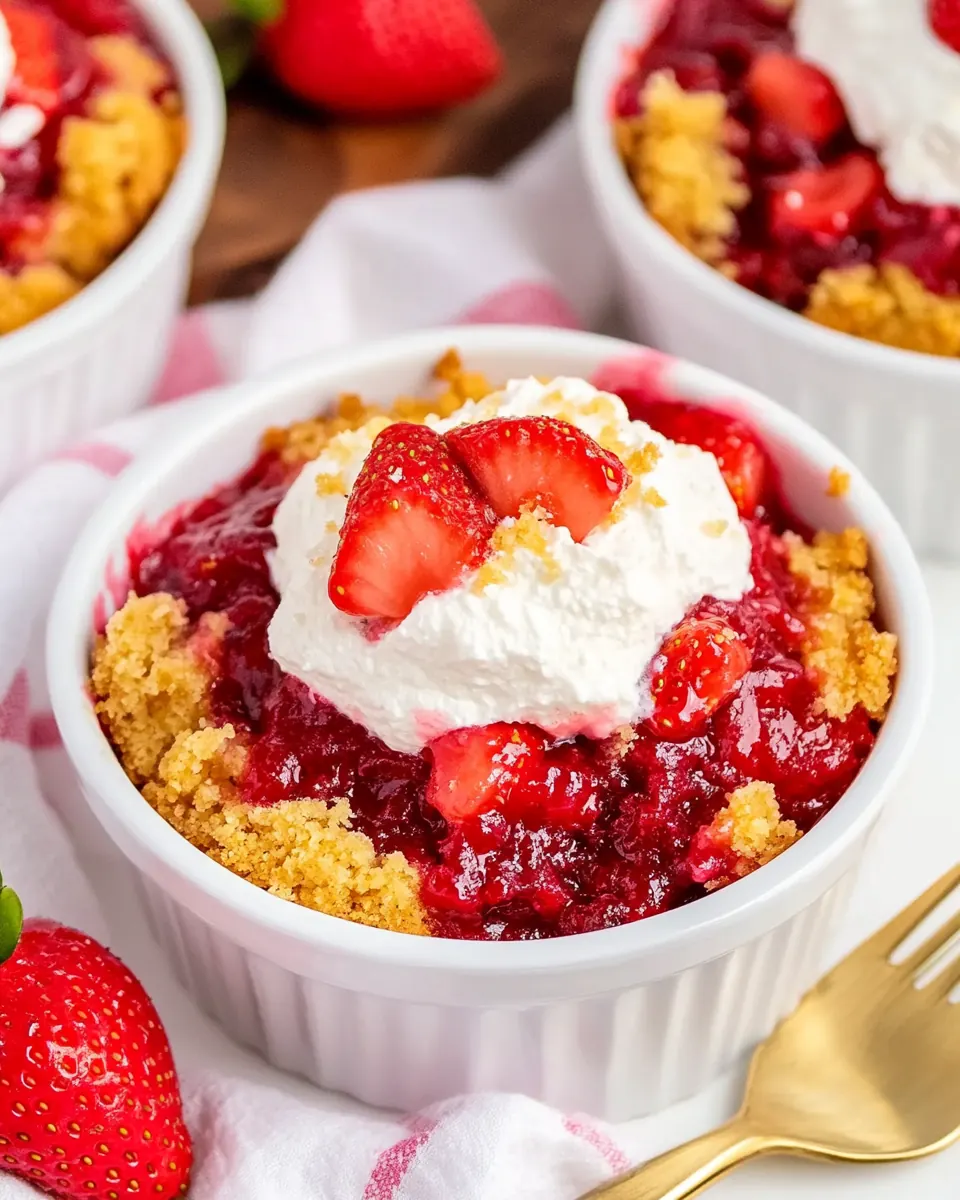
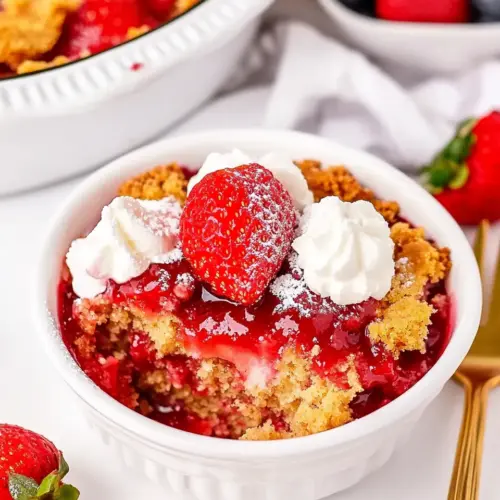
The intense strawberry filling provides a vivid fruity punch that contrasts beautifully with the lightly sweet, cakey topping. I enjoy how the fruit juices concentrate as they bake, producing a syrupy texture under a crisp surface. That contrast between jammy interior and crackly top is why I keep returning to this dessert.
Minimal Equipment and Fuss
I appreciate recipes that do not demand special tools, and Strawberry Dump Cake fits into that category. All you need is a baking pan and basic utensils. The simplicity means I can focus on other parts of a meal without worrying about elaborate technique, and it makes the recipe accessible to cooks of all levels.
Great for Gatherings
This cake scales easily, and it travels well if you need to bring dessert to a gathering. I often take it to summer get togethers because it feeds a crowd and still feels homemade. The vibrant color and bubbling edges make it a centerpiece that invites people to dig in.
Comfort and Versatility
Finally, I love that Strawberry Dump Cake doubles as both an everyday treat and a casual showstopper. You can serve it warm with a spoon, or let it cool and slice it for a potluck. Its forgiving nature lets me relax, and that relaxing vibe is one of the main reasons I make it so often.
What to Buy for Strawberry Dump Cake
I choose ingredients that balance simplicity with reliable results. The list here focuses on a sweet, fruity filling and an easy cakey top that crisps up in the oven. The key players are the strawberry pie filling, which provides bright flavor and syrupy texture, the box cake mix which gives structure and a sweet golden crust, and the butter which browns and helps the dry mix form a crisp surface. Together they create that beloved contrast between jammy fruit and a crunchy top.
- 42 ounces strawberry pie filling (2 21 oz cans is ideal): Provides sweet, fruit-packed filling and syrupy moisture that forms the base of the dump cake; it contributes fruity flavor and a soft, jam-like texture when baked. Canned form ensures consistent sweetness and thick consistency, helping the cake set without additional thickeners. Using two 21-ounce cans yields ample coverage for a 9×13 pan and balances the dry cake mix.
- 1 box vanilla cake mix: Adds structure, sweetness, and a tender crumb when sprinkled over the fruit; cake mix supplies leavening agents and flavor components so the dessert rises and develops a golden crust. Convenience of a boxed mix streamlines preparation and ensures consistent results across batches. Vanilla flavor complements the strawberries and enhances overall sweetness without extra ingredients.
- 1 cup buttermelted: Supplies fat and moisture that melt into the cake mix to create a crisp, buttery topping and tender interior; melted buttermilk (buttermelted) likely functions like melted butter with a slight tang. Incorporating warm melted fat helps the dry mix hydrate evenly and promotes browning on the surface. Pouring it gently over the mix ensures pockets of crispness and tender cake beneath.
Step by Step Instructions for Strawberry Dump Cake
This method is straightforward but benefits from attention to visual and sensory cues. As you assemble, notice how the filling settles and how the butter soaks into the cake mix. The oven does most of the work, but small details matter for a perfectly textured top and a bubbling, jammy center.
- Preheat the oven to 350 degrees and prepare a 9×13 pan with a light coating of cooking spray.: You will smell the faint warmth from the oven as it comes up to temperature, and preparing the pan ensures the finished cake releases easily. Using a light coating of cooking spray prevents sticking while keeping the edges crisp. A common issue is skipping the pan prep, which can cause the dessert to cling and break when serving. Make sure the oven reaches 350 degrees so baking starts consistently.
- Spread the strawberry pie filling evenly across the bottom of the prepared pan.: At this stage you will notice the bright red filling spread into a glossy bed, and the aroma of strawberry will become apparent. Even distribution matters because it ensures each bite has fruit and syrup. If you pile the filling too thick in the center, the edges may bake differently and the center can stay overly saucy. Use a spatula to level the filling to the edges for uniform baking.
- Carefully distribute the cake mix over the strawberries in an even layer.: The dry vanilla cake mix will look powdery at first, and scattering it evenly helps it absorb juices consistently as it bakes. You will see the contrast between the red filling beneath and the pale mix above. Avoid dumping all the mix in one spot because clumps can create under baked pockets; instead, sprinkle it in a grid pattern to get even coverage.
- Pour melted butter over the cake mix, doing your best to evenly cover the cake mix.: As you drizzle the warm butter , it should make a gentle sizzling sound where it meets the dry mix, and you will see it darken slightly as it soaks in. The butter promotes browning and helps form the crisp crust. Pour slowly and aim for even distribution so the topping browns uniformly. Pouring all the butter in one area can cause greasy spots or uneven crust formation.
- Bake in the preheated oven for 50-55 minutes or until the top is golden brown.: You will hear gentle bubbling from the filling as the sugars caramelize, and the top should become a warm golden color with a slightly crackly texture. The smell will be rich and sweet, and steam may escape from the edges. If the top browns too quickly, tent loosely with foil to prevent burning while the interior finishes. A common mistake is under baking, which leaves the cake mix floury and the interior not set.
- Remove from oven and allow to cool for 10 minutes before serving.: Cooling briefly lets the filling settle so it is scoopable rather than runny, and the top firms slightly while still warm. You will notice the aroma mellow and the texture become easier to plate. Cutting or serving immediately can lead to a runny slice, so resist the urge to dive in right away. Ten minutes gives the best balance between warm servings and manageable portions.
Customization Ideas
I like to offer a few ways to personalize Strawberry Dump Cake without complicating the process. Small changes can shift the flavor or texture while keeping the basics intact. Below are practical, easy to follow ideas you can try.
- Boost fruit presence by stirring in a cup of chopped fresh strawberry to the canned filling before spreading, for extra texture and freshness.
- Layering technique involves applying the cake mix in a thinner, more even layer for a lighter, crisper top rather than a dense crust.
- Browned butter flavor comes from gently browning the butter before pouring, adding nutty complexity while still using the same amount of fat.
- Serving warmth is achieved by reheating portions briefly in the oven or microwave just before plating, which refreshes the crisp top and warm filling.
- Make ahead storage suggests you bake and cool completely, then refrigerate covered for up to four days, reheating portions as needed for best texture.
What to Serve With Strawberry Dump Cake
This dessert is versatile and pairs well with simple accompaniments. I usually serve it warm, and a few thoughtful sides elevate the experience. Here are ideas for different occasions and practical serving advice.
- Classic scoop of vanilla ice cream on warm slices offers a cooling contrast and creamy mouthfeel against the jammy strawberry filling and crisp top.
- Light whipped cream dolloped at serving adds airy texture and a mild richness without overpowering the fruit.
- Outdoor gatherings work well because the cake travels easily and feeds a crowd, making it ideal for summer potlucks or picnics.
- Casual dinners where you want a simple dessert to end the meal, this cake keeps the vibe relaxed and homey.
- Storage tip keep leftovers covered after the first day and refrigerate for up to four days to maintain quality, and reheat individual portions to refresh the texture.
- Seasonal pairing favors summer fruit sides or a simple fruit salad to echo the bright strawberry notes and keep the meal light.
FAQ
Conclusion
What makes this recipe special is its perfect mix of jammy strawberry filling and a crunchy, buttery cake topping that feels indulgent yet effortless. I encourage you to try it the next time you want a dessert that delivers big flavor with minimal work. It is forgiving, satisfying, and a lovely way to showcase sweet strawberry notes, whether for a casual family night or a summer gathering. Enjoy the warmth and the smiles it brings.
Strawberry Dump Cake
Equipment
- 9×13 baking pan
- Oven
- Spatula
Ingredients
- 42 ounces strawberry pie filling (2 21 oz cans is ideal) Provides sweet, fruit-packed filling and syrupy moisture that forms the base of the dump cake; it contributes fruity flavor and a soft, jam-like texture when baked. Canned form ensures consistent sweetness and thick consistency, helping the cake set without additional thickeners. Using two 21-ounce cans yields ample coverage for a 9x13 pan and balances the dry cake mix.
- 1 box vanilla cake mix Adds structure, sweetness, and a tender crumb when sprinkled over the fruit; cake mix supplies leavening agents and flavor components so the dessert rises and develops a golden crust. Convenience of a boxed mix streamlines preparation and ensures consistent results across batches. Vanilla flavor complements the strawberries and enhances overall sweetness without extra ingredients.
- 1 cup buttermelted Supplies fat and moisture that melt into the cake mix to create a crisp, buttery topping and tender interior; melted buttermilk (buttermelted) likely functions like melted butter with a slight tang. Incorporating warm melted fat helps the dry mix hydrate evenly and promotes browning on the surface. Pouring it gently over the mix ensures pockets of crispness and tender cake beneath.
Instructions
- Preheat the oven to 350 degrees and prepare a 9×13 pan with a light coating of cooking spray.: You will smell the faint warmth from the oven as it comes up to temperature, and preparing the pan ensures the finished cake releases easily. Using a light coating of cooking spray prevents sticking while keeping the edges crisp. A common issue is skipping the pan prep, which can cause the dessert to cling and break when serving. Make sure the oven reaches 350 degrees so baking starts consistently.
- Spread the strawberry pie filling evenly across the bottom of the prepared pan.: At this stage you will notice the bright red filling spread into a glossy bed, and the aroma of strawberry will become apparent. Even distribution matters because it ensures each bite has fruit and syrup. If you pile the filling too thick in the center, the edges may bake differently and the center can stay overly saucy. Use a spatula to level the filling to the edges for uniform baking.
- Carefully distribute the cake mix over the strawberries in an even layer.: The dry vanilla cake mix will look powdery at first, and scattering it evenly helps it absorb juices consistently as it bakes. You will see the contrast between the red filling beneath and the pale mix above. Avoid dumping all the mix in one spot because clumps can create under baked pockets; instead, sprinkle it in a grid pattern to get even coverage.
- Pour melted butter over the cake mix, doing your best to evenly cover the cake mix.: As you drizzle the warm butter , it should make a gentle sizzling sound where it meets the dry mix, and you will see it darken slightly as it soaks in. The butter promotes browning and helps form the crisp crust. Pour slowly and aim for even distribution so the topping browns uniformly. Pouring all the butter in one area can cause greasy spots or uneven crust formation.
- Bake in the preheated oven for 50-55 minutes or until the top is golden brown.: You will hear gentle bubbling from the filling as the sugars caramelize, and the top should become a warm golden color with a slightly crackly texture. The smell will be rich and sweet, and steam may escape from the edges. If the top browns too quickly, tent loosely with foil to prevent burning while the interior finishes. A common mistake is under baking, which leaves the cake mix floury and the interior not set.
- Remove from oven and allow to cool for 10 minutes before serving.: Cooling briefly lets the filling settle so it is scoopable rather than runny, and the top firms slightly while still warm. You will notice the aroma mellow and the texture become easier to plate. Cutting or serving immediately can lead to a runny slice, so resist the urge to dive in right away. Ten minutes gives the best balance between warm servings and manageable portions.
Notes
- Boost fruit presence by stirring in a cup of chopped fresh strawberry to the canned filling before spreading, for extra texture and freshness.
- Layering technique involves applying the cake mix in a thinner, more even layer for a lighter, crisper top rather than a dense crust.
- Browned butter flavor comes from gently browning the butter before pouring, adding nutty complexity while still using the same amount of fat.
- Serving warmth is achieved by reheating portions briefly in the oven or microwave just before plating, which refreshes the crisp top and warm filling.
- Make ahead storage suggests you bake and cool completely, then refrigerate covered for up to four days, reheating portions as needed for best texture.