Sticky Toffee Pudding
Sticky Toffee Pudding has always been my dessert of choice when I want something deeply comforting and slightly nostalgic. The first time I made it, I remember the kitchen filling with the rich scent of caramel and warm dates, and I felt like I had folded a little British teatime tradition into my own weeknight routine.
Over the years I have learned to tune the sauce to my taste, sometimes making it a touch silkier, other times letting it reach a deeper amber to bring out a toffee bite. Each time I serve Sticky Toffee Pudding it becomes a small celebration, with friends asking for a second spoonful of sauce and that slow smile that comes after the first warm bite.
Recipe Snapshot
1 hr 30 mins
60 mins
30 mins
Medium
450 kcal
British
Gluten-Free, Low FODMAP
Desserts
Medium saucepan, Small saucepan, Food processor, Ramekins, Baking sheet, Sieve
What Sets This Sticky Toffee Pudding Apart
Deep caramel richness
I love how Sticky Toffee Pudding balances a deep, buttery caramel sauce with the mellow sweetness of dates. The sauce is cooked long enough to develop a complex flavor, and that long simmer brings both color and a toffee like depth that makes every forkful memorable.
Comforting texture contrast
The cakes themselves are moist and tender because of the date puree, while the toffee sauce adds a glossy, slightly sticky top note. I enjoy that contrast, it feels both homely and a little indulgent, like a warm blanket with a satin edge.
Make ahead friendly
I often prepare the components ahead, chilling the cakes and warming the sauce just before serving. That flexibility makes this dessert great for hosting, because you can focus on your guests instead of heating pans at the last minute.
Simple pantry ingredients
This recipe leans on familiar items like flour, sugar, and butter, with dates as the star. I love how accessible it is, no obscure items needed, yet the result feels special enough for company.
Playful finishing touches
Finally, the way the warm sauce melds with a scoop of whipped cream is pure joy. I often spoon extra sauce over the plate so every bite is saucy and warm, and that small detail always gets compliments.
Ingredients Required for Sticky Toffee Pudding
These ingredients are chosen for balance and texture. The dates bring natural sweetness and moisture, while the combination of butter and sugars creates a rich toffee profile. The small amount of baking powder and baking soda give lift without drying the cake. Together they form a pudding that is tender, deeply flavored, and perfect with warm sauce.
- 21/2 cups heavy whipping cream: Whip to create a rich, velvety cream for serving alongside or drizzling over the pudding; can be lightly sweetened and whipped to soft peaks to contrast the dense cake texture.
- 1/2 cups salted butter: Melt to add richness and moisture to the batter and to enrich the toffee sauce; contributes a silky mouthfeel and helps carry flavors throughout the dessert.
- 1/2 cup light corn syrup: Stir into the toffee sauce to add body and prevent crystallization; provides a glossy, sweet texture that helps bind the sauce to the pudding.
- 1 cup sugar: Dissolve into the toffee sauce and batter to sweeten and caramelize during cooking; influences browning and enhances overall sweetness and mouthfeel.
- 6 ounces dates pitted (about 7 dates): Soak and blend to impart deep, caramel-like fruitiness and natural sweetness to the pudding; rehydrating in hot liquid helps create a soft, flavorful crumb.
- 3/4 cup water: Simmer to rehydrate the dates and form the liquid base for the sticky sauce; extracts flavor and softens the fruit for easy blending into the batter.
- 3/4 cup all-purpose flour (plus 3 tbsp): Sift and fold into the batter to provide structure and bulk for the cake; a small extra amount is reserved to adjust thickness or dust pan surfaces as needed.
- 1 teaspoon baking powder: Leaven to lighten the cake by releasing gases during baking; works with baking soda and egg to create a tender, airy crumb.
- 1/4 teaspoon baking soda: React with acidic components to create additional lift and tenderize the cake; helps neutralize acidity and contributes to a balanced rise.
- pinch salt: Season lightly to enhance and balance sweetness; a pinch elevates flavors without being detectable as a distinct taste.
- 4 tablespoons unsalted butter softened: Soften and cream into the batter to add richness, moisture, and a tender crumb; works with sugars to aerate the mixture and contribute to texture.
- 3/4 cup brown sugar: Melt and caramelize into the batter and sauce to add deep molasses flavor and moistness; contributes color, chewiness, and complex sweetness.
- 1 egg: Bind the batter and provide structure while adding moisture and richness; also aids in emulsifying fats for a uniform texture.
- 1/2 teaspoon vanilla extract: Flavor to add a warm, aromatic note that enhances the pudding and toffee sauce; a small amount brightens the dessert and complements the caramelized sugars.
Making This Sticky Toffee Pudding
I like to approach the cooking in stages so the toffee sauce and cakes both get the attention they deserve. Start by building the sauce, then soften the dates and finish by baking and assembling the puddings so every ramekin ends up glossy and warm when served.
- Make toffee sauce by combining 1/4 cups cream, butter, corn syrup, and sugar in a medium saucepan. Bring to a boil. Making sure to stir frequently, cook mixture until it becomes a deep amber color (35-40 minutes).: The first moments of cooking the sauce are filled with the smell of caramelizing sugar , and you will notice the color slowly shift to a warm amber, releasing a nutty aroma. As it simmers, bubbles will change from fast and frothy to slower and thicker, a key visual cue that the sugars are concentrating. Stirring frequently prevents hot spots and reduces the risk of burning, which would impart a bitter taste. If the mixture smells acrid, it is overheating, so lower the heat and stir more. Patience here matters because this deep cook builds the complex toffee notes that make the final dessert sing.
- Whisk in remaining heavy cream and then strain the sauce through a sieve into a glass bowl.: When you add the remaining heavy whipping cream , the sauce will hiss and steam briefly, and the texture will instantly become silkier, with the fat rounding out the caramel edges. Straining removes any tiny crystallized bits or stray solids, ensuring a smooth, glossy finish. The syrup should pour slowly and coat the back of a spoon. If you see gritty particles, they can create an unpleasant mouthfeel, so the sieve step is crucial. Cool slightly to thicken before using, but keep it warm enough to be pourable when serving.
- In another small saucepan, simmer dates in water on low heat for about 15 minutes (the dates should be soft). Once done, add the dates and excess liquid to a food processor and puree until smooth.: As the dates simmer, the kitchen fills with a rich, fruity aroma and the fruit softens into a jam like consistency. The leftover poaching liquid captures concentrated flavor, so include some of it in the food processor to reach a velvety puree. The texture should be completely smooth without large fibrous bits. If the puree is too thick, add a tablespoon of the poaching liquid to loosen it. A common mistake is undercooking the dates , which leaves grit; make sure they are very soft before processing.
- Preheat oven to 350°F. Butter 6 ramekins and set aside.: Preheating creates an even oven environment, and greasing the ramekins ensures the cakes will release cleanly after baking. You should feel a warm wave of heat when you open the oven, and the racks should be centered for even browning. Use room temperature butter rubbed into the ramekins so the batter clings well during baking. If you skip greasing, the cakes can stick and tear when removed, spoiling the layered presentation.
- Whisk flour, baking powder, baking soda, and salt in a small bowl. Set aside.: Sifting or whisking these dry ingredients together creates an even distribution of leavening, which leads to consistent rise and texture. When combined, the mixture should look uniform with no clumps, and you may notice a faint bready scent. This step prevents pockets of baking soda or powder that can cause uneven spots in the cake. If you see lumps, break them up thoroughly to avoid dense bites in the finished pudding.
- In another bowl beat the butter and brown sugar together until light and fluffy. Add egg and vanilla, followed by the date puree. Add dry ingredients and beat until smooth.: Creaming butter and brown sugar aerates the batter and gives lift, producing a softer crumb. You will see the mixture lighten in color and become creamy. Adding the egg and vanilla extract brings structure and aroma, then the date puree folds in moisture and depth. Incorporating the dry ingredients should be done gently to avoid overmixing, which can make cakes tough. If the batter feels overly dense, check that your butter was soft enough at the start.
- Spoon batter into ramekins making sure to smooth the tops. Bake for 20 minutes or until centers come out clean when a toothpick is inserted. Let cool for 10 minutes.: As the puddings bake, the aroma will turn warmly spiced and caramel like, and the tops will set with gentle springiness. A clean toothpick indicates the crumb is cooked but still moist. Allowing the cakes to rest for 10 minutes stabilizes them so they are easier to handle when trimming. Cutting too soon can cause the cakes to crumble, so give them that brief cooling period to firm up.
- Trim tops of the cake to be level with the tops of the ramekins. Remove cakes and then cut in half horizontally.: Trimming evens the surface so the layering fits neatly back into the ramekin. When you remove the cakes, they will release with a soft sigh and show a tender interior flecked with dates . Cutting horizontally creates two thin layers that soak up sauce more effectively, making each bite succulent. Use a serrated knife in a sawing motion to avoid tearing. If you press too hard, the cake can compress and lose its airy texture.
- Clean out ramekins and spoon 1 tablespoon of toffee sauce into the bottom of each ramekin. Layer bottoms of cakes back in the ramekins, followed by another tablespoon of toffee sauce and then the top piece of cake. Add another tablespoon of toffee sauce and spread evenly.: The first spoonful of sauce creates a warm base that soaks into the bottom layer and adds moisture from below. Building the layers this way ensures the pudding is rich throughout, not just on top. The sauce should look glossy and slightly runny so it penetrates the sponge. If the sauce is too cool and thick, warm it slightly to make layering easier. Avoid overfilling, which can make the cakes soggy rather than luxuriously moist.
- Place ramekins on a baking sheet and bake for 10 minutes.: This short bake reheats the assembled cakes and helps the sauce meld into the sponge, producing a shiny surface and an intimate mingling of flavors. You will hear a gentle bubbling and see the sauce thicken at the edges, another useful visual cue. Keep an eye on them so they do not overbake and dry out. If the tops brown too quickly, tent with foil for the remaining time.
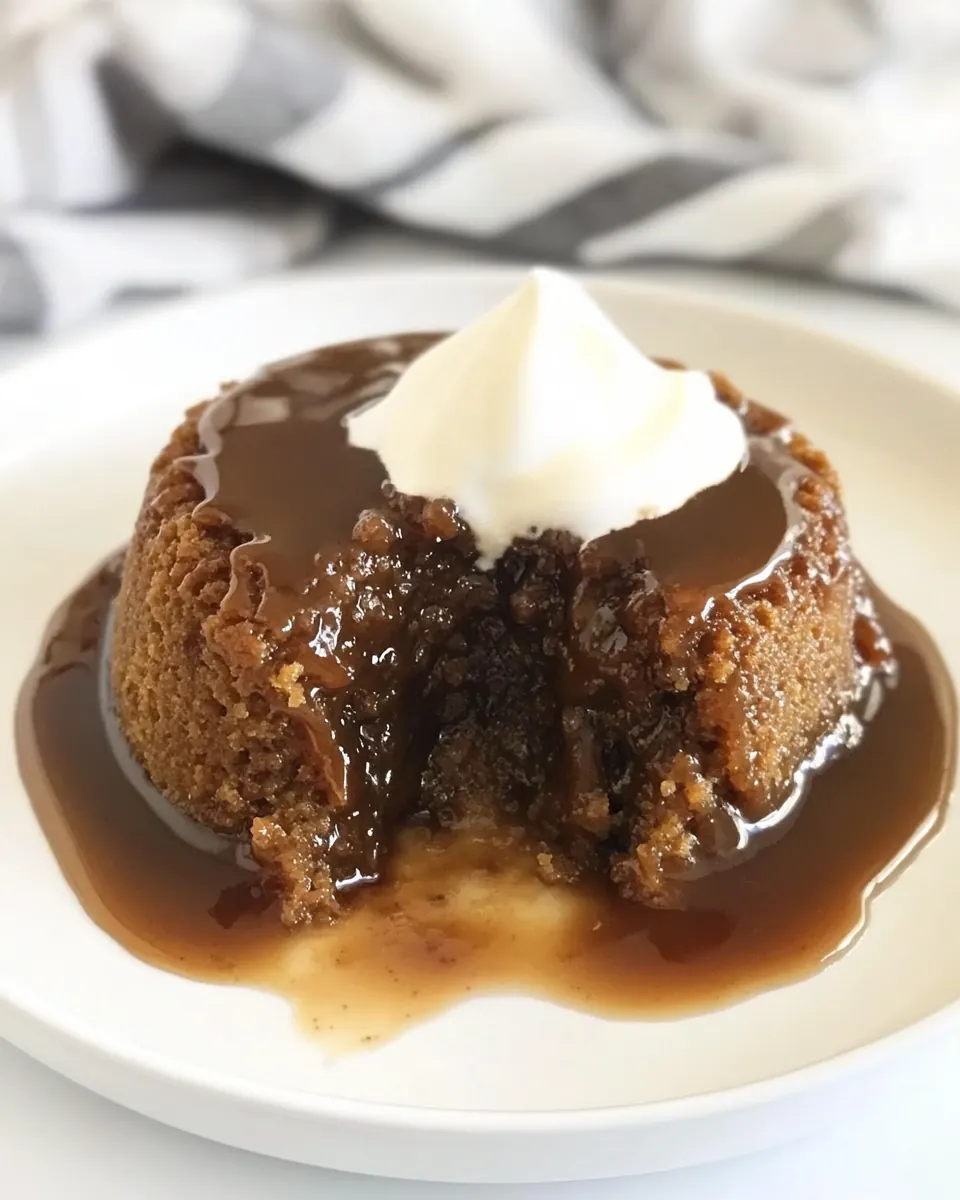
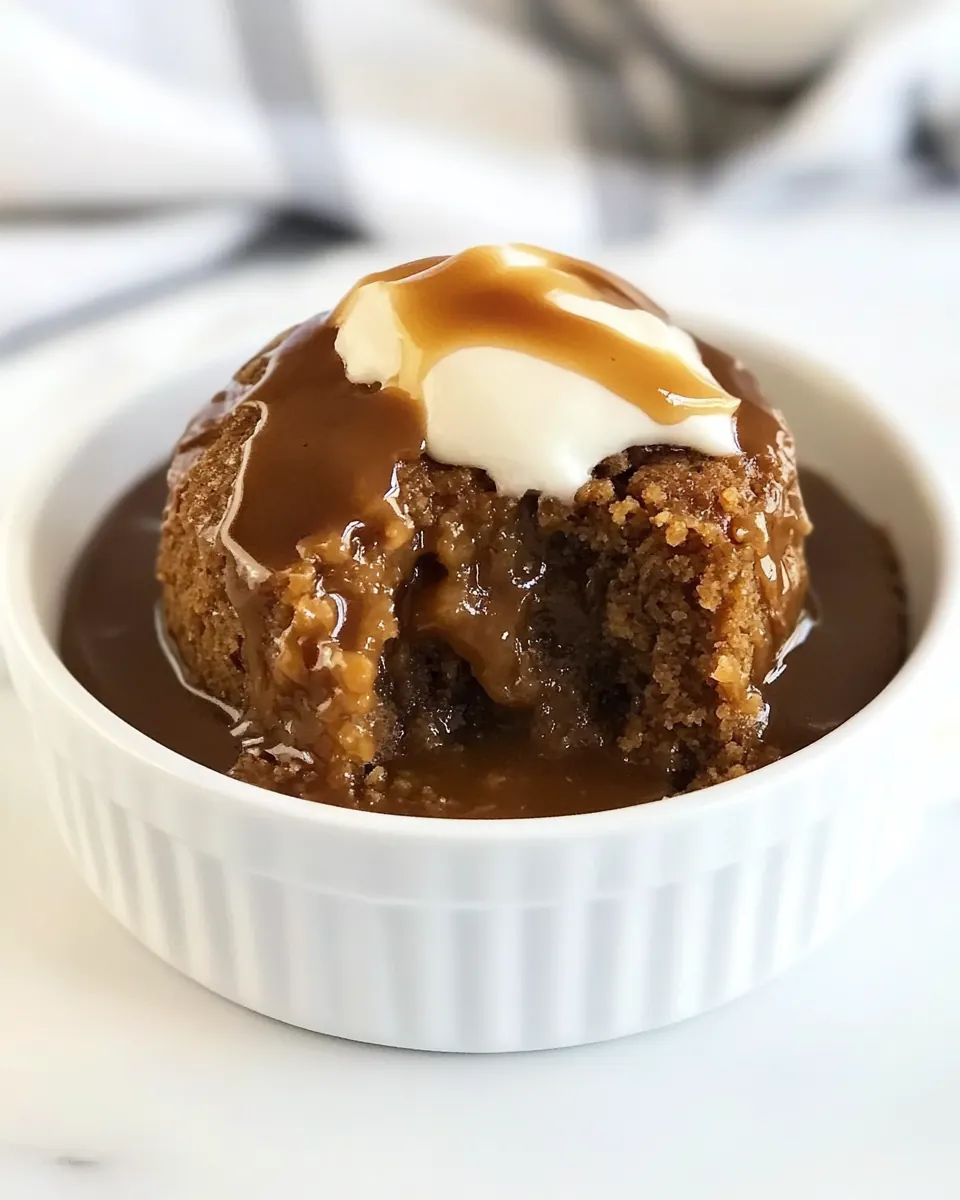
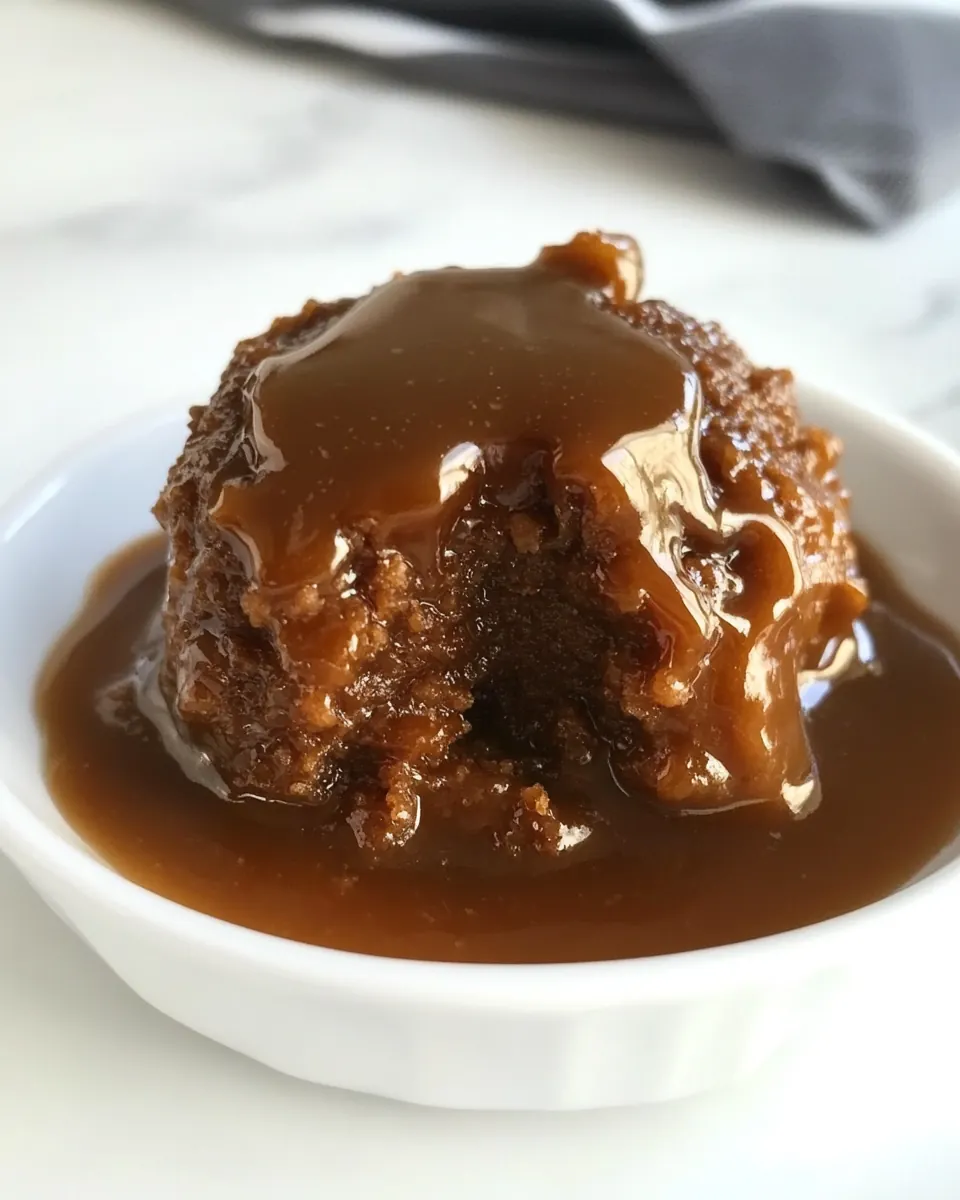
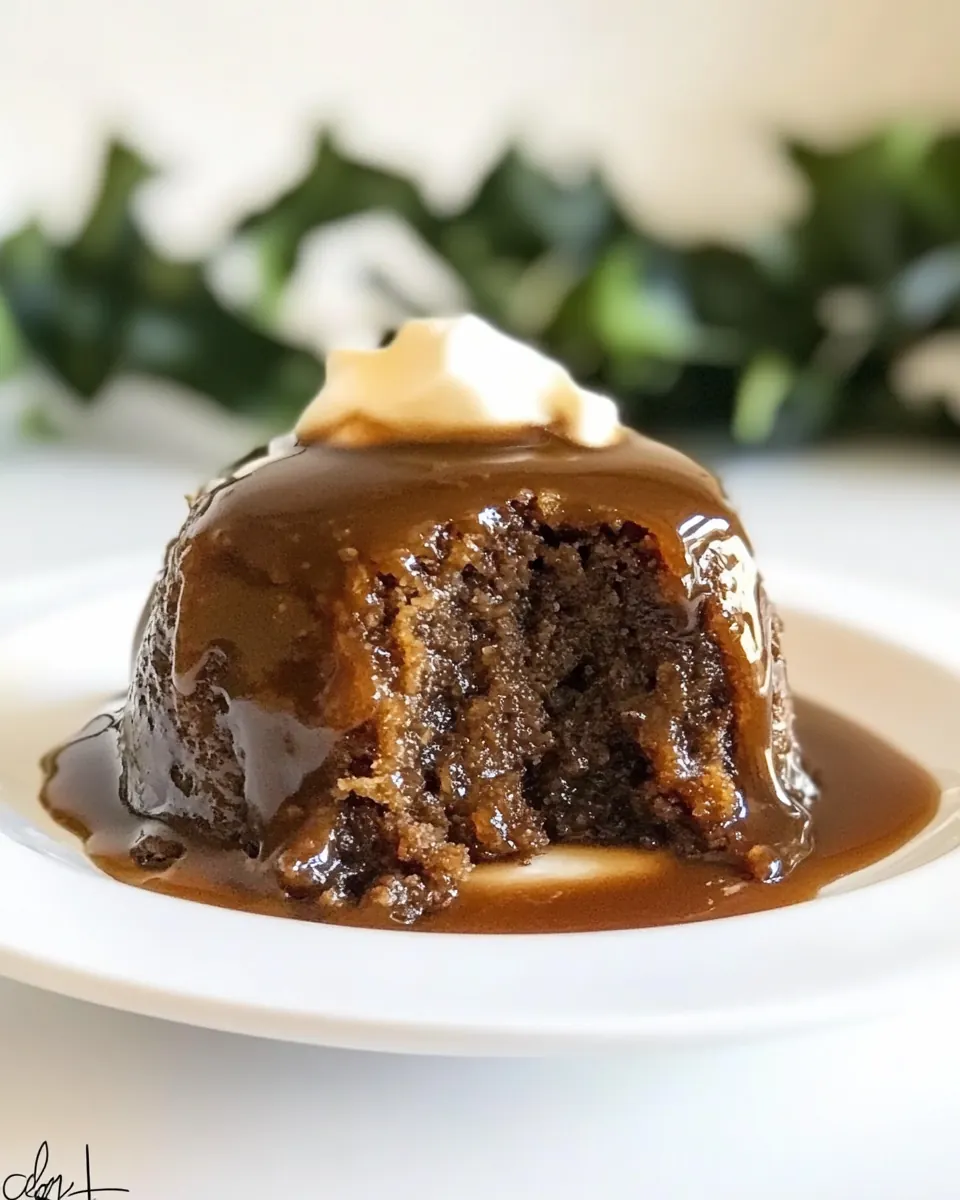
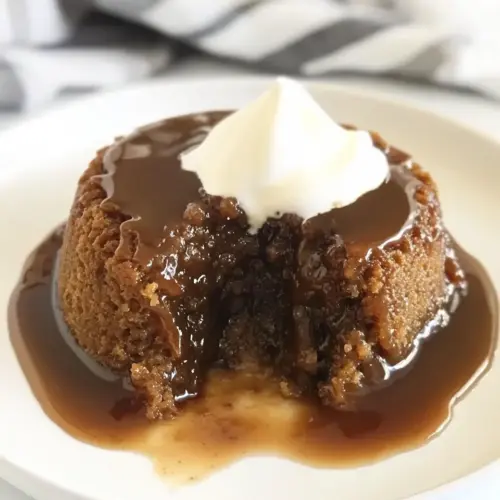
- Let cool slightly, then remove cakes from ramekins making sure to flip the cake onto the dessert plate. Top with warmed toffee sauce and whipped cream.: When you invert the ramekins, the cakes should slide out with a soft plop and reveal the glossy sauce seeping into the sponge. The final flourish is pouring extra warm sauce and a cloud of whipped cream to balance warmth and coolness. Serve immediately while the sauce is warm; if it cools and firms, reheat briefly to restore that luscious pourable quality. Serving cold will mask the sauce's aroma and texture.
Helpful Hints
I like to collect a handful of practical tips that make the process smoother and the result more consistent. Below are expanded pointers based on my experience with this recipe, each with a focused reason and what to watch out for.
- Warm your ramekins: Warming the ramekins slightly before assembling helps keep the sauce fluid and encourages even absorption into the sponge when baking the final time.
- Softened butter matters: If your butter is too cold, the creaming will be uneven and the batter might be dense, so leave it at room temperature until it is yielding but not greasy.
- Watch the sauce carefully: The toffee sauce can go from perfect to bitter quickly, so use moderate heat and stir often to maintain control over color and flavor.
- Use a fine sieve: Straining the sauce ensures it has a satin texture without any grainy particles, which makes the final presentation more elegant.
- Include poaching liquid: When pureeing the dates, add a bit of the cooking liquid for a smoother consistency and extra flavor extraction.
What to Serve With Sticky Toffee Pudding
This pudding is decadent, so pairing it with complementary elements elevates the experience. Think of contrasts that highlight warmth and richness, and remember the goal is balance on the plate.
- Whipped cream or clotted cream: A dollop of softly whipped cream cools the palate and adds airy texture against the warm toffee sauce.
- Ice cream: Vanilla ice cream provides a creamy, cold counterpoint that amplifies the sauce and softens the sweetness for those who prefer contrast.
- Fresh fruit accompaniment: Bright berries or a few slices of pear can cut through the richness and add a refreshing bite to each forkful.
- Serving occasions: This dessert is ideal for winter dinners, holiday gatherings, or a cozy weekend treat where you want something special but not fussy.
- Storage tips: Store leftovers in an airtight container in the fridge for up to two days; reheat gently in the microwave for 30 to 60 seconds so the sauce loosens again.
- Seasonal pairings: In colder months serve with spiced tea or coffee; for a lighter finish in late winter offer small citrus segments to refresh the palate.
FAQ
Conclusion
Sticky Toffee Pudding stands out because of its combination of moist, date studded cake and a deeply flavored, silky toffee sauce. Give it a try when you want a dessert that feels both special and reassuring, something that comforts without fuss. Share it warm with friends or savor a quiet moment with a spoon, and let the rich sauce and tender crumb do the talking.
Sticky Toffee Pudding
Equipment
- Medium Saucepan
- Small Saucepan
- Food Processor
- Ramekins
- Baking Sheet
- Sieve
Ingredients
- 21/2 cups heavy whipping cream Whip to create a rich, velvety cream for serving alongside or drizzling over the pudding; can be lightly sweetened and whipped to soft peaks to contrast the dense cake texture.
- 1/2 cups salted butter Melt to add richness and moisture to the batter and to enrich the toffee sauce; contributes a silky mouthfeel and helps carry flavors throughout the dessert.
- 1/2 cup light corn syrup Stir into the toffee sauce to add body and prevent crystallization; provides a glossy, sweet texture that helps bind the sauce to the pudding.
- 1 cup sugar Dissolve into the toffee sauce and batter to sweeten and caramelize during cooking; influences browning and enhances overall sweetness and mouthfeel.
- 6 ounces dates pitted (about 7 dates) Soak and blend to impart deep, caramel-like fruitiness and natural sweetness to the pudding; rehydrating in hot liquid helps create a soft, flavorful crumb.
- 3/4 cup water Simmer to rehydrate the dates and form the liquid base for the sticky sauce; extracts flavor and softens the fruit for easy blending into the batter.
- 3/4 cup all-purpose flour (plus 3 tbsp) Sift and fold into the batter to provide structure and bulk for the cake; a small extra amount is reserved to adjust thickness or dust pan surfaces as needed.
- 1 teaspoon baking powder Leaven to lighten the cake by releasing gases during baking; works with baking soda and egg to create a tender, airy crumb.
- 1/4 teaspoon baking soda React with acidic components to create additional lift and tenderize the cake; helps neutralize acidity and contributes to a balanced rise.
- pinch salt Season lightly to enhance and balance sweetness; a pinch elevates flavors without being detectable as a distinct taste.
- 4 tablespoons unsalted butter softened Soften and cream into the batter to add richness, moisture, and a tender crumb; works with sugars to aerate the mixture and contribute to texture.
- 3/4 cup brown sugar Melt and caramelize into the batter and sauce to add deep molasses flavor and moistness; contributes color, chewiness, and complex sweetness.
- 1 egg Bind the batter and provide structure while adding moisture and richness; also aids in emulsifying fats for a uniform texture.
- 1/2 teaspoon vanilla extract Flavor to add a warm, aromatic note that enhances the pudding and toffee sauce; a small amount brightens the dessert and complements the caramelized sugars.
Instructions
- Make toffee sauce by combining 1/4 cups cream, butter, corn syrup, and sugar in a medium saucepan. Bring to a boil. Making sure to stir frequently, cook mixture until it becomes a deep amber color (35-40 minutes).: The first moments of cooking the sauce are filled with the smell of caramelizing sugar , and you will notice the color slowly shift to a warm amber, releasing a nutty aroma. As it simmers, bubbles will change from fast and frothy to slower and thicker, a key visual cue that the sugars are concentrating. Stirring frequently prevents hot spots and reduces the risk of burning, which would impart a bitter taste. If the mixture smells acrid, it is overheating, so lower the heat and stir more. Patience here matters because this deep cook builds the complex toffee notes that make the final dessert sing.
- Whisk in remaining heavy cream and then strain the sauce through a sieve into a glass bowl.: When you add the remaining heavy whipping cream , the sauce will hiss and steam briefly, and the texture will instantly become silkier, with the fat rounding out the caramel edges. Straining removes any tiny crystallized bits or stray solids, ensuring a smooth, glossy finish. The syrup should pour slowly and coat the back of a spoon. If you see gritty particles, they can create an unpleasant mouthfeel, so the sieve step is crucial. Cool slightly to thicken before using, but keep it warm enough to be pourable when serving.
- In another small saucepan, simmer dates in water on low heat for about 15 minutes (the dates should be soft). Once done, add the dates and excess liquid to a food processor and puree until smooth.: As the dates simmer, the kitchen fills with a rich, fruity aroma and the fruit softens into a jam like consistency. The leftover poaching liquid captures concentrated flavor, so include some of it in the food processor to reach a velvety puree. The texture should be completely smooth without large fibrous bits. If the puree is too thick, add a tablespoon of the poaching liquid to loosen it. A common mistake is undercooking the dates , which leaves grit; make sure they are very soft before processing.
- Preheat oven to 350°F. Butter 6 ramekins and set aside.: Preheating creates an even oven environment, and greasing the ramekins ensures the cakes will release cleanly after baking. You should feel a warm wave of heat when you open the oven, and the racks should be centered for even browning. Use room temperature butter rubbed into the ramekins so the batter clings well during baking. If you skip greasing, the cakes can stick and tear when removed, spoiling the layered presentation.
- Whisk flour, baking powder, baking soda, and salt in a small bowl. Set aside.: Sifting or whisking these dry ingredients together creates an even distribution of leavening, which leads to consistent rise and texture. When combined, the mixture should look uniform with no clumps, and you may notice a faint bready scent. This step prevents pockets of baking soda or powder that can cause uneven spots in the cake. If you see lumps, break them up thoroughly to avoid dense bites in the finished pudding.
- In another bowl beat the butter and brown sugar together until light and fluffy. Add egg and vanilla, followed by the date puree. Add dry ingredients and beat until smooth.: Creaming butter and brown sugar aerates the batter and gives lift, producing a softer crumb. You will see the mixture lighten in color and become creamy. Adding the egg and vanilla extract brings structure and aroma, then the date puree folds in moisture and depth. Incorporating the dry ingredients should be done gently to avoid overmixing, which can make cakes tough. If the batter feels overly dense, check that your butter was soft enough at the start.
- Spoon batter into ramekins making sure to smooth the tops. Bake for 20 minutes or until centers come out clean when a toothpick is inserted. Let cool for 10 minutes.: As the puddings bake, the aroma will turn warmly spiced and caramel like, and the tops will set with gentle springiness. A clean toothpick indicates the crumb is cooked but still moist. Allowing the cakes to rest for 10 minutes stabilizes them so they are easier to handle when trimming. Cutting too soon can cause the cakes to crumble, so give them that brief cooling period to firm up.
- Trim tops of the cake to be level with the tops of the ramekins. Remove cakes and then cut in half horizontally.: Trimming evens the surface so the layering fits neatly back into the ramekin. When you remove the cakes, they will release with a soft sigh and show a tender interior flecked with dates . Cutting horizontally creates two thin layers that soak up sauce more effectively, making each bite succulent. Use a serrated knife in a sawing motion to avoid tearing. If you press too hard, the cake can compress and lose its airy texture.
- Clean out ramekins and spoon 1 tablespoon of toffee sauce into the bottom of each ramekin. Layer bottoms of cakes back in the ramekins, followed by another tablespoon of toffee sauce and then the top piece of cake. Add another tablespoon of toffee sauce and spread evenly.: The first spoonful of sauce creates a warm base that soaks into the bottom layer and adds moisture from below. Building the layers this way ensures the pudding is rich throughout, not just on top. The sauce should look glossy and slightly runny so it penetrates the sponge. If the sauce is too cool and thick, warm it slightly to make layering easier. Avoid overfilling, which can make the cakes soggy rather than luxuriously moist.
- Place ramekins on a baking sheet and bake for 10 minutes.: This short bake reheats the assembled cakes and helps the sauce meld into the sponge, producing a shiny surface and an intimate mingling of flavors. You will hear a gentle bubbling and see the sauce thicken at the edges, another useful visual cue. Keep an eye on them so they do not overbake and dry out. If the tops brown too quickly, tent with foil for the remaining time.
- Let cool slightly, then remove cakes from ramekins making sure to flip the cake onto the dessert plate. Top with warmed toffee sauce and whipped cream.: When you invert the ramekins, the cakes should slide out with a soft plop and reveal the glossy sauce seeping into the sponge. The final flourish is pouring extra warm sauce and a cloud of whipped cream to balance warmth and coolness. Serve immediately while the sauce is warm; if it cools and firms, reheat briefly to restore that luscious pourable quality. Serving cold will mask the sauce's aroma and texture.
Notes
- Warm your ramekins: Warming the ramekins slightly before assembling helps keep the sauce fluid and encourages even absorption into the sponge when baking the final time.
- Softened butter matters: If your butter is too cold, the creaming will be uneven and the batter might be dense, so leave it at room temperature until it is yielding but not greasy.
- Watch the sauce carefully: The toffee sauce can go from perfect to bitter quickly, so use moderate heat and stir often to maintain control over color and flavor.
- Use a fine sieve: Straining the sauce ensures it has a satin texture without any grainy particles, which makes the final presentation more elegant.
- Include poaching liquid: When pureeing the dates, add a bit of the cooking liquid for a smoother consistency and extra flavor extraction.