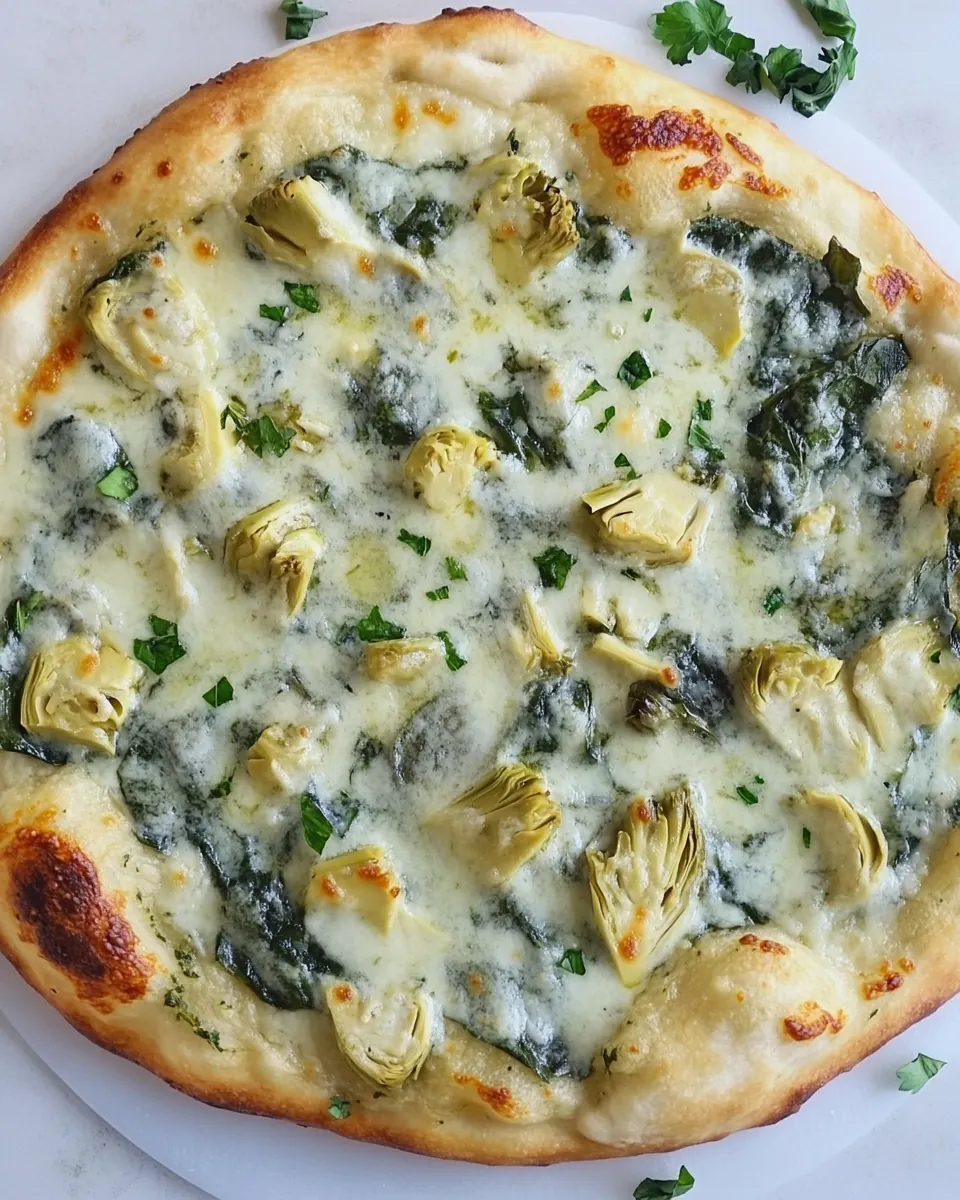
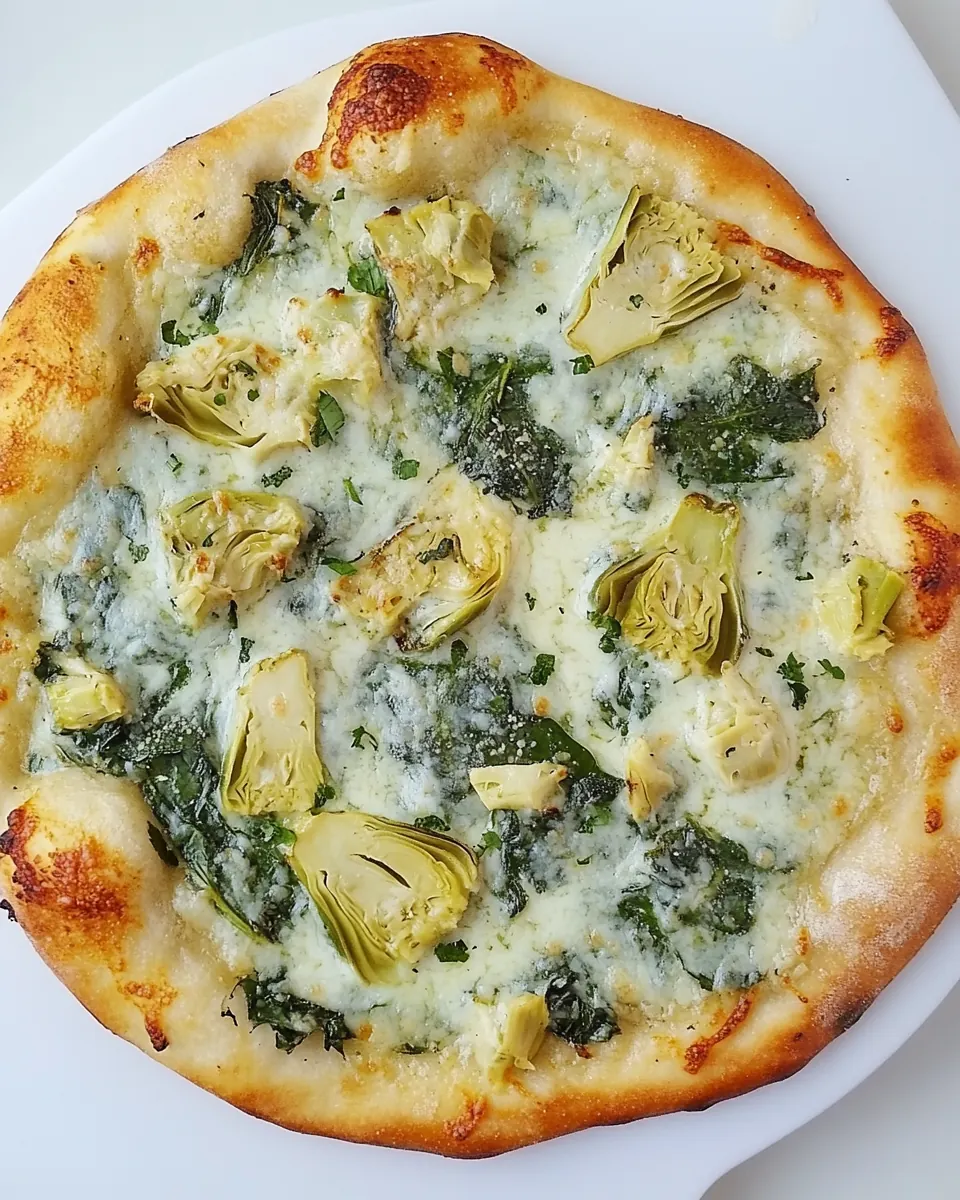
Spinach and Artichoke Pizza
Spinach and Artichoke Pizza is one of those dishes I turn to when I want something that feels both comforting and a little adventurous, a perfect bridge between a classic pie and a bold appetizer. The first time I made this, I had leftover jarred artichokes and a freezer stash of frozen spinach, and I decided to toss them on a simple hand stretched crust. What came out of the oven was a crisp edged pizza with a tender center, pockets of melted mozzarella, and gnarly bites of tangy artichoke that made everyone at the table pause and smile.
Over the years I learned to treat the garlic oil like liquid gold, brushing just enough to perfume the dough without drowning it, and to loosen up the thawed spinach until it barely held moisture. The pine nuts add a toasted crunch that keeps every bite interesting, while the blue cheese gives a salty push that balances the creamy mozzarella. When friends ask what I love most about this pie, I say it is the texture play, and the fact that it never feels heavy despite the richness.
Recipe Snapshot
1 hr 20 mins
75 mins
5 mins
Medium
350 kcal
Italian
Keto, Gluten-Free
Dinner
Cast iron skillet, Oven broiler, Parchment paper
Why Try This Spinach and Artichoke Pizza
Layered Savory Flavor
I love how Spinach and Artichoke Pizza layers bright, earthy, and tangy flavors. The combination of marinated artichoke hearts and thawed spinach creates a savory base that complements both the milky melt of mozzarella and the sharpness of blue cheese. Each bite offers contrast, which keeps the palate engaged.
Fast Sizzle to Crisp
There is something thrilling about searing the dough briefly on a hot skillet, then finishing under the broiler. I like that this technique yields a crisp, blistered crust that still has a tender interior. The quick stovetop sear locks in structure, while the broiler gives the top an even, bubbling finish.
Textural Interest
Pine nuts are a small detail that make a big difference. They toast slightly when you broil the pizza, offering a pleasing crunch against creamy cheeses and soft spinach. I often find guests commenting on that tiny, satisfying contrast.
Flexible and Approachable
This recipe adapts to what you have on hand. If you want to skip the skillet and broiler, the oven method still produces a lovely pie. I appreciate recipes that give room to adjust without compromising the final result, and this one does just that.
Great for Sharing
I reach for Spinach and Artichoke Pizza when I want something shareable that feels special but not fussy. It sits well on a casual weeknight table or as part of a spread for guests. The flavors are familiar enough to be comforting, yet distinct enough to be memorable.
What You Need for Spinach and Artichoke Pizza
The ingredients here are straightforward, and each one plays a clear role. The dough provides structure and chew, while the olive oil and garlic create a fragrant base. Spinach and artichoke bring earthy and tangy notes, cheeses offer cream and salt, and pine nuts add crunch and a toasty aroma. Together they form a balanced pizza that is both satisfying and layered.
- 1 pound of pizza dough: Stretch and shape pizza dough into a thin round to form the crust base; provide chewiness and structure for toppings to bake evenly. Allow dough to rest briefly if necessary to relax gluten for easier shaping. Pre-bake briefly for a crispier bottom if using very wet toppings.
- 1/4 cup olive oil: Coat dough lightly with olive oil to prevent sogginess and add a rich, fruity fat that enhances mouthfeel. Use oil in the sauce mixture to carry flavors and promote browning of the crust edges. Reserve a bit for drizzling after baking to boost aroma and shine.
- 3 cloves large garlic minced: Mince garlic finely to release pungent, aromatic compounds that fragrant the oil and sauce; serve as a primary savory note. Sauté briefly in oil if desired to mellow harshness and develop sweetness, or mix raw into lemon and oil for a bright flavor. Distribute evenly so small bites contain balanced garlicky intensity without overpowering other ingredients.
- 1 tablespoon fresh lemon juice: Brighten the topping mixture with fresh lemon juice to add acidity that balances rich cheeses and oils. Use sparingly to avoid making the dough soggy; fold into olive oil and garlic for a light vinaigrette coating. Lemon juice also helps lift and freshen the flavors of spinach and artichoke.
- 1 teaspoon dried basil: Season with dried basil to impart warm, herbaceous notes that complement tomato-free white pizza profiles. Sprinkle into the oil-lemon mixture so the herb hydrates and releases aroma during baking. Combine with fresh basil garnish to layer complementary basil flavors.
- 1 teaspoon freshly ground black pepper: Add freshly ground black pepper to introduce sharp, warming heat and aromatic complexity across the topping. Grind just before use to maximize volatile flavor compounds, and distribute to ensure subtle peppery bites throughout. Pair with salt to enhance overall taste without masking delicate ingredients.
- 1/2 teaspoon salt: Season with salt to enhance and balance the overall flavors of cheese, spinach, and artichoke; draw out moisture from vegetables when mixed. Use measured amounts to avoid over-salting, especially with brined or marinated components. Dissolve in the oil-lemon mixture for even seasoning.
- 1 ounce package frozen spinach thawed and drained, 10: Thaw and drain frozen spinach thoroughly to remove excess water and concentrate flavor, preventing a soggy crust. Chop or squeeze dry and mix with the oil-garlic–lemon base to evenly coat leaves and infuse seasoning. Fold into the topping so spinach contributes tender, leafy texture and mild green flavor.
- 2 cups marinated artichoke hearts drained, about two 7 ounce jars: Drain marinated artichoke hearts and chop if desired to distribute tangy, tender bites across the pizza; supply acidic, savory depth from the marinade. Pat dry to limit extra moisture and mix with spinach and cheeses for cohesive topping. Use artichoke pieces to create textural contrast and Mediterranean flavor.
- 4 ounces fresh mozzarella sliced thin or grated, about 1 cup: Slice or grate fresh mozzarella to provide a creamy, melting cheese layer that binds toppings and creates a gooey texture when baked. Distribute evenly to promote uniform melting and attractive browning without overpowering delicate flavors. Choose low-moisture mozzarella or blot slices to control release of water.
- 2 4 ounces blue cheese broken into chunks: Crumble blue cheese into chunks to introduce sharp, tangy, and savory pockets of intense flavor that contrast the milder mozzarella. Scatter in small amounts to avoid dominating the pizza while allowing bursts of pungency. Pair with sweet or nutty elements like pine nuts to balance its assertiveness.
- 2 tablespoons pine nuts: Toast pine nuts lightly to develop nutty aroma and crunchy texture, then sprinkle over the pizza for contrast with creamy cheeses and tender greens. Use sparingly due to rich flavor and high oil content; add just before or after baking to preserve delicate crunch. Chop if larger pieces would disrupt each bite balance.
- 2 tablespoons fresh basil for garnish: Tear fresh basil and use as a finishing garnish to add bright, aromatic herb freshness and color contrast to the baked pizza. Scatter over the finished pie off heat to preserve volatile fragrant oils and vivid green appearance. Use sparingly to complement dried basil used earlier and reinforce the herb profile.
Cooking Instructions for Spinach and Artichoke Pizza
These directions guide you through stovetop searing and broiling for a blistered crust, plus an oven only option if you want a simpler method. Read each step before starting so you can time the skillet heating and broiler stage without rushing.
- Heat a small skillet over medium heat, add the olive oil and the garlic. Cook for one to two minutes, until the garlic is fragrant (PLEASE – watch closely!! Don't burn the garlic.). Remove from heat and add the basil, lemon juice, pepper and salt. Set aside.: The moment you warm the olive oil with minced garlic , the kitchen will fill with a warm, savory perfume that signals you are building the recipe's aromatic foundation. You should hear a gentle shimmer from the oil and see small bubbles form around the garlic edges as it softens. The reason we remove it from heat before adding dried basil and lemon juice is to preserve the fresh brightness of those ingredients, which can fade under prolonged high heat. A common error here is letting the garlic brown too much, which will impart bitterness; at the first fragrant pop and light sizzle, pull the skillet off the heat and stir in the seasonings so the mixture cools just slightly while keeping its aroma.
- After the dough has risen, punch it down and place it back on the floured surface. This amount of dough yielded 2 pizza crusts for my 12-inch cast iron skillet. If you're using an 8-inch skillet, you may get 3 crusts. Divide the dough evenly in half (or thirds). Roll out your dough just a little larger than the size of your skillet. Place on a large sheet of parchment paper.: Working with the risen dough, you will feel its elasticity and light air pockets as you press and fold to deflate it gently. Rolling it slightly larger than your skillet gives you an edge to tuck and maneuver when transferring to the hot pan. The tactile cue is that the dough should spring back a touch but not snap; if it resists stretching, let it rest for five to ten minutes. One mistake is overflouring, which can dry the dough; instead, use just enough flour so it stops sticking while still remaining pliable.
- Place an oven rack directly under your broiler and preheat your broiler to the highest setting. Additionally, place your cast iron skillet on the stovetop burner, turning the heat on high. You want to heat the skillet for 10 minutes. If it begins to smoke a lot, you can reduce the heat a bit. But you want it HOT.: Heating the skillet until very hot ensures a snap and quick crust sear when the dough lands. For about ten minutes you will notice the pan radiating heat and possibly a faint shimmer of oil if there is residual seasoning on the iron. This intense surface temperature creates immediate contact browning, which contributes to texture and flavor. Be mindful of the smoke point; heavy smoking indicates excessive heat, so lower the flame slightly to avoid burnt flavors. A common oversight is not preheating long enough, resulting in a limp bottom instead of a crisp one.
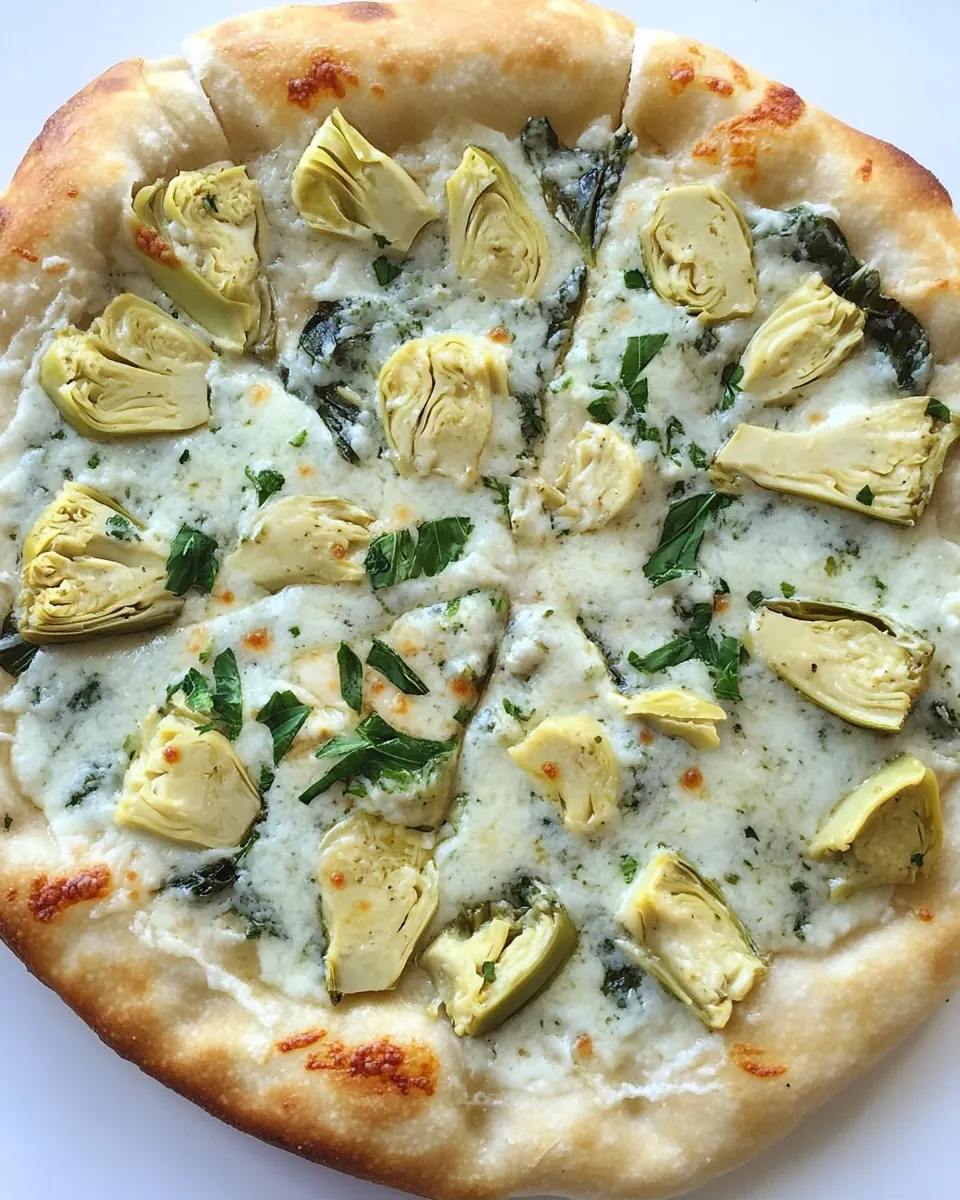
- While the skillet is heating, begin placing your toppings on your dough. Brush half of the garlic oil on each pizza and then scatter the spinach (make sure you squeezed your spinach of any excess liquid) evenly among both pizzas. Top with the mozzarella cheese, then the artichokes, then scatter on the blue cheese crumbles and finish with a sprinkle of the pine nuts.: Assembling on parchment lets you build safely and transfer without disturbing the layout. When you brush the garlic oil, you want an even, glossy film rather than pools, so the crust crisps and absorbs flavor. Distribute the squeezed spinach thinly so moisture is minimized and so each bite includes greens. The mozzarella should create creamy islands while the marinated artichoke hearts provide tangy pockets. Scattered blue cheese will produce bright, salty notes in localized bites, and toasted pine nuts add crunch. A frequent mistake is overloading toppings, which prevents even cooking and leaves the crust soggy; keep a balanced layer for best results.
- When your skillet is hot carefully lift the pizza (holding onto the sides of the parchment paper) and place it in the skillet. Let it cook for no longer than 25 seconds. After 25 seconds turn the heat off and grab the skillet and pop it in the oven, right under the broiler. Broil for 1 minute, then using the potholder, grab the handle and rotate 180 degrees, broiling for only 1 more minute. Remove immediately and place on the stovetop. Carefully lift or slide the pizza out and repeat with the other pizza. Top both pizzas with fresh basil. Slice and serve!: That initial contact with the hot pan will hiss and give a light browning sound, a signal the crust is searing. Twenty five seconds is intentionally brief to set the bottom without overcooking; the visual cue is a faint golden tone forming. Moving the skillet into the broiler finishes the top rapidly so cheeses bubble and edges blister; you will see bubbling and some charred flecks on the crust. Rotate for even broiling because broilers are often hotter at one side. The most common error here is leaving the pizza under the broiler too long, which can quickly burn the cheese or crust; watch constantly and remove at the first sign of deep golden browning. After cooking, the fresh basil on top will smell herbaceous and bright, and slicing reveals a crisp rim and tender, cheesy interior.
- If you prefer to make the pizza completely in the oven just skip the skillet and broiler. Instead heat your oven to 350 degrees and bake your pizza for 25 to 30 minutes. Remove and top with basil. Let sit five minutes and slice and serve.: Baking on a preheated oven rack yields a different, gentler texture with evenly baked cheese and a uniformly browned crust. At 350 degrees the pizza will take a bit longer to develop color, and you will notice a slow bubbling across the cheese surface rather than the rapid blistering from the broiler. Letting the pizza rest five minutes after baking helps the cheese set so slices hold together cleanly when cut. A typical mistake is slicing immediately, which causes toppings to slide and the cheese to stretch messily; patient resting improves presentation and texture.
Recipe Tips about Spinach and Artichoke Pizza
This section expands on practical tips to help you nail texture, flavor balance, and timing. I cover small techniques I use every time I make Spinach and Artichoke Pizza, from dough handling to final garnish, so each pie comes out consistently great.
- Preheat the skillet thoroughly, giving it at least ten minutes over high heat so the pan surface will sear the dough instantly. A properly preheated skillet creates that sought after crisp bottom and blistered edge, and prevents the dough from sticking when you first place it.
- Squeeze frozen spinach well before assembly, pressing it in a clean towel until nearly dry. Excess moisture is the main culprit for soggy pizza centers, and removing liquid early preserves a crisp crust under the toppings.
- Moderate the garlic oil when brushing the dough, using just enough to coat for flavor without saturating. Too much oil can prevent the crust from crisping, so aim for an even, thin sheen rather than puddles.
- Distribute cheeses thoughtfully by layering the mozzarella first for melt, then placing small clusters of blue cheese so its boldness appears in occasional bright bites rather than overwhelming the whole pie.
- Toast pine nuts briefly on low heat or under the broiler for a moment to enhance flavor, watching closely because they brown very quickly. Golden nuts add a buttery crunch that elevates mouthfeel.
- Let pizzas rest five minutes after cooking to allow cheeses to set, which makes slicing neater and helps toppings stay in place. Resting also lets flavors meld slightly, improving the eating experience.
Pairing Suggestions for Spinach and Artichoke Pizza
Spinach and Artichoke Pizza pairs well with light, fresh sides and simple beverages that do not compete with its bold flavors. Consider options that add crispness or acidity to balance the richness of cheeses and oil. These serving ideas suit casual dinners, weekend lunches, and gatherings.
- Crisp green salad with lemon vinaigrette, offering a bright, acidic contrast to the creamy cheese and earthy spinach, perfect for balancing richness at the table.
- Simple roasted vegetables like asparagus or cherry tomatoes, which add seasonal sweetness and a warm complement to the savory pie when served family style.
- Light soup starter such as a brothy vegetable soup to begin a meal without overpowering the pizza‘s flavors, suitable for lunch or a light dinner.
- Occasion suggestion for weeknight dinner or relaxed entertaining; the pizza is approachable for guests and quick enough for a satisfying family meal.
- Storage tip store leftover slices in an airtight container in the refrigerator for up to three days, and reheat in a hot skillet or oven to revive crispness rather than microwaving which can make the crust limp.
- Seasonal pairing during spring and summer, serve with a platter of fresh herbs and a squeeze of lemon to brighten slices, while in cooler months, offer roasted root vegetables or a warm salad to create comforting pairings.
FAQ
Conclusion
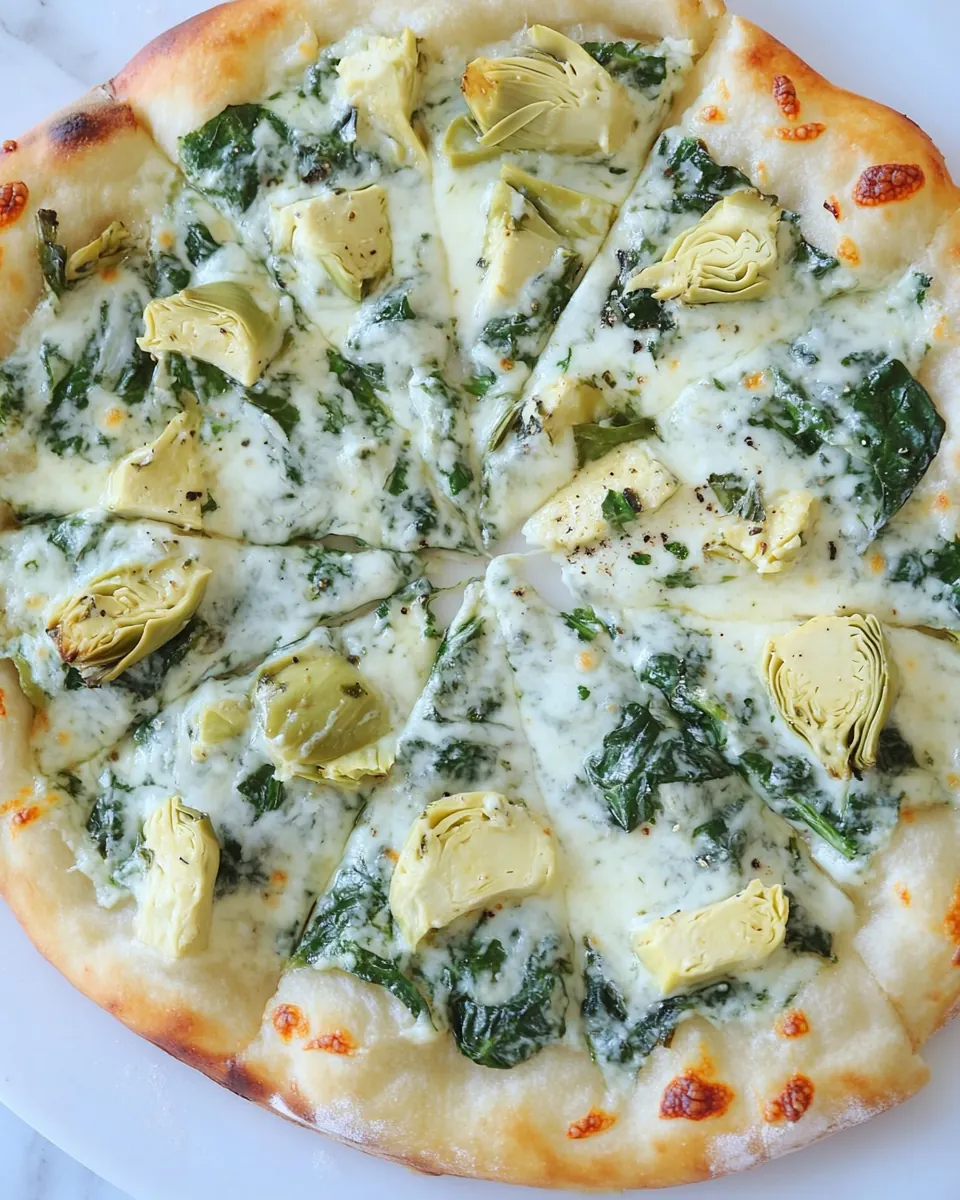
Spinach and Artichoke Pizza shines because it balances creamy cheeses, bright marinated artichokes, and earthy spinach on a crisp, blistered crust. Its combination of textures and flavors makes it feel both comforting and a little special. Give this recipe a try when you want a shareable pie that is easy to assemble yet impressive to serve. I hope it becomes a go to for your next pizza night, bringing that satisfying mix of savory layers and toasty crunch that keeps everyone reaching for another slice.
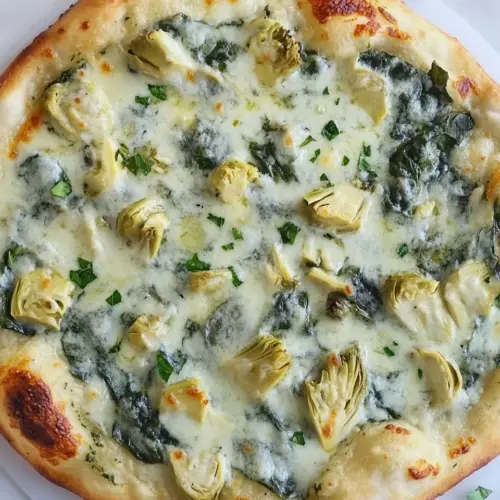
Spinach and Artichoke Pizza
Equipment
- Cast-Iron Skillet
- Oven Broiler
- Parchment Paper
Ingredients
- 1 pound of pizza dough Stretch and shape pizza dough into a thin round to form the crust base; provide chewiness and structure for toppings to bake evenly. Allow dough to rest briefly if necessary to relax gluten for easier shaping. Pre-bake briefly for a crispier bottom if using very wet toppings.
- 1/4 cup olive oil Coat dough lightly with olive oil to prevent sogginess and add a rich, fruity fat that enhances mouthfeel. Use oil in the sauce mixture to carry flavors and promote browning of the crust edges. Reserve a bit for drizzling after baking to boost aroma and shine.
- 3 cloves large garlic minced Mince garlic finely to release pungent, aromatic compounds that fragrant the oil and sauce; serve as a primary savory note. Sauté briefly in oil if desired to mellow harshness and develop sweetness, or mix raw into lemon and oil for a bright flavor. Distribute evenly so small bites contain balanced garlicky intensity without overpowering other ingredients.
- 1 tablespoon fresh lemon juice Brighten the topping mixture with fresh lemon juice to add acidity that balances rich cheeses and oils. Use sparingly to avoid making the dough soggy; fold into olive oil and garlic for a light vinaigrette coating. Lemon juice also helps lift and freshen the flavors of spinach and artichoke.
- 1 teaspoon dried basil Season with dried basil to impart warm, herbaceous notes that complement tomato-free white pizza profiles. Sprinkle into the oil-lemon mixture so the herb hydrates and releases aroma during baking. Combine with fresh basil garnish to layer complementary basil flavors.
- 1 teaspoon freshly ground black pepper Add freshly ground black pepper to introduce sharp, warming heat and aromatic complexity across the topping. Grind just before use to maximize volatile flavor compounds, and distribute to ensure subtle peppery bites throughout. Pair with salt to enhance overall taste without masking delicate ingredients.
- 1/2 teaspoon salt Season with salt to enhance and balance the overall flavors of cheese, spinach, and artichoke; draw out moisture from vegetables when mixed. Use measured amounts to avoid over-salting, especially with brined or marinated components. Dissolve in the oil-lemon mixture for even seasoning.
- 1 ounce package frozen spinach thawed and drained, 10 Thaw and drain frozen spinach thoroughly to remove excess water and concentrate flavor, preventing a soggy crust. Chop or squeeze dry and mix with the oil-garlic-lemon base to evenly coat leaves and infuse seasoning. Fold into the topping so spinach contributes tender, leafy texture and mild green flavor.
- 2 cups marinated artichoke hearts drained, about two 7 ounce jars Drain marinated artichoke hearts and chop if desired to distribute tangy, tender bites across the pizza; supply acidic, savory depth from the marinade. Pat dry to limit extra moisture and mix with spinach and cheeses for cohesive topping. Use artichoke pieces to create textural contrast and Mediterranean flavor.
- 4 ounces fresh mozzarella sliced thin or grated, about 1 cup Slice or grate fresh mozzarella to provide a creamy, melting cheese layer that binds toppings and creates a gooey texture when baked. Distribute evenly to promote uniform melting and attractive browning without overpowering delicate flavors. Choose low-moisture mozzarella or blot slices to control release of water.
- 2 -4 ounces blue cheese broken into chunks Crumble blue cheese into chunks to introduce sharp, tangy, and savory pockets of intense flavor that contrast the milder mozzarella. Scatter in small amounts to avoid dominating the pizza while allowing bursts of pungency. Pair with sweet or nutty elements like pine nuts to balance its assertiveness.
- 2 tablespoons pine nuts Toast pine nuts lightly to develop nutty aroma and crunchy texture, then sprinkle over the pizza for contrast with creamy cheeses and tender greens. Use sparingly due to rich flavor and high oil content; add just before or after baking to preserve delicate crunch. Chop if larger pieces would disrupt each bite balance.
- 2 tablespoons fresh basil for garnish Tear fresh basil and use as a finishing garnish to add bright, aromatic herb freshness and color contrast to the baked pizza. Scatter over the finished pie off heat to preserve volatile fragrant oils and vivid green appearance. Use sparingly to complement dried basil used earlier and reinforce the herb profile.
Instructions
- Heat a small skillet over medium heat, add the olive oil and the garlic. Cook for one to two minutes, until the garlic is fragrant (PLEASE - watch closely!! Don't burn the garlic.). Remove from heat and add the basil, lemon juice, pepper and salt. Set aside.: The moment you warm the olive oil with minced garlic , the kitchen will fill with a warm, savory perfume that signals you are building the recipe's aromatic foundation. You should hear a gentle shimmer from the oil and see small bubbles form around the garlic edges as it softens. The reason we remove it from heat before adding dried basil and lemon juice is to preserve the fresh brightness of those ingredients, which can fade under prolonged high heat. A common error here is letting the garlic brown too much, which will impart bitterness; at the first fragrant pop and light sizzle, pull the skillet off the heat and stir in the seasonings so the mixture cools just slightly while keeping its aroma.
- After the dough has risen, punch it down and place it back on the floured surface. This amount of dough yielded 2 pizza crusts for my 12-inch cast iron skillet. If you're using an 8-inch skillet, you may get 3 crusts. Divide the dough evenly in half (or thirds). Roll out your dough just a little larger than the size of your skillet. Place on a large sheet of parchment paper.: Working with the risen dough, you will feel its elasticity and light air pockets as you press and fold to deflate it gently. Rolling it slightly larger than your skillet gives you an edge to tuck and maneuver when transferring to the hot pan. The tactile cue is that the dough should spring back a touch but not snap; if it resists stretching, let it rest for five to ten minutes. One mistake is overflouring, which can dry the dough; instead, use just enough flour so it stops sticking while still remaining pliable.
- Place an oven rack directly under your broiler and preheat your broiler to the highest setting. Additionally, place your cast iron skillet on the stovetop burner, turning the heat on high. You want to heat the skillet for 10 minutes. If it begins to smoke a lot, you can reduce the heat a bit. But you want it HOT.: Heating the skillet until very hot ensures a snap and quick crust sear when the dough lands. For about ten minutes you will notice the pan radiating heat and possibly a faint shimmer of oil if there is residual seasoning on the iron. This intense surface temperature creates immediate contact browning, which contributes to texture and flavor. Be mindful of the smoke point; heavy smoking indicates excessive heat, so lower the flame slightly to avoid burnt flavors. A common oversight is not preheating long enough, resulting in a limp bottom instead of a crisp one.
- While the skillet is heating, begin placing your toppings on your dough. Brush half of the garlic oil on each pizza and then scatter the spinach (make sure you squeezed your spinach of any excess liquid) evenly among both pizzas. Top with the mozzarella cheese, then the artichokes, then scatter on the blue cheese crumbles and finish with a sprinkle of the pine nuts.: Assembling on parchment lets you build safely and transfer without disturbing the layout. When you brush the garlic oil, you want an even, glossy film rather than pools, so the crust crisps and absorbs flavor. Distribute the squeezed spinach thinly so moisture is minimized and so each bite includes greens. The mozzarella should create creamy islands while the marinated artichoke hearts provide tangy pockets. Scattered blue cheese will produce bright, salty notes in localized bites, and toasted pine nuts add crunch. A frequent mistake is overloading toppings, which prevents even cooking and leaves the crust soggy; keep a balanced layer for best results.
- When your skillet is hot carefully lift the pizza (holding onto the sides of the parchment paper) and place it in the skillet. Let it cook for no longer than 25 seconds. After 25 seconds turn the heat off and grab the skillet and pop it in the oven, right under the broiler. Broil for 1 minute, then using the potholder, grab the handle and rotate 180 degrees, broiling for only 1 more minute. Remove immediately and place on the stovetop. Carefully lift or slide the pizza out and repeat with the other pizza. Top both pizzas with fresh basil. Slice and serve!: That initial contact with the hot pan will hiss and give a light browning sound, a signal the crust is searing. Twenty five seconds is intentionally brief to set the bottom without overcooking; the visual cue is a faint golden tone forming. Moving the skillet into the broiler finishes the top rapidly so cheeses bubble and edges blister; you will see bubbling and some charred flecks on the crust. Rotate for even broiling because broilers are often hotter at one side. The most common error here is leaving the pizza under the broiler too long, which can quickly burn the cheese or crust; watch constantly and remove at the first sign of deep golden browning. After cooking, the fresh basil on top will smell herbaceous and bright, and slicing reveals a crisp rim and tender, cheesy interior.
- If you prefer to make the pizza completely in the oven just skip the skillet and broiler. Instead heat your oven to 350 degrees and bake your pizza for 25 to 30 minutes. Remove and top with basil. Let sit five minutes and slice and serve.: Baking on a preheated oven rack yields a different, gentler texture with evenly baked cheese and a uniformly browned crust. At 350 degrees the pizza will take a bit longer to develop color, and you will notice a slow bubbling across the cheese surface rather than the rapid blistering from the broiler. Letting the pizza rest five minutes after baking helps the cheese set so slices hold together cleanly when cut. A typical mistake is slicing immediately, which causes toppings to slide and the cheese to stretch messily; patient resting improves presentation and texture.
Notes
- Preheat the skillet thoroughly, giving it at least ten minutes over high heat so the pan surface will sear the dough instantly. A properly preheated skillet creates that sought after crisp bottom and blistered edge, and prevents the dough from sticking when you first place it.
- Squeeze frozen spinach well before assembly, pressing it in a clean towel until nearly dry. Excess moisture is the main culprit for soggy pizza centers, and removing liquid early preserves a crisp crust under the toppings.
- Moderate the garlic oil when brushing the dough, using just enough to coat for flavor without saturating. Too much oil can prevent the crust from crisping, so aim for an even, thin sheen rather than puddles.
- Distribute cheeses thoughtfully by layering the mozzarella first for melt, then placing small clusters of blue cheese so its boldness appears in occasional bright bites rather than overwhelming the whole pie.
- Toast pine nuts briefly on low heat or under the broiler for a moment to enhance flavor, watching closely because they brown very quickly. Golden nuts add a buttery crunch that elevates mouthfeel.
- Let pizzas rest five minutes after cooking to allow cheeses to set, which makes slicing neater and helps toppings stay in place. Resting also lets flavors meld slightly, improving the eating experience.