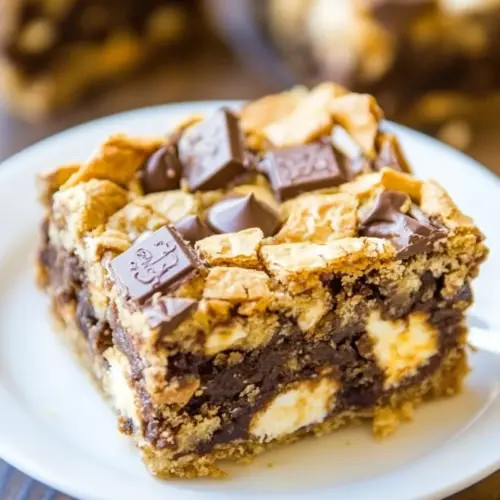
Soft and Gooey Loaded Smores Bars
Soft and Gooey Loaded Smores Bars have been my go to for those afternoons when I need a single dessert that feels like a campfire and a warm kitchen all at once. The first sentence of many of my recipe notes even says just that, because the memory of sticky fingers and chocolate traces on a chin is the very reason I keep this one in regular rotation. I remember testing these bars on a rainy Saturday, turning the little routine of melting butter and stirring batter into a tiny ceremony, and by the time they came out of the oven the house smelled like a summer bonfire.
One time a neighbor dropped by unexpectedly and I handed over a warm square, watching their face shift from surprise to the kind of slow smile that says comfort. We chatted while the chocolate softened and the marshmallows puffed, and that casual sharing is what these bars are about for me. They are forgiving, meaning you can mix them in a single bowl and still have everyone asking for seconds. I love how simple ingredients come together to make something that feels elevated and nostalgic at once.
When I make Soft and Gooey Loaded Smores Bars I tend to keep the rhythm steady: one small bowl for wet ingredients, a little folding to preserve texture, and a patient cooldown so the bars slice clean. Each step has a little nuance that rewards attention, yet none are intimidating. I often make a pan when friends pop over, and the leftovers, if there are any, get gently reheated for an almost fresh experience. It is a recipe that bridges seasons, so it lives on my counter and my weekend list.
Recipe Snapshot
30 mins
8 mins
22 mins
Medium
200 kcal
American
Gluten-Free, Low FODMAP
Desserts
8-by-8-inch baking pan, Aluminum foil, Mixing bowl, Microwave, Spatula
Why You’ll Love This Soft and Gooey Loaded Smores Bars
Comforting, nostalgic flavor in a single pan
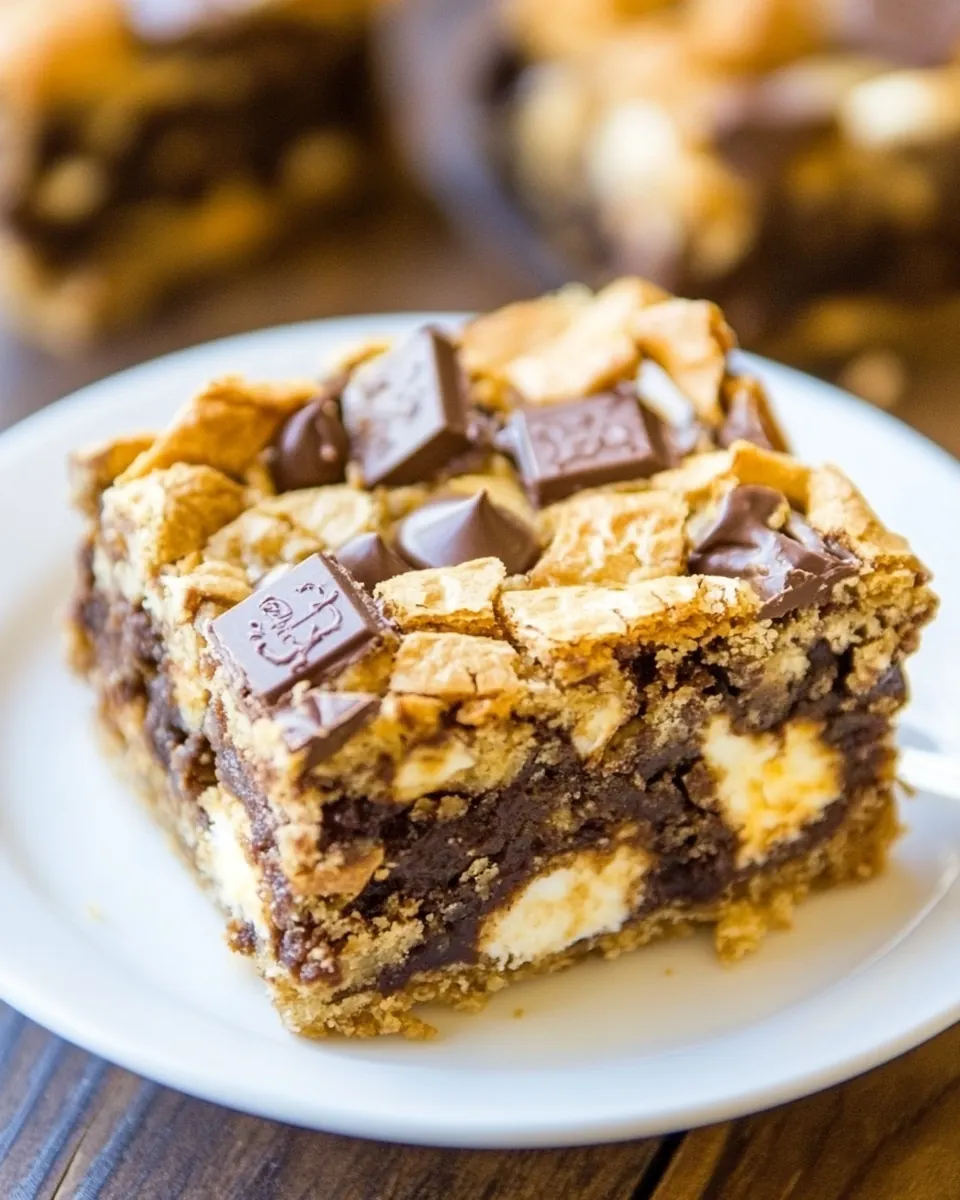
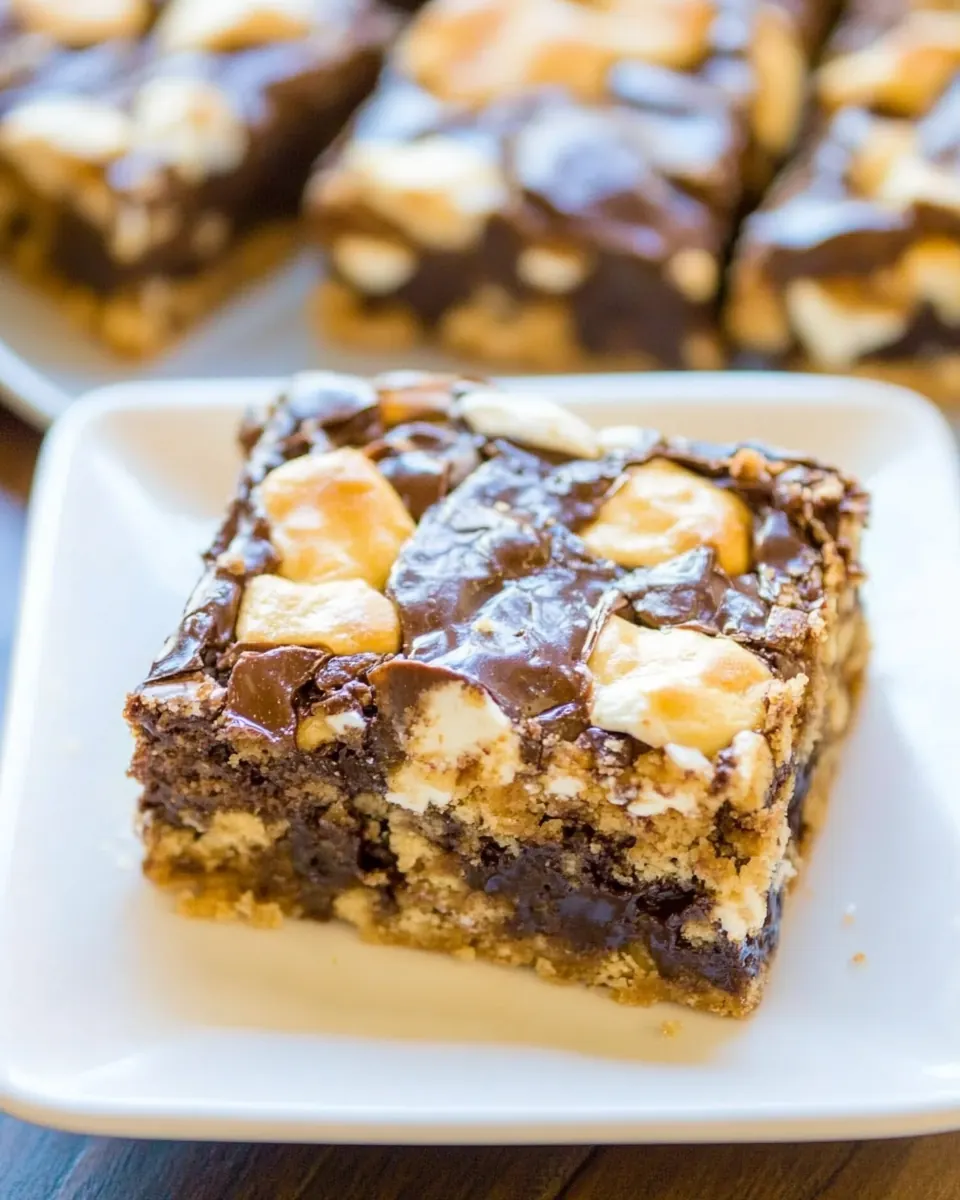
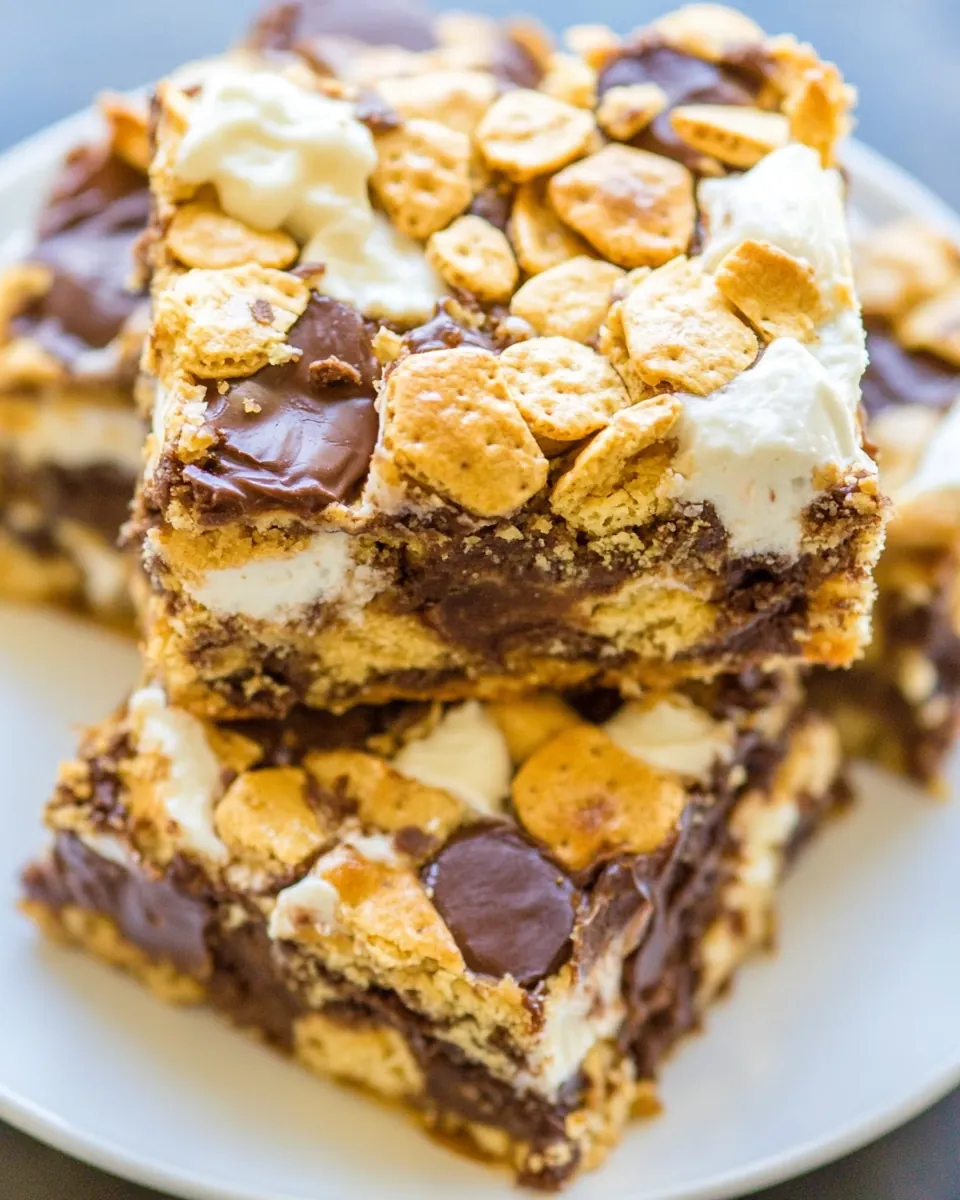
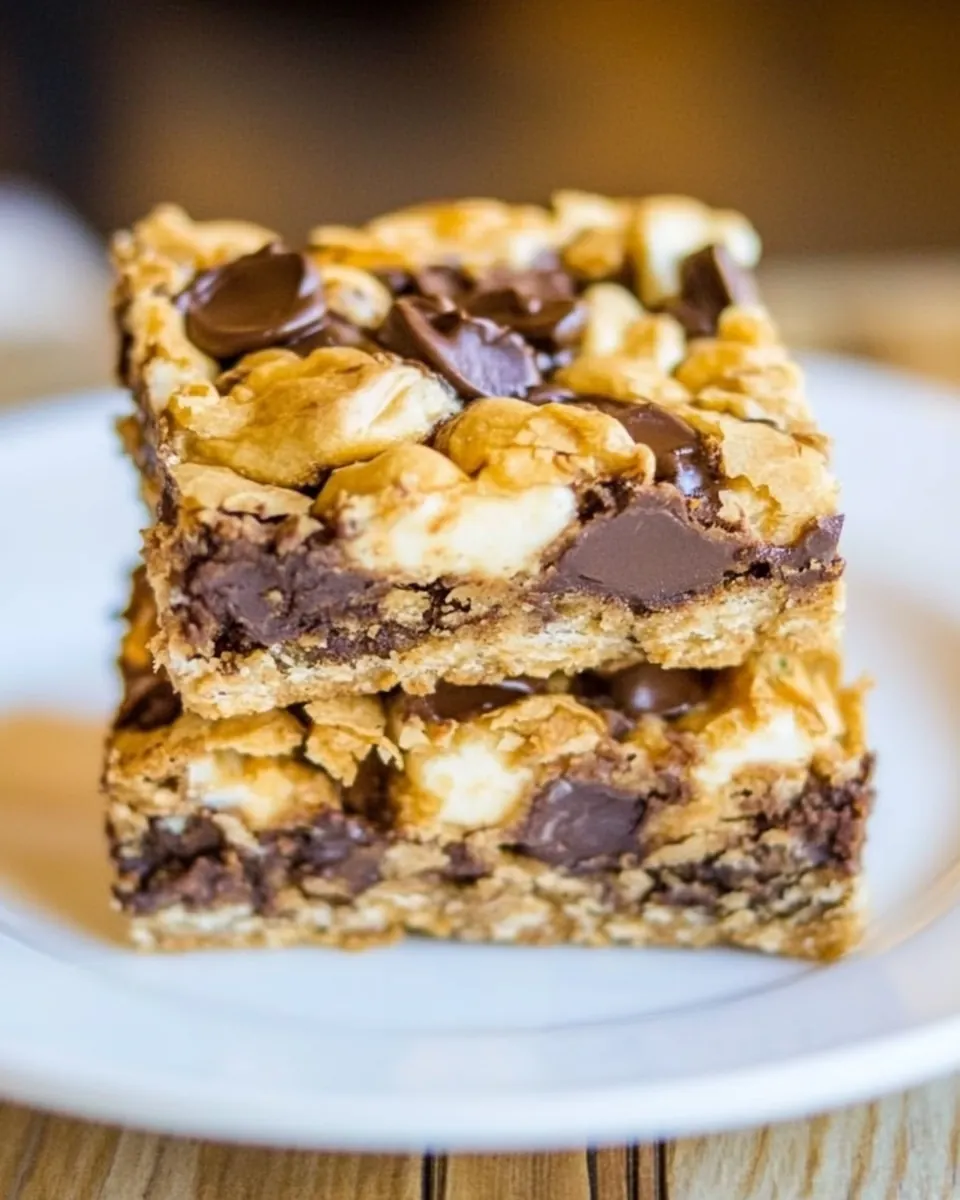
I adore how Soft and Gooey Loaded Smores Bars channel that campfire nostalgia without requiring an outdoor fire. When I bite into one I get the familiar interplay of sweet chocolate, pillowy marshmallows, and slightly crunchy graham crackers. The texture contrast is everything, and it makes these bars irresistible to both kids and grown ups.
Speed and simplicity that still feels special
From set up to oven is so straightforward that I can pull this together during a short break in my day. The recipe uses a handful of pantry staples, yet the result is impressive enough to bring to a casual gathering. I often find myself recommending it as an easy treat for last minute celebrations because it looks and tastes like you spent more time than you actually did.
Flexible and forgiving technique
I like that the method tolerates a little variation. You can be a touch rough when folding in the mix ins, and the bars still turn out tender and gooey. That forgiving nature makes this one of my go to recipes when I want reliability without rigid precision. It also means home bakers with varying skill levels can get a great outcome.
Shareable, snackable format
The bars slice into tidy squares that are ideal for sharing. I love bringing a pan to a neighbor or tucking one into a lunchbox because they travel well when wrapped. Their size makes portioning simple, and they work as a dessert, an after school snack, or a potluck contribution.
Great make ahead and storage profile
These bars keep well at room temperature for several days and even freeze nicely for months. I appreciate having a stash of these on hand when I want an effortless dessert option, and the ability to maintain texture after reheating means they feel freshly baked even days later.
Key Ingredients for Soft and Gooey Loaded Smores Bars
My philosophy with these ingredients is simple, keep the cast small and let each player shine. The base is a buttery, sweet batter that binds everything together, while the graham crackers, marshmallows, and chocolate chips are the flavor heroes. They each contribute texture and nostalgia, working in harmony to produce bars that are soft in the center yet hold their shape when sliced.
- 1/2 cup unsalted butter, 1 stick, melted: Melted to provide a rich, tender texture that binds the batter and adds buttery flavor; contributes moisture and helps the bars stay soft and gooey once cooled.
- 1 large egg: Beaten to incorporate structure and lift, helping the bars set while keeping them chewy; adds a bit of richness and helps emulsify the batter for even texture.
- 1 cup light brown sugar, packed: Packed to supply sweetness and deep molasses notes that enhance the toasted flavors; helps create a caramelized chew on the edges while balancing the other mix-ins.
- 1 tablespoon vanilla extract: Added to infuse aromatic sweetness and round out flavors; helps mask any potential egginess and complements the brown sugar and chocolate.
- 3/4 cup all-purpose flour: Measured to give structure and body while keeping the bars tender; provides the necessary gluten to hold the pieces together without becoming cakey when used sparingly.
- 5 full-size graham crackers, roughly chopped (about 2 cups): Crushed to contribute crunchy, toasty graham flavor and textural contrast; distributes through the bars to evoke classic s'mores character and absorb some moisture for balance.
- 1 heaping cup mini marshmallows: Folded in to create pockets of melted sweetness and authentic s'mores texture; offers soft, pillowy bites that melt into the warm bars for gooey appeal.
- 1 cup semi-sweet chocolate chips: Scattered to deliver bursts of rich, slightly bitter-sweet chocolate that melt when baked; balances the marshmallows and graham crackers for a classic s'mores profile.
Making Soft and Gooey Loaded Smores Bars
Working through this recipe is joyful because it moves quickly and rewards attention. I like to set up my ingredients and tools first so I can move smoothly. Once the oven is warm and the batter is combined this becomes a matter of gentle folding and patient cooling to achieve the ideal texture.
- Preheat oven to 350 F. Line an 8-by-8-inch baking pan with aluminum foil, spray with cooking spray; set aside.: My hands always notice the difference when the oven reaches temperature and the pan is ready, the warm air has a slightly sweet note as the oven settles into its heat. Doing this step prepares the environment so the batter starts cooking evenly on contact, preventing underbaked centers. A common issue is skipping the lining and spray, which makes removal messy and causes edges to stick; lining and spraying helps the bars lift cleanly. You should hear the faint click as the oven cycles, and visually confirm that the foil is smooth so batter spreads evenly. If you line the pan poorly, the batter may pool in creases, producing uneven baking. I make sure the foil extends a bit over the pan edges, which doubles as handles for lifting the finished block out. During this step I also check my oven rack is centered so the top browns evenly.
- In a large, microwave-safe bowl melt the butter, about 1 minute on high power.: As the butter melts it sighs and brightens, forming golden pools that smell nutty and rich; that aroma is a good early signal that flavor is developing. Melting in short bursts prevents splattering and overheating, which can scorch the fat. A frequent mistake is microwaving too long, creating hot spots that can cook the egg in the next step. After heating, I stir the butter so any hot pockets even out, feeling the bowl's warmth to judge cooling time. If your microwave is powerful, reduce time; if it seems underheated, add 10 second bursts. The goal is fully melted but not boiling.
- Wait momentarily before adding the egg so you don’t scramble it. Add the egg, brown sugar, vanilla, and whisk until smooth.: Right after melting the butter there is a brief window where the residual heat can shock the egg , so I pause until the bowl is warm not hot. When I whisk in the egg , the mixture becomes glossy and slightly thick, and the aroma of brown sugar blooms as the molasses warms. This step creates the emulsion that gives the bars a tender crumb. A common error is adding the egg too early which causes curdling or bits of cooked egg that affect texture. Whisk until the mixture is homogenous and smooth, but stop before it becomes foamy which would introduce extra air.
- Add the flour and stir until just combined, don’t overmix.: Adding the all-purpose flour transforms the glossy wet mix into a more structured batter, and the surface will look matte rather than shiny when ready. Stirring just to combine preserves tenderness; over mixing will develop gluten and create a chewier texture. You should see streaks disappear and feel the batter thicken under your spoon. A common misstep is vigorous beating, which yields a less delicate crumb. Use a folding motion and stop when no dry pockets remain, the batter should be cohesive but not dense.
- Add the graham crackers and any crumbs on cutting board, marshmallows, chocolate chips and fold to incorporate.: At this stage the bowl fills with textures and warm aromas as you fold in the graham crackers , marshmallows , and chocolate chips . Folding preserves the marshmallow shape while distributing the crackers and chips so each bite is varied. You will notice streaks of white from marshmallows and glossy chips against the golden batter. A pitfall here is over folding until the marshmallows melt into the batter, losing those soft pockets; fold gently until mixed but still visibly chunked. The sound shifts to a quieter, thicker swipe as the mixture becomes cohesive, and you should feel slight resistance when the spatula pulls through.
- Turn batter out into prepared pan, smoothing the top lightly with a spatula.: Pouring the batter into the lined pan creates a thick, even layer that smells of butter and chocolate. Smoothing the top lightly distributes mix ins and prevents high and low spots that can affect baking time. My hand senses when the surface is level, and visually I aim for a uniform thickness to ensure even doneness. A common problem is overworking the surface which can press out mix ins, so a gentle touch is best. Use the spatula edge to nudge batter into corners, and tap the pan briefly on the counter to release air bubbles.
- Bake for about 20 to 22 minutes, or until bars have firmed up in the center and edges will be set. Some marshmallows may have developed a hint of golden color.: While baking you will smell a warm, toasty aroma as the graham crackers and butter brown slightly and the chocolate softens. The visual cues are crucial, watch for edges that pull slightly away from the foil and a center that jiggles less when nudged. If the marshmallows brown a touch, that adds a toasty note. A common mistake is overbaking which dries the bars; remove them when the center is just set for a soft interior. Listen for the quiet settling of the oven once the bars are nearly done, and trust the visual cues more than a fixed minute count because ovens vary.
- Allow bars to cool in pan for at least 30 minutes before slicing and serving.: Cooling is the patience reward, as the aroma mellows and molten bits firm just enough to slice cleanly. The bars will still be soft but slice without smooshing if you wait the recommended time. Cutting too early is a frequent error that leads to messy squares and lost structure. I run a sharp knife along the foil edges to loosen the block before lifting it out, and slicing yields neat pieces with melted pockets of chocolate and tender marshmallow. The texture will be noticeably more cohesive after the rest period.
Tips for Success
I like to keep a few straightforward habits when I bake these bars so the process stays relaxed and the outcome is consistent. These tips are practical, based on what I have learned by testing variations and watching what goes wrong when a step is rushed.
- Warm the egg slightly before adding it to the melted butter. A room temperature egg blends more easily and reduces the chance of scrambling from residual heat.
- Measure flour accurately by spooning into the cup and leveling, not scooping. This prevents dense bars that lose their soft interior.
- Fold gently when incorporating the graham crackers, marshmallows, and chocolate chips to keep distinct textures intact in each bite.
- Check doneness visually instead of relying solely on time. Look for set edges and a slightly soft center, which indicates the perfect gooey interior.
- Cool thoroughly for at least 30 minutes in the pan; this helps the bars firm up so they slice cleanly without crumbling.
Serving Ideas for Soft and Gooey Loaded Smores Bars
These bars are delightfully versatile and lend themselves to casual or festive serving. I enjoy presenting them warm, but they are equally good at room temperature, which makes them practical for gatherings. Their size and sweetness make them ideal for sharing, and they pair well with simple beverages and seasonal touches.
- Casual gatherings: Serve warm squares on a platter for game nights or potlucks, letting guests help themselves.
- After school snack: Offer a single bar wrapped in parchment for an easy treat that kids love.
- Picnic friendly: Pack cooled bars in an airtight container for a portable dessert that travels well.
- Holiday tray: Arrange slices on a festive board alongside other bite sized sweets for holiday parties and family get togethers.
- Storage tips: Keep bars in an airtight container at room temperature for up to one week, or freeze for longer storage; thaw gently before serving.
FAQ
Conclusion
These bars stand out because they capture classic smores flavors in a tidy, one pan treat that is both comforting and shareable. I encourage you to give this recipe a try the next time you want a quick dessert that feels nostalgic and special. The effortless assembly and the payoff of warm, gooey squares make it a dependable favorite to keep in your baking rotation.
Soft and Gooey Loaded Smores Bars
Equipment
- 8-by-8-inch baking pan
- Aluminum Foil
- Mixing Bowl
- Microwave
- Spatula
Ingredients
- 1/2 cup unsalted butter, 1 stick, melted Melted to provide a rich, tender texture that binds the batter and adds buttery flavor; contributes moisture and helps the bars stay soft and gooey once cooled.
- 1 large egg Beaten to incorporate structure and lift, helping the bars set while keeping them chewy; adds a bit of richness and helps emulsify the batter for even texture.
- 1 cup light brown sugar, packed Packed to supply sweetness and deep molasses notes that enhance the toasted flavors; helps create a caramelized chew on the edges while balancing the other mix-ins.
- 1 tablespoon vanilla extract Added to infuse aromatic sweetness and round out flavors; helps mask any potential egginess and complements the brown sugar and chocolate.
- 3/4 cup all-purpose flour Measured to give structure and body while keeping the bars tender; provides the necessary gluten to hold the pieces together without becoming cakey when used sparingly.
- 5 full-size graham crackers, roughly chopped (about 2 cups) Crushed to contribute crunchy, toasty graham flavor and textural contrast; distributes through the bars to evoke classic s'mores character and absorb some moisture for balance.
- 1 heaping cup mini marshmallows Folded in to create pockets of melted sweetness and authentic s'mores texture; offers soft, pillowy bites that melt into the warm bars for gooey appeal.
- 1 cup semi-sweet chocolate chips Scattered to deliver bursts of rich, slightly bitter-sweet chocolate that melt when baked; balances the marshmallows and graham crackers for a classic s'mores profile.
Instructions
- Preheat oven to 350 F. Line an 8-by-8-inch baking pan with aluminum foil, spray with cooking spray; set aside.: My hands always notice the difference when the oven reaches temperature and the pan is ready, the warm air has a slightly sweet note as the oven settles into its heat. Doing this step prepares the environment so the batter starts cooking evenly on contact, preventing underbaked centers. A common issue is skipping the lining and spray, which makes removal messy and causes edges to stick; lining and spraying helps the bars lift cleanly. You should hear the faint click as the oven cycles, and visually confirm that the foil is smooth so batter spreads evenly. If you line the pan poorly, the batter may pool in creases, producing uneven baking. I make sure the foil extends a bit over the pan edges, which doubles as handles for lifting the finished block out. During this step I also check my oven rack is centered so the top browns evenly.
- In a large, microwave-safe bowl melt the butter, about 1 minute on high power.: As the butter melts it sighs and brightens, forming golden pools that smell nutty and rich; that aroma is a good early signal that flavor is developing. Melting in short bursts prevents splattering and overheating, which can scorch the fat. A frequent mistake is microwaving too long, creating hot spots that can cook the egg in the next step. After heating, I stir the butter so any hot pockets even out, feeling the bowl's warmth to judge cooling time. If your microwave is powerful, reduce time; if it seems underheated, add 10 second bursts. The goal is fully melted but not boiling.
- Wait momentarily before adding the egg so you don’t scramble it. Add the egg, brown sugar, vanilla, and whisk until smooth.: Right after melting the butter there is a brief window where the residual heat can shock the egg , so I pause until the bowl is warm not hot. When I whisk in the egg , the mixture becomes glossy and slightly thick, and the aroma of brown sugar blooms as the molasses warms. This step creates the emulsion that gives the bars a tender crumb. A common error is adding the egg too early which causes curdling or bits of cooked egg that affect texture. Whisk until the mixture is homogenous and smooth, but stop before it becomes foamy which would introduce extra air.
- Add the flour and stir until just combined, don’t overmix.: Adding the all-purpose flour transforms the glossy wet mix into a more structured batter, and the surface will look matte rather than shiny when ready. Stirring just to combine preserves tenderness; over mixing will develop gluten and create a chewier texture. You should see streaks disappear and feel the batter thicken under your spoon. A common misstep is vigorous beating, which yields a less delicate crumb. Use a folding motion and stop when no dry pockets remain, the batter should be cohesive but not dense.
- Add the graham crackers and any crumbs on cutting board, marshmallows, chocolate chips and fold to incorporate.: At this stage the bowl fills with textures and warm aromas as you fold in the graham crackers , marshmallows , and chocolate chips . Folding preserves the marshmallow shape while distributing the crackers and chips so each bite is varied. You will notice streaks of white from marshmallows and glossy chips against the golden batter. A pitfall here is over folding until the marshmallows melt into the batter, losing those soft pockets; fold gently until mixed but still visibly chunked. The sound shifts to a quieter, thicker swipe as the mixture becomes cohesive, and you should feel slight resistance when the spatula pulls through.
- Turn batter out into prepared pan, smoothing the top lightly with a spatula.: Pouring the batter into the lined pan creates a thick, even layer that smells of butter and chocolate. Smoothing the top lightly distributes mix ins and prevents high and low spots that can affect baking time. My hand senses when the surface is level, and visually I aim for a uniform thickness to ensure even doneness. A common problem is overworking the surface which can press out mix ins, so a gentle touch is best. Use the spatula edge to nudge batter into corners, and tap the pan briefly on the counter to release air bubbles.
- Bake for about 20 to 22 minutes, or until bars have firmed up in the center and edges will be set. Some marshmallows may have developed a hint of golden color.: While baking you will smell a warm, toasty aroma as the graham crackers and butter brown slightly and the chocolate softens. The visual cues are crucial, watch for edges that pull slightly away from the foil and a center that jiggles less when nudged. If the marshmallows brown a touch, that adds a toasty note. A common mistake is overbaking which dries the bars; remove them when the center is just set for a soft interior. Listen for the quiet settling of the oven once the bars are nearly done, and trust the visual cues more than a fixed minute count because ovens vary.
- Allow bars to cool in pan for at least 30 minutes before slicing and serving.: Cooling is the patience reward, as the aroma mellows and molten bits firm just enough to slice cleanly. The bars will still be soft but slice without smooshing if you wait the recommended time. Cutting too early is a frequent error that leads to messy squares and lost structure. I run a sharp knife along the foil edges to loosen the block before lifting it out, and slicing yields neat pieces with melted pockets of chocolate and tender marshmallow. The texture will be noticeably more cohesive after the rest period.
Notes
- Warm the egg slightly before adding it to the melted butter. A room temperature egg blends more easily and reduces the chance of scrambling from residual heat.
- Measure flour accurately by spooning into the cup and leveling, not scooping. This prevents dense bars that lose their soft interior.
- Fold gently when incorporating the graham crackers, marshmallows, and chocolate chips to keep distinct textures intact in each bite.
- Check doneness visually instead of relying solely on time. Look for set edges and a slightly soft center, which indicates the perfect gooey interior.
- Cool thoroughly for at least 30 minutes in the pan; this helps the bars firm up so they slice cleanly without crumbling.