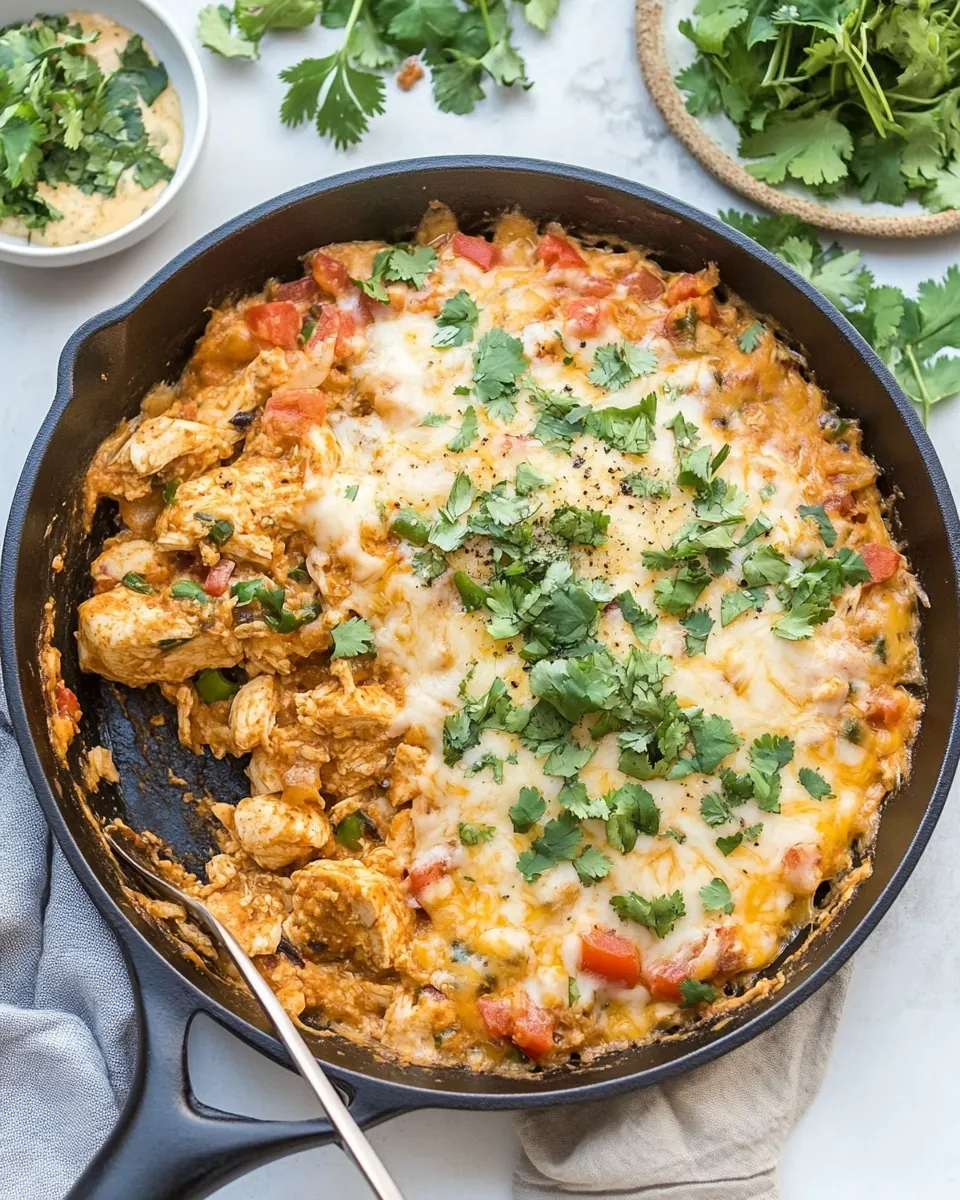
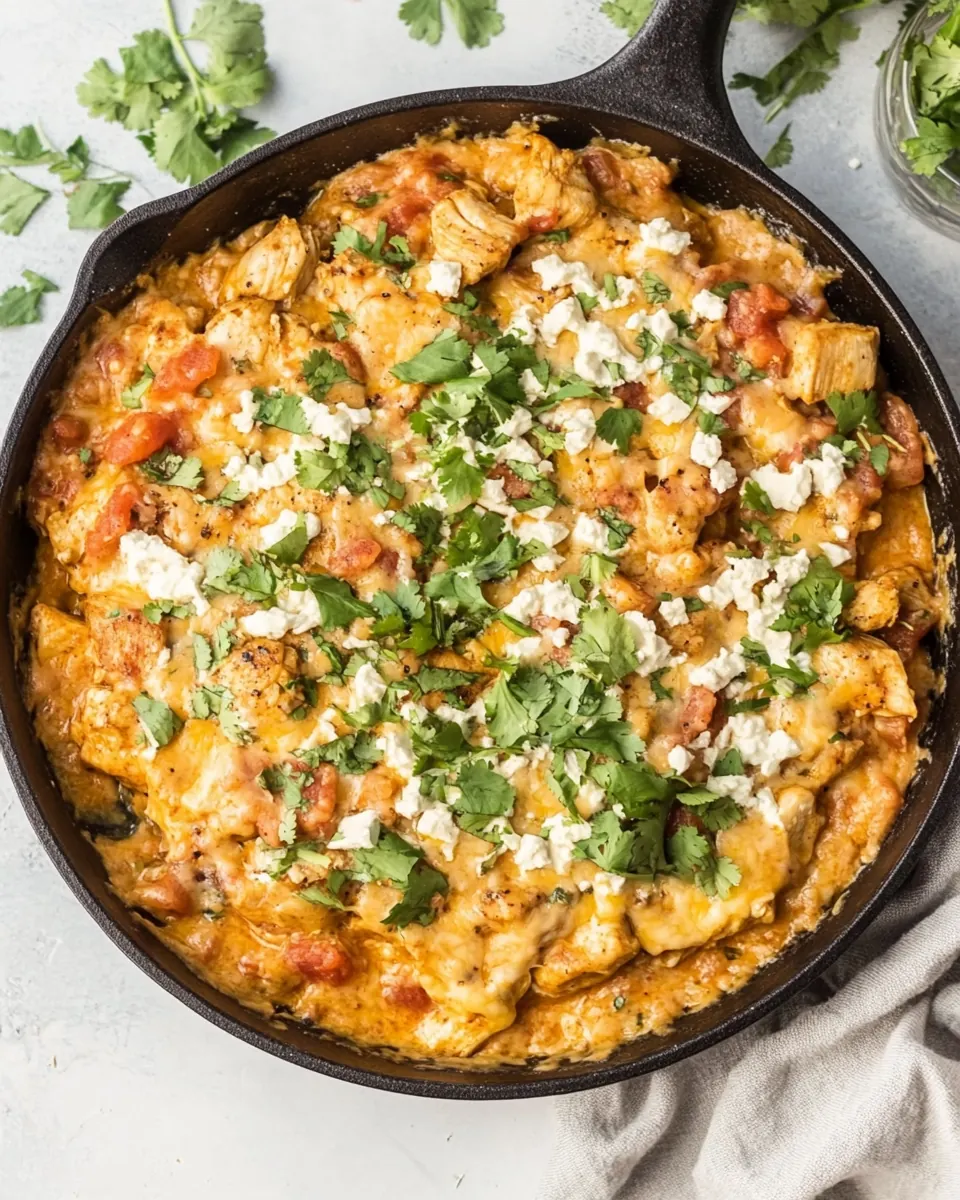
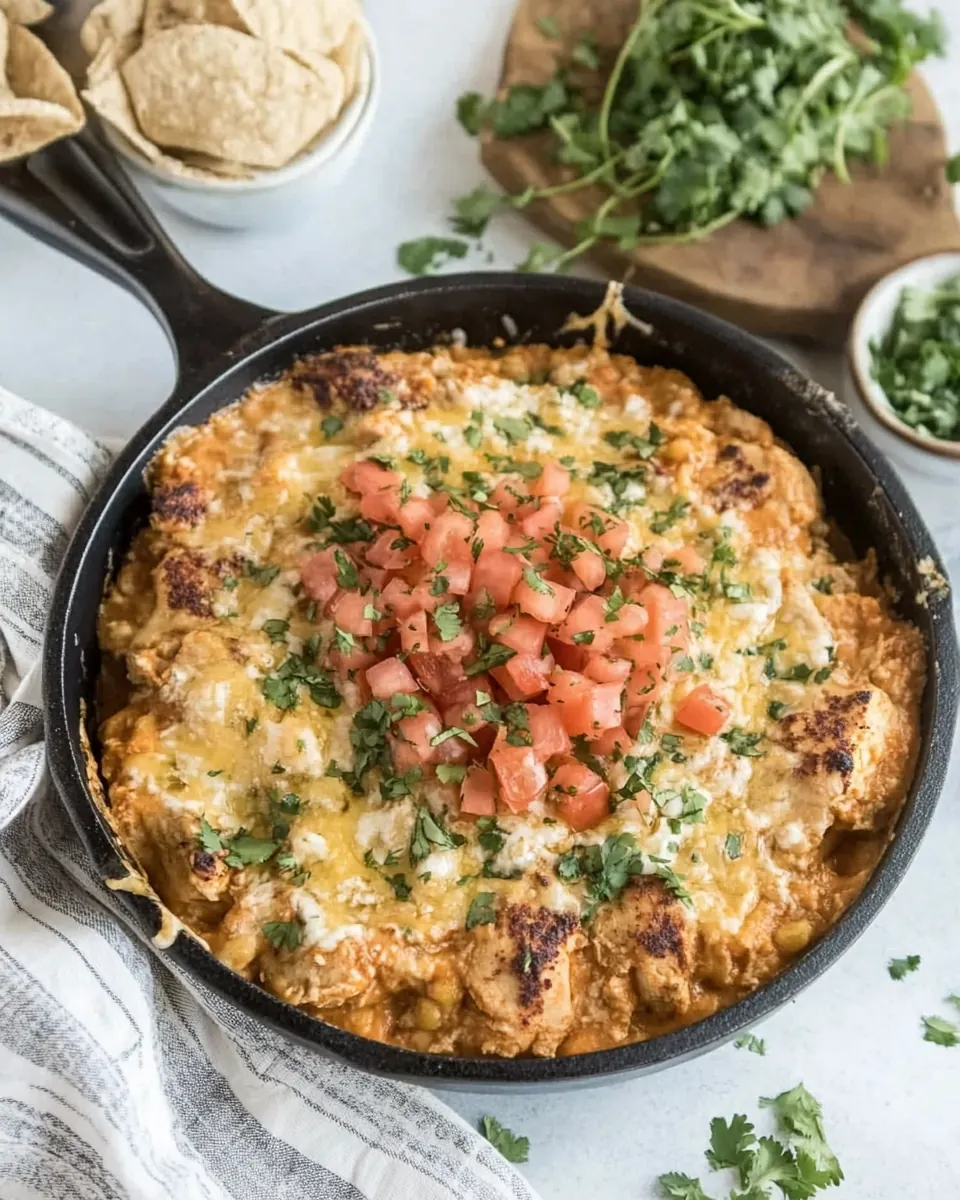
Skillet Chicken con Queso
Skillet Chicken con Queso is one of those weekday heroes I turn to when I want something comforting, cheesy, and quick without a lot of fuss.
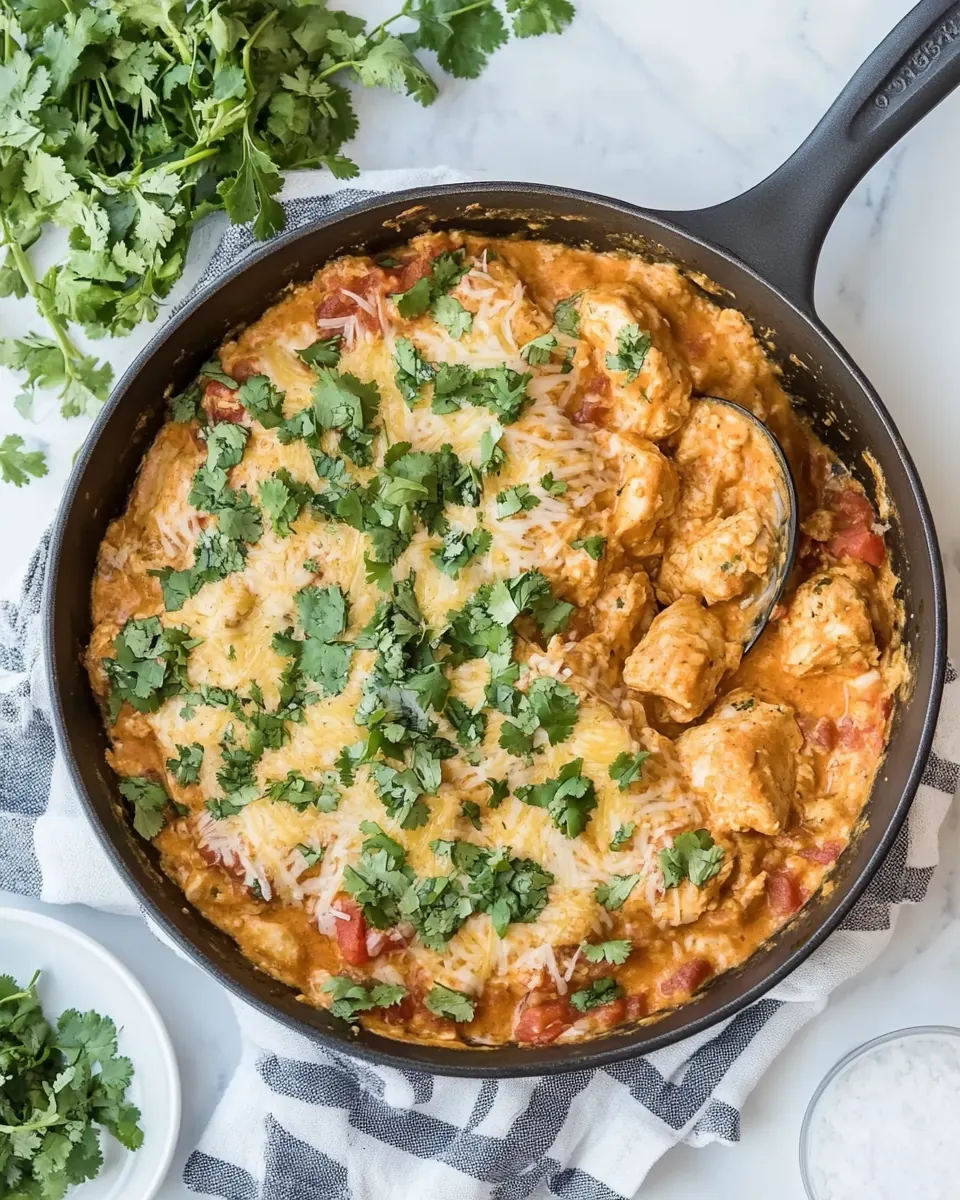
One evening after a long day of errands I pulled a few pantry staples together and ended up with a bubbling skillet full of creamy rice, tender chicken, and melty cheese that everyone at the table hovered over. I remember the moment the broiler hit the top layer of cheese and it started to brown, the kitchen filled with that toasty, slightly caramelized aroma that makes you want to call everyone to dinner. That first forkful, where the smooth queso met the warm, seasoned chicken, convinced me this would become a staple for busy nights.
I also love how flexible this dish is. It started as a simple skillet idea and evolved each time I made it, depending on what I had handy. Sometimes I fold in a spoonful of fresh pico or a handful of chopped cilantro right at the end to brighten it up, sometimes I keep it simple and let the creamy base and seasoned chicken shine. Every version has that satisfying mix of textures, from fluffy rice to the soft melt of cheese, and it always brings people to the table. If you enjoy food that is straightforward, full of flavor, and unapologetically cheesy, you are going to love this one.
Recipe Snapshot
25 mins
5 mins
20 mins
Medium
450 kcal
Mexican
Gluten-Free, Low FODMAP
Dinner
Large Skillet, Spatula, Oven Broiler
The Magic of This Skillet Chicken con Queso
Comforting Creamy Texture
I adore the way Skillet Chicken con Queso delivers a velvety, creamy mouthfeel thanks to the melted queso and half and half. That silky base clings to each grain of rice, making every bite indulgent yet balanced. I often find myself pausing after the first forkful to savor that luxurious texture, which sets this dish apart from run of the mill casseroles.
Speed for Busy Nights
We often need dinner in a hurry, and this recipe answers that call. From seasoning the chicken to bubbling the rice in the same skillet, you cut down on steps and dishes. I like that the method respects time without sacrificing flavor, so you can deliver a crowd pleasing meal on a weeknight and still have leftovers that reheat beautifully.
Bold, Layered Flavors
The mix of taco seasoning, queso, and a tangy salsa creates a layered profile I can’t get enough of. There is a warm, savory backbone from the seasoned chicken, a creamy middle from the dairy, and a bright finish from the fresh cilantro and pico. I always find new little flavor notes each time I make it, which keeps the dish interesting.
One Skillet Convenience
I love one pan meals for the cleanup win, and this one truly earns that badge. Cooking the chicken first and then building the rice and sauce in the same skillet captures those fond flavors from the browned bits. It is a practical approach that also enhances taste, and I especially appreciate it when hosting friends who want something satisfying with minimal kitchen time.
Customizable and Crowd Friendly
This recipe is a great template. I’ll toss in extra vegetables or beans when I want bulk, and the crowd always appreciates the top layer of melted cheese and a sprinkle of cilantro for color. I’ve made this for family gatherings and casual dinners, and every time it hits the mark because it is both familiar and adaptable.
Key Ingredients for Skillet Chicken con Queso
These ingredients come together to create a balance of creamy, savory, and fresh elements. The key players are the seasoned chicken for protein and flavor, the dairy components for creaminess, and the rice as a comforting base that soaks up the sauce. Together they form a one skillet meal that is both hearty and approachable.
- 1 tablespoon olive oil: Adds a fruity, savory frying medium that helps brown chicken and carry seasonings; contributes a subtle richness and prevents sticking during sautéing, enhancing overall mouthfeel.
- 3 chicken breasts boneless/skinless and cut into cubes: Provides tender, lean protein that becomes the main body of the dish when cubed and browned; soaks up seasonings and queso to create hearty, satisfying bites throughout the skillet.
- 1 ounce Taco Seasoning Click for Homemade Recipe!: Lends a concentrated blend of spices to season the chicken and rice; delivers classic Tex-Mex flavors like chili, cumin, and garlic that unify the dish with bold, savory notes.
- 1 1/2 tablespoons water: Helps dissolve and distribute the taco seasoning evenly while adding necessary moisture for cooking; aids in creating a light pan sauce that prevents dryness and binds flavors.
- 1 cup half and half: Contributes creamy, slightly rich dairy that melds with queso to create a smooth, velvety sauce; balances spicy elements and adds luscious mouth-coating texture to the skillet.
- 2 cups instant white rice: Provides a quick-cooking starch that soaks up flavorful liquids and bulks the meal; yields tender grains that deliver comforting body and help stretch the dish for more servings.
- 1 cup Queso Blanco (White Queso) homemade or store bought, melted: Supplies a smooth, melty cheese base that creates the signature queso component; adds creamy tang and a cohesive sauce that clings to chicken and rice for rich flavor.
- 1 cup salsa thin restaurant style: Brings bright, tangy tomato and chili notes that cut through richness; adds acidity and moisture to brighten the overall flavor profile and complement the queso.
- 1/4 fresh cilantro chopped, plus more for garnish: Imparts fresh herbaceous flavor and visual color when chopped and mixed in; enhances fragrance and adds a clean, slightly citrusy finish as part of the garnish.
- 1 can Green Chiles 4.5 ounce can, drained: Adds mild, slightly smoky green chili heat and vegetal flavor; contributes small bursts of piquant interest without overwhelming the creamy sauce.
- 1/2 cup pico de gallo: Provides fresh, chunky tomato-onion flavor with cilantro and lime notes; adds texture contrast and zesty brightness when spooned into the finished skillet.
- 1 cup Mexican blend cheese shredded: Delivers a melty, savory topping that browns slightly if baked or melts smoothly when stirred; enhances cheesiness and provides an appealing gooey finish to the dish.
Putting Together Skillet Chicken con Queso
Bringing this recipe to life is about timing and paying attention to sensory cues. You will build layers of flavor by searing, simmering, and broiling, and each stage rewards close attention to texture and aroma.
- Heat the chicken cubes and olive oil in a large skillet over medium/high heat.: The moment the olive oil begins to shimmer and slightly ripple, you will smell a faint warmth that signals the pan is ready. When you add the chicken cubes, pay attention to the initial sizzle, which tells you the surface is sealing and the Maillard reaction is starting to brown the meat. That browning creates complex savory flavors you want in the final dish. As the chicken cooks, listen for even sizzling across the pieces, and watch for golden edges forming; that visual cue means good flavor development. A common error here is crowding the pan, which traps steam and prevents browning, resulting in pale, steamed meat instead of seared pieces. If pieces are cooking unevenly, gently shift them so each piece has contact with the hot surface.
- Now sprinkle 1 ounce Taco Seasoning on chicken cubes and turning them to make sure all sides are coated well. Add in the 1 1/2 tablespoons water to assist with coating all the chicken cubes.: Right after adding the taco seasoning , you should notice an aromatic lift, a warm spice perfume that fills the kitchen. The small splash of water helps dissolve the seasoning and creates a thin glaze that adheres to the chicken , ensuring each bite is evenly seasoned. As you turn the pieces, watch the spice form a light coating and take on color from the pan, which deepens the flavor. If you skip the water, the seasoning can clump and not distribute evenly, leaving pockets of intense spice or bland areas. Stir gently to avoid knocking off the crust that is forming.
- Turn the chicken cubes as you cook for about 6-8 minutes OR until the chicken is just cooked through.: During this stage you will rely on tactile and visual signals more than precise timing alone. The chicken should develop a golden brown exterior and feel slightly firm to the touch when done, with juices running clear if you test a thicker piece. The pan will emit a toasty note as the sugars in the seasoning caramelize. Avoid overcooking, because dry chicken will undermine the creamy nature of the dish; once the pieces are opaque and spring back slightly, remove them. A frequent mistake is to assume large pieces cook through faster than they do; cut a piece if unsure rather than guessing.
- Place the chicken cubes on a plate and cover with foil to retain the heat. Set aside.: Covering the cooked chicken with foil traps gentle steam and keeps the meat warm without continuing to aggressively cook it. This step preserves juiciness while you finish the sauce and rice in the same skillet. You will notice residual warmth and a faint perfume of spices lingering under the foil. If you leave the chicken sitting uncovered it will cool quickly and form a film on the surface, which can change its texture when reintroduced to the hot skillet later. Keep it loosely tented so condensation does not accumulate and make the surface soggy.
- In the same skillet, add the half & half and white rice. Stir to combine.: When you return the pan to medium heat and pour in the half and half , watch how it loosens the browned bits clinging to the bottom, lifting flavor into the liquid. As you stir in the rice , you should see the grains become coated and begin to warm through. The mixture will steam lightly and emit a gentle dairy aroma. This step is where the base of the sauce forms, so keep the heat moderate to avoid scalding the dairy. If the cream starts to separate or bubble aggressively, lower the heat immediately, because burning will give the dish an unpleasant bitter note.
- Add in the melted queso and salsa. Stir to fully combine. Bring to a boil, then cover and reduce heat to simmer for 5 minutes or until the rice is fully cooked and fluffy.: Adding the warmed queso and thin salsa will transform the pan into a luscious, saucy mixture. As you stir, the sauce should become glossy and cling to the rice , and a gentle bubbling will indicate the flavors are melding. Once you see steady bubbles at the edges, cover and drop to a low simmer; the trapped steam finishes cooking the instant rice to a tender, fluffy texture. You will smell a meld of dairy and tomato notes as the sauce reduces slightly. Avoid leaving the heat too high while covered, as the sauce can scorch on the bottom; if you catch a burnt smell, remove the lid and reduce temperature immediately.
- Stir in cilantro, green chiles, and pico de gallo into the rice mixture.: The moment you fold in the cilantro , canned green chiles , and fresh pico de gallo , the bowl will brighten with herbal and tangy aromas. These additions introduce contrast to the creamy base, making the dish lively rather than one note. Once stirred, you should see flecks of green and red dispersed through the rice, signaling balance. A pitfall here is adding delicate ingredients too early, which causes loss of fresh texture and color; fold them in at the end to preserve brightness.
- Add the cooked chicken cubes back to skillet and nestle into the rice.: As you return the warm chicken to the skillet, nestle the pieces into the rice so they sit slightly below the surface and absorb some of the saucy mixture. You will feel a satisfying warmth and see the meat and rice become unified. This melding ensures each bite combines protein and sauce, rather than segregated components. A common slip is to simply scatter the chicken on top; pressing them into the mixture helps flavor integration and keeps the pieces from drying under the broiler.
- Cover with the 1 cup cheese.: Layering shredded Mexican blend cheese across the top creates a melty, golden finish after broiling. The cheese should be spread evenly so it melts uniformly and browns without burning. Watch the color and texture as it transitions from glossy to bubbling and then to a lightly toasted surface. Putting too much cheese can lead to an overly heavy top layer that takes longer to brown, while too little will not provide that satisfying pull; aim for an even blanket that covers the surface.
- Place skillet under the broiler for approximately 3-5 minutes or until the cheese is fully melted on top. Garnish with more cilantro if desired.: Under the broiler the cheese will bubble and develop those caramelized brown spots that signal readiness, releasing a crunchy, toasty scent that is irresistible. Keep the oven door slightly ajar if your broiler instructions suggest it, and watch closely because broilers can go from perfectly golden to burnt very quickly. When you see an even golden brown, remove the skillet and let it rest for a couple minutes so the sauce settles. A common error is walking away from the broiler, which can result in burnt cheese and a bitter finish.
How to Switch It Up
This section offers ways to tweak the recipe while keeping the core comforting elements intact. Each tip begins with a bolded phrase to help you scan options and adapt the dish for different occasions or preferences.
- Add vegetables: Stir in cooked vegetables like zucchini or corn toward the end to boost volume and nutrition while maintaining the creamy texture of the dish.
- Beans for bulk: Fold in rinsed red kidney or black beans after simmering so they heat through without breaking down, adding protein and a pleasant bite.
- Use store bought shortcuts: Opt for store bought queso, salsa, and pico de gallo when time is tight, they blend well and preserve the intended flavor profile.
- Make it milder or spicier: Adjust the heat by choosing a mild or hot taco seasoning and salsa, tasting as you go so the spice level suits your table.
- Swap rice types carefully: If you use regular white rice instead of instant, increase the liquid and cook time, and check for doneness often to avoid overcooking.
- Garnish choices: Offer extra chopped cilantro and a squeeze of fresh lime at the table to brighten servings individually.
Best Served With
This dish plays well with simple sides and reaches into different meal occasions. Below are thoughtful serving suggestions that highlight pairing ideas, storage guidance, and suitable occasions.
- Fresh salad on the side: A crisp green salad provides a refreshing counterpoint to the creamy skillet, adding crunch and acidity to balance the meal.
- Warm tortillas: Soft flour or corn tortillas allow diners to scoop the cheesy rice and chicken, turning the dish into a hands on experience for casual dinners.
- Family weeknight dinner: This recipe is ideal for easy weeknight dinners because it is fast, filling, and kid friendly, perfect for busy households.
- Entertaining a crowd: Serve straight from the skillet on the table for a communal feel, with bowls of extra pico de gallo and cilantro so guests can customize.
- Storage tips: Store leftovers in an airtight container in the fridge for up to four days, and reheat gently on the stove or in the oven to preserve texture.
- Seasonal pairing: In cooler months, pair it with a warm vegetable side, while in summer, lighten up with a chilled corn salad or simple tomato salad for contrast.
- Occasion ideas: Great for casual dinner nights, potlucks, or anytime you want a satisfying one skillet meal that feels special with minimal effort.
FAQ
Conclusion
Skillet Chicken con Queso stands out because it pairs creamy queso and seasoned chicken over fluffy rice for a comforting, fuss free meal. Try it when you want a reliable weeknight winner that still feels indulgent. It’s the kind of recipe that simplifies dinner without sacrificing flavor, making it perfect for busy families or casual entertaining. Give it a go and enjoy how quickly it becomes a go-to in your rotation.

Skillet Chicken con Queso
Equipment
- Large Skillet
- Spatula
- Oven Broiler
Ingredients
- 1 tablespoon olive oil Adds a fruity, savory frying medium that helps brown chicken and carry seasonings; contributes a subtle richness and prevents sticking during sautéing, enhancing overall mouthfeel.
- 3 chicken breasts boneless/skinless and cut into cubes Provides tender, lean protein that becomes the main body of the dish when cubed and browned; soaks up seasonings and queso to create hearty, satisfying bites throughout the skillet.
- 1 ounce Taco Seasoning Click for Homemade Recipe! Lends a concentrated blend of spices to season the chicken and rice; delivers classic Tex-Mex flavors like chili, cumin, and garlic that unify the dish with bold, savory notes.
- 1 1/2 tablespoons water Helps dissolve and distribute the taco seasoning evenly while adding necessary moisture for cooking; aids in creating a light pan sauce that prevents dryness and binds flavors.
- 1 cup half and half Contributes creamy, slightly rich dairy that melds with queso to create a smooth, velvety sauce; balances spicy elements and adds luscious mouth-coating texture to the skillet.
- 2 cups instant white rice Provides a quick-cooking starch that soaks up flavorful liquids and bulks the meal; yields tender grains that deliver comforting body and help stretch the dish for more servings.
- 1 cup Queso Blanco (White Queso) homemade or store bought, melted Supplies a smooth, melty cheese base that creates the signature queso component; adds creamy tang and a cohesive sauce that clings to chicken and rice for rich flavor.
- 1 cup salsa thin restaurant style Brings bright, tangy tomato and chili notes that cut through richness; adds acidity and moisture to brighten the overall flavor profile and complement the queso.
- 1/4 fresh cilantro chopped, plus more for garnish Imparts fresh herbaceous flavor and visual color when chopped and mixed in; enhances fragrance and adds a clean, slightly citrusy finish as part of the garnish.
- 1 can Green Chiles 4.5 ounce can, drained Adds mild, slightly smoky green chili heat and vegetal flavor; contributes small bursts of piquant interest without overwhelming the creamy sauce.
- 1/2 cup pico de gallo Provides fresh, chunky tomato-onion flavor with cilantro and lime notes; adds texture contrast and zesty brightness when spooned into the finished skillet.
- 1 cup Mexican blend cheese shredded Delivers a melty, savory topping that browns slightly if baked or melts smoothly when stirred; enhances cheesiness and provides an appealing gooey finish to the dish.
Instructions
- Heat the chicken cubes and olive oil in a large skillet over medium/high heat.: The moment the olive oil begins to shimmer and slightly ripple, you will smell a faint warmth that signals the pan is ready. When you add the chicken cubes, pay attention to the initial sizzle, which tells you the surface is sealing and the Maillard reaction is starting to brown the meat. That browning creates complex savory flavors you want in the final dish. As the chicken cooks, listen for even sizzling across the pieces, and watch for golden edges forming; that visual cue means good flavor development. A common error here is crowding the pan, which traps steam and prevents browning, resulting in pale, steamed meat instead of seared pieces. If pieces are cooking unevenly, gently shift them so each piece has contact with the hot surface.
- Now sprinkle 1 ounce Taco Seasoning on chicken cubes and turning them to make sure all sides are coated well. Add in the 1 1/2 tablespoons water to assist with coating all the chicken cubes.: Right after adding the taco seasoning , you should notice an aromatic lift, a warm spice perfume that fills the kitchen. The small splash of water helps dissolve the seasoning and creates a thin glaze that adheres to the chicken , ensuring each bite is evenly seasoned. As you turn the pieces, watch the spice form a light coating and take on color from the pan, which deepens the flavor. If you skip the water, the seasoning can clump and not distribute evenly, leaving pockets of intense spice or bland areas. Stir gently to avoid knocking off the crust that is forming.
- Turn the chicken cubes as you cook for about 6-8 minutes OR until the chicken is just cooked through.: During this stage you will rely on tactile and visual signals more than precise timing alone. The chicken should develop a golden brown exterior and feel slightly firm to the touch when done, with juices running clear if you test a thicker piece. The pan will emit a toasty note as the sugars in the seasoning caramelize. Avoid overcooking, because dry chicken will undermine the creamy nature of the dish; once the pieces are opaque and spring back slightly, remove them. A frequent mistake is to assume large pieces cook through faster than they do; cut a piece if unsure rather than guessing.
- Place the chicken cubes on a plate and cover with foil to retain the heat. Set aside.: Covering the cooked chicken with foil traps gentle steam and keeps the meat warm without continuing to aggressively cook it. This step preserves juiciness while you finish the sauce and rice in the same skillet. You will notice residual warmth and a faint perfume of spices lingering under the foil. If you leave the chicken sitting uncovered it will cool quickly and form a film on the surface, which can change its texture when reintroduced to the hot skillet later. Keep it loosely tented so condensation does not accumulate and make the surface soggy.
- In the same skillet, add the half & half and white rice. Stir to combine.: When you return the pan to medium heat and pour in the half and half , watch how it loosens the browned bits clinging to the bottom, lifting flavor into the liquid. As you stir in the rice , you should see the grains become coated and begin to warm through. The mixture will steam lightly and emit a gentle dairy aroma. This step is where the base of the sauce forms, so keep the heat moderate to avoid scalding the dairy. If the cream starts to separate or bubble aggressively, lower the heat immediately, because burning will give the dish an unpleasant bitter note.
- Add in the melted queso and salsa. Stir to fully combine. Bring to a boil, then cover and reduce heat to simmer for 5 minutes or until the rice is fully cooked and fluffy.: Adding the warmed queso and thin salsa will transform the pan into a luscious, saucy mixture. As you stir, the sauce should become glossy and cling to the rice , and a gentle bubbling will indicate the flavors are melding. Once you see steady bubbles at the edges, cover and drop to a low simmer; the trapped steam finishes cooking the instant rice to a tender, fluffy texture. You will smell a meld of dairy and tomato notes as the sauce reduces slightly. Avoid leaving the heat too high while covered, as the sauce can scorch on the bottom; if you catch a burnt smell, remove the lid and reduce temperature immediately.
- Stir in cilantro, green chiles, and pico de gallo into the rice mixture.: The moment you fold in the cilantro , canned green chiles , and fresh pico de gallo , the bowl will brighten with herbal and tangy aromas. These additions introduce contrast to the creamy base, making the dish lively rather than one note. Once stirred, you should see flecks of green and red dispersed through the rice, signaling balance. A pitfall here is adding delicate ingredients too early, which causes loss of fresh texture and color; fold them in at the end to preserve brightness.
- Add the cooked chicken cubes back to skillet and nestle into the rice.: As you return the warm chicken to the skillet, nestle the pieces into the rice so they sit slightly below the surface and absorb some of the saucy mixture. You will feel a satisfying warmth and see the meat and rice become unified. This melding ensures each bite combines protein and sauce, rather than segregated components. A common slip is to simply scatter the chicken on top; pressing them into the mixture helps flavor integration and keeps the pieces from drying under the broiler.
- Cover with the 1 cup cheese.: Layering shredded Mexican blend cheese across the top creates a melty, golden finish after broiling. The cheese should be spread evenly so it melts uniformly and browns without burning. Watch the color and texture as it transitions from glossy to bubbling and then to a lightly toasted surface. Putting too much cheese can lead to an overly heavy top layer that takes longer to brown, while too little will not provide that satisfying pull; aim for an even blanket that covers the surface.
- Place skillet under the broiler for approximately 3-5 minutes or until the cheese is fully melted on top. Garnish with more cilantro if desired.: Under the broiler the cheese will bubble and develop those caramelized brown spots that signal readiness, releasing a crunchy, toasty scent that is irresistible. Keep the oven door slightly ajar if your broiler instructions suggest it, and watch closely because broilers can go from perfectly golden to burnt very quickly. When you see an even golden brown, remove the skillet and let it rest for a couple minutes so the sauce settles. A common error is walking away from the broiler, which can result in burnt cheese and a bitter finish.
Notes
- Add vegetables: Stir in cooked vegetables like zucchini or corn toward the end to boost volume and nutrition while maintaining the creamy texture of the dish.
- Beans for bulk: Fold in rinsed red kidney or black beans after simmering so they heat through without breaking down, adding protein and a pleasant bite.
- Use store bought shortcuts: Opt for store bought queso, salsa, and pico de gallo when time is tight, they blend well and preserve the intended flavor profile.
- Make it milder or spicier: Adjust the heat by choosing a mild or hot taco seasoning and salsa, tasting as you go so the spice level suits your table.
- Swap rice types carefully: If you use regular white rice instead of instant, increase the liquid and cook time, and check for doneness often to avoid overcooking.
- Garnish choices: Offer extra chopped cilantro and a squeeze of fresh lime at the table to brighten servings individually.