
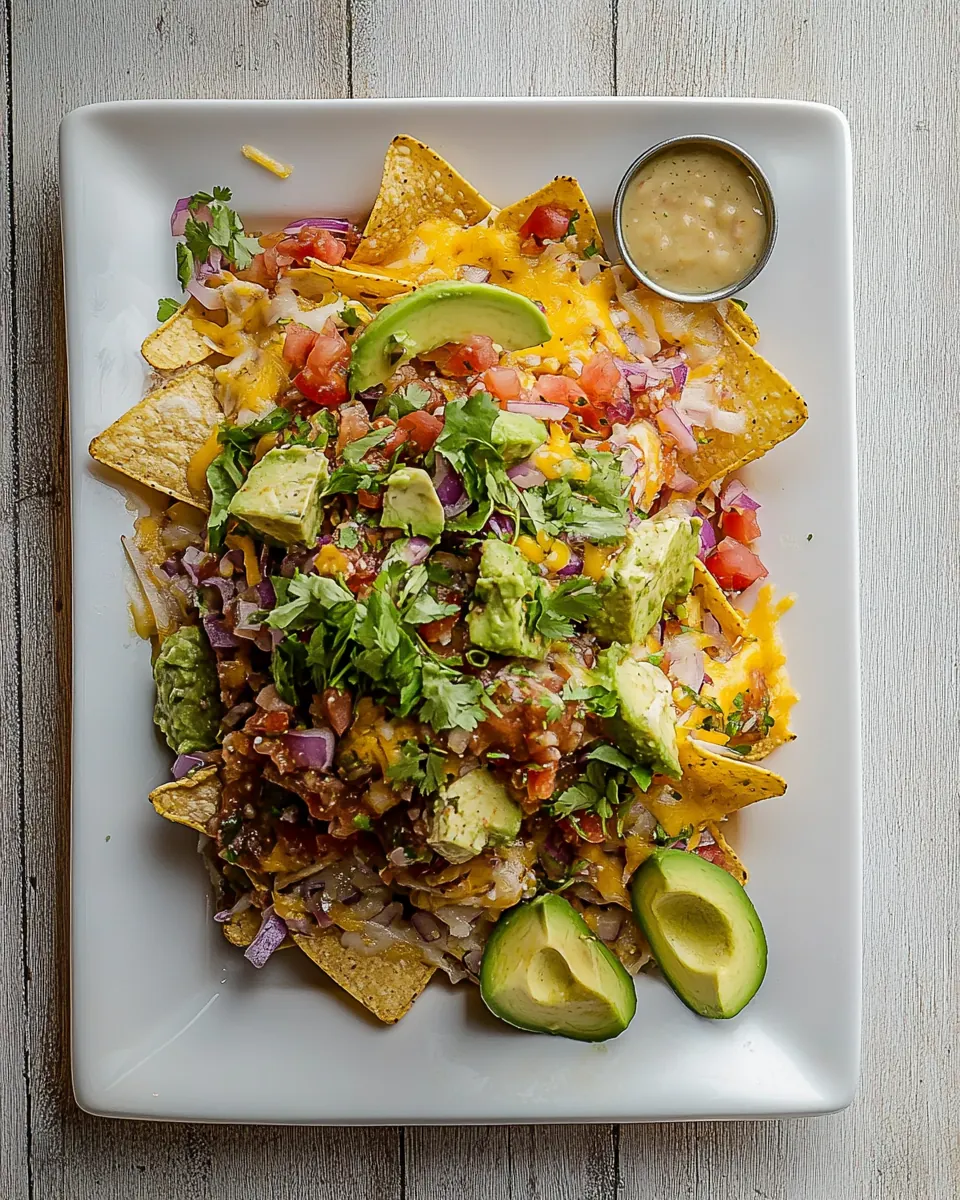
Salad nachos with home preserved zesty salsa
Salad nachos with home preserved zesty salsa arrived in my kitchen on a humid summer afternoon when I wanted something crunchy and bright that felt a little rebellious and wholly comforting.
I remember standing at the counter with a basket of overripe tomatoes and a jar of my last preserved peppers, thinking about how simple ingredients can turn into a festive snack. I love how tomatoes and chili peppers play off each other, the former cooling and juicy, the latter lifting everything with heat. That first bite taught me that this is not just a party plate, it is a memory maker. Over the years I have adjusted textures and salt levels until the combination of crisp chips and tangy, preserved salsa became a go to when friends drop by unexpectedly. It is casual but deliberate, every forkful telling you that someone cared to simmer and season in advance. I often serve it for impromptu gatherings, or when I want a no fuss lunch that feels like a celebration. If you make a big batch of the salsa one afternoon, you will find yourself reaching for it all week, spooning it over simple things to lift them instantly. There is an honest kind of joy in sharing crunchy chips with a pot of preserved salsa that I hope you find when you make this recipe.
Recipe Snapshot
50 mins
20 mins
30 mins
Medium
120 kcal
Mexican
Paleo, Vegan
Appetizers
Large stockpot, Stainless steel saucepan, Preserving jars with lids and bands, Jar tongs
What’s Great About This Salad nachos with home preserved zesty salsa
Bright preserved flavor that lasts
I adore how Salad nachos with home preserved zesty salsa keeps the bright, ripe taste of summer tomatoes months after the harvest. I like making a large pot of this salsa and knowing the effort I put in will pay off through crisp, vinegary bites even in cooler months. The preservation concentrates flavor while keeping a lively acidity that cuts through richer bites.
Textural contrast that sings
The contrast between crunchy chips and the juicy, chunky salsa is why I keep coming back to this dish. I love the way the green bell peppers and onions hold their structure, giving you a satisfying bite against the soft tomatoes. That variety of texture makes each mouthful interesting, and it helps the dish work as a snack, appetizer, or a casual light meal.
Flexible heat and approachable spice
I appreciate that the heat level is easy to control. With the choice of chili peppers you can dial it down or push it up. I often swap between jalapeño and hotter options depending on the crowd, and I always taste and adjust the salt so the flavors sit balanced, not overwhelmed.
Make ahead convenience
Because the salsa is preserved, you can prepare it long before your gathering. I value recipes that let you do the hard work ahead of time, so when guests arrive you only need to arrange chips and jar the salsa. It frees you to enjoy company rather than fuss over last minute prep.
Simple, pantry friendly ingredients
This recipe uses basics you likely already grow or keep on hand. I find that the familiar cider vinegar and garlic bring everything into harmony, and the small list of ingredients makes it straightforward to scale up when needed.
Everything You Need for Salad nachos with home preserved zesty salsa
These ingredients are honest and functional. I treat the tomatoes as the foundation, the peppers and onions as texture anchors, and the vinegar as the brightener that preserves everything. Each item plays a role, whether it is acidity, heat, or body, so the ensemble works together to create a salsa that is both spoonable and sturdy enough for nachos.
- 5 cups chopped cored peeled tomatoes about 13 medium or 7 large: Provide body, juiciness, and mild sweetness while contributing the bulk of the salsa; peeled, cored, and chopped to ensure a smooth texture and even cooking.
- 2 1/2 cups chopped seeded green bell peppers about 2 large: Add crunch, fresh green pepper flavor, and mild bitterness that balances tomato sweetness; seeded and chopped to prevent excess moisture and uniform distribution.
- 2 1/2 cups chopped onions about 3 to 4 medium or 2 large: Lend savory pungency and a hint of sweetness that deepens the salsa’s flavor profile; chopped to meld with tomatoes and release aromatics during processing.
- 1 1/4 cups chopped seeded chili peppers such as hot banana, Hungarian wax, Serrano, or jalapeño (about 7 medium): Bring heat, bright chilylike flavor, and a spicy kick that defines the salsa’s intensity; seeded and chopped to control heat and spread it evenly throughout the mixture.
- 3/4 cup cider vinegar: Provide acidity and preservation qualities while brightening flavors; measured to ensure proper pH for safe home preserving and a balanced tartness.
- 1 to 2 cloves garlic finely chopped: Contribute aromatic pungency and depth with a sharp, savory note; finely chopped to integrate seamlessly and release flavor without large raw pieces.
- 1 tbsp finely chopped cilantro: Deliver fresh herbal brightness and a citrusy, slightly peppery note; finely chopped to distribute the flavor subtly throughout the salsa without overpowering it.
- 1 1/2 tsp salt: Season and enhance all flavors while helping draw out moisture from the vegetables; carefully measured to balance taste and aid preservation.
- 1/2 tsp hot pepper sauce (optional): Offer an extra layer of heat and vinegary spice when desired while adding complexity; used optionally to adjust the salsa’s final spiciness to taste.
- 4500 ml half pint glass preserving jars with lids and bands: Serve as containers for safe water-bath canning and long-term storage; half–pint preserving jars with lids and bands are specified for proper sealing and portioning.
Instructions for Salad nachos with home preserved zesty salsa
I like to think of canning salsa as a choreography of heat, timing, and cleanliness. Follow these directions closely and you will have jars that hold bright flavor for months. Below I expand each step with sensory cues and troubleshooting tips so you can feel confident at every stage.
- PREPARE boiling water canner (a large stockpot will do). Heat jars and lids in simmering water until ready for use. Do not boil. Set bands aside.: You will notice the gentle hiss of simmering water as the jars and lids warm, which helps prevent thermal shock when you ladle in hot salsa. Warming the jars means the glass will not crack when exposed to the hot liquid, and lids softened in simmering water form a better seal later on. A common mistake is letting the canner come to a full rolling boil while jars are in it, which can warp lids, so keep the temperature at a steady simmer. If you do not have a canner, use a large stockpot with a rack to keep jars off the bottom. When handling hot jars, always use jar tongs to avoid burns, and keep a clean towel nearby for drying the rims just before sealing.
- COMBINE tomatoes, green peppers, onions, chili peppers, vinegar, garlic, cilantro, salt, and hot pepper sauce, if using, in a large stainless steel saucepan. Bring to a boil over medium-high heat, stirring constantly. Reduce heat and boil gently, stirring frequently, until slightly thickened about 10 minutes.: As you add each ingredient, a chorus of aromas will rise, the sharp tang of cider vinegar mixing with the fresh green scent of cilantro and the sweet pop of tomatoes . Stainless steel preserves heat evenly and prevents metallic reactions with the vinegar. Stir everything gently to distribute the salt and seasonings; this helps draw juices from the vegetables so they cook uniformly. Avoid overcrowding the pan, because crowding can cause uneven cooking and steaming rather than a proper simmer. If the mixture seems excessively watery at first, that is normal; the goal is to reduce and concentrate flavors through cooking.
- LADLE hot salsa into hot jars, leaving 1/2 inch headspace. Remove air bubbles and adjust the headspace, if necessary, by adding hot salsa. Wipe rim. Centre lid on jar. Apply the band until the fit is fingertip-tight do not over-tighten the jar.: You will hear a lively bubbling as the mixture comes to a boil, and the scent will deepen into a rich, savory tang. Stirring constantly at the aggressive boil prevents scorching on the bottom and ensures the heat is distributed. When you reduce to a gentle boil, watch for visual cues such as the salsa pulling away from the sides of the pan and a slight thickening of the liquid. This concentration of flavors is essential, as it intensifies sweetness and balances acidity. A common error is undercooking, which leaves the salsa thin and less cohesive. If it feels too thick, a splash of water will loosen it, but trust visual cues to decide the endpoint.
- PROCESS the jars in a pot of boiling water for 15 minutes (adjust for altitude). Remove jars and cool. Check lids for seal after 24 hours. The lid should not flex up and down when the center is pressed.: The sound of the warm salsa falling into warm glass is satisfying, and leaving the precise half inch of headspace is crucial because it allows space for expansion during processing. Too little headspace can cause jars to overflow and prevent proper vacuum sealing; too much invites excess air that can shorten shelf life. After adding the salsa, inspect for large air bubbles and remove them by sliding a non metallic tool along the jar sides. Wipe the rim so no residue prevents a good seal. One mistake is neglecting to adjust headspace after filling; always check before applying lids.
- Remove air bubbles and adjust the headspace, if necessary, by adding hot salsa. Wipe rim. Centre lid on jar. Apply the band until the fit is fingertip-tight do not over-tighten the jar.: When you remove air bubbles, you often see small pockets of steam escape, and the surface will look smoother. A clean rim is essential to a secure seal, so use a damp cloth to remove any stray bits. Applying the band fingertip-tight ensures room for air to escape during processing; over tightening can prevent proper seal formation or cause lids to buckle. A frequent misstep is tightening bands too much before processing, which can ruin the vacuum seal.
- PROCESS the jars in a pot of boiling water for 15 minutes (adjust for altitude).: As the pot comes to a boil, you will see steady rolling bubbles and steam. Processing time is what guarantees shelf stability, because the sustained high temperature kills spoilage organisms. Make sure jars are fully submerged by at least an inch of water, and maintain a boil throughout the timing. A critical error is underprocessing or removing jars prematurely; always wait the full allotted time and factor in any altitude adjustments that your local extension recommends.
- Remove jars and cool.: After processing, the jars will clink as you lift them onto a towel, and the lids will often begin to pop as the vacuum forms. Place them upright in a draft free area to cool undisturbed for 12 to 24 hours. You will hear final sealing pops, and the center of each lid should be concave and firm to touch. Disturbing the jars while they are cooling can prevent proper sealing and invite contamination, so resist the urge to tighten bands or move jars until fully cooled.
- Check lids for seal after 24 hours.: Press the center of each lid; it should not flex up and down. A proper seal will feel solid and make a dull sound when tapped. If a lid did not seal, refrigerate and use that jar first. One common oversight is assuming all lids sealed; always inspect and label jars with the date and intended use timeline so you can use unsealed jars promptly.
Tips for Success
These tips will help you produce reliably tasty preserved salsa and enjoyable salad nachos. I expand practical steps I often use and common pitfalls to avoid so your jars store well and your serving moment shines.
- Choose the right tomatoes Use firm ripe tomatoes for best texture, as overly soft fruit will break down too much during cooking and produce a runny salsa.
- Seed for smoother texture If you prefer less liquid and fewer seeds, remove seeds from the green bell peppers and chili peppers before chopping.
- Keep everything warm Warm jars and lids reduce the chance of breakage when hot salsa is added, and they help form a better vacuum seal during processing.
- Taste and adjust Taste the salsa before canning; small adjustments to salt or hot pepper sauce can make a big difference after long term storage.
- Watch the boil Maintain a gentle rolling boil during processing to ensure jars are exposed to consistent temperatures for safety and preservation.
- Label jars Date and label your jars with contents so you know when they were made and can rotate your pantry stock easily.
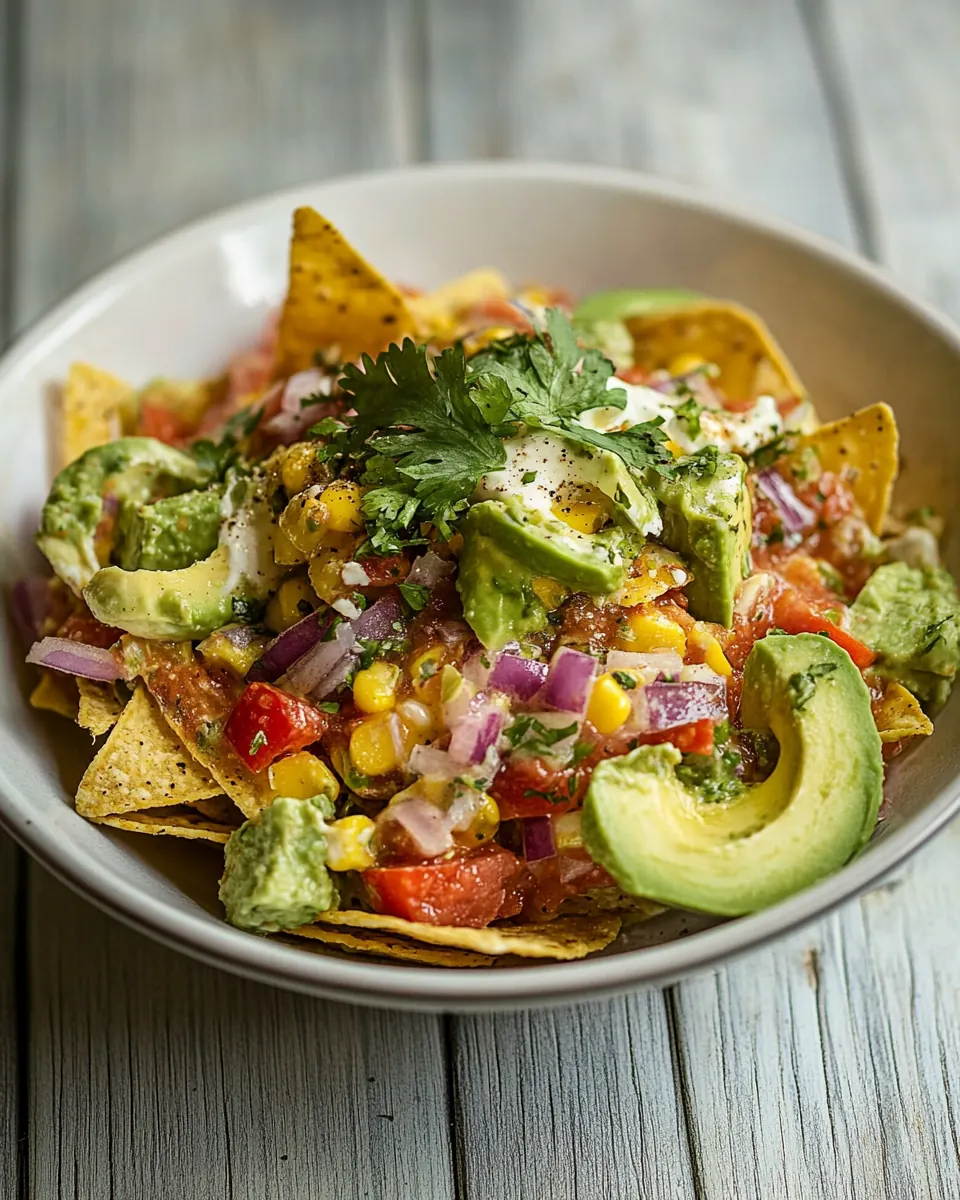
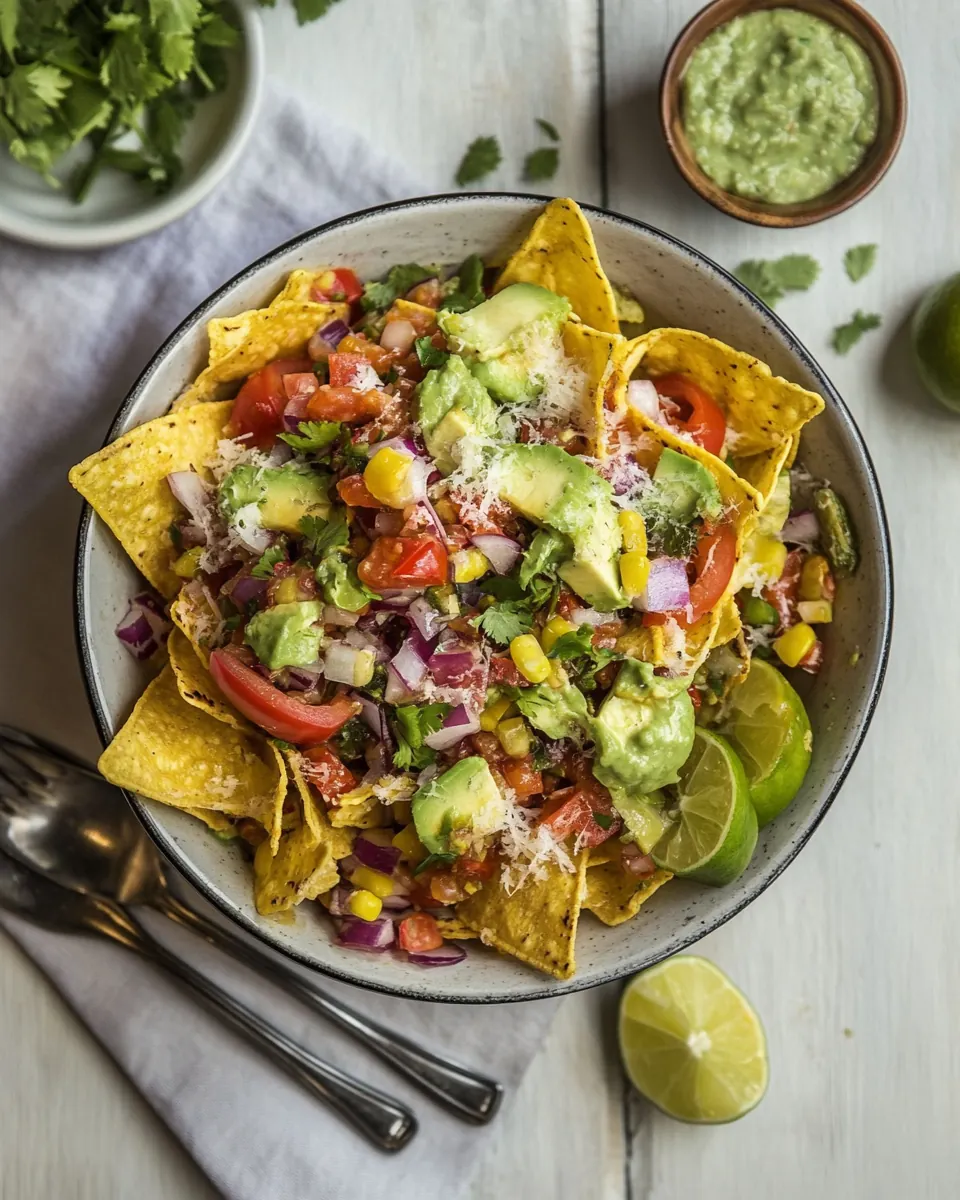
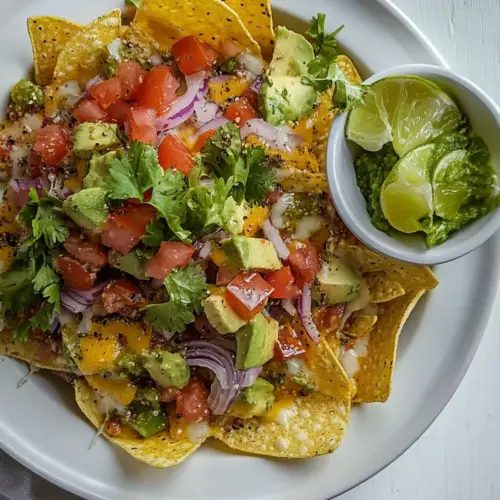
What to Pair With Salad nachos with home preserved zesty salsa
Serving this salsa over crunchy chips is the obvious choice, but there are many ways to elevate it. Below are thoughtful pairings and serving ideas for occasions from casual snacks to light suppers. I include storage and seasonal notes so you can plan ahead.
- Chips and dippers Serve with a variety of sturdy tortilla chips so the salsa stays crunchy on top; scoopable chips work best for parties and casual gatherings.
- Light lunch Spoon over a bowl of mixed greens for a tangy dressing alternative, adding texture without weighing down the salad, ideal for hot summer lunches.
- Brunch or snack table Place jars on a self serve table with spoons, chips, and small bowls of accompaniments so guests can customize their portions during a brunch or snack spread.
- Occasions Great for outdoor summer parties, picnics, or Ramadan if you want a vibrant snack to break the fast; it slots into casual menus and relaxed gatherings easily.
- Storage tips Store sealed jars in a cool dark cupboard; once opened refrigerate and use within a few weeks. Properly processed jars can keep for many months to a few years as noted in traditional canning guidance.
- Seasonal pairing This salsa shines in summer when tomatoes and peppers are at their peak, but preserved jars make it a welcome brightener through autumn and winter meals.
FAQ
Conclusion
This recipe shines because it turns peak summer produce into a preserved, ready to serve flavor booster that keeps giving long after the harvest. It is approachable, satisfying, and flexible, so you can tailor the heat and texture to suit your table. I encourage you to try making a batch, enjoy the process of canning, and relish the convenience of reaching for a jar when you want a quick crunchy, tangy lift. Share it with friends, label your jars, and savor the way simple ingredients can become a pantry staple.
Salad nachos with home preserved zesty salsa
Equipment
- Large Stockpot
- Stainless steel saucepan
- Preserving jars with lids and bands
- Jar tongs
Ingredients
- 5 cups chopped cored peeled tomatoes about 13 medium or 7 large Provide body, juiciness, and mild sweetness while contributing the bulk of the salsa; peeled, cored, and chopped to ensure a smooth texture and even cooking.
- 2 -1/2 cups chopped seeded green bell peppers about 2 large Add crunch, fresh green pepper flavor, and mild bitterness that balances tomato sweetness; seeded and chopped to prevent excess moisture and uniform distribution.
- 2 -1/2 cups chopped onions about 3 to 4 medium or 2 large Lend savory pungency and a hint of sweetness that deepens the salsa’s flavor profile; chopped to meld with tomatoes and release aromatics during processing.
- 1 -1/4 cups chopped seeded chili peppers such as hot banana, Hungarian wax, Serrano, or jalapeño (about 7 medium) Bring heat, bright chilylike flavor, and a spicy kick that defines the salsa’s intensity; seeded and chopped to control heat and spread it evenly throughout the mixture.
- 3/4 cup cider vinegar Provide acidity and preservation qualities while brightening flavors; measured to ensure proper pH for safe home preserving and a balanced tartness.
- 1 to 2 cloves garlic finely chopped Contribute aromatic pungency and depth with a sharp, savory note; finely chopped to integrate seamlessly and release flavor without large raw pieces.
- 1 tbsp finely chopped cilantro Deliver fresh herbal brightness and a citrusy, slightly peppery note; finely chopped to distribute the flavor subtly throughout the salsa without overpowering it.
- 1 -1/2 tsp salt Season and enhance all flavors while helping draw out moisture from the vegetables; carefully measured to balance taste and aid preservation.
- 1/2 tsp hot pepper sauce optional Offer an extra layer of heat and vinegary spice when desired while adding complexity; used optionally to adjust the salsa’s final spiciness to taste.
- 4500 ml half pint glass preserving jars with lids and bands Serve as containers for safe water-bath canning and long-term storage; half-pint preserving jars with lids and bands are specified for proper sealing and portioning.
Instructions
- PREPARE boiling water canner (a large stockpot will do). Heat jars and lids in simmering water until ready for use. Do not boil. Set bands aside.: You will notice the gentle hiss of simmering water as the jars and lids warm, which helps prevent thermal shock when you ladle in hot salsa. Warming the jars means the glass will not crack when exposed to the hot liquid, and lids softened in simmering water form a better seal later on. A common mistake is letting the canner come to a full rolling boil while jars are in it, which can warp lids, so keep the temperature at a steady simmer. If you do not have a canner, use a large stockpot with a rack to keep jars off the bottom. When handling hot jars, always use jar tongs to avoid burns, and keep a clean towel nearby for drying the rims just before sealing.
- COMBINE tomatoes, green peppers, onions, chili peppers, vinegar, garlic, cilantro, salt, and hot pepper sauce, if using, in a large stainless steel saucepan. Bring to a boil over medium-high heat, stirring constantly. Reduce heat and boil gently, stirring frequently, until slightly thickened about 10 minutes.: As you add each ingredient, a chorus of aromas will rise, the sharp tang of cider vinegar mixing with the fresh green scent of cilantro and the sweet pop of tomatoes . Stainless steel preserves heat evenly and prevents metallic reactions with the vinegar. Stir everything gently to distribute the salt and seasonings; this helps draw juices from the vegetables so they cook uniformly. Avoid overcrowding the pan, because crowding can cause uneven cooking and steaming rather than a proper simmer. If the mixture seems excessively watery at first, that is normal; the goal is to reduce and concentrate flavors through cooking.
- LADLE hot salsa into hot jars, leaving 1/2 inch headspace. Remove air bubbles and adjust the headspace, if necessary, by adding hot salsa. Wipe rim. Centre lid on jar. Apply the band until the fit is fingertip-tight do not over-tighten the jar.: You will hear a lively bubbling as the mixture comes to a boil, and the scent will deepen into a rich, savory tang. Stirring constantly at the aggressive boil prevents scorching on the bottom and ensures the heat is distributed. When you reduce to a gentle boil, watch for visual cues such as the salsa pulling away from the sides of the pan and a slight thickening of the liquid. This concentration of flavors is essential, as it intensifies sweetness and balances acidity. A common error is undercooking, which leaves the salsa thin and less cohesive. If it feels too thick, a splash of water will loosen it, but trust visual cues to decide the endpoint.
- PROCESS the jars in a pot of boiling water for 15 minutes (adjust for altitude). Remove jars and cool. Check lids for seal after 24 hours. The lid should not flex up and down when the center is pressed.: The sound of the warm salsa falling into warm glass is satisfying, and leaving the precise half inch of headspace is crucial because it allows space for expansion during processing. Too little headspace can cause jars to overflow and prevent proper vacuum sealing; too much invites excess air that can shorten shelf life. After adding the salsa, inspect for large air bubbles and remove them by sliding a non metallic tool along the jar sides. Wipe the rim so no residue prevents a good seal. One mistake is neglecting to adjust headspace after filling; always check before applying lids.
- Remove air bubbles and adjust the headspace, if necessary, by adding hot salsa. Wipe rim. Centre lid on jar. Apply the band until the fit is fingertip-tight do not over-tighten the jar.: When you remove air bubbles, you often see small pockets of steam escape, and the surface will look smoother. A clean rim is essential to a secure seal, so use a damp cloth to remove any stray bits. Applying the band fingertip-tight ensures room for air to escape during processing; over tightening can prevent proper seal formation or cause lids to buckle. A frequent misstep is tightening bands too much before processing, which can ruin the vacuum seal.
- PROCESS the jars in a pot of boiling water for 15 minutes (adjust for altitude).: As the pot comes to a boil, you will see steady rolling bubbles and steam. Processing time is what guarantees shelf stability, because the sustained high temperature kills spoilage organisms. Make sure jars are fully submerged by at least an inch of water, and maintain a boil throughout the timing. A critical error is underprocessing or removing jars prematurely; always wait the full allotted time and factor in any altitude adjustments that your local extension recommends.
- Remove jars and cool.: After processing, the jars will clink as you lift them onto a towel, and the lids will often begin to pop as the vacuum forms. Place them upright in a draft free area to cool undisturbed for 12 to 24 hours. You will hear final sealing pops, and the center of each lid should be concave and firm to touch. Disturbing the jars while they are cooling can prevent proper sealing and invite contamination, so resist the urge to tighten bands or move jars until fully cooled.
- Check lids for seal after 24 hours.: Press the center of each lid; it should not flex up and down. A proper seal will feel solid and make a dull sound when tapped. If a lid did not seal, refrigerate and use that jar first. One common oversight is assuming all lids sealed; always inspect and label jars with the date and intended use timeline so you can use unsealed jars promptly.
Notes
- Choose the right tomatoes Use firm ripe tomatoes for best texture, as overly soft fruit will break down too much during cooking and produce a runny salsa.
- Seed for smoother texture If you prefer less liquid and fewer seeds, remove seeds from the green bell peppers and chili peppers before chopping.
- Keep everything warm Warm jars and lids reduce the chance of breakage when hot salsa is added, and they help form a better vacuum seal during processing.
- Taste and adjust Taste the salsa before canning; small adjustments to salt or hot pepper sauce can make a big difference after long term storage.
- Watch the boil Maintain a gentle rolling boil during processing to ensure jars are exposed to consistent temperatures for safety and preservation.
- Label jars Date and label your jars with contents so you know when they were made and can rotate your pantry stock easily.