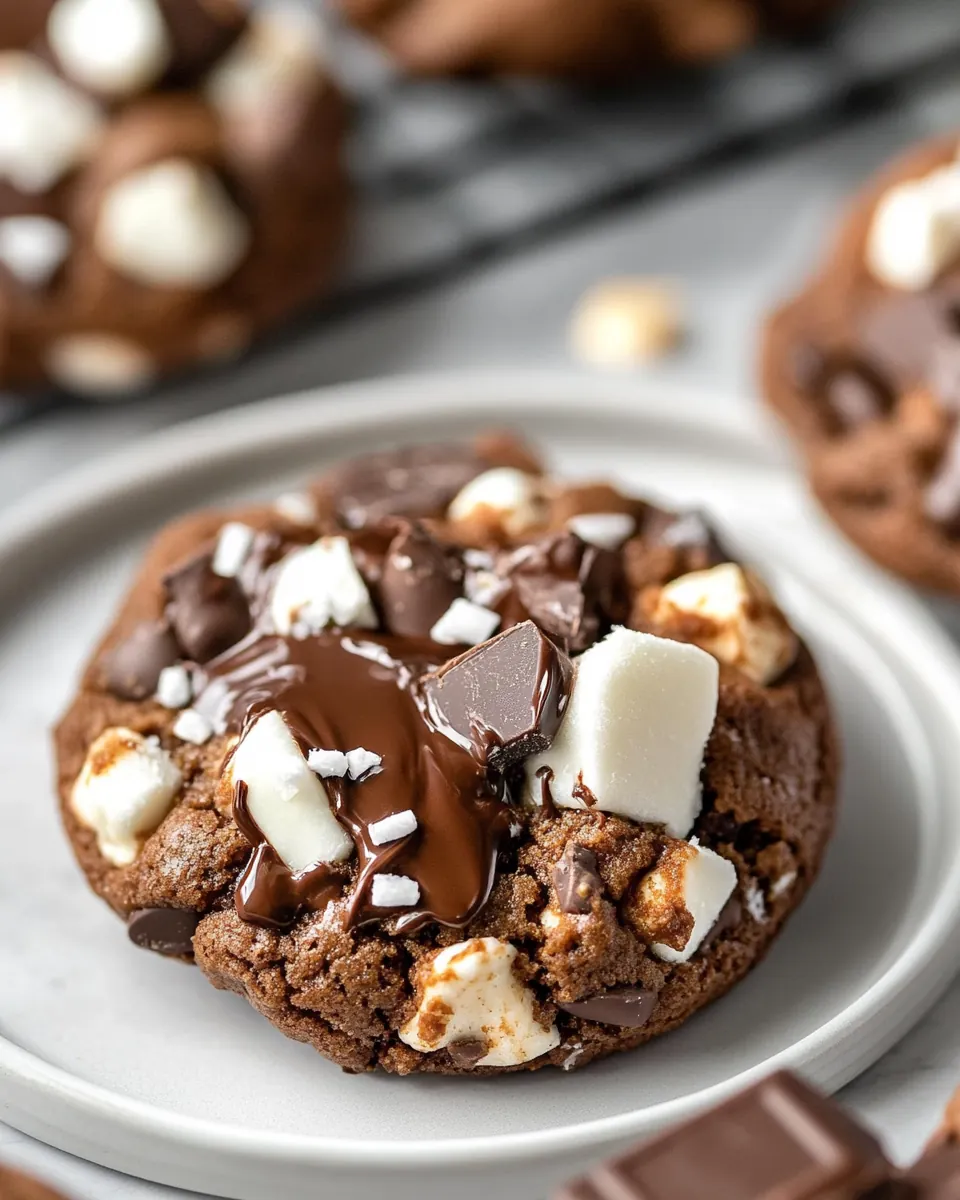
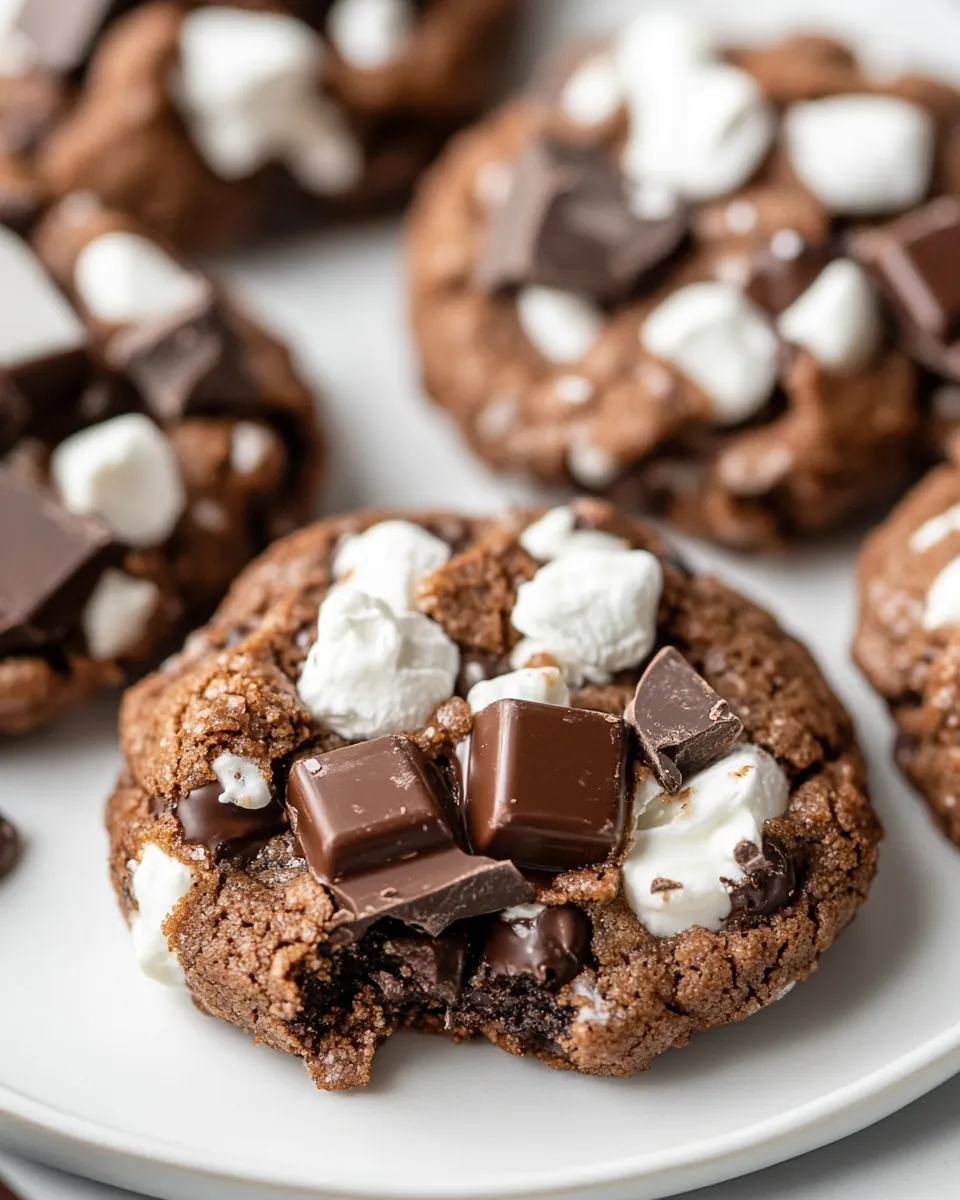
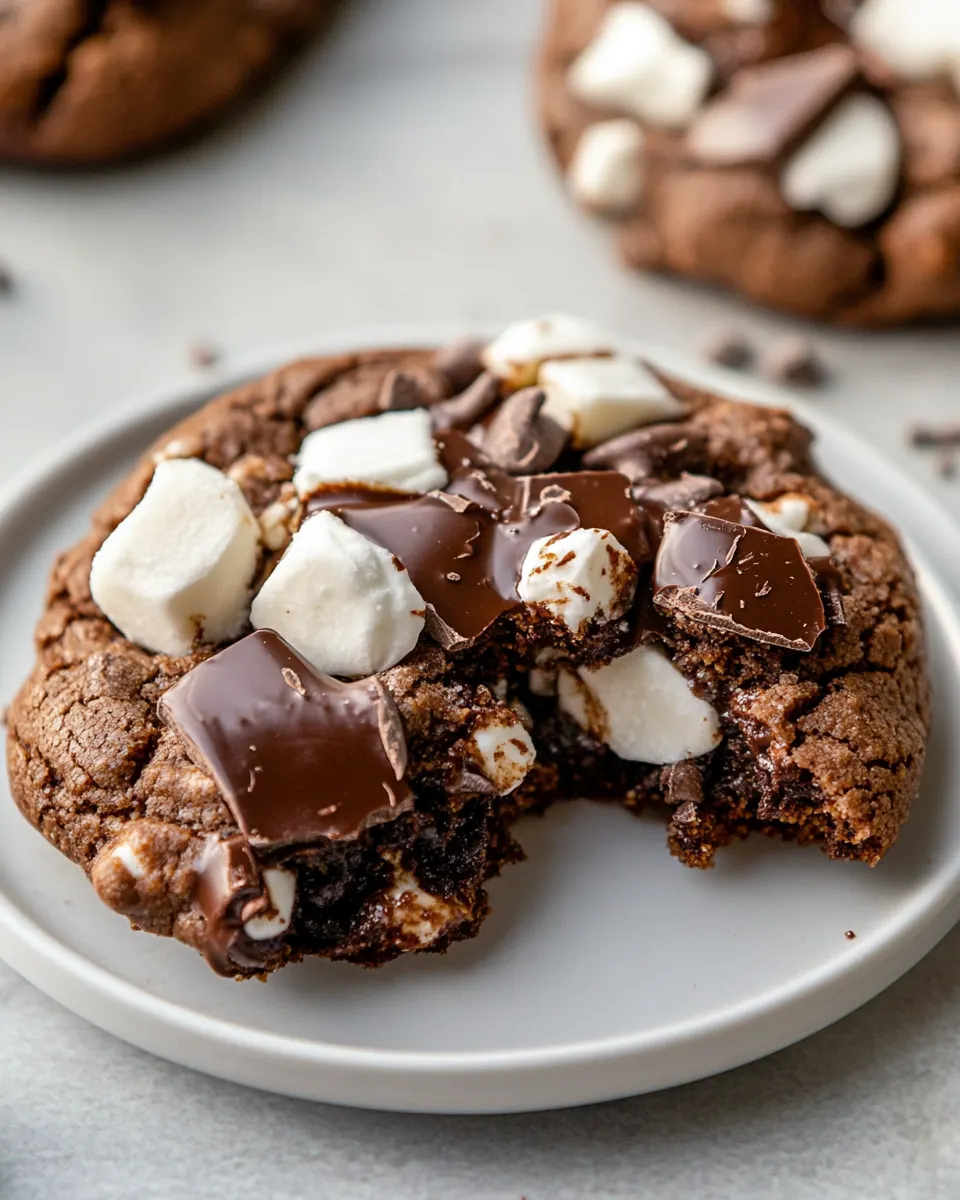
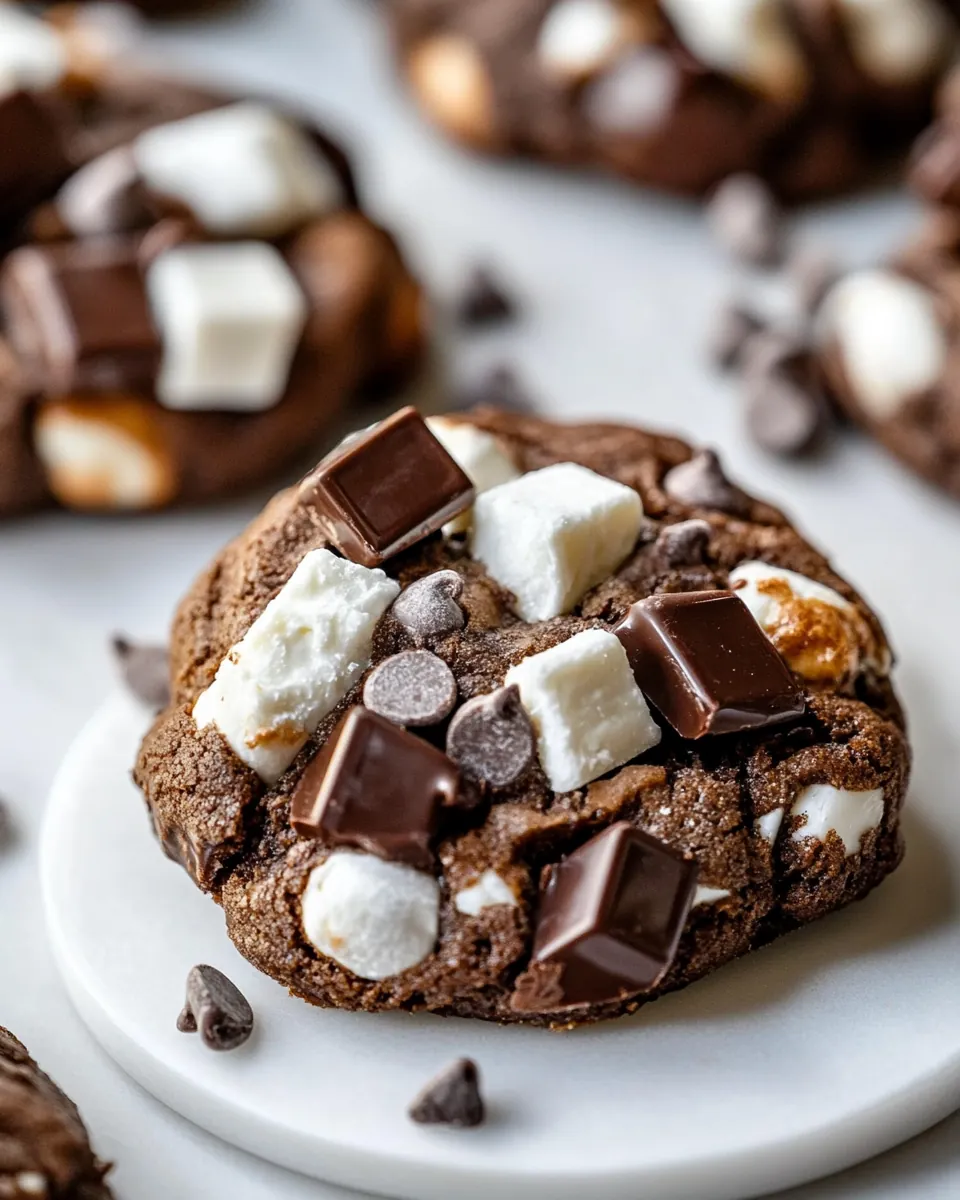
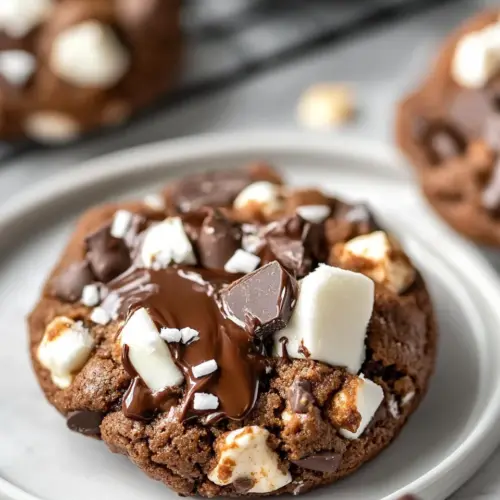
Rocky Road Chocolate Cookies
Rocky Road Chocolate Cookies landed in my kitchen the way most treasured recipes do, from a messy afternoon of experiments and a stubborn craving for something deeply chocolatey. I remember the first time I tasted a warm cookie studded with walnut pieces and gooey marshmallows, the texture pulling me in different directions at once, crisp edges yielding to a tender, fudgy center. That moment stuck with me, and I started refining the balance until each element had its moment to shine.
These cookies feel like a celebration in a bite, and they became my go to when friends dropped by unannounced. I like to walk people through the layers while the aroma fills the house, because the combination of melted semi sweet chocolate and cocoa powder creates a scent that is comforting and a little decadent. There is a rhythm to making them that I enjoy, from melting the chocolate to the quiet patience of chilling the dough, which somehow makes the final bake worth the wait.
Recipe Snapshot
2 hr 54 mins
150 mins
24 mins
Hard
150 kcal
American
Gluten-Free, Low FODMAP
Desserts
Microwave safe bowl, Stand mixer with paddle attachment, Mixing bowl, Spatula, Baking sheet, Parchment paper, Cooling rack
What You’ll Enjoy About This Rocky Road Chocolate Cookies
Rich Chocolate Intensity
I love how Rocky Road Chocolate Cookies deliver a deep, chocolate forward profile without feeling one note. The melted semi sweet chocolate and the cocoa powder team up to create layers of chocolate flavor, so each bite feels indulgent but balanced. I often tell friends that these cookies read like a chocolate celebration rather than a flat square of sweetness.
Playful Textures
The mix of crunchy walnut pieces, melty chopped milk chocolate bars, and pillowy mini marshmallows means you get a little surprise in every mouthful. I appreciate recipes that surprise the palate, and this one alternates between crisp edge, chewy center, and soft marshmallow pockets. That contrast keeps each cookie interesting from the first bite to the last.
Reliable Crowd Pleaser
I make these when I want a crowd friendly treat because the recipe scales well and stores easily. You can chill the dough and bake batches as needed, which is handy for hosting. I love seeing a tray of warm cookies reappear over coffee, and this one rarely lasts long in my house.
Simple Techniques, Big Results
There is nothing fussy here, just classic methods that reward patience. Melting the semi sweet baking chocolate bars, beating the butter and sugars until light, and chilling the dough are small steps that dramatically improve texture. I find following these techniques yields consistently excellent cookies every time.
Versatility and Comfort
These cookies travel well from lunchboxes to potlucks, and they work for cozy nights in or celebratory gatherings. I often tweak the amount of walnut pieces or marshmallows depending on mood without losing the cookie’s identity. That flexibility makes them a recipe I return to again and again.
Ingredients Required for Rocky Road Chocolate Cookies
These ingredients form a classic confectionary lineup built for contrast and depth. The chocolate elements create a rich chocolate backbone, while the flour and leavening agents give structure. The butter and sugars provide tenderness and caramelized notes, and the mix ins like walnut pieces and mini marshmallows introduce crunch and chew. Together, they produce a cookie that is texturally layered and satisfying.
- 8 ounces semi-sweet baking chocolate bars, chopped: Melt and incorporate to provide deep chocolate flavor and a glossy base for the cookie dough; chopped semi–sweet baking chocolate helps bind fats and intensify cocoa richness when cooled. Use gentle melting to avoid graininess, then temper into the batter for texture and flavor balance. Enhances overall chocolate intensity and contributes to a fudgy interior.
- 1 cup flour: Stabilize and structure the cookies by supplying gluten and bulk; flour creates the framework that traps air and moisture during baking. Measure accurately and gently fold to avoid developing excess toughness. Balances wet ingredients and determines final cookie density.
- 1/3 cup cocoa powder: Concentrate chocolate taste while reducing moisture and adding dryness; cocoa powder boosts cocoa intensity and deepens color. Sift to remove lumps and evenly distribute within the dry mix for uniform chocolate flavor. Works with melted chocolate to elevate overall richness.
- 1 teaspoon baking powder: Leaven and lift the cookie dough by releasing carbon dioxide when heated, producing slight puff and tenderness; baking powder lightens texture without altering flavor. Combine with dry ingredients to ensure even distribution and consistent rising. Controls crumb and prevents overly dense cookies.
- 1/4 teaspoons salt: Enhance taste and balance sweetness while strengthening gluten slightly; salt brightens chocolate and balances flavors even in small amounts. Dissolve into wet ingredients or mix into dry for uniform seasoning. Prevents flat or one-dimensional taste.
- 5 tablespoons unsalted butter room temperature: Enrich and tenderize the dough by adding fat that contributes to a soft, rich mouthfeel; room–temperature unsalted butter creams with sugars to incorporate air. Soften properly to ensure smooth creaming and even fat distribution. Controls spread and flavor without added salt.
- 1/2 cup brown sugar: Moisten, sweeten, and add caramel notes while contributing to chewiness and moisture retention; brown sugar interacts with butter during creaming to trap air and flavor. Pack lightly for accurate measurement and combine with granulated sugar for balanced texture. Promotes softer, moister cookies.
- 1/2 cup granulated sugar: Provide sweetness, crisping, and structure through granulated sugar which helps with creaming and spread; it encourages slight caramelization at cookie edges. Measure precisely and cream with butter to incorporate air for lift. Balances flavor and contributes to texture contrast.
- 2 large eggs room temperature: Bind ingredients, add moisture, and assist leavening by creating steam during baking; large room–temperature eggs emulsify fats and help create uniform batter. Use at room temperature to ensure smoother incorporation and optimal volume. Contributes to structure, richness, and chew.
- 1 teaspoon vanilla extract: Flavor and enhance aroma with a warm, sweet vanilla note that rounds out chocolate flavors; vanilla extract complements and deepens overall taste. Add during mixing of wet ingredients for consistent distribution. Provides subtle complexity and familiar cookie flavor.
- 3/4 cup walnut pieces: Add crunchy texture and nutty flavor while contributing to body and visual interest; walnut pieces offer contrast to soft cookie interior and sweet mix-ins. Toast lightly for extra aroma and fold in near the end to preserve shape. Balances sweetness with earthy, buttery notes.
- 1 cup mini marshmallows, divided: Introduce soft, chewy pockets and playful texture; dividing mini marshmallows allows some to melt into the cookie while others remain intact for contrast. Fold most in at the end and reserve some for topping to achieve both gooey and pillowy textures. Contributes classic rocky road character.
- 1 cup chopped milk chocolate bars, divided: Contribute additional creamy chocolate chunks and varied chocolate texture; dividing chopped milk chocolate bars lets some melt into the dough and some stay distinct. Stir most into batter and reserve pieces for topping to create melty pockets and visible chocolate bits. Adds sweetness and milk–chocolate contrast.
The Process for Making Rocky Road Chocolate Cookies
I like to think of baking these cookies as a sequence of small, deliberate acts that build flavor over time. The directions are straightforward, but the patience you invest in melting and chilling will pay off with texture and depth. I always keep an eye on sensory cues, since they tell you more than any clock.
- Melt the semi-sweet chocolate in the microwave and let cool.: The aroma of warm semi sweet baking chocolate bars fills the kitchen with a toasty, cocoa scent as it softens, and you will see a glossy, pourable liquid that is your cue to stop heating. Stirring between short bursts prevents scorching, which causes a grainy texture and dull flavor, so use 15 second bursts and stir well. If the chocolate feels too hot to touch, let it rest until it is just warm, because adding it too hot to the batter can cook the eggs and create lumps. A common slip is overheating which makes the chocolate seize, so keep low power and patience.
- In a mixing bowl, whisk the flour, cocoa powder, baking powder, and salt together. Set aside.: You will notice the dry mix taking on a uniform cocoa tone, and the sifted flour and cocoa powder should feel light and airy between your fingers. This step ensures even distribution of the leavening and prevents pockets of salt or baking powder, which would create uneven flavor or rise. I tap the bowl gently to settle the mix and inspect for clumps. Avoid skipping the whisking, because adding wet ingredients to unblended dry mix can create streaks and inconsistent crumb.
- In the bowl of a stand mixer, with the paddle attachment, beat the butter, brown sugar, and granulated sugar together for 2 minutes. Add the eggs and vanilla and mix until smooth. Mix in the melted chocolate.: As you cream the unsalted butter with the sugars, you should see it lighten slightly and develop a glossy, aerated texture that makes the batter tender. The sound changes to a soft, rhythmic hum, and the scent becomes sweet and buttery. When the large eggs and vanilla extract are incorporated, the mixture smooths into a pudding like consistency, ready to accept the warm chocolate. Fold in the slightly cooled melted chocolate gradually so the batter stays cohesive and does not seize; if the chocolate is too warm, it will separate the butter and create a greasy texture. A common mistake is adding hot chocolate too quickly, which leads to a broken batter, so always cool just a bit first.
- Add the flour ingredients and mix until combined, scraping the sides as needed.: When the dry mix meets the wet, the bowl will transition from glossy to a dense, chocolatey dough that clings to the paddle. Use a flexible spatula to lift and fold while scraping the sides so all pockets of flour are incorporated. You want a homogeneous dough without overmixing, because overworking gluten will yield a tough cookie. The correct texture is pliable but not sticky; if it seems very loose, a short chill will help. A typical error here is overbeating which causes tight crumb, so mix only until no streaks remain.
- Use a wooden spoon or a spatula to mix in the walnuts, 1/2 cup marshmallows, and 1/2 cup of the chopped milk chocolate bars.: As you fold these mix ins in, you will hear a soft tearing sound and watch the dough stud with specks of nuts and chocolate. The walnut pieces should distribute evenly without being pulverized, giving audible crunch in the finished cookie. The reserved mini marshmallows will partly melt but mostly remain pillowy and sweet inside the dough. A common misstep is stirring too vigorously which can mash the marshmallows into the dough completely, losing their texture, so fold gently until evenly dispersed.
- Cover dough and refrigerate at least 2 hours. If chilled longer, let it sit on the counter for 30 minutes before rolling.: Chilling firms the dough and deepens flavor, allowing the fats to solidify so the cookies spread less and keep a fudgy center. During refrigeration the dough becomes denser and flavors meld, producing a more complex, less raw cocoa taste. If the dough is chilled overnight, let it rest for about 30 minutes so it loosens just enough to shape easily. Skipping this step often causes over spread and thin cookies, so patience here improves final texture.
- Preheat the oven to 350 degrees Fahrenheit and line baking sheet with parchment paper.: You will smell the warm, dry heat as the oven approaches temperature and see even glow on the racks. A properly preheated oven ensures immediate reaction from the leavening, giving neat edges and balanced rise. Lining the baking sheet with parchment protects the bottoms and helps with even browning. A frequent error is placing trays in before the oven is fully hot, which can lead to underbaked centers and uneven color.
- Scoop the dough and form into 1 1/2 inch balls, about 24. Place the dough 3 inches apart on the prepared pan.: As you portion, the dough should hold shape and feel slightly cool to the touch. Forming uniform 1 1/2 inch balls ensures even baking, producing consistent size and texture. Spacing them 3 inches apart prevents them from joining into a single mass, and the visual cue is when the mounds look smooth and compact. An easy mistake is making uneven sizes which leads to some cookies overbaked while others are underdone.
- Bake for 11 minutes and then press 3 marshmallows into the tops of each cookie. Return to oven and cook for 1 more minute. Press in a couple more chocolate chunks and let cool on the pan for 5 minutes. Transfer the cookies to a cooling rack to cool before enjoying!: During the first bake you will notice edges set and the centers look slightly glossy, a sign they are nearly done. When you press the mini marshmallows in, they will soften and puff, creating a sweet, pillowy top after the additional minute in the oven. The final press of extra chopped milk chocolate bars gives shiny, melty pockets on top. Letting them rest on the pan for 5 minutes allows residual heat to finish baking gently, and transferring to a rack prevents the bottoms from steaming. A common pitfall is removing them too soon which can cause centers to collapse, so allow that short rest before moving them.
Substitutions and Tips
I like sharing practical pointers that keep these cookies reliable every time you bake them. The tips below expand on small choices that change texture, flavor, and appearance. Read them as you prep and keep a notepad by the mixer.
- Choose quality chocolate — Use good quality semi sweet baking chocolate bars and chopped milk chocolate bars to ensure smooth melting and glossy pockets of melt that taste far better than low quality chips.
- Toasting walnuts — Lightly toast the walnut pieces in a dry skillet for two to three minutes until fragrant, this deepens nuttiness and prevents them from tasting raw in the baked cookie.
- Room temperature eggs and butter — Let the large eggs and unsalted butter come to room temperature so they incorporate smoothly, which yields an even, aerated batter with better texture.
- Controlled chilling — Chill the dough for at least two hours; for longer chill times up to 24 hours, remove 30 minutes before scooping so the dough is pliable but not soft, which ensures consistent shaping.
- Parchment or silicone — Line baking sheets with parchment paper to prevent sticking and help the bottoms brown evenly, it also makes cleanup effortless and keeps cookies intact when transferring to a rack.
- Adjust marshmallow placement — Press the reserved mini marshmallows into the cookies during the final bake to keep them recognizable and soft, rather than fully melted into the dough.
- Even scoops — Use a 1 1/2 inch scoop for uniform cookies that bake at the same rate, ensuring consistent results across trays.
Serving Options for Rocky Road Chocolate Cookies
These cookies are versatile and suit many settings, from casual snack plates to celebratory dessert spreads. Below are thoughtful serving ideas and pairing suggestions to help you present them beautifully and store them wisely.
- Casual snack plate — Serve a variety of sizes on a platter alongside a bowl of fresh fruit for a balance of sweet and bright flavors, making an approachable after school or afternoon tea offering.
- Party dessert table — Arrange the cookies on a tiered stand with labels, mixing whole cookies with halved ones so guests can sample different textures without committing to a whole cookie.
- Gift boxes — Layer parchment between cookies in a box and tie with ribbon, these travel well and make an excellent homemade gift during holidays or for a neighborly treat.
- Occasion pairing — For festive occasions or family gatherings, pair these cookies with warm beverages such as coffee or hot cocoa, emphasizing the chocolate notes and soft marshmallow pockets to complement a cozy theme.
- Storage tips — Store cooled cookies in an airtight container at room temperature for up to four days, separating layers with parchment to preserve crisp edges and chewy centers; for longer storage, freeze for up to three months.
- Serving temperature — These cookies are best served slightly warm or at room temperature so the melted milk chocolate bars pockets remain soft but the cookie structure holds together.
- Seasonal pairing — They work well year round, and particularly during cooler months when rich, chocolatey treats feel most comforting, making them a dependable choice for gatherings or cozy nights in.
FAQ
Conclusion
What makes these Rocky Road Chocolate Cookies special is the way contrasting textures and layered chocolate create an unforgettable bite. The combination of melted semi sweet chocolate, cocoa, chopped milk chocolate, walnuts, and mini marshmallows gives you crisp edges, a tender interior, and pockets of gooey sweetness that keep every mouthful interesting. I encourage you to give them a try, enjoy the process of melting and chilling, and share the results with friends and family. Baking them is a comforting ritual that rewards patience, and I hope they become a favorite in your rotation.
Rocky Road Chocolate Cookies
Equipment
- Microwave-safe Bowl
- Stand mixer with paddle attachment
- Mixing Bowl
- Spatula
- Baking Sheet
- Parchment Paper
- Cooling rack
Ingredients
- 8 ounces semi-sweet baking chocolate bars, chopped Melt and incorporate to provide deep chocolate flavor and a glossy base for the cookie dough; chopped semi-sweet baking chocolate helps bind fats and intensify cocoa richness when cooled. Use gentle melting to avoid graininess, then temper into the batter for texture and flavor balance. Enhances overall chocolate intensity and contributes to a fudgy interior.
- 1 cup flour Stabilize and structure the cookies by supplying gluten and bulk; flour creates the framework that traps air and moisture during baking. Measure accurately and gently fold to avoid developing excess toughness. Balances wet ingredients and determines final cookie density.
- 1/3 cup cocoa powder Concentrate chocolate taste while reducing moisture and adding dryness; cocoa powder boosts cocoa intensity and deepens color. Sift to remove lumps and evenly distribute within the dry mix for uniform chocolate flavor. Works with melted chocolate to elevate overall richness.
- 1 teaspoon baking powder Leaven and lift the cookie dough by releasing carbon dioxide when heated, producing slight puff and tenderness; baking powder lightens texture without altering flavor. Combine with dry ingredients to ensure even distribution and consistent rising. Controls crumb and prevents overly dense cookies.
- 1/4 teaspoons salt Enhance taste and balance sweetness while strengthening gluten slightly; salt brightens chocolate and balances flavors even in small amounts. Dissolve into wet ingredients or mix into dry for uniform seasoning. Prevents flat or one-dimensional taste.
- 5 tablespoons unsalted butter room temperature Enrich and tenderize the dough by adding fat that contributes to a soft, rich mouthfeel; room-temperature unsalted butter creams with sugars to incorporate air. Soften properly to ensure smooth creaming and even fat distribution. Controls spread and flavor without added salt.
- 1/2 cup brown sugar Moisten, sweeten, and add caramel notes while contributing to chewiness and moisture retention; brown sugar interacts with butter during creaming to trap air and flavor. Pack lightly for accurate measurement and combine with granulated sugar for balanced texture. Promotes softer, moister cookies.
- 1/2 cup granulated sugar Provide sweetness, crisping, and structure through granulated sugar which helps with creaming and spread; it encourages slight caramelization at cookie edges. Measure precisely and cream with butter to incorporate air for lift. Balances flavor and contributes to texture contrast.
- 2 large eggs room temperature Bind ingredients, add moisture, and assist leavening by creating steam during baking; large room-temperature eggs emulsify fats and help create uniform batter. Use at room temperature to ensure smoother incorporation and optimal volume. Contributes to structure, richness, and chew.
- 1 teaspoon vanilla extract Flavor and enhance aroma with a warm, sweet vanilla note that rounds out chocolate flavors; vanilla extract complements and deepens overall taste. Add during mixing of wet ingredients for consistent distribution. Provides subtle complexity and familiar cookie flavor.
- 3/4 cup walnut pieces Add crunchy texture and nutty flavor while contributing to body and visual interest; walnut pieces offer contrast to soft cookie interior and sweet mix-ins. Toast lightly for extra aroma and fold in near the end to preserve shape. Balances sweetness with earthy, buttery notes.
- 1 cup mini marshmallows, divided Introduce soft, chewy pockets and playful texture; dividing mini marshmallows allows some to melt into the cookie while others remain intact for contrast. Fold most in at the end and reserve some for topping to achieve both gooey and pillowy textures. Contributes classic rocky road character.
- 1 cup chopped milk chocolate bars, divided Contribute additional creamy chocolate chunks and varied chocolate texture; dividing chopped milk chocolate bars lets some melt into the dough and some stay distinct. Stir most into batter and reserve pieces for topping to create melty pockets and visible chocolate bits. Adds sweetness and milk-chocolate contrast.
Instructions
- Melt the semi-sweet chocolate in the microwave and let cool.: The aroma of warm semi sweet baking chocolate bars fills the kitchen with a toasty, cocoa scent as it softens, and you will see a glossy, pourable liquid that is your cue to stop heating. Stirring between short bursts prevents scorching, which causes a grainy texture and dull flavor, so use 15 second bursts and stir well. If the chocolate feels too hot to touch, let it rest until it is just warm, because adding it too hot to the batter can cook the eggs and create lumps. A common slip is overheating which makes the chocolate seize, so keep low power and patience.
- In a mixing bowl, whisk the flour, cocoa powder, baking powder, and salt together. Set aside.: You will notice the dry mix taking on a uniform cocoa tone, and the sifted flour and cocoa powder should feel light and airy between your fingers. This step ensures even distribution of the leavening and prevents pockets of salt or baking powder, which would create uneven flavor or rise. I tap the bowl gently to settle the mix and inspect for clumps. Avoid skipping the whisking, because adding wet ingredients to unblended dry mix can create streaks and inconsistent crumb.
- In the bowl of a stand mixer, with the paddle attachment, beat the butter, brown sugar, and granulated sugar together for 2 minutes. Add the eggs and vanilla and mix until smooth. Mix in the melted chocolate.: As you cream the unsalted butter with the sugars, you should see it lighten slightly and develop a glossy, aerated texture that makes the batter tender. The sound changes to a soft, rhythmic hum, and the scent becomes sweet and buttery. When the large eggs and vanilla extract are incorporated, the mixture smooths into a pudding like consistency, ready to accept the warm chocolate. Fold in the slightly cooled melted chocolate gradually so the batter stays cohesive and does not seize; if the chocolate is too warm, it will separate the butter and create a greasy texture. A common mistake is adding hot chocolate too quickly, which leads to a broken batter, so always cool just a bit first.
- Add the flour ingredients and mix until combined, scraping the sides as needed.: When the dry mix meets the wet, the bowl will transition from glossy to a dense, chocolatey dough that clings to the paddle. Use a flexible spatula to lift and fold while scraping the sides so all pockets of flour are incorporated. You want a homogeneous dough without overmixing, because overworking gluten will yield a tough cookie. The correct texture is pliable but not sticky; if it seems very loose, a short chill will help. A typical error here is overbeating which causes tight crumb, so mix only until no streaks remain.
- Use a wooden spoon or a spatula to mix in the walnuts, 1/2 cup marshmallows, and 1/2 cup of the chopped milk chocolate bars.: As you fold these mix ins in, you will hear a soft tearing sound and watch the dough stud with specks of nuts and chocolate. The walnut pieces should distribute evenly without being pulverized, giving audible crunch in the finished cookie. The reserved mini marshmallows will partly melt but mostly remain pillowy and sweet inside the dough. A common misstep is stirring too vigorously which can mash the marshmallows into the dough completely, losing their texture, so fold gently until evenly dispersed.
- Cover dough and refrigerate at least 2 hours. If chilled longer, let it sit on the counter for 30 minutes before rolling.: Chilling firms the dough and deepens flavor, allowing the fats to solidify so the cookies spread less and keep a fudgy center. During refrigeration the dough becomes denser and flavors meld, producing a more complex, less raw cocoa taste. If the dough is chilled overnight, let it rest for about 30 minutes so it loosens just enough to shape easily. Skipping this step often causes over spread and thin cookies, so patience here improves final texture.
- Preheat the oven to 350 degrees Fahrenheit and line baking sheet with parchment paper.: You will smell the warm, dry heat as the oven approaches temperature and see even glow on the racks. A properly preheated oven ensures immediate reaction from the leavening, giving neat edges and balanced rise. Lining the baking sheet with parchment protects the bottoms and helps with even browning. A frequent error is placing trays in before the oven is fully hot, which can lead to underbaked centers and uneven color.
- Scoop the dough and form into 1 1/2 inch balls, about 24. Place the dough 3 inches apart on the prepared pan.: As you portion, the dough should hold shape and feel slightly cool to the touch. Forming uniform 1 1/2 inch balls ensures even baking, producing consistent size and texture. Spacing them 3 inches apart prevents them from joining into a single mass, and the visual cue is when the mounds look smooth and compact. An easy mistake is making uneven sizes which leads to some cookies overbaked while others are underdone.
- Bake for 11 minutes and then press 3 marshmallows into the tops of each cookie. Return to oven and cook for 1 more minute. Press in a couple more chocolate chunks and let cool on the pan for 5 minutes. Transfer the cookies to a cooling rack to cool before enjoying!: During the first bake you will notice edges set and the centers look slightly glossy, a sign they are nearly done. When you press the mini marshmallows in, they will soften and puff, creating a sweet, pillowy top after the additional minute in the oven. The final press of extra chopped milk chocolate bars gives shiny, melty pockets on top. Letting them rest on the pan for 5 minutes allows residual heat to finish baking gently, and transferring to a rack prevents the bottoms from steaming. A common pitfall is removing them too soon which can cause centers to collapse, so allow that short rest before moving them.
Notes
- Choose quality chocolate — Use good quality semi sweet baking chocolate bars and chopped milk chocolate bars to ensure smooth melting and glossy pockets of melt that taste far better than low quality chips.
- Toasting walnuts — Lightly toast the walnut pieces in a dry skillet for two to three minutes until fragrant, this deepens nuttiness and prevents them from tasting raw in the baked cookie.
- Room temperature eggs and butter — Let the large eggs and unsalted butter come to room temperature so they incorporate smoothly, which yields an even, aerated batter with better texture.
- Controlled chilling — Chill the dough for at least two hours; for longer chill times up to 24 hours, remove 30 minutes before scooping so the dough is pliable but not soft, which ensures consistent shaping.
- Parchment or silicone — Line baking sheets with parchment paper to prevent sticking and help the bottoms brown evenly, it also makes cleanup effortless and keeps cookies intact when transferring to a rack.
- Adjust marshmallow placement — Press the reserved mini marshmallows into the cookies during the final bake to keep them recognizable and soft, rather than fully melted into the dough.
- Even scoops — Use a 1 1/2 inch scoop for uniform cookies that bake at the same rate, ensuring consistent results across trays.