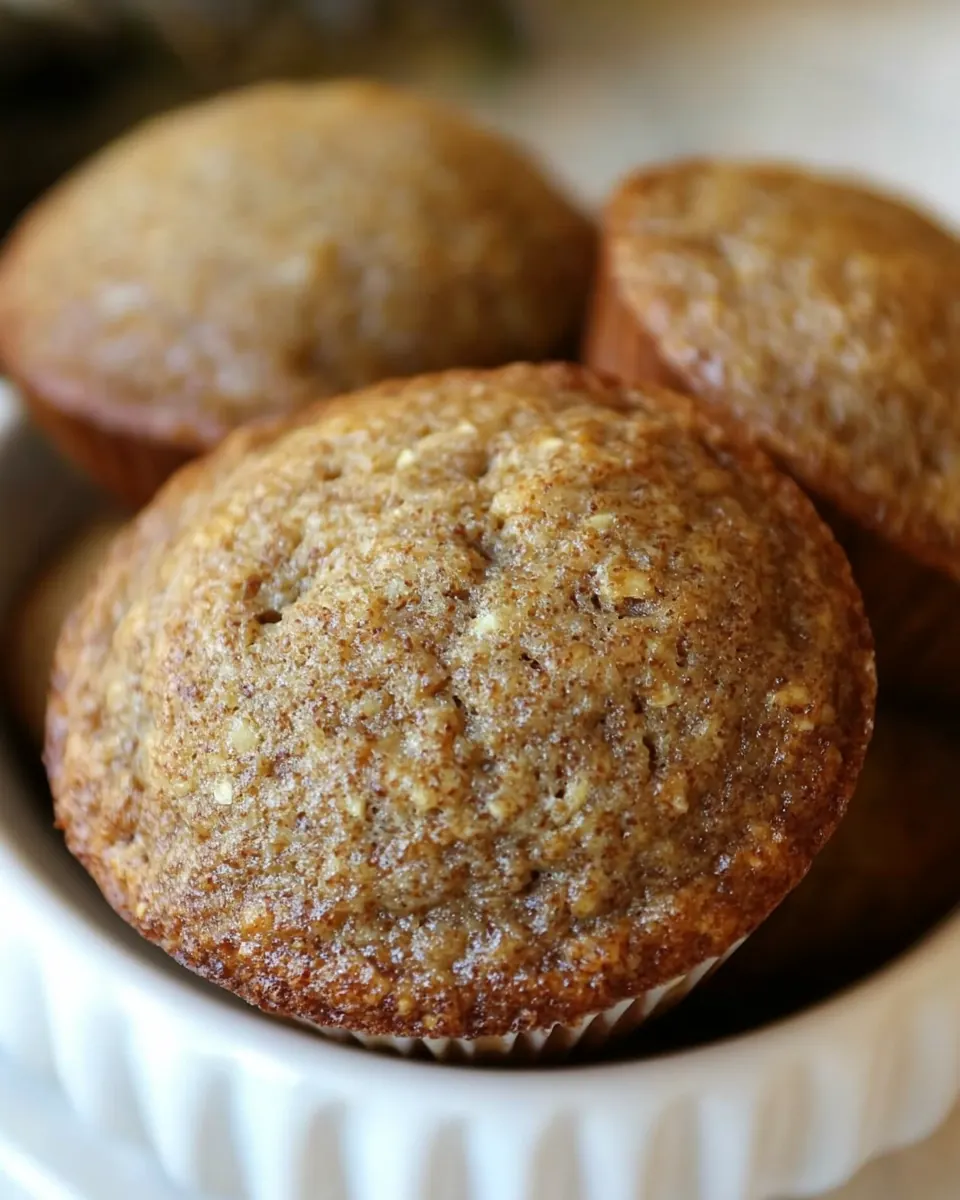
Refrigerator Bran Muffins
Refrigerator Bran Muffins have been on my kitchen counter for as long as I can remember, a humble presence that quietly rescued busy mornings and surprise visitors. I first learned this recipe from an aunt who kept a labeled container of batter in her fridge like a little magic trick. She would scoop out what she needed, bake a dozen, and send me home with warm muffins and stories. Over time I adopted her habit, only tweaking amounts until the texture felt just right to my hands and teeth.
What I love about Refrigerator Bran Muffins is how they bridge convenience with comfort. The batter sits chilled, patient, and forgiving, so I can bake exactly what I want when I want it. I remember one Saturday when I used the last of the batter to cheer up a friend after a long shift, and the smell of baking bran and butter flavored shortening filled the apartment like an instant calm. That day convinced me these muffins are more than a breakfast item, they are a small kindness you can share on a moment notice.
Recipe Snapshot
40 mins
20 mins
20 mins
Easy
180 kcal
American
Gluten-Free, Low FODMAP
Breakfast
Large bowl, Muffin tin, Wire rack, Measuring cups, Spoon or scoop
What We Adore About This Refrigerator Bran Muffins
They save time without skimping on texture
I adore how Refrigerator Bran Muffins let you keep batter ready, so baking is as simple as scooping, filling, and popping tins in the oven. The convenience factor is huge for me on rushed mornings, and the batter ages in the fridge in a way that actually deepens flavor, rather than losing freshness.
They use familiar pantry staples
This recipe leans on everyday items like all purpose flour, sugar, and eggs, plus cereal for texture. I like that you do not need specialty gear or exotic ingredients, which makes it feel friendly and approachable. It is the kind of recipe I can teach to a teen or a neighbor with equal ease.
Great texture from bran and cereal
Combining bran flakes cereal with All Bran cereal creates a complex crumb, a hearty chew with a tender crumb at the same time. I appreciate how one cereal hydrates and softens, while the other adds body so the muffins do not collapse. That contrast is what keeps me reaching for this recipe.
Flexible yield and storage
Because you can refrigerate the batter for weeks, this recipe scales easily. I often make a large batch to serve at a brunch, then store the rest. The batter behavior is forgiving, and the muffins maintain a pleasant crumb even after freezing and reheating, which suits my unpredictable schedule.
Comforting, nostalgic flavor
There is a simple warmth to Refrigerator Bran Muffins that evokes childhood kitchens. The mild, buttery notes and wholesome graininess pair well with coffee or tea, and they work for breakfast, snacks, or a light dessert. For me, that nostalgia is the real draw.
What You Need for Refrigerator Bran Muffins

These ingredients form a pragmatic, old school lineup that focuses on texture and longevity. The cereals provide fiber and structure, the combination of all purpose flour and buttermilk balances tenderness and tang, and the eggs and shortening bring richness so each muffin stays moist. Together they create a batter that tolerates refrigeration, allowing you to bake fresh muffins on demand.
- 2 c. Bran Flakes Cereal: Soak the bran flakes in boiling water to soften and hydrate them, releasing flavor and helping create a tender muffin crumb. Allow the mixture to cool slightly so it can be combined safely with other wet ingredients without cooking the eggs. Retained soaking liquid adds moisture and integrates soluble fiber into the batter.
- 2 c. boiling water: Pour boiling water over the bran to fully bloom the flakes and extract moisture, which helps swell the bran and improve texture. Let the liquid cool before mixing with fats and eggs to avoid curdling. Preserve the soaking liquid in the batter to maintain overall moisture balance.
- 1 c. shortening butter flavored: Cream to incorporate air and distribute fat evenly through the batter, promoting a light crumb and rich mouthfeel in the finished muffins. Use a butter–flavored shortening for stability and enhanced shelf life while contributing a mild buttery note. Work until smooth but do not overmix to prevent greasy texture.
- 3 c. sugar: Sweeten to balance the hearty, slightly bitter flavors from bran and cereal while aiding in browning and moisture retention during baking. Use granulated sugar to provide structure through caramelization and help stabilize whipped eggs. Measure carefully to keep muffins from becoming overly dense or cloying.
- 4 eggs: Whisk to provide structure and leavening through coagulated proteins and trapped air, giving the muffins lift and tenderness. Beat eggs with sugars to create a stable emulsion that helps incorporate fats and liquids evenly. Temper eggs if adding hot liquids to prevent scrambling.
- 1 tsp salt: Season to enhance and balance the overall flavor profile, moderating sweetness and accentuating other ingredients. Use salt precisely to strengthen gluten just enough for structure without toughening muffins. Dissolve evenly in the wet ingredients to ensure consistent distribution.
- 5 tsp baking soda: Leaven to react with acidic components in the batter and produce carbon dioxide, creating rise and lightness in the muffins. Measure baking soda carefully because too much can produce an alkaline taste and discoloration. Combine thoroughly with wet ingredients to activate evenly prior to baking.
- 5 c. all-purpose flour: Thicken to provide bulk and structure, forming the framework that traps gas from leaveners and supports mix-ins. Use all-purpose flour for a balanced protein content that yields tender but stable muffins. Sift or whisk before adding to prevent lumps and ensure even incorporation.
- 4 c. buttermilk: Acidify to react with baking soda for chemical leavening and to tenderize crumb through low pH, contributing subtle tang and moist texture. Use buttermilk for its acidity and richness, which enhances flavor and reacts predictably with baking soda. Keep chilled until mixing to help maintain batter consistency.
- 4 c. All-Bran Cereal: Add crunch and concentrated bran flavor to increase fiber content and provide textural contrast within the muffins. Use All-Bran cereal to boost nutritional profile and create visible bran pieces that complement the softened bran flakes. Stir in gently to distribute without over-developing gluten.
Making This Refrigerator Bran Muffins
These directions are straightforward, but each stage rewards care. Read through the steps before starting, and prepare your muffin tins and cooling racks so the process flows. I find that small habits, like stirring the bran while it cools, make a big difference in texture.
- In a large bowl add the bran flakes.: As the bran hits the bowl you will notice the dry, brittle texture and toasted aroma, which foreshadows the nutty note it will introduce once hydrated. Use a large glass or metal bowl so the hot water does not warp anything, and make sure there is room to stir comfortably. A common mistake here is using a bowl that is too small which leads to spills when you add boiling water.
- Pour the boiling water over the top, and mix well. Stir every couple of minutes while the mixture cools to room temperature. The mixture will be thick and sticky.: Immediately the bran soaks and swells, releasing steam and a warm, toasted scent. Stirring every couple of minutes while it cools ensures even hydration and prevents clumps, giving a uniformly thick, sticky mixture that folds into the batter. If you leave the bran unturned it can clump into dense pockets that break the muffin texture.
- In a large bowl with a tight fitting lid (needed if you aren't baking the muffin batter right away), cream together shortening and sugar. Mix in eggs, salt baking soda until combined.: Creaming produces a pale, slightly fluffy mass that traps air, and you will hear a soft scraping sound as the paddle moves through softened shortening. This step is crucial because it distributes fat evenly, which yields tender muffins. A common oversight is rushing this phase, which results in pockets of unincorporated shortening and uneven crumb.
- Mix in flour and buttermilk, alternating ingredients as you add them and mixing. Add in the All-Bran Cereal and cooled bran flakes mixture and stir until combined.: When you add each egg, the batter will glossy slightly and gain elasticity, and the scent becomes richer. Mixing until just combined avoids overworking the batter, which would make muffins tough. Watch for a smooth, cohesive texture; if you over mix, the muffin tops may be flat and tight.
- Spoon batter into muffin cups coated with non-stick spray or with muffin cup liners. They should be 2/3 full. Bake at 350 degrees for 20 minutes.: Alternating keeps the batter balanced and prevents lumps, and you will notice the batter shift between thick and more fluid states. This technique yields a tender crumb by preventing over development of gluten. A frequent error is dumping all flour at once, creating pockets of dry flour or a gummy batter from overmixing.
- Add in the All-Bran Cereal and cooled bran flakes mixture and stir until combined: The batter will thicken noticeably and take on flecks of bran, giving a hearty appearance and a slightly grainy mouthfeel that I love. Stir until the mix is uniform, but do not beat; over stirring will make muffins dense. If the cereal remains dry on the edges you probably did not hydrate the bran enough, which will create dry pockets in the muffins.
- Spoon batter into muffin cups coated with non-stick spray or with muffin cup liners: As you fill each cup watch the batter settle and smooth slightly on top, showing you the right consistency. They should be two thirds full so the tops can rise without overflowing. A common mistake is overfilling which leads to merged domes and uneven baking.
- They should be 2/3 full: Keeping that consistent fill level gives even rise across the tray, producing uniform muffins that brown at the same rate. I use a small ice cream scoop for quick, repeatable portions to avoid mismatched sizes. If one pan has much more batter than another, the bake time will vary and some muffins may be underdone.
- Bake at 350 degrees for 20 minutes: During baking the kitchen will fill with a toasty, wheaty aroma and the tops should turn a warm golden brown. You can test doneness with a toothpick which should come out clean or with a few moist crumbs, and the sides will slightly pull away from the pan. Opening the oven early or setting temperature too high causes rapid doming and potential overbrowning, so keep the oven steady for even results.
Variations to Try
Below are practical ideas and storage notes that let you adapt Refrigerator Bran Muffins for different occasions. Each tip starts with a clear focus and then expands on how to make it work.
- Make ahead batter storage: Keep batter in a large airtight container in the refrigerator for up to six weeks. When you are ready to bake, scoop out only the number of muffins you need, refill the container, and return it to the fridge. This system is perfect for planning breakfasts or last minute guests because it eliminates the mixing step and preserves freshness.
- Consistent scooping method: Use a small ice cream scoop for even portions which ensures uniform rise and baking. Consistency reduces overbaked edges or undercooked centers and speeds up assembly when you have multiple pans to fill. It also makes presentation more appealing if you are serving guests.
- Cooling and storing baked muffins: Allow muffins to cool completely on a wire rack before sealing them, which prevents condensation and sogginess. Store at room temperature for one to two days in an airtight container, refrigerate for up to a week, or freeze for two to three months in a sealed bag. Reheat frozen muffins in the microwave for forty five to sixty seconds for a quick refresh.
- Even hydration technique: Stir the bran flakes cereal while it cools to avoid clumps and ensure even moisture distribution. This gives a consistent crumb and prevents dry pockets in the baked muffin. If you skip stirring, dense pieces of bran can remain and alter texture.
- Use liners or nonstick spray: Line muffin tins or spray them to prevent sticking, especially if you plan to store and reheat muffins. Liners make removal simple and keep shapes intact, while sprayed pans can give slightly crisper bottoms which some people prefer.
Pairing Suggestions for Refrigerator Bran Muffins
These muffins pair wonderfully with a variety of beverages and light dishes, and they suit multiple occasions from casual breakfasts to late night snacks. Think about temperature and texture contrasts when serving to create a balanced plate.
- Breakfast spread: Serve warm muffins with a spread of soft butter or a fruit jam alongside a pot of coffee for an easy morning meal. The sturdy texture of the muffins holds up to spreads without falling apart, making them ideal for a make ahead brunch.
- Afternoon snack: Pair a muffin with a cup of tea for a comforting afternoon pick me up. The subtle graininess complements light herbal or black teas and provides sustained energy between meals.
- Brunch buffet: Place a stack of muffins on a platter next to fresh fruit and yogurt to offer guests a variety of textures and flavors. The muffins are sturdy enough to sit out for an hour, making them convenient for gatherings.
- Storage guidance: For short term keeping, place cooled muffins in an airtight container at room temperature for one to two days. For longer storage, refrigerate up to a week or freeze for two to three months. Thaw frozen muffins at room temperature or microwave briefly for a warm treat.
- Seasonal serving: These muffins work year round as a wholesome option, and their neutral flavor makes them adaptable. In cooler months, serve warm; in warmer months, offer them room temperature with chilled yogurt.
FAQ
Conclusion
Refrigerator Bran Muffins stand out because they combine make ahead convenience with a satisfying, hearty texture that keeps well and warms up beautifully. Give them a try when you want fresh baked muffins with minimal morning effort, and you will appreciate how the chilled batter simplifies planning. I hope you enjoy the ritual of scooping and baking a handful whenever you need a quick, wholesome treat, and that these muffins become one of your reliable, comforting kitchen staples.
Refrigerator Bran Muffins
Equipment
- Large Bowl
- Muffin Tin
- Wire Rack
- Measuring Cups
- Spoon or scoop
Ingredients
- 2 c. Bran Flakes Cereal Soak the bran flakes in boiling water to soften and hydrate them, releasing flavor and helping create a tender muffin crumb. Allow the mixture to cool slightly so it can be combined safely with other wet ingredients without cooking the eggs. Retained soaking liquid adds moisture and integrates soluble fiber into the batter.
- 2 c. boiling water Pour boiling water over the bran to fully bloom the flakes and extract moisture, which helps swell the bran and improve texture. Let the liquid cool before mixing with fats and eggs to avoid curdling. Preserve the soaking liquid in the batter to maintain overall moisture balance.
- 1 c. shortening butter flavored Cream to incorporate air and distribute fat evenly through the batter, promoting a light crumb and rich mouthfeel in the finished muffins. Use a butter-flavored shortening for stability and enhanced shelf life while contributing a mild buttery note. Work until smooth but do not overmix to prevent greasy texture.
- 3 c. sugar Sweeten to balance the hearty, slightly bitter flavors from bran and cereal while aiding in browning and moisture retention during baking. Use granulated sugar to provide structure through caramelization and help stabilize whipped eggs. Measure carefully to keep muffins from becoming overly dense or cloying.
- 4 eggs Whisk to provide structure and leavening through coagulated proteins and trapped air, giving the muffins lift and tenderness. Beat eggs with sugars to create a stable emulsion that helps incorporate fats and liquids evenly. Temper eggs if adding hot liquids to prevent scrambling.
- 1 tsp salt Season to enhance and balance the overall flavor profile, moderating sweetness and accentuating other ingredients. Use salt precisely to strengthen gluten just enough for structure without toughening muffins. Dissolve evenly in the wet ingredients to ensure consistent distribution.
- 5 tsp baking soda Leaven to react with acidic components in the batter and produce carbon dioxide, creating rise and lightness in the muffins. Measure baking soda carefully because too much can produce an alkaline taste and discoloration. Combine thoroughly with wet ingredients to activate evenly prior to baking.
- 5 c. all-purpose flour Thicken to provide bulk and structure, forming the framework that traps gas from leaveners and supports mix-ins. Use all-purpose flour for a balanced protein content that yields tender but stable muffins. Sift or whisk before adding to prevent lumps and ensure even incorporation.
- 4 c. buttermilk Acidify to react with baking soda for chemical leavening and to tenderize crumb through low pH, contributing subtle tang and moist texture. Use buttermilk for its acidity and richness, which enhances flavor and reacts predictably with baking soda. Keep chilled until mixing to help maintain batter consistency.
- 4 c. All-Bran Cereal Add crunch and concentrated bran flavor to increase fiber content and provide textural contrast within the muffins. Use All-Bran cereal to boost nutritional profile and create visible bran pieces that complement the softened bran flakes. Stir in gently to distribute without over-developing gluten.
Instructions
- In a large bowl add the bran flakes.: As the bran hits the bowl you will notice the dry, brittle texture and toasted aroma, which foreshadows the nutty note it will introduce once hydrated. Use a large glass or metal bowl so the hot water does not warp anything, and make sure there is room to stir comfortably. A common mistake here is using a bowl that is too small which leads to spills when you add boiling water.
- Pour the boiling water over the top, and mix well. Stir every couple of minutes while the mixture cools to room temperature. The mixture will be thick and sticky.: Immediately the bran soaks and swells, releasing steam and a warm, toasted scent. Stirring every couple of minutes while it cools ensures even hydration and prevents clumps, giving a uniformly thick, sticky mixture that folds into the batter. If you leave the bran unturned it can clump into dense pockets that break the muffin texture.
- In a large bowl with a tight fitting lid (needed if you aren't baking the muffin batter right away), cream together shortening and sugar. Mix in eggs, salt baking soda until combined.: Creaming produces a pale, slightly fluffy mass that traps air, and you will hear a soft scraping sound as the paddle moves through softened shortening. This step is crucial because it distributes fat evenly, which yields tender muffins. A common oversight is rushing this phase, which results in pockets of unincorporated shortening and uneven crumb.
- Mix in flour and buttermilk, alternating ingredients as you add them and mixing. Add in the All-Bran Cereal and cooled bran flakes mixture and stir until combined.: When you add each egg, the batter will glossy slightly and gain elasticity, and the scent becomes richer. Mixing until just combined avoids overworking the batter, which would make muffins tough. Watch for a smooth, cohesive texture; if you over mix, the muffin tops may be flat and tight.
- Spoon batter into muffin cups coated with non-stick spray or with muffin cup liners. They should be 2/3 full. Bake at 350 degrees for 20 minutes.: Alternating keeps the batter balanced and prevents lumps, and you will notice the batter shift between thick and more fluid states. This technique yields a tender crumb by preventing over development of gluten. A frequent error is dumping all flour at once, creating pockets of dry flour or a gummy batter from overmixing.
- Add in the All-Bran Cereal and cooled bran flakes mixture and stir until combined: The batter will thicken noticeably and take on flecks of bran, giving a hearty appearance and a slightly grainy mouthfeel that I love. Stir until the mix is uniform, but do not beat; over stirring will make muffins dense. If the cereal remains dry on the edges you probably did not hydrate the bran enough, which will create dry pockets in the muffins.
- Spoon batter into muffin cups coated with non-stick spray or with muffin cup liners: As you fill each cup watch the batter settle and smooth slightly on top, showing you the right consistency. They should be two thirds full so the tops can rise without overflowing. A common mistake is overfilling which leads to merged domes and uneven baking.
- They should be 2/3 full: Keeping that consistent fill level gives even rise across the tray, producing uniform muffins that brown at the same rate. I use a small ice cream scoop for quick, repeatable portions to avoid mismatched sizes. If one pan has much more batter than another, the bake time will vary and some muffins may be underdone.
- Bake at 350 degrees for 20 minutes: During baking the kitchen will fill with a toasty, wheaty aroma and the tops should turn a warm golden brown. You can test doneness with a toothpick which should come out clean or with a few moist crumbs, and the sides will slightly pull away from the pan. Opening the oven early or setting temperature too high causes rapid doming and potential overbrowning, so keep the oven steady for even results.
Notes
- Make ahead batter storage: Keep batter in a large airtight container in the refrigerator for up to six weeks. When you are ready to bake, scoop out only the number of muffins you need, refill the container, and return it to the fridge. This system is perfect for planning breakfasts or last minute guests because it eliminates the mixing step and preserves freshness.
- Consistent scooping method: Use a small ice cream scoop for even portions which ensures uniform rise and baking. Consistency reduces overbaked edges or undercooked centers and speeds up assembly when you have multiple pans to fill. It also makes presentation more appealing if you are serving guests.
- Cooling and storing baked muffins: Allow muffins to cool completely on a wire rack before sealing them, which prevents condensation and sogginess. Store at room temperature for one to two days in an airtight container, refrigerate for up to a week, or freeze for two to three months in a sealed bag. Reheat frozen muffins in the microwave for forty five to sixty seconds for a quick refresh.
- Even hydration technique: Stir the bran flakes cereal while it cools to avoid clumps and ensure even moisture distribution. This gives a consistent crumb and prevents dry pockets in the baked muffin. If you skip stirring, dense pieces of bran can remain and alter texture.
- Use liners or nonstick spray: Line muffin tins or spray them to prevent sticking, especially if you plan to store and reheat muffins. Liners make removal simple and keep shapes intact, while sprayed pans can give slightly crisper bottoms which some people prefer.