
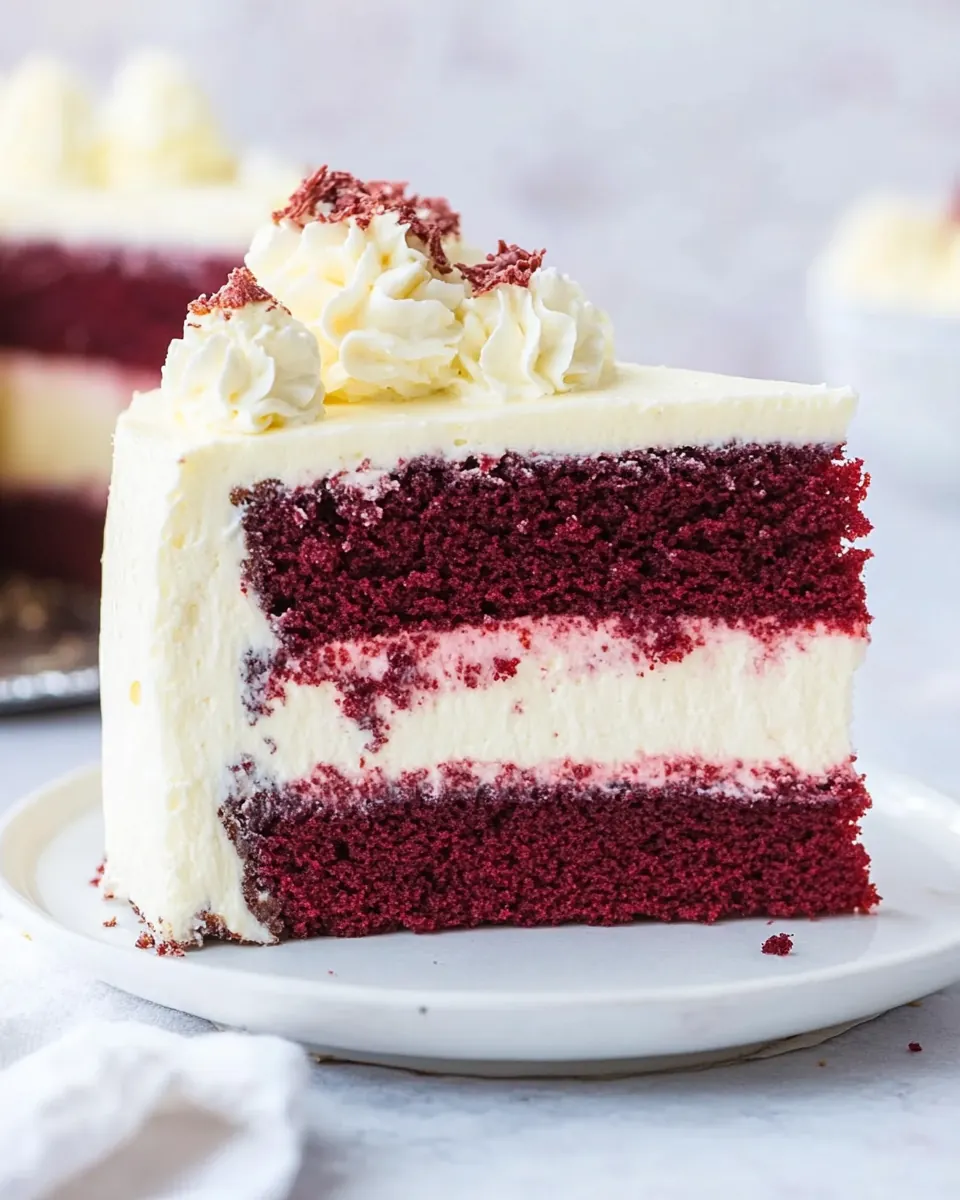
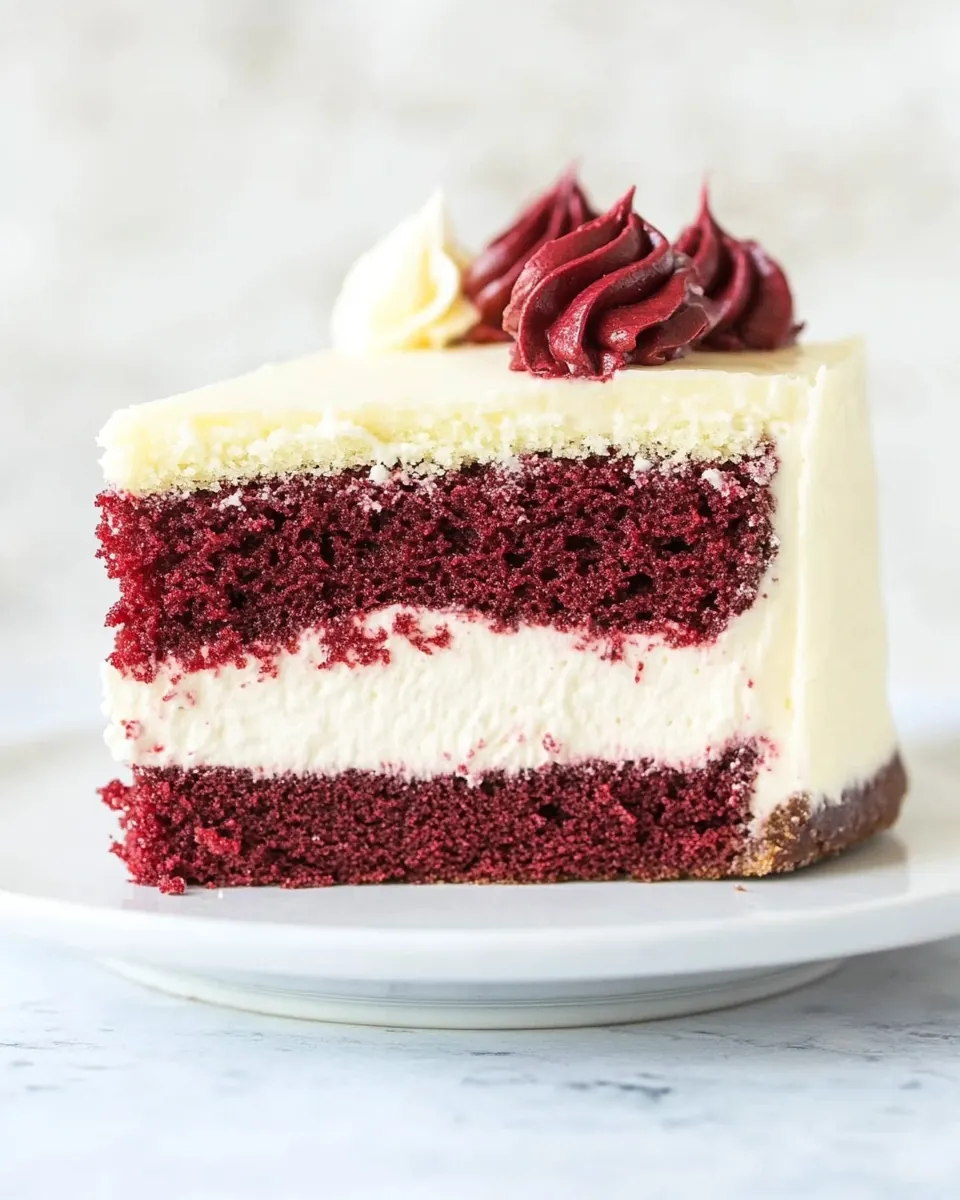
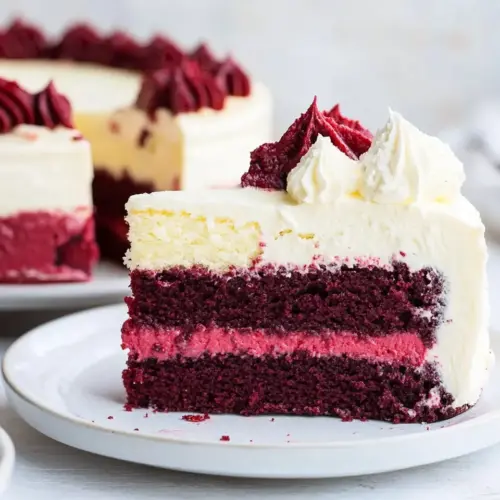
Red Velvet Cake Cheesecake
Red Velvet Cake Cheesecake began as a celebration experiment that somehow turned my kitchen into a laboratory of comfort and showstopping dessert energy. I remember pulling the first slice from the fridge and thinking about how the velvety cream cheese layer met the tender crumb of the all purpose flour cake, and how each forkful felt like a small reward after a long week. That first sentence still makes me smile, because this mashup delivers both the nostalgic charm of cake and the dense, tangy richness of cheesecake.
Over the years I have made this treat for birthdays, housewarmings, and last minute dinner parties where everyone expected something simple. What they got instead was a layered spectacle that always starts conversations, and I enjoy the ritual of assembling the layers as much as the reward of slicing into that neat red crumb and creamy center. The process taught me patience, and also a few tricks about temperature and timing that keep the two textures distinct yet harmonious.
Recipe Snapshot
3 hr
120 mins
60 mins
Hard
450 kcal
American
Gluten-Free, Low FODMAP
Desserts
8-inch cake pans, Parchment paper, Hand mixer or stand mixer, Spatula, Oven, Knife, Cake stand
Why This Red Velvet Cake Cheesecake Is So Good
Layered Luxury in Every Bite
I adore how Red Velvet Cake Cheesecake presents two classic desserts in one elegant package. The contrast between the airy cake crumb and the dense cream cheese layer creates a dynamic mouthfeel that makes each bite interesting. I often say the cake is the light voice and the cheesecake is the bass line, and together they form a memorable dessert arrangement.
Reliable Party Star
When I serve Red Velvet Cake Cheesecake I notice guests relax, because it signals celebration. It slices well, stands up to transport, and keeps its structure in the fridge, so I can make it ahead. I love that it looks professional without requiring advanced techniques, which makes it my go to when I want something impressive but manageable.
Flavor Harmony
The tang from the sour cream and cream cheese balances the sweetness of sugar and the faint cocoa notes from cocoa powder. I appreciate that the cake batter uses both buttermilk and vinegar to build tender crumb and signature red velvet tang, which pairs seamlessly with the cheesecake filling. That balance is why this dessert never tastes cloying, even when you have a generous slice.
Technique Friendly
Even though the recipe has multiple components, the techniques are straightforward and forgiving. I find that small habits like bringing eggs and cream cheese to room temperature and mixing at the right speeds eliminate common problems, so you end up with smooth texture and neat layers. For home bakers who want to stretch their skills, this is a satisfying project.
Make Ahead Ease
This dessert rewards planning because chilling strengthens the structure and deepens the flavors. I often assemble everything a day ahead and chill overnight, which frees me up on serving day. If you enjoy desserts that improve with a little rest, Red Velvet Cake Cheesecake is a delight.
Ingredient List for Red Velvet Cake Cheesecake
These ingredients come together to create two complementary textures, the soft crumb of a classic cake and the smooth density of a cheesecake. The key players are the cream cheese for tang and silkiness, buttermilk and vinegar for a tender cake crumb, and cocoa powder plus red gel food coloring for that signature color and subtle chocolate note. Each item supports structure, flavor, or moisture, and together they make layering easy and reliable.
- Baking Spray for the pans: Prepare pans by coating them evenly so baked layers release cleanly and prevent sticking during cooling and slicing.
- 2 1/2 cups all-purpose flour: Provide structure and body to the cake batter by contributing gluten and absorbing liquids, producing a tender crumb when properly mixed.
- 1 1/2 cups sugar: Sweeten the batter and interact with fats and eggs to provide moisture, tenderness, and support browning and caramelization during baking.
- 1 teaspoon baking soda: Leaven the cake by producing carbon dioxide when reacting with acids or heat, helping create a light, airy texture in the crumb.
- 1 teaspoon baking powder: Support lift and additional leavening, offering fine texture and slight rise when combined with other leaveners in the recipe.
- 1/2 teaspoons salt: Enhance overall flavor balance and strengthen dough by tightening gluten slightly, while moderating sweetness and leavening action.
- 1/3 cup cocoa powder: Impart rich chocolate flavor and deepen the red hue contrast, while contributing a slight dryness that requires balancing with liquids.
- 2 large eggs at room temperature: Bind ingredients, contribute moisture and richness, and help emulsify the batter for a smooth, cohesive texture throughout the cake.
- 1 1/2 cups vegetable oil: Provide rich moisture and tenderness, contribute to leavening suspension, and help keep the cake soft and rich without drying out.
- 1 cup buttermilk room temperature: Add slight acidity and tang to activate baking soda, tenderize crumb, and contribute to a moist, tangy flavor profile in the cake.
- 1 teaspoon white distilled vinegar: React with baking soda to help leaven the cake and provide a bright acidic note that complements the buttermilk.
- 1 teaspoon vanilla extract: Add aromatic sweetness and depth to both the cake and cheesecake layers, enhancing overall flavor complexity with minimal volume.
- 1 teaspoon red gel food coloring or 2 tablespoons regular food coloring: Deliver vibrant color to achieve the signature red appearance, allowing precise control over hue and intensity in the batter.
- 24 ounces cream cheese softened to room temperature: Soften and enrich the cheesecake layer by providing creamy texture, tang, and fat that produce a smooth, dense filling.
- 1 cup granulated sugar: Enhance sweetness in the cheesecake filling and balance tang from cream cheese and sour cream while contributing to structure.
- 2 large eggs room temperature: Bind and enrich the cheesecake filling, adding moisture, structure, and silkiness while aiding in setting during baking.
- 1/2 tablespoon vanilla extract: Contribute a subtle vanilla aroma that rounds flavor notes in the filling and complements both cake and cheesecake components.
- 1 cup sour cream room temperature: Add tang and creaminess to the filling, improving mouthfeel and contributing to a smooth, slightly tangy finish when baked.
- 2 tablespoons all-purpose flour: Stabilize the cheesecake by absorbing excess moisture, helping the filling hold shape and achieve a silky, sliceable texture.
- 1/2 teaspoons salt: Regulate seasoning and intensify other flavors, preventing blandness and balancing sweetness across the cheesecake and cake layers.
- Cream Cheese Frosting Recipe search it on the blog: Provide a finishing sweet and creamy topping that complements the layered dessert; search the blog for detailed frosting preparation and assembly tips.
Recipe Steps for Red Velvet Cake Cheesecake

These directions transform dry ingredients and dairy into a layered showstopper. Work methodically and keep components at the recommended temperatures so you get even baking and smooth textures. Below I expand each step with sensory cues, why the technique matters, and troubleshooting pointers drawn from many bakes.
- Preheat oven to 350 degrees F.: You will smell a faint warmed air as the oven comes up to temperature, and preheating ensures the batter begins to set immediately when placed inside which helps with rise and crumb structure. If the oven is cooler than stated, cakes can bake unevenly and become dense, so use an oven thermometer to verify actual temperature. A common mistake is placing pans in before full preheat, which leads to uneven centers and poor oven spring.
- Spray two 8-inch cake pans with baking spray, cover the bottom to fit with parchment paper, and spray again with baking spray. Set aside.: The syrupy scent of nonstick spray will be faint, but the visual cue is a glossy pan surface that prevents sticking. Lining with parchment ensures the cake lifts cleanly, maintaining smooth sides and edges, which matters when you invert and layer. If the pans are not fully greased, edges may tear when unmolding, so be thorough and press the parchment down so it does not shift while pouring batter.
- In a medium bowl, combine dry ingredients: flour, sugar, baking powder, baking soda, salt, and cocoa powder. Whisk to combine. Set aside.: flour, sugar, baking powder, baking soda, salt, and cocoa powder. Whisk to combine. Set aside. : A dry, dusty cocoa aroma signals that the powders are properly combined, which promotes even distribution and consistent flavor. Properly whisked dry ingredients prevent pockets of leavening, which would cause uneven rise and tunnels. A trap to avoid is dumping wet into partially mixed dry; always whisk first so every bite tastes balanced.
- Add wet ingredients to a large bowl: eggs, oil, buttermilk, vinegar, vanilla extract, and red gel food coloring. Using a hand mixer (or stand mixer), whisk on medium speed until thoroughly combined.: eggs, oil, buttermilk, vinegar, vanilla extract, and red gel food coloring. Using a hand mixer (or stand mixer), whisk on medium speed until thoroughly combined. : As you mix, the batter will become smoother and slightly glossy, and the color will deepen to a vivid red. Mixing at medium speed emulsifies the oil with the eggs, creating a uniform batter which helps the cake bake evenly. Overmixing can incorporate too much air or develop gluten later when dry ingredients are added, so stop once the texture is smooth and homogenous.
- Reduce the mixer speed to low and slowly add the dry ingredients. Stop occasionally to scrape the sides and bottom of the bowl. Whisk just until thoroughly combined.: At this point you will notice the batter thicken and the crumb taking form, and gentle folding keeps the cake tender. Scraping is essential because dry flour pockets at the bottom will bake into lumps or undercooked streaks. A common error is rushing this step, which leads to uneven texture and streaks of flour in the baked cake.
- Divide the batter equally into the prepared pans.: The batter will pour with a silky sheen and settle into an even surface; splitting evenly promotes uniform baking and matching layers for stacking. Use a scale or eyeball as best you can to keep the layers the same thickness, which makes assembly easier and visually balanced. Pouring all into one pan or uneven division will require trimming and can waste cake.
- Bake, rotating the pans halfway through the cooking process until a toothpick inserted into the center of the cakes comes out clean, about 30 minutes.: While baking, you will hear soft crackles and see the edges begin to pull away slightly; the top will spring back when touched gently. Rotating ensures both pans brown evenly, which is especially important in ovens with hotspots. Avoid opening the oven door frequently, because that sudden chill can collapse the centers and affect rise.
- Remove the cakes from the oven and run a knife around the edges to loosen them from the pans. Let them cool in the pans for about 20-30 minutes. Invert the cakes onto a plate and then re-invert them onto a cooling rack, round side up. Cool completely before frosting.: Cooling brings out a subtle baked aroma, and the crumb firms so you can handle the layers without tearing. The double invert helps release the cake neatly while keeping the top surface smooth. Rushing this and trying to frost warm cake may cause the frosting to melt and slide off, so patience here pays off.
- For this layer, preheat oven to 325 degrees F.: A lower temperature for the cheesecake helps it set gently and reduces cracking, producing a creamy, barely jiggly center. The oven giving off a mild warm dairy scent indicates the right environment for baking custardlike fillings. If you bake cheesecake too hot, it will puff then crack as it cools, so trust the lower temp for a smooth finish.
- Spray two 8-inch cake pans with baking spray and cover the bottom to fit with parchment paper. Set aside.: Preparing pans for cheesecake mirrors the cake pan prep, but this time the goal is to ensure the denser filling releases cleanly. Proper lining prevents tugging when removing chilled cheesecakes, which helps maintain edges for neat stacking. Skipping the parchment often causes the filling to stick and break when you try to unmold.
- In a large bowl, beat cream cheese for 1 minute. Add sugar and flour and mix until thoroughly combined and there are no lumps. Scrape down the sides of the bowl with a spatula.: The texture should shift from tacky to glossy, and the aroma becomes tangy and sweet as cream cheese and sugar meld. Smoothness here is critical for a lump free cheesecake, so take the time to beat properly and scrape. If small lumps remain, they can bake into uneven pockets that detract from the silkiness.
- With the mixer on low, add the eggs to the mixture, one at a time, and beat until just mixed through, careful not to over-beat. Scrape down the sides of the bowl with a spatula.: The filling will become looser and slightly more glossy as eggs incorporate, and adding them slowly minimizes air bubbles that cause cracking. Gentle mixing keeps the filling dense yet creamy, which is the hallmark of great cheesecake. Over-beating traps air, so avoid creating foam that will collapse during cooling.
- Add salt, vanilla extract, and sour cream and beat until mixed through, stopping to scrape the sides and bottom of the bowl with a spatula.: The sour cream brings a smooth, tangy silk to the batter and the mixture will smell bright and slightly tangy. Thorough scraping assures even distribution and prevents small pockets of unmixed ingredients. If you skip scraping, you risk uneven baking and textural inconsistencies in the final filling.
- Divide the cheesecake batter equally into the prepared pans. Level the tops with a spatula.: The filling will settle with a satiny surface, and leveling ensures even cooking and neat stacking later. A smooth top also helps prevent air pockets that can contribute to cracking. If one pan gets significantly more batter, you may end up with mismatched thickness that requires trimming.
- Transfer the cake into the preheated oven and bake it for 40-45 minutes. The cheesecakes should be just slightly wobbly in the center but puffy and settled on the sides.: During baking you will notice the edges firming and the center retaining a slight jiggle, which indicates proper doneness for a creamy interior. The lower heat allows the custard to set slowly without browning or separating. Overbaking will yield a dry, crumbly texture and increase the chance of cracks, so err on the side of slight wobble.
- Turn off the oven and crack open the door. Cool cheesecakes entirely in the open oven.: This gradual cooling reduces thermal shock and minimizes cracking, and you may detect a mellow, baked dairy aroma as they rest. Slow cooling gives the custard time to stabilize and prevents sudden collapse. Removing them immediately into cool air can cause the tops to sink and crack.
- Once completely cooled, remove the cakes from the oven and refrigerate for at least 5-6 hours. Run a butter knife around the edges to release the cakes from the pan. Store in the fridge until ready to assemble.: Chilling firms the filling so it slices cleanly and tightens flavors; the cold also helps the layers stay distinct during stacking. If you try to unmold too early the cheesecake may tear, so allow full refrigeration time. A common error is under chilling which results in gooey, unmanageable layers.
- Prepare the Cream Cheese Frosting per the recipe directions.: The frosting should be smooth, spreadable, and slightly tangy, complementing the cheesecake while adding a silky finish. A correctly prepared frosting will hold peaks but still spread easily, creating neat coverage. If the frosting is too warm it will slump on the cake; chill briefly to firm it up before spreading.
- Start with a cake stand and place a cardboard round cake paper on top. Add 1/3 cup of frosting and spread it.: The first dollop creates a glue layer to stabilize the stack, and you will feel a pleasant resistance as the frosting anchors the base. This small step keeps the layers from slipping and helps with even stacking. Skipping this can lead to sliding layers when the cake is moved.
- Level its layers using a cake leveler or a sharp, serrated knife. Place one layer on the cake stand.: Leveling produces flat surfaces that sit flush together, which improves stability and the final clean aesthetic. You will see crumbs gather on the board as you trim, so keep a clean knife and wipe between cuts. Cutting with a dull blade can tear the crumb and create an uneven surface.
- Add 1/3 of the frosting and spread it in an even layer.: The filling will feel cool and silky beneath the knife, and an even layer ensures balanced flavor and structural support for the next layer. Apply gentle pressure so the frosting spreads without squishing out the edges. Too much filling here can cause slippage, so measure visually or use a spatula to keep it even.
- Level the cheesecake layer using a sharp, serrated knife. Level the edges. Place it on top of the frosting layer.: Working carefully, you will align textures and create a neat profile, and the cheesecake will provide a dense counterpoint to the cake layer. Keep hands cool and steady to maintain shape while transferring. A cracked cheesecake edge can be smoothed later with frosting, but it is best to handle delicately to avoid breakage.
- Repeat with the remaining layer and another cheesecake layer.: Building the stack reveals the final silhouette, and each added layer should sit with minimal shifting if previous steps were followed. The alternating textures become visually striking, and the stacked weight helps the frosting adhere. If layers slip, chill briefly to firm them before continuing.
- Use the remaining frosting to cover the cake entirely.: As you spread the frosting the cake will transform into a polished dessert, with a cool and creamy scent. A crumb coat first minimizes crumbs showing through, followed by a final smooth coat for a professional finish. Applying warm frosting or overworking can cause smearing and sliding, so keep motions smooth and patient.
- Add cake crumbs to the edges of the cake.: Pressing crumbs on the sides adds texture and hides any seams, creating a cohesive look and a hint of color contrast. The crumbs stick easily to the frosting, and the finished edge looks intentional and pretty. If the frosting is too soft, the crumbs may sink in and create uneven patches, so ensure frosting has some body.
- Chill it for at least four hours, better longer, before serving it so the frosting sets.: As it chills you will notice the aroma settle and the layers knit together, making slicing cleaner and flavors more integrated. Extended chilling firms the frosting and improves slice definition, which is ideal for presentation. Serving too soon risks slumping layers and a softer bite that does not hold shape.
- Serve with a side of whipped cream.: The cool, airy whipped cream offers a light counterpoint to the rich cheesecake and cake, and a small dollop brightens each serving. The whipped texture and mild sweetness balance the denser layers, adding a fresh mouthfeel. If you prepare the whipped cream too far ahead without stabilizer it may deflate, so whip shortly before serving.
How to Switch It Up
If you want to vary the dessert without changing the core experience, small adjustments make a big visual or flavor impact. Below are detailed tips to adapt texture, color, and presentation while staying true to the technique that makes this dessert reliable.
- Adjust color intensity by using less or more red gel food coloring until you hit the shade you love, working in small increments to avoid oversaturation.
- Swap oil for neutral flavored oil alternatives but keep the amount the same to maintain moistness and tender crumb without introducing strong flavors.
- Make ahead and freeze by assembling and freezing wrapped slices for up to one month, then thaw in the fridge overnight for an elegant ready supply.
- Chill between layers for 20 to 30 minutes if you need to stabilize the stack during assembly, this prevents sliding and makes applying the final coat of frosting easier.
- Use a serrated knife warmed under hot water and wiped dry for cleaner slices when serving, wiping between cuts to maintain neat edges.
How to Enjoy Red Velvet Cake Cheesecake
This dessert shines in many settings, and the way you serve it can highlight different aspects of its personality. Whether you are aiming for a cozy family dessert or a centerpiece for a formal gathering, these serving ideas will help you plan the experience.
- For celebrations, set the cake on a central stand and slice at the table to show the layers, offering small plates and forks so guests can savor the contrast between cake and cheesecake.
- For casual gatherings, pre-slice and arrange on a platter with a side of chilled whipped cream for easy self service, making it simple for guests to grab a slice and mingle.
- Storage tips, keep the cake refrigerated in an airtight container for up to four days, and for longer storage freeze individual slices wrapped tightly then thaw in the fridge before serving.
- Seasonal pairings, in cooler months I pair slices with warm coffee or tea to balance the chilled texture, while in warmer weather a light fruit garnish brightens the plate without overpowering the dessert.
- Occasions, this dessert is perfect for birthdays, anniversaries, and holiday dinners where you want a showstopping dessert that is both familiar and elegant.
FAQ
Conclusion
This layered creation stands out because it marries the airy charm of red velvet cake with the lush density of cheesecake, offering a balanced, memorable dessert. I encourage you to give it a try, planning ahead so each component can rest and reach the ideal temperature for assembly. With a bit of patience and the room temperature steps followed, you will be rewarded with clean slices, confident presentation, and a dessert that guests remember fondly. Enjoy the process, and don’t be afraid to personalize the color intensity or chilling time to match your style.
Red Velvet Cake Cheesecake
Equipment
- 8 inch cake pans
- Parchment Paper
- Hand mixer or stand mixer
- Spatula
- Oven
- Knife
- Cake stand
Ingredients
- Baking Spray for the pans Prepare pans by coating them evenly so baked layers release cleanly and prevent sticking during cooling and slicing.
- 2 1/2 cups all-purpose flour Provide structure and body to the cake batter by contributing gluten and absorbing liquids, producing a tender crumb when properly mixed.
- 1 1/2 cups sugar Sweeten the batter and interact with fats and eggs to provide moisture, tenderness, and support browning and caramelization during baking.
- 1 teaspoon baking soda Leaven the cake by producing carbon dioxide when reacting with acids or heat, helping create a light, airy texture in the crumb.
- 1 teaspoon baking powder Support lift and additional leavening, offering fine texture and slight rise when combined with other leaveners in the recipe.
- 1/2 teaspoons salt Enhance overall flavor balance and strengthen dough by tightening gluten slightly, while moderating sweetness and leavening action.
- 1/3 cup cocoa powder Impart rich chocolate flavor and deepen the red hue contrast, while contributing a slight dryness that requires balancing with liquids.
- 2 large eggs at room temperature Bind ingredients, contribute moisture and richness, and help emulsify the batter for a smooth, cohesive texture throughout the cake.
- 1 1/2 cups vegetable oil Provide rich moisture and tenderness, contribute to leavening suspension, and help keep the cake soft and rich without drying out.
- 1 cup buttermilk room temperature Add slight acidity and tang to activate baking soda, tenderize crumb, and contribute to a moist, tangy flavor profile in the cake.
- 1 teaspoon white distilled vinegar React with baking soda to help leaven the cake and provide a bright acidic note that complements the buttermilk.
- 1 teaspoon vanilla extract Add aromatic sweetness and depth to both the cake and cheesecake layers, enhancing overall flavor complexity with minimal volume.
- 1 teaspoon red gel food coloring or 2 tablespoons regular food coloring Deliver vibrant color to achieve the signature red appearance, allowing precise control over hue and intensity in the batter.
- 24 ounces cream cheese softened to room temperature Soften and enrich the cheesecake layer by providing creamy texture, tang, and fat that produce a smooth, dense filling.
- 1 cup granulated sugar Enhance sweetness in the cheesecake filling and balance tang from cream cheese and sour cream while contributing to structure.
- 2 large eggs room temperature Bind and enrich the cheesecake filling, adding moisture, structure, and silkiness while aiding in setting during baking.
- 1/2 tablespoon vanilla extract Contribute a subtle vanilla aroma that rounds flavor notes in the filling and complements both cake and cheesecake components.
- 1 cup sour cream room temperature Add tang and creaminess to the filling, improving mouthfeel and contributing to a smooth, slightly tangy finish when baked.
- 2 tablespoons all-purpose flour Stabilize the cheesecake by absorbing excess moisture, helping the filling hold shape and achieve a silky, sliceable texture.
- 1/2 teaspoons salt Regulate seasoning and intensify other flavors, preventing blandness and balancing sweetness across the cheesecake and cake layers.
- Cream Cheese Frosting Recipe search it on the blog Provide a finishing sweet and creamy topping that complements the layered dessert; search the blog for detailed frosting preparation and assembly tips.
Instructions
- Preheat oven to 350 degrees F.: You will smell a faint warmed air as the oven comes up to temperature, and preheating ensures the batter begins to set immediately when placed inside which helps with rise and crumb structure. If the oven is cooler than stated, cakes can bake unevenly and become dense, so use an oven thermometer to verify actual temperature. A common mistake is placing pans in before full preheat, which leads to uneven centers and poor oven spring.
- Spray two 8-inch cake pans with baking spray, cover the bottom to fit with parchment paper, and spray again with baking spray. Set aside.: The syrupy scent of nonstick spray will be faint, but the visual cue is a glossy pan surface that prevents sticking. Lining with parchment ensures the cake lifts cleanly, maintaining smooth sides and edges, which matters when you invert and layer. If the pans are not fully greased, edges may tear when unmolding, so be thorough and press the parchment down so it does not shift while pouring batter.
- In a medium bowl, combine dry ingredients: flour, sugar, baking powder, baking soda, salt, and cocoa powder. Whisk to combine. Set aside.: flour, sugar, baking powder, baking soda, salt, and cocoa powder. Whisk to combine. Set aside. : A dry, dusty cocoa aroma signals that the powders are properly combined, which promotes even distribution and consistent flavor. Properly whisked dry ingredients prevent pockets of leavening, which would cause uneven rise and tunnels. A trap to avoid is dumping wet into partially mixed dry; always whisk first so every bite tastes balanced.
- Add wet ingredients to a large bowl: eggs, oil, buttermilk, vinegar, vanilla extract, and red gel food coloring. Using a hand mixer (or stand mixer), whisk on medium speed until thoroughly combined.: eggs, oil, buttermilk, vinegar, vanilla extract, and red gel food coloring. Using a hand mixer (or stand mixer), whisk on medium speed until thoroughly combined. : As you mix, the batter will become smoother and slightly glossy, and the color will deepen to a vivid red. Mixing at medium speed emulsifies the oil with the eggs, creating a uniform batter which helps the cake bake evenly. Overmixing can incorporate too much air or develop gluten later when dry ingredients are added, so stop once the texture is smooth and homogenous.
- Reduce the mixer speed to low and slowly add the dry ingredients. Stop occasionally to scrape the sides and bottom of the bowl. Whisk just until thoroughly combined.: At this point you will notice the batter thicken and the crumb taking form, and gentle folding keeps the cake tender. Scraping is essential because dry flour pockets at the bottom will bake into lumps or undercooked streaks. A common error is rushing this step, which leads to uneven texture and streaks of flour in the baked cake.
- Divide the batter equally into the prepared pans.: The batter will pour with a silky sheen and settle into an even surface; splitting evenly promotes uniform baking and matching layers for stacking. Use a scale or eyeball as best you can to keep the layers the same thickness, which makes assembly easier and visually balanced. Pouring all into one pan or uneven division will require trimming and can waste cake.
- Bake, rotating the pans halfway through the cooking process until a toothpick inserted into the center of the cakes comes out clean, about 30 minutes.: While baking, you will hear soft crackles and see the edges begin to pull away slightly; the top will spring back when touched gently. Rotating ensures both pans brown evenly, which is especially important in ovens with hotspots. Avoid opening the oven door frequently, because that sudden chill can collapse the centers and affect rise.
- Remove the cakes from the oven and run a knife around the edges to loosen them from the pans. Let them cool in the pans for about 20-30 minutes. Invert the cakes onto a plate and then re-invert them onto a cooling rack, round side up. Cool completely before frosting.: Cooling brings out a subtle baked aroma, and the crumb firms so you can handle the layers without tearing. The double invert helps release the cake neatly while keeping the top surface smooth. Rushing this and trying to frost warm cake may cause the frosting to melt and slide off, so patience here pays off.
- For this layer, preheat oven to 325 degrees F.: A lower temperature for the cheesecake helps it set gently and reduces cracking, producing a creamy, barely jiggly center. The oven giving off a mild warm dairy scent indicates the right environment for baking custardlike fillings. If you bake cheesecake too hot, it will puff then crack as it cools, so trust the lower temp for a smooth finish.
- Spray two 8-inch cake pans with baking spray and cover the bottom to fit with parchment paper. Set aside.: Preparing pans for cheesecake mirrors the cake pan prep, but this time the goal is to ensure the denser filling releases cleanly. Proper lining prevents tugging when removing chilled cheesecakes, which helps maintain edges for neat stacking. Skipping the parchment often causes the filling to stick and break when you try to unmold.
- In a large bowl, beat cream cheese for 1 minute. Add sugar and flour and mix until thoroughly combined and there are no lumps. Scrape down the sides of the bowl with a spatula.: The texture should shift from tacky to glossy, and the aroma becomes tangy and sweet as cream cheese and sugar meld. Smoothness here is critical for a lump free cheesecake, so take the time to beat properly and scrape. If small lumps remain, they can bake into uneven pockets that detract from the silkiness.
- With the mixer on low, add the eggs to the mixture, one at a time, and beat until just mixed through, careful not to over-beat. Scrape down the sides of the bowl with a spatula.: The filling will become looser and slightly more glossy as eggs incorporate, and adding them slowly minimizes air bubbles that cause cracking. Gentle mixing keeps the filling dense yet creamy, which is the hallmark of great cheesecake. Over-beating traps air, so avoid creating foam that will collapse during cooling.
- Add salt, vanilla extract, and sour cream and beat until mixed through, stopping to scrape the sides and bottom of the bowl with a spatula.: The sour cream brings a smooth, tangy silk to the batter and the mixture will smell bright and slightly tangy. Thorough scraping assures even distribution and prevents small pockets of unmixed ingredients. If you skip scraping, you risk uneven baking and textural inconsistencies in the final filling.
- Divide the cheesecake batter equally into the prepared pans. Level the tops with a spatula.: The filling will settle with a satiny surface, and leveling ensures even cooking and neat stacking later. A smooth top also helps prevent air pockets that can contribute to cracking. If one pan gets significantly more batter, you may end up with mismatched thickness that requires trimming.
- Transfer the cake into the preheated oven and bake it for 40-45 minutes. The cheesecakes should be just slightly wobbly in the center but puffy and settled on the sides.: During baking you will notice the edges firming and the center retaining a slight jiggle, which indicates proper doneness for a creamy interior. The lower heat allows the custard to set slowly without browning or separating. Overbaking will yield a dry, crumbly texture and increase the chance of cracks, so err on the side of slight wobble.
- Turn off the oven and crack open the door. Cool cheesecakes entirely in the open oven.: This gradual cooling reduces thermal shock and minimizes cracking, and you may detect a mellow, baked dairy aroma as they rest. Slow cooling gives the custard time to stabilize and prevents sudden collapse. Removing them immediately into cool air can cause the tops to sink and crack.
- Once completely cooled, remove the cakes from the oven and refrigerate for at least 5-6 hours. Run a butter knife around the edges to release the cakes from the pan. Store in the fridge until ready to assemble.: Chilling firms the filling so it slices cleanly and tightens flavors; the cold also helps the layers stay distinct during stacking. If you try to unmold too early the cheesecake may tear, so allow full refrigeration time. A common error is under chilling which results in gooey, unmanageable layers.
- Prepare the Cream Cheese Frosting per the recipe directions.: The frosting should be smooth, spreadable, and slightly tangy, complementing the cheesecake while adding a silky finish. A correctly prepared frosting will hold peaks but still spread easily, creating neat coverage. If the frosting is too warm it will slump on the cake; chill briefly to firm it up before spreading.
- Start with a cake stand and place a cardboard round cake paper on top. Add 1/3 cup of frosting and spread it.: The first dollop creates a glue layer to stabilize the stack, and you will feel a pleasant resistance as the frosting anchors the base. This small step keeps the layers from slipping and helps with even stacking. Skipping this can lead to sliding layers when the cake is moved.
- Level its layers using a cake leveler or a sharp, serrated knife. Place one layer on the cake stand.: Leveling produces flat surfaces that sit flush together, which improves stability and the final clean aesthetic. You will see crumbs gather on the board as you trim, so keep a clean knife and wipe between cuts. Cutting with a dull blade can tear the crumb and create an uneven surface.
- Add 1/3 of the frosting and spread it in an even layer.: The filling will feel cool and silky beneath the knife, and an even layer ensures balanced flavor and structural support for the next layer. Apply gentle pressure so the frosting spreads without squishing out the edges. Too much filling here can cause slippage, so measure visually or use a spatula to keep it even.
- Level the cheesecake layer using a sharp, serrated knife. Level the edges. Place it on top of the frosting layer.: Working carefully, you will align textures and create a neat profile, and the cheesecake will provide a dense counterpoint to the cake layer. Keep hands cool and steady to maintain shape while transferring. A cracked cheesecake edge can be smoothed later with frosting, but it is best to handle delicately to avoid breakage.
- Repeat with the remaining layer and another cheesecake layer.: Building the stack reveals the final silhouette, and each added layer should sit with minimal shifting if previous steps were followed. The alternating textures become visually striking, and the stacked weight helps the frosting adhere. If layers slip, chill briefly to firm them before continuing.
- Use the remaining frosting to cover the cake entirely.: As you spread the frosting the cake will transform into a polished dessert, with a cool and creamy scent. A crumb coat first minimizes crumbs showing through, followed by a final smooth coat for a professional finish. Applying warm frosting or overworking can cause smearing and sliding, so keep motions smooth and patient.
- Add cake crumbs to the edges of the cake.: Pressing crumbs on the sides adds texture and hides any seams, creating a cohesive look and a hint of color contrast. The crumbs stick easily to the frosting, and the finished edge looks intentional and pretty. If the frosting is too soft, the crumbs may sink in and create uneven patches, so ensure frosting has some body.
- Chill it for at least four hours, better longer, before serving it so the frosting sets.: As it chills you will notice the aroma settle and the layers knit together, making slicing cleaner and flavors more integrated. Extended chilling firms the frosting and improves slice definition, which is ideal for presentation. Serving too soon risks slumping layers and a softer bite that does not hold shape.
- Serve with a side of whipped cream.: The cool, airy whipped cream offers a light counterpoint to the rich cheesecake and cake, and a small dollop brightens each serving. The whipped texture and mild sweetness balance the denser layers, adding a fresh mouthfeel. If you prepare the whipped cream too far ahead without stabilizer it may deflate, so whip shortly before serving.
Notes
- Adjust color intensity by using less or more red gel food coloring until you hit the shade you love, working in small increments to avoid oversaturation.
- Swap oil for neutral flavored oil alternatives but keep the amount the same to maintain moistness and tender crumb without introducing strong flavors.
- Make ahead and freeze by assembling and freezing wrapped slices for up to one month, then thaw in the fridge overnight for an elegant ready supply.
- Chill between layers for 20 to 30 minutes if you need to stabilize the stack during assembly, this prevents sliding and makes applying the final coat of frosting easier.
- Use a serrated knife warmed under hot water and wiped dry for cleaner slices when serving, wiping between cuts to maintain neat edges.