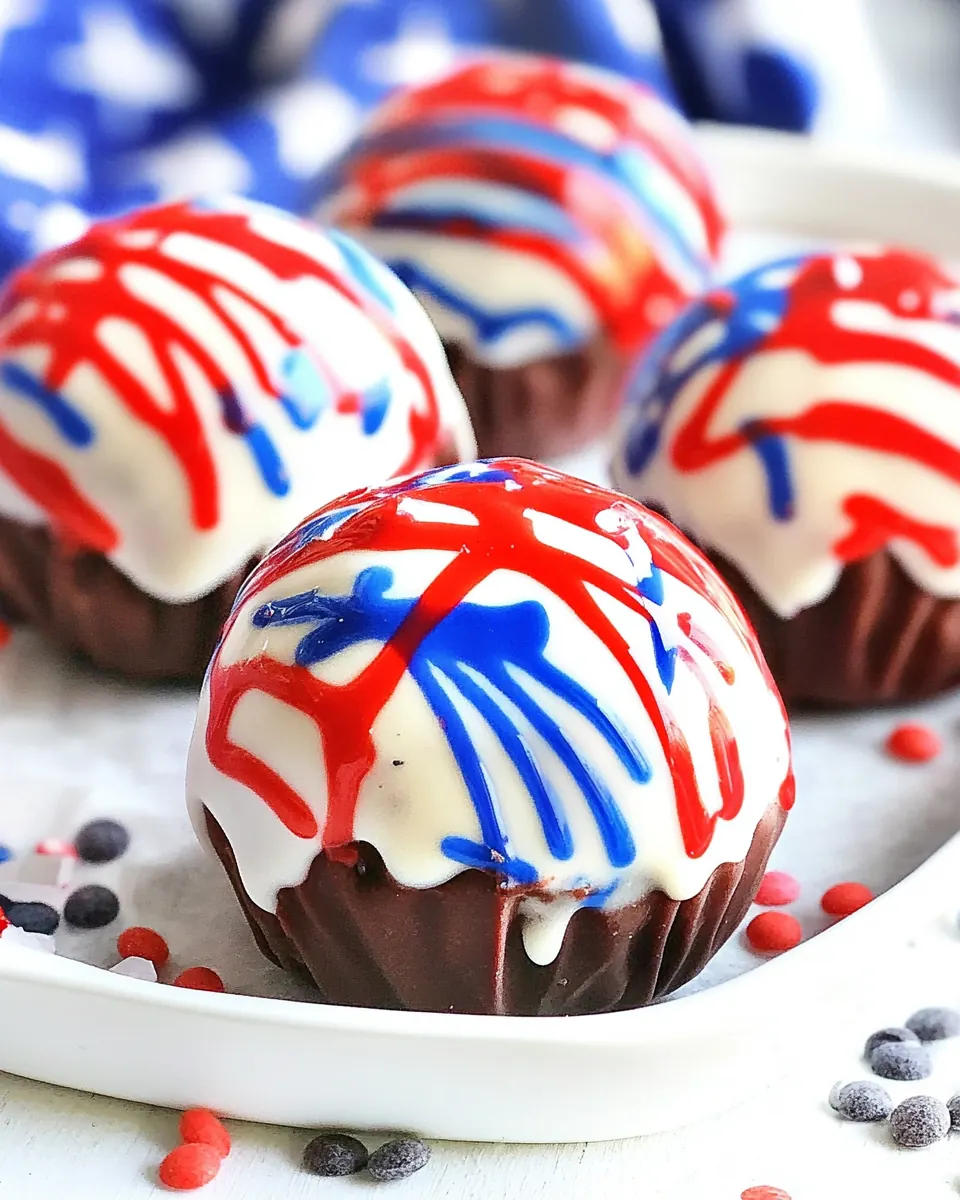
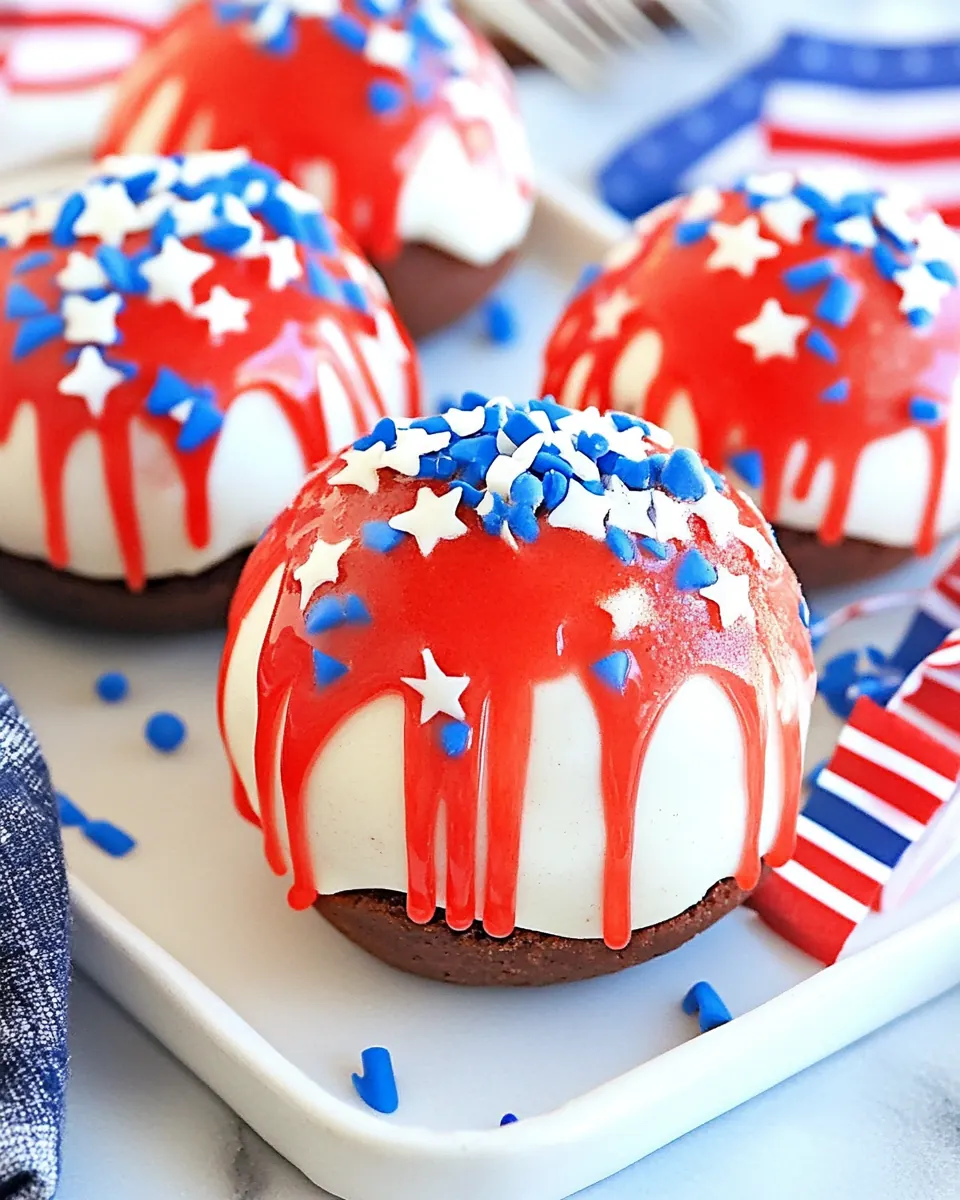
Patriotic Hot Cocoa Bombs
Patriotic Hot Cocoa Bombs have become my go to for festive gatherings when I want a playful, show stopping treat that doubles as a cozy drink.
One winter afternoon a few years back I was wrapping gifts and craving something cheerful to warm the room. I pulled together a few jars of colorful candy melts and some simple hot chocolate mixes, and the result was pure joy. These little spheres felt like edible ornaments, and everyone at the table lit up when they saw the marbled shells melt into steaming mugs. I remember laughing at the tiny explosions of marshmallows and chips as they rose to the top, and that memory is why I still make them when friends come by.
What I love most about Patriotic Hot Cocoa Bombs is how customizable they are. I keep some components prepped so I can assemble them while chatting with guests. The visual payoff is immediate, the milk steams and the shell gives a satisfying crack, and the flavors unfold like a warm hug. Honestly, these are the kind of recipe that makes people slow down, take a picture, and actually savor the moment. They are playful to make, and comforting to drink, and that’s a rare combination I return to again and again.
Recipe Snapshot
60 mins
30 mins
30 mins
Medium
200 kcal
American
Keto, Gluten-Free
Desserts
Microwave safe bowls, Silicone half sphere mold, Spoon, Freezer
Why Try This Patriotic Hot Cocoa Bombs
They are a crowd pleaser
I love serving Patriotic Hot Cocoa Bombs because they create an instant moment of delight. When you pour warm milk over the shell and it opens to reveal the mix and marshmallows, people pause and smile. The visual reveal makes them perfect for gatherings with friends and family, and I often use them as a centerpiece activity at parties.
Easy assembly with big impact
These bombs are approachable even if you are not an experienced chocolatier. The technique relies on simple tools and short melting windows, so you can produce a dozen in less than an hour once you get the flow down. I find the method forgiving, and small mistakes often become charming rustic details rather than failures.
Great for gifting and seasonal fun
I frequently package sets in small boxes as gifts. Because the ingredients are shelf stable, they ship well and keep until the recipient is ready to enjoy them. The patriotic color scheme also makes them ideal for seasonal celebrations when you want a themed edible present.
Customizable flavor and texture
With separate packets of hot chocolate and different chips or mini marshmallows, you can tailor sweetness and texture. I like swapping white mini baking chips for colorful ones to add pops of texture. This flexibility means you can adapt the bombs for a mellow cup or a very indulgent one depending on the mix and add ins you choose.
Kid friendly and interactive
Kids adore the ritual of pouring milk and watching the cocoa bomb bloom. I often invite little helpers to drizzle sprinkles on top, which adds to the fun and sense of ownership. It doubles as a simple kitchen activity that keeps them engaged while you finish other party tasks.
What Goes Into Patriotic Hot Cocoa Bombs
The philosophy here is simple, color and function working together. Each ingredient plays a role, from the structural candy melts that form the shell, to the instant hot chocolate mix that delivers quick, cozy flavor when hot milk is poured. Mini chips and marshmallows add texture and nostalgia, while sprinkles bring visual pop. Together they create a treat that is both festive and foolproof.
- 1 cup red candy melts: Melted to form sturdy, vibrant red shells for the cocoa bombs and add sweet, creamy flavor that complements the hot chocolate. Provides color contrast and visual appeal when paired with the blue and white melts, helping create a patriotic theme. Softens when warmed to allow sealing of the sphere halves and holds decorations when set.
- 1 cup white candy melts: Melted to create smooth, neutral white shells or used for drizzling and sealing the bombs, offering a creamy, sweet base. Helps balance brighter candy melt colors and can be tinted or left natural for contrast. Sets with a glossy finish that enhances presentation and secures fillings effectively.
- 1 cup blue candy melts: Melted to build bold blue shells or accents that complete the patriotic color scheme while adding sweet, creamy texture. Supplies visual balance among the red and white melts and can be used for decorative drizzles or colored layers. Cools to a firm, snappable coating that protects and contains the hot chocolate mix and mix-ins.
- 6 tablespoons white hot chocolate: Dissolvable powder used as the white-flavored hot chocolate center in each bomb, delivering creamy vanilla or white chocolate taste when the bomb melts in hot milk. Blends easily with the milk to create a smooth beverage and complements the milk hot chocolate for variety. Measured to ensure consistent flavor and portion control across bombs.
- 6 tablespoons milk hot chocolate: Dissolvable powder used as the classic milk-flavored hot chocolate center, providing traditional cocoa richness once the bomb dissolves in hot milk or water. Balances sweetness and deep chocolate notes with the white hot chocolate option to offer flavor variation. Packs into shells with marshmallows and chips to create a full, comforting cup.
- White mini baking chips in different colors: Decorative small white chips used to add texture, pockets of creamy sweetness, and colorful accents when tinted or mixed with colored pieces. Melts slightly when bombs are poured or when hot liquid is added, creating small creamy bites in the finished drink. Useful for filling, decorating, or adding visual interest to the cocoa bomb interiors and exteriors.
- Mini marshmallows: Soft, mini-sized marshmallows used to provide classic fluffy texture and to create floating garnish when the bomb dissolves in hot liquid. Add visual charm, extra sweetness, and an authentic hot cocoa experience inside each bomb. Help fill volume inside shells and create a fun reveal when the sphere melts.
- Sprinkles: white blue and red: Decorative red, white, and blue sprinkles used to enhance the patriotic appearance and add a delicate crunchy texture to the finished bombs. Applied to the exterior before the candy fully sets or sprinkled on melted drizzles to adhere and create festive accents. Provide eye-catching finishing touches that reinforce the theme.
Patriotic Hot Cocoa Bombs Instructions
These instructions will walk you through melting, molding, filling, sealing, and presenting your bombs step by step. I like to set up an assembly line so each task flows smoothly and the melted candy stays at the right consistency. Keep towels and a small bowl of warm water nearby to quickly clean tools if needed.
- Add candy melts to three, small, microwave safe bowls. Melt in the microwave in 30-second increments, stirring in between until fully melted. This will take between 60-90 seconds.: The aroma of warm chocolate will be gentle and sweet as the melts begin to soften, and you should hear the quiet bubbling as pockets of steam escape when microwaving. Use short bursts so the texture becomes velvety and glossy rather than grainy. This method preserves shine and prevents burning, which is critical for a smooth shell. A common mistake is overheating the melts, causing them to seize into a grainy paste, so heat in 30 second increments and stir well between each burst to distribute the heat evenly.
- Spoon about 1/2 tablespoon of each color into the bottom of each half-sphere mold. You will make 12 half-spheres.: As you stir, notice the transformation from lumpy solids to a fluid that coats the spoon, which signals readiness. The sound is minimal, mostly the soft swish of the spoon, and the visual cue is a uniform, mirror like surface. Stirring helps release trapped steam and avoids hot spots that cause scorching. Avoid rushing this step by using longer microwave bursts, as that can create scorched flavor and ruined texture.
- Using the back of a spoon, gently swirl the colors together for a marble effect, don't fully combine them. Carefully, spread the melted chocolate to the sides of each mold. Freeze for about 10 minutes or until hardened.: When spooning, the colors should pool with a glossy surface, and you will feel the gentle weight of the drops as you place them. This stage sets the foundation for the marble effect, and the portions ensure you will end up with consistent, sealable halves. A frequent error is overfilling which prevents sealing later, so keep to the measured amounts for tidy assembly.
- Gently remove the hardened half-spheres from the silicone molds. In 6 of them, spoon 1 tablespoon of each of the hot chocolate mix, add baking chips and mini marshmallows.: The visual cue to stop swirling is when distinct ribbons of color remain, like painted strokes, rather than blending into a single tone. You may see faint waves and streaks that catch the light, which is exactly what you want for the final look. Gentle motion preserves color separation, while vigorous mixing creates a muddied result, so take a light hand to maintain contrast.
- Add a bit of MELTED candy melts to the edges of the 6 bottom half-spheres and cover with the top spheres. Run a clean finger around the edge to remove any extra candy melt and smooth the edge.: As you spread, the soft sheen will glide up the silicone walls and begin to thin as it moves, which is desirable for a delicate shell. Use circular motions to build an even thickness, then tap the mold lightly to release air bubbles. If the layer is uneven it can create weak spots that crack during filling, so smoothness here matters. One pitfall is leaving thin patches that will break when you remove the halves, so add a touch more melts if you see translucency.
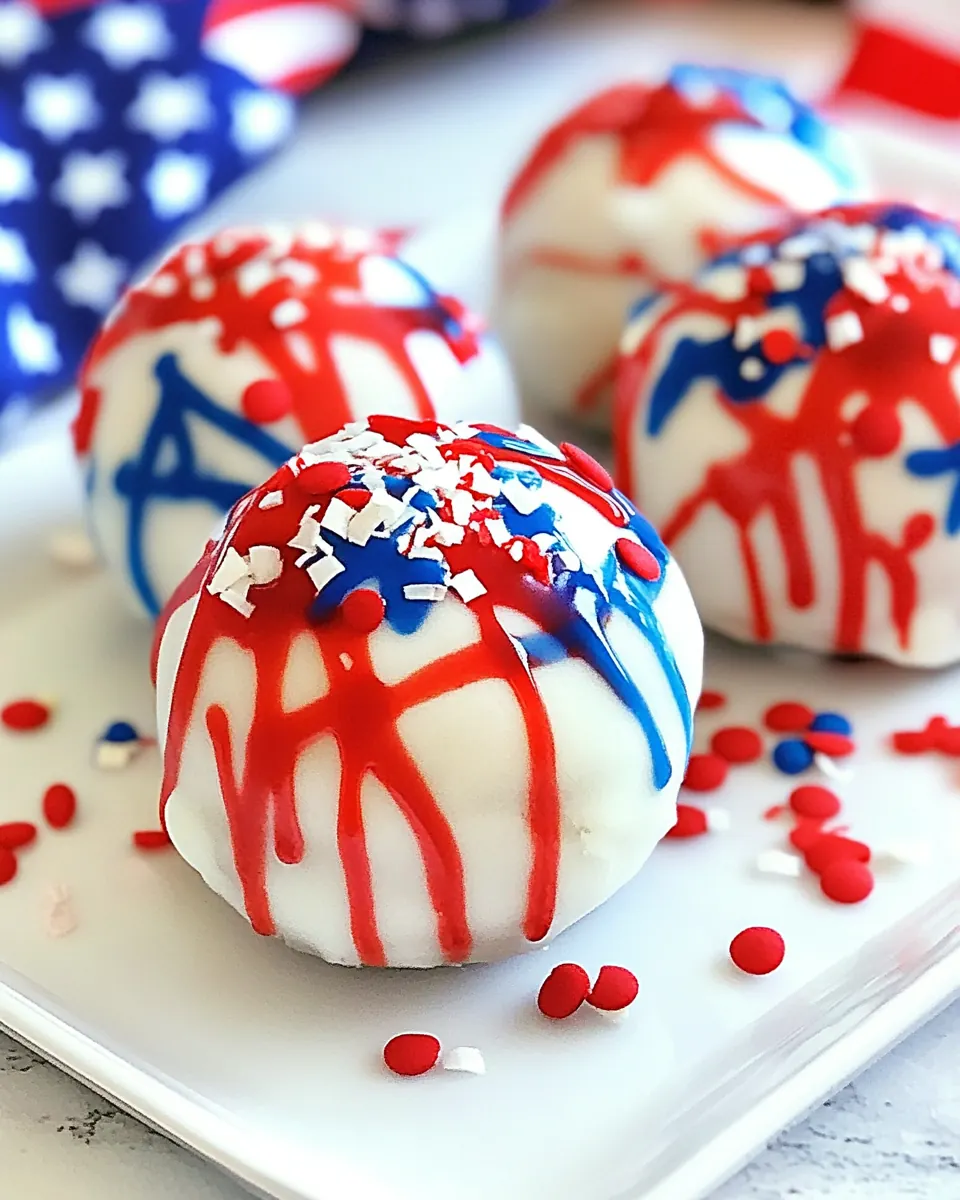
- Drizzle melted white chocolate on top and garnish immediately with sprinkles.: In the freezer the candy will firm and you may hear faint settling noises as it sets. When fully hardened the surface will lose its glossy wobble and feel firm to the touch. Timing is key because under chilled shells will deform during removal, while leaving them too long can cause condensation when returning to room temperature; aim for a solid set with no tackiness.
- Freeze for 10 minutes or refrigerate until ready to serve.: Removing them should feel clean, with the shells popping free without cracking, and you might notice a faint snap as the edges release. If a shell resists, let it sit a minute longer in the freezer rather than forcing it, to avoid breakage. A common mistake is bending the shell too much which causes fissures, so handle each with soft, steady movements.
- To serve, place a cocoa bomb into a mug. Pour hot milk over it. Once the shell melts, stir with a spoon to fully combine. Serve and enjoy!: When assembling the filled halves, the dry mixes will sit like a tiny treasure trove inside, with chips catching the light and marshmallows creating little clouds. Even distribution ensures each bomb dissolves evenly in hot milk, producing consistent flavor. Overstuffing can prevent effective sealing and may cause the top to sit unevenly, so measure the fill components carefully.
- Add a bit of MELTED candy melts to the edges of the 6 bottom half spheres and cover with the top spheres: The melted candy acts like edible glue and will set quickly, forming a neat seam; you should see a faint glossy ridge that smooths out as it settles. Press gently to join the halves without squeezing out the contents. If you press too hard you risk forcing mix out of the seam or cracking the shell, so aim for a light touch and a consistent ring of glue.
- Run a clean finger around the edge to remove any extra candy melt and smooth the edge: The tactile feedback here is important, you will feel small irregularities and can smooth them into a neat band that improves the visual finish. Wiping away excess prevents unsightly drips and helps the bombs sit flat. One trap is using a sticky or messy finger, which transfers debris to the seam, so keep a clean finger or damp cloth available for tidy work.
- Drizzle melted white chocolate on top and garnish immediately with sprinkles: The drizzle should fall in thin, glossy ribbons that set with a slight sheen, and the sprinkles will adhere when applied right away. This final flourish supplies texture and color contrast, and the sound of sprinkles scattering into place is quietly satisfying. If you wait too long to add sprinkles the drizzle will harden and they will not stick, so work swiftly in this step.
- Freeze for 10 minutes or refrigerate until ready to serve: Chilling firms the seam and stabilizes the bombs for storage, and you may notice a faint chill scent as they cool. Proper cooling reduces the chance of melting during handling or transport. Avoid stacking them too tightly in storage, which can cause decoration smudging or surface blemishes.
- To serve, place a cocoa bomb into a mug: The bomb will sit like a little orb awaiting transformation, and its glossy surface will reflect the steam from the milk you pour. Positioning it in the center of the mug ensures an even melt. A common oversight is using a mug that is too shallow, which can cause splashing when milk is added, so choose a deep cup for the best result.
- Pour hot milk over it: As hot milk pours, the shell will begin to gloss and weaken, and you will hear a gentle crack as it opens, releasing the mix and marshmallows. Stirring once the shell has melted mixes the ingredients into a smooth, comforting drink with pockets of melted chips and fluffy marshmallow. Do not use boiling milk as it can scald the cocoa and alter the texture; aim for hot but not harshly boiling.
- Once the shell melts, stir with a spoon to fully combine: The stirring blends the textures into a cohesive cup, distributing melted chips and marshmallows so every sip has body and sweetness. You should see ribbon like currents as the chocolate and mix disperse through the milk, creating a rich color and creamy mouthfeel. If lumps remain, continue stirring gently until smooth, avoiding aggressive whisking that can cool the drink too quickly.
- Serve and enjoy!: Serving time is the reward, when steam, aroma, and flavor come together and invite conversation. Present each mug with a small spoon for stirring and optionally an extra sprinkle on top. A misstep is letting the drinks sit too long before serving, which can cause the marshmallows to sink and the surface to dull, so bring them to the table promptly.
How to Switch It Up
You can easily adapt Patriotic Hot Cocoa Bombs for different looks and flavors without changing the basic technique. Below are ideas to vary colors, fillings, and presentation while keeping the assembly familiar and simple.
- Swap colors Change the candy melt colors to fit any theme, using the same marble technique to create custom palettes for holidays or parties.
- Mix hot chocolate flavors Combine different instant hot chocolate mixes to create layered taste profiles, such as richer or more mellow cups depending on your preference.
- Adjust sweetness Reduce the number of baking chips or omit them altogether if you prefer a less sweet cup.
- Vary textures Add small crunchy mix ins that will still melt, like tiny candy bits, for a pleasant contrast against the smooth cocoa.
- Gift packaging Arrange bombs in small boxes with tissue and a note suggesting milk temperature and stirring instructions for a polished homemade gift.
What to Pair With Patriotic Hot Cocoa Bombs
These cocoa bombs work beautifully as a stand alone treat or paired with simple bites. Think cozy accompaniments that complement the sweet, creamy profile without overpowering it. Below are serving suggestions, occasions, and storage notes presented as a list to make planning easy.
- Simple cookies Shortbread or sugar cookies offer a buttery counterpoint and are easy to dunk into the hot cocoa.
- Holiday brunch Serve alongside warm pancakes and fruit for a festive breakfast spread where the bombs add an indulgent drink option.
- Gift boxes Pair three bombs with a small jar of extra hot chocolate mix and a wooden spoon for a thoughtful homemade present.
- After dinner Present as a sweet finish to casual dinners, offering each guest a bomb to melt into milk for a warm nightcap that is non alcoholic.
- Storage tips Keep bombs chilled in an airtight container in the fridge for up to two weeks or freeze for longer storage, bringing them to room temperature before gifting to avoid condensation.
- Seasonal pairings They are perfect for winter gatherings, rainy afternoons, and patriotic celebrations where themed colors enhance the occasion.
FAQ
Conclusion
Patriotic Hot Cocoa Bombs are special because they blend show stopping presentation with a comforting, familiar flavor that brings people together. Give them a try for your next gathering or as a homemade gift, and enjoy the joyful reactions when guests pour milk and watch each bomb transform. These bombs are easy to assemble, fun to customize, and perfect for creating warm, festive moments with minimal fuss.
Patriotic Hot Cocoa Bombs
Equipment
- Microwave safe bowls
- Silicone half sphere mold
- Spoon
- Freezer
Ingredients
- 1 cup red candy melts Melted to form sturdy, vibrant red shells for the cocoa bombs and add sweet, creamy flavor that complements the hot chocolate. Provides color contrast and visual appeal when paired with the blue and white melts, helping create a patriotic theme. Softens when warmed to allow sealing of the sphere halves and holds decorations when set.
- 1 cup white candy melts Melted to create smooth, neutral white shells or used for drizzling and sealing the bombs, offering a creamy, sweet base. Helps balance brighter candy melt colors and can be tinted or left natural for contrast. Sets with a glossy finish that enhances presentation and secures fillings effectively.
- 1 cup blue candy melts Melted to build bold blue shells or accents that complete the patriotic color scheme while adding sweet, creamy texture. Supplies visual balance among the red and white melts and can be used for decorative drizzles or colored layers. Cools to a firm, snappable coating that protects and contains the hot chocolate mix and mix-ins.
- 6 tablespoons white hot chocolate Dissolvable powder used as the white-flavored hot chocolate center in each bomb, delivering creamy vanilla or white chocolate taste when the bomb melts in hot milk. Blends easily with the milk to create a smooth beverage and complements the milk hot chocolate for variety. Measured to ensure consistent flavor and portion control across bombs.
- 6 tablespoons milk hot chocolate Dissolvable powder used as the classic milk-flavored hot chocolate center, providing traditional cocoa richness once the bomb dissolves in hot milk or water. Balances sweetness and deep chocolate notes with the white hot chocolate option to offer flavor variation. Packs into shells with marshmallows and chips to create a full, comforting cup.
- White mini baking chips in different colors Decorative small white chips used to add texture, pockets of creamy sweetness, and colorful accents when tinted or mixed with colored pieces. Melts slightly when bombs are poured or when hot liquid is added, creating small creamy bites in the finished drink. Useful for filling, decorating, or adding visual interest to the cocoa bomb interiors and exteriors.
- Mini marshmallows Soft, mini-sized marshmallows used to provide classic fluffy texture and to create floating garnish when the bomb dissolves in hot liquid. Add visual charm, extra sweetness, and an authentic hot cocoa experience inside each bomb. Help fill volume inside shells and create a fun reveal when the sphere melts.
- Sprinkles: white blue and red Decorative red, white, and blue sprinkles used to enhance the patriotic appearance and add a delicate crunchy texture to the finished bombs. Applied to the exterior before the candy fully sets or sprinkled on melted drizzles to adhere and create festive accents. Provide eye-catching finishing touches that reinforce the theme.
Instructions
- Add candy melts to three, small, microwave safe bowls. Melt in the microwave in 30-second increments, stirring in between until fully melted. This will take between 60-90 seconds.: The aroma of warm chocolate will be gentle and sweet as the melts begin to soften, and you should hear the quiet bubbling as pockets of steam escape when microwaving. Use short bursts so the texture becomes velvety and glossy rather than grainy. This method preserves shine and prevents burning, which is critical for a smooth shell. A common mistake is overheating the melts, causing them to seize into a grainy paste, so heat in 30 second increments and stir well between each burst to distribute the heat evenly.
- Spoon about 1/2 tablespoon of each color into the bottom of each half-sphere mold. You will make 12 half-spheres.: As you stir, notice the transformation from lumpy solids to a fluid that coats the spoon, which signals readiness. The sound is minimal, mostly the soft swish of the spoon, and the visual cue is a uniform, mirror like surface. Stirring helps release trapped steam and avoids hot spots that cause scorching. Avoid rushing this step by using longer microwave bursts, as that can create scorched flavor and ruined texture.
- Using the back of a spoon, gently swirl the colors together for a marble effect, don't fully combine them. Carefully, spread the melted chocolate to the sides of each mold. Freeze for about 10 minutes or until hardened.: When spooning, the colors should pool with a glossy surface, and you will feel the gentle weight of the drops as you place them. This stage sets the foundation for the marble effect, and the portions ensure you will end up with consistent, sealable halves. A frequent error is overfilling which prevents sealing later, so keep to the measured amounts for tidy assembly.
- Gently remove the hardened half-spheres from the silicone molds. In 6 of them, spoon 1 tablespoon of each of the hot chocolate mix, add baking chips and mini marshmallows.: The visual cue to stop swirling is when distinct ribbons of color remain, like painted strokes, rather than blending into a single tone. You may see faint waves and streaks that catch the light, which is exactly what you want for the final look. Gentle motion preserves color separation, while vigorous mixing creates a muddied result, so take a light hand to maintain contrast.
- Add a bit of MELTED candy melts to the edges of the 6 bottom half-spheres and cover with the top spheres. Run a clean finger around the edge to remove any extra candy melt and smooth the edge.: As you spread, the soft sheen will glide up the silicone walls and begin to thin as it moves, which is desirable for a delicate shell. Use circular motions to build an even thickness, then tap the mold lightly to release air bubbles. If the layer is uneven it can create weak spots that crack during filling, so smoothness here matters. One pitfall is leaving thin patches that will break when you remove the halves, so add a touch more melts if you see translucency.
- Drizzle melted white chocolate on top and garnish immediately with sprinkles.: In the freezer the candy will firm and you may hear faint settling noises as it sets. When fully hardened the surface will lose its glossy wobble and feel firm to the touch. Timing is key because under chilled shells will deform during removal, while leaving them too long can cause condensation when returning to room temperature; aim for a solid set with no tackiness.
- Freeze for 10 minutes or refrigerate until ready to serve.: Removing them should feel clean, with the shells popping free without cracking, and you might notice a faint snap as the edges release. If a shell resists, let it sit a minute longer in the freezer rather than forcing it, to avoid breakage. A common mistake is bending the shell too much which causes fissures, so handle each with soft, steady movements.
- To serve, place a cocoa bomb into a mug. Pour hot milk over it. Once the shell melts, stir with a spoon to fully combine. Serve and enjoy!: When assembling the filled halves, the dry mixes will sit like a tiny treasure trove inside, with chips catching the light and marshmallows creating little clouds. Even distribution ensures each bomb dissolves evenly in hot milk, producing consistent flavor. Overstuffing can prevent effective sealing and may cause the top to sit unevenly, so measure the fill components carefully.
- Add a bit of MELTED candy melts to the edges of the 6 bottom half spheres and cover with the top spheres: The melted candy acts like edible glue and will set quickly, forming a neat seam; you should see a faint glossy ridge that smooths out as it settles. Press gently to join the halves without squeezing out the contents. If you press too hard you risk forcing mix out of the seam or cracking the shell, so aim for a light touch and a consistent ring of glue.
- Run a clean finger around the edge to remove any extra candy melt and smooth the edge: The tactile feedback here is important, you will feel small irregularities and can smooth them into a neat band that improves the visual finish. Wiping away excess prevents unsightly drips and helps the bombs sit flat. One trap is using a sticky or messy finger, which transfers debris to the seam, so keep a clean finger or damp cloth available for tidy work.
- Drizzle melted white chocolate on top and garnish immediately with sprinkles: The drizzle should fall in thin, glossy ribbons that set with a slight sheen, and the sprinkles will adhere when applied right away. This final flourish supplies texture and color contrast, and the sound of sprinkles scattering into place is quietly satisfying. If you wait too long to add sprinkles the drizzle will harden and they will not stick, so work swiftly in this step.
- Freeze for 10 minutes or refrigerate until ready to serve: Chilling firms the seam and stabilizes the bombs for storage, and you may notice a faint chill scent as they cool. Proper cooling reduces the chance of melting during handling or transport. Avoid stacking them too tightly in storage, which can cause decoration smudging or surface blemishes.
- To serve, place a cocoa bomb into a mug: The bomb will sit like a little orb awaiting transformation, and its glossy surface will reflect the steam from the milk you pour. Positioning it in the center of the mug ensures an even melt. A common oversight is using a mug that is too shallow, which can cause splashing when milk is added, so choose a deep cup for the best result.
- Pour hot milk over it: As hot milk pours, the shell will begin to gloss and weaken, and you will hear a gentle crack as it opens, releasing the mix and marshmallows. Stirring once the shell has melted mixes the ingredients into a smooth, comforting drink with pockets of melted chips and fluffy marshmallow. Do not use boiling milk as it can scald the cocoa and alter the texture; aim for hot but not harshly boiling.
- Once the shell melts, stir with a spoon to fully combine: The stirring blends the textures into a cohesive cup, distributing melted chips and marshmallows so every sip has body and sweetness. You should see ribbon like currents as the chocolate and mix disperse through the milk, creating a rich color and creamy mouthfeel. If lumps remain, continue stirring gently until smooth, avoiding aggressive whisking that can cool the drink too quickly.
- Serve and enjoy!: Serving time is the reward, when steam, aroma, and flavor come together and invite conversation. Present each mug with a small spoon for stirring and optionally an extra sprinkle on top. A misstep is letting the drinks sit too long before serving, which can cause the marshmallows to sink and the surface to dull, so bring them to the table promptly.
Notes
- Swap colors Change the candy melt colors to fit any theme, using the same marble technique to create custom palettes for holidays or parties.
- Mix hot chocolate flavors Combine different instant hot chocolate mixes to create layered taste profiles, such as richer or more mellow cups depending on your preference.
- Adjust sweetness Reduce the number of baking chips or omit them altogether if you prefer a less sweet cup.
- Vary textures Add small crunchy mix ins that will still melt, like tiny candy bits, for a pleasant contrast against the smooth cocoa.
- Gift packaging Arrange bombs in small boxes with tissue and a note suggesting milk temperature and stirring instructions for a polished homemade gift.