Olive Oil Pancakes
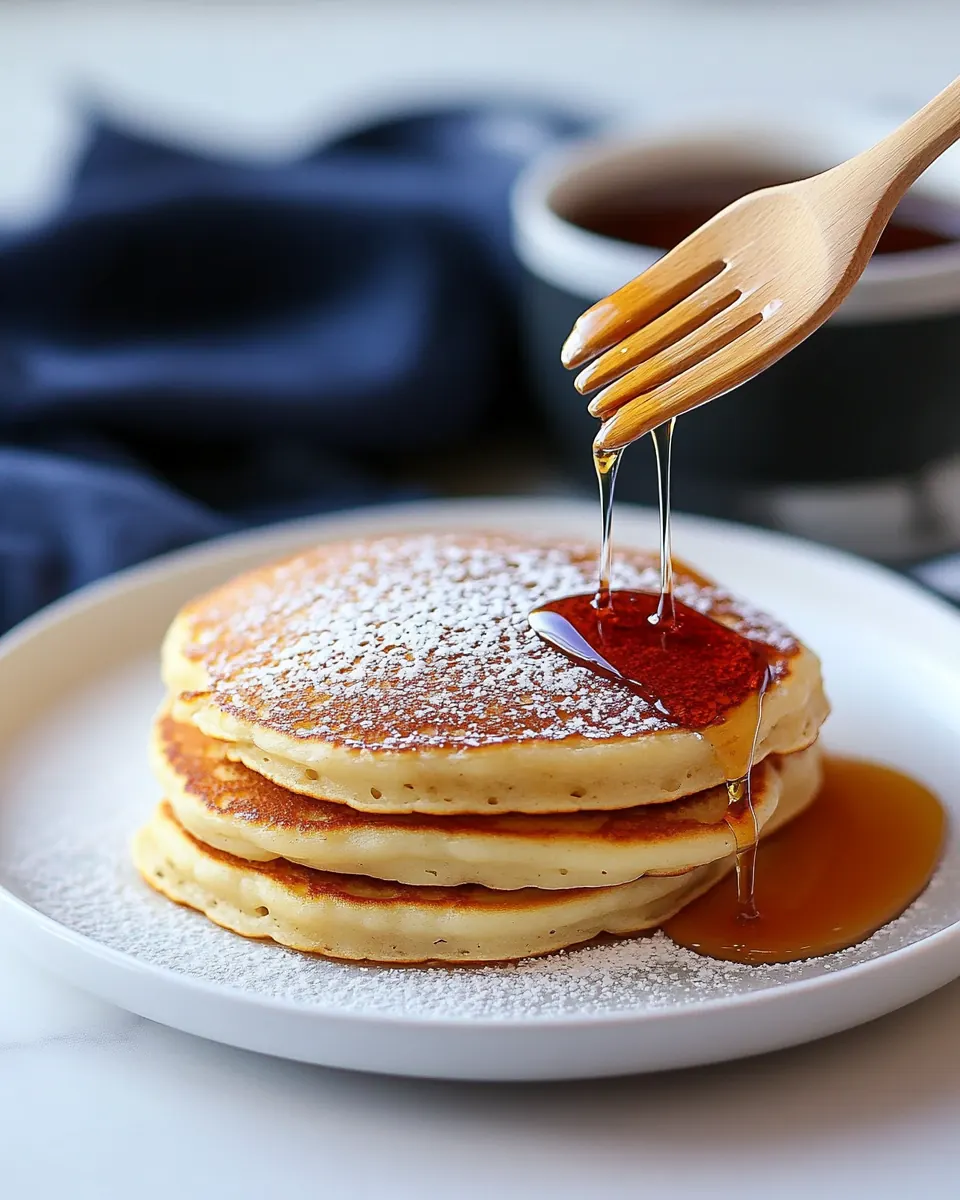
Olive Oil Pancakes have a way of sneaking into my weekend mornings like an old friend, comforting and uncomplicated. The first time I made these, the bright scent of lemon zest and the warm, slightly fruity perfume of extra virgin olive oil filled the kitchen, and I felt that small, domestic kind of happiness that only simple food can give.
I remember standing at the stove, whisk in hand, thinking about how lovely it is when a recipe trusts good ingredients to do the work. The batter came together with a few stirs, and as the pancakes sizzled I watched golden edges appear, then flip to reveal perfectly bronzed undersides. That quiet crackle and the soft steam rising from the pan still make me smile.
Recipe Snapshot
30 mins
10 mins
20 mins
Medium
200 kcal
American
Gluten-Free, Low FODMAP
Breakfast
Nonstick skillet or griddle, Mixing bowls, Whisk, Measuring cups and spoons, Ladle or large cookie scoop
Why This Olive Oil Pancakes Works
Light but Satisfying Texture
I love that Olive Oil Pancakes are tender inside yet have a gentle crisp at the edges. Using all purpose flour with the right balance of baking powder and baking soda gives lift without heaviness, and the olive oil keeps the crumb moist. When you bite in, you should feel a soft, springy center contrasted with a faintly crisp perimeter, which makes each mouthful interesting.
Bright, Natural Flavors
The subtle fruitiness from the extra virgin olive oil and the pop of brightness from the lemon zest make these pancakes feel special without being fussy. I appreciate recipes that use minimal flavoring yet deliver a layered taste profile. The vanilla and the small amount of sugar round things out, so you get a little sweetness and aromatic warmth that mingle beautifully with the oil and citrus.
Fast and Friendly to Make
One of the reasons I come back to Olive Oil Pancakes is how quickly they come together. You whisk dry ingredients in one bowl, wet in another, then fold them together. It is the sort of recipe you can make while the coffee brews, and you end up with pancakes that taste like you spent more time on them than you actually did.
Flexible Serving Options
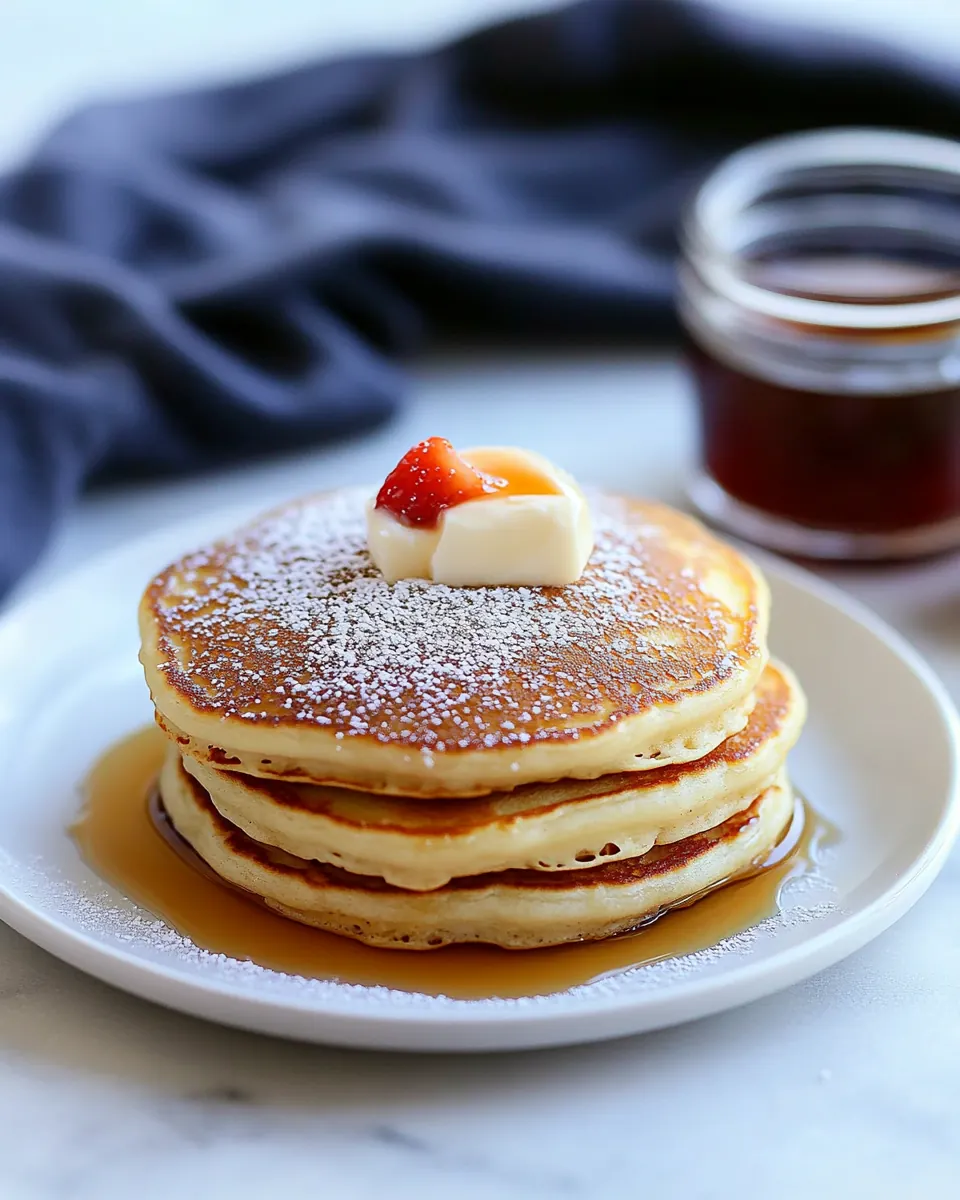
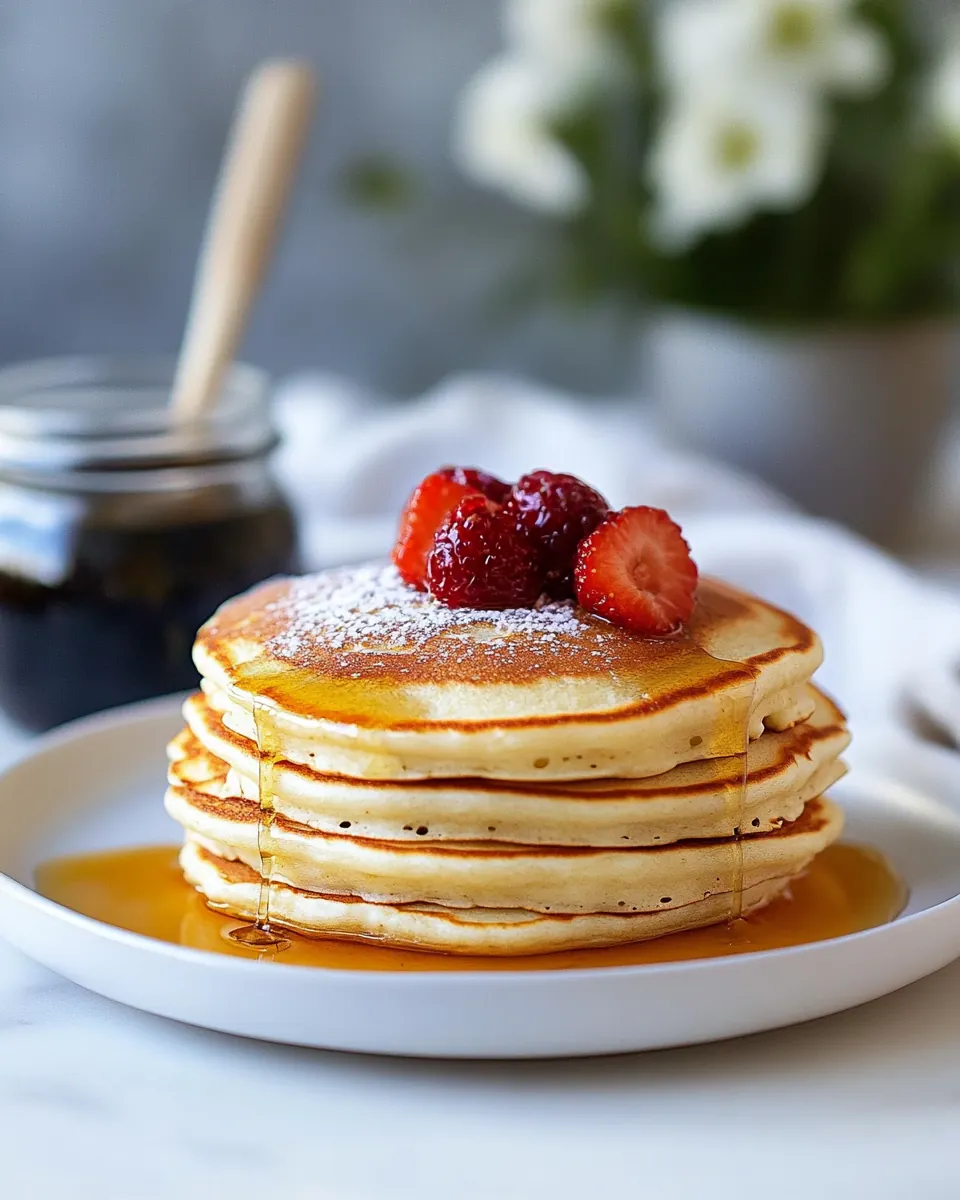
These pancakes are wonderfully adaptable. Serve them with classic maple syrup for a comforting breakfast, or top with fresh fruit for a lighter feel. The gentle flavor profile means they pair well with many accompaniments, and I often change toppings depending on the season and what I have on hand.
Reliable Results
I trust this method because it consistently produces evenly cooked pancakes that are golden and tender. There is a small learning curve about pan temperature, but once you find the sweet spot, the skillet rewards you with consistent browning and a pleasing texture every time. I find that following a couple of key sensory cues helps avoid common pitfalls like overbrowning or undercooked centers.
Olive Oil Pancakes Shopping List
These ingredients come together to create pancakes that are at once simple and nuanced. The philosophy here is balance: a modest amount of fat from extra virgin olive oil for moisture and flavor, chemical leaveners to lift the batter, a touch of sugar and vanilla for sweetness and aroma, and buttermilk to add tang and tenderness. Each component plays a clear role, and together they yield a batter that behaves predictably on the griddle.
- 1 1/4 cup 156 g all-purpose flour, sifted: Provide structure and body to the batter by supplying gluten and starch; sifting aerates the flour to avoid lumps and ensures a lighter, more tender pancake texture when combined with the wet ingredients.
- 2 tablespoons 24 g sugar: Add sweetness and help with browning; granulated sugar also contributes to moisture retention and can slightly tenderize the crumb when dissolved into the batter.
- 1 1/2 teaspoons baking powder: Leaven the pancakes by releasing carbon dioxide when activated; baking powder creates lift and a fluffy interior, improving rise during cooking.
- 1/2 teaspoon baking soda: React with acidic components to produce additional lift; baking soda helps with browning and balances pH for tender crumb development when combined with buttermilk.
- 1/2 teaspoon fine sea salt: Enhance overall flavor balance and strengthen gluten slightly; fine sea salt heightens sweetness and rounds out the taste while controlling fermentation of leaveners.
- 1 large egg: Bind ingredients and add richness through proteins and fats; a large egg provides structure, emulsification, and moisture for a cohesive, tender pancake.
- 1 cup 250 g buttermilk: Provide acidity, moisture, and tang that react with baking soda for lift; buttermilk contributes to tender crumb and adds a pleasant, slightly sour flavor profile.
- 3 tablespoons 42 g extra virgin olive oil: Contribute richness and a fruity, savory fat that tenderizes the batter; extra virgin olive oil replaces butter for moisture and imparts subtle flavor nuances.
- 1 teaspoon finely grated lemon zest: Offer bright citrus aroma and a fresh, zesty lift; finely grated lemon zest adds essential oils that enhance flavor without introducing extra liquid.
- 1/2 teaspoon vanilla extract: Lend aromatic sweetness and depth with a small amount of extract; vanilla extract rounds flavors and complements the lemon zest and olive oil in the batter.
Cooking Instructions for Olive Oil Pancakes
These directions are forgiving, but I like to approach them with calm focus. The sequence of combining dry and wet ingredients, and the patience on the pan, are where consistency is won. Follow sensory cues like batter thickness, pan temperature, and visual browning to get repeatable pancakes.
- In a mixing bowl, whisk together flour, sugar, baking powder, baking soda, and salt until evenly incorporated.: You will notice the dry mixture turns homogenous and slightly aerated, with a faintly sweet and saline scent from the sugar and fine sea salt . This step ensures the leavening is distributed so pancakes rise uniformly. If you skip thorough whisking, you risk pockets of leavener that puff unevenly; using a whisk and sweeping the bowl sides prevents that.
- In a small bowl or 2-cup glass measuring cup, whisk together buttermilk, egg, oil, lemon zest, and vanilla until smooth. Add to bowl with dry ingredients and whisk just until smooth (it will still be a bit lumpy, just as long as there aren't any huge clumps of flour).: The wet mix should look glossy and slightly thick, with specks of lemon zest dotting the surface and a mild aroma of vanilla . Emulsifying the egg and oil creates a stable liquid phase that integrates easily into the dry ingredients. If you notice separation or cold lumps, whisk more vigorously; lukewarm buttermilk helps if your kitchen is chilly.
- Heat a nonstick skillet or griddle pan over medium heat. Be patient and let the pan come up to temperature fully.: The batter should come together with small lumps, not a perfectly silky paste. You will see a few flour pockets vanish as the batter rests briefly on the spoon. This minimal mixing prevents gluten overdevelopment, which keeps the pancakes tender. Overmixing is the main error here, leading to tough pancakes.
- Rub a little butter or olive oil on the skillet with a paper towel if necessary (a good nonstick pan will barely need any greasing at all).: Bring the pan to temperature until a drop of water skitters and hisses, signaling readiness. The correct heat gives a steady sizzle and steady browning without burning. If your pan is too hot, pancakes will brown on the outside and stay raw inside, so raise or lower the heat to find a gentle, even sizzle.
- Ladle approximately 3 tablespoons of batter for each pancake (I use a large cookie scoop for this, filling it just barely level), leaving enough space between pancakes so they don’t touch as they spread out. Use the back of the scoop to gently spread into 4-inch rounds if necessary as the batter is on the thick side.: A lightly greased surface produces even contact and reliable browning, with a faint toasty aroma as the fat warms. Use just enough to coat, wiping excess to avoid frying the batter. The mistake to avoid is a sticky pan from too little fat or smoking from too much.
- Cook for about 2 to 3 minutes or until bottoms are deep golden brown; then flip and cook for another 1 to 2 minutes until browned. If you find your pancakes are browning more quickly, turn down the heat (the centers need time to cook through).: The batter should pour with some body, forming rounds that hold together. You will hear a soft settling sound as batter meets pan and see edges begin to set. If pancakes spread into irregular shapes, your pan may be slightly too cool or your batter too thin; adjust accordingly.
- Transfer to serving plates and serve, or place on a baking sheet in a 200 degree F oven to keep warm while you finish cooking the rest of the pancakes. Enjoy warm, drizzled with maple syrup.: Gently coaxing the batter into uniform rounds helps achieve even cooking and pretty presentation, and the surface should look matte and slightly bumpy before flipping. Avoid pressing down which compresses the air pockets and yields dense pancakes.
- Cook for about 2 to 3 minutes or until bottoms are deep golden brown: Look for a deep golden hue and small bubbles forming at the surface edges that stay open, that is your visual cue. You should hear a soft, sustained sizzle but not aggressive crackling. If you smell burning, reduce the heat immediately; undercooked centers indicate the temperature was too high.
- Then flip and cook for another 1 to 2 minutes until browned: After flipping, the second side cooks quicker, so watch for a uniform golden color and a springy center when pressed gently. The aroma will shift to a richer, toasty note and you will see slight steaming. Flipping too often or pressing the pancake flattens it and robs it of airiness.
- If you find your pancakes are browning more quickly, turn down the heat: Slowing the heat gives the center time to set without overbrowning the surface, and you will notice a steadier, lower sizzle. This adjustment is crucial for thicker pancakes that need more time to cook through. A common oversight is leaving the burner unchanged; small adjustments yield consistent results.
- Transfer to serving plates and serve, or place on a baking sheet in a 200 degree F oven to keep warm while you finish cooking the rest of the pancakes: The stack will maintain warmth and texture in the low oven, and the aroma in the kitchen becomes gently sweet and toasty. Use a wire rack over the sheet if you want to prevent steam softening. Avoid piling them directly on top of each other while finishing; trapped steam will make edges limp.
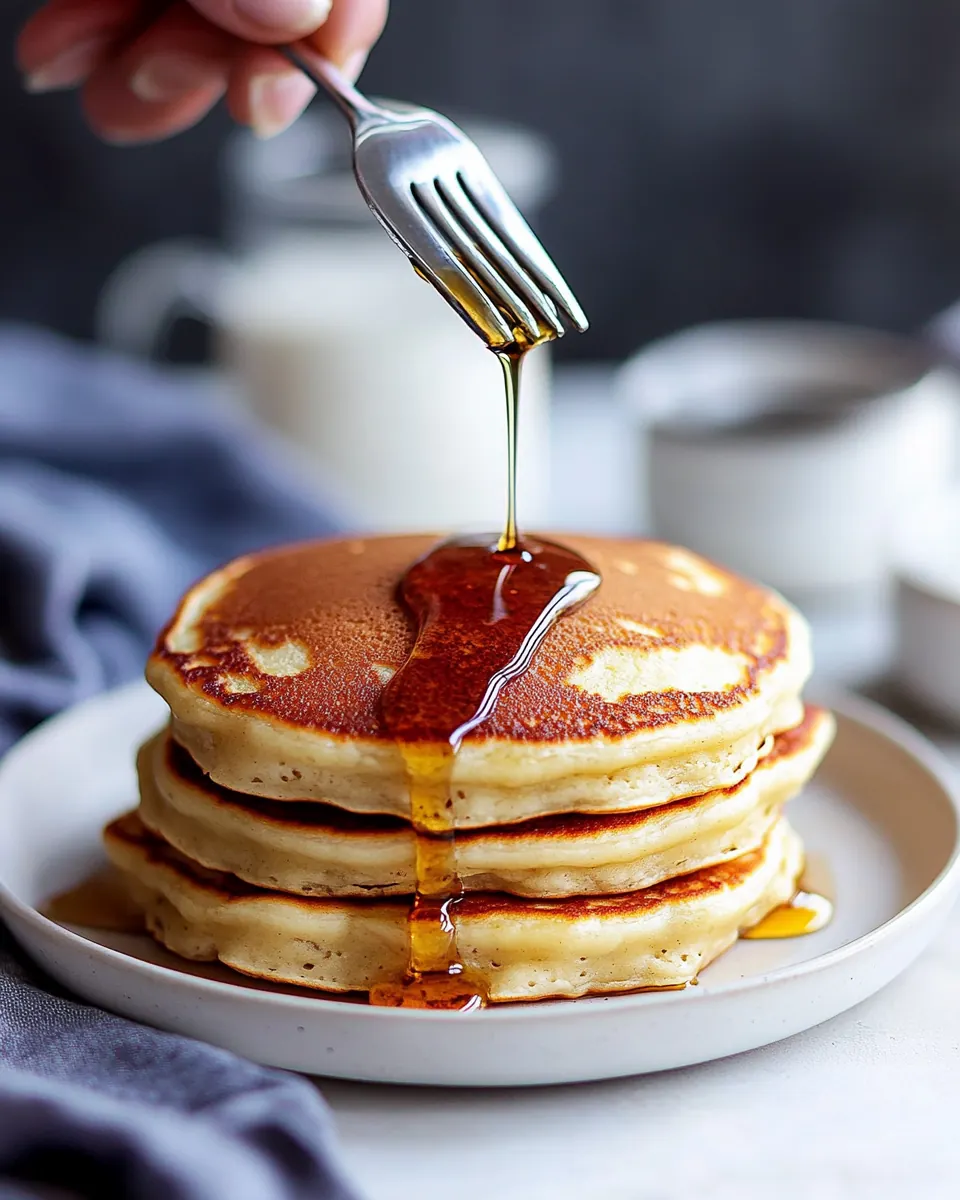
- Enjoy warm, drizzled with maple syrup: The final service brings the bright citrus and olive oil notes together with sweet syrup, creating a balanced bite that is warm and satisfying. Serve immediately for best texture, as residual steam will soften the crisp edges over time. If serving later, reheat briefly on a skillet to refresh the surface.
Helpful Hints
I like to think of these as small, practical strategies that make the cooking more predictable and the pancakes more repeatable. These tips come from repeated practice and a few unavoidable mistakes that taught me better ways to handle the batter and the pan.
- Measure flour correctly: Spoon the all purpose flour into your measuring cup and level it with a knife rather than scooping directly from the bag, which can compact the flour and yield dense pancakes.
- Test the pan temperature: Flick a few drops of water on the skillet, they should dance and evaporate quickly, signaling the right heat for even browning.
- Keep the batter slightly lumpy: Overmixing develops gluten and makes pancakes chewy, so stop when the batter is just combined with small streaks of flour still visible.
- Use a large cookie scoop for consistency: Portioning with a scoop ensures uniform pancake sizes so they cook at the same rate; I fill mine just barely level for three tablespoon rounds.
- Control browning with heat: If the bottoms darken too fast, reduce the burner slightly and give the center extra time to cook through without burning the exterior.
- Store leftovers properly: Cool completely before stacking and refrigerate in an airtight container; reheat on a skillet to restore the edges rather than microwaving which can make them limp.
What to Serve Alongside Olive Oil Pancakes
These pancakes are versatile and can be dressed up or kept simple depending on the occasion. I often choose accompaniments that complement the subtle citrus and olive oil notes without overwhelming them. Below are ideas for pairings, occasions, and storage guidance to help you plan a meal around these pancakes.
- Classic maple syrup: A warm drizzle of maple syrup is timeless and pairs naturally with the pancake’s tender crumb and bright lemon zest.
- Fresh fruit: Seasonal berries or sliced stone fruit add acidity and freshness, balancing the oil’s richness and adding vibrant color to the plate.
- Whipped cream or Greek style yogurt: A dollop brings a creamy contrast, especially for brunch where you want a mix of textures and tang.
- Casual weekend brunch: These pancakes are ideal for slow mornings when you want a relaxed meal that feels a bit elevated; they also work well for family breakfasts on holidays.
- Light lunch: Serve a pair of pancakes with savory sides like a green salad for a lighter midday meal that still satisfies.
- Storage tips: Cool completely before refrigerating, stack with parchment between layers, and reheat briefly on a skillet to refresh texture.
- Seasonal pairings: In spring and summer opt for bright berries and citrus, while in fall add spiced compotes or caramelized fruit for warmth.
FAQ
Conclusion
These Olive Oil Pancakes stand out for their bright lemon note, tender crumb and the subtle, fruity contribution of extra virgin olive oil. They are easy to make, forgiving in technique, and produce consistently pleasing results that feel a touch elevated compared with ordinary pancakes. Give them a try on a slow morning, and you may find they become a regular in your breakfast rotation because they are quick, adaptable, and reliably delicious. I hope you enjoy the cozy ritual of making and sharing them.
Olive Oil Pancakes
Equipment
- Nonstick skillet or griddle
- Mixing Bowls
- Whisk
- Measuring Cups and Spoons
- Ladle or large cookie scoop
Ingredients
- 1 1/4 cup 156 g all-purpose flour, sifted Provide structure and body to the batter by supplying gluten and starch; sifting aerates the flour to avoid lumps and ensures a lighter, more tender pancake texture when combined with the wet ingredients.
- 2 tablespoons 24 g sugar Add sweetness and help with browning; granulated sugar also contributes to moisture retention and can slightly tenderize the crumb when dissolved into the batter.
- 1 1/2 teaspoons baking powder Leaven the pancakes by releasing carbon dioxide when activated; baking powder creates lift and a fluffy interior, improving rise during cooking.
- 1/2 teaspoon baking soda React with acidic components to produce additional lift; baking soda helps with browning and balances pH for tender crumb development when combined with buttermilk.
- 1/2 teaspoon fine sea salt Enhance overall flavor balance and strengthen gluten slightly; fine sea salt heightens sweetness and rounds out the taste while controlling fermentation of leaveners.
- 1 large egg Bind ingredients and add richness through proteins and fats; a large egg provides structure, emulsification, and moisture for a cohesive, tender pancake.
- 1 cup 250 g buttermilk Provide acidity, moisture, and tang that react with baking soda for lift; buttermilk contributes to tender crumb and adds a pleasant, slightly sour flavor profile.
- 3 tablespoons 42 g extra virgin olive oil Contribute richness and a fruity, savory fat that tenderizes the batter; extra virgin olive oil replaces butter for moisture and imparts subtle flavor nuances.
- 1 teaspoon finely grated lemon zest Offer bright citrus aroma and a fresh, zesty lift; finely grated lemon zest adds essential oils that enhance flavor without introducing extra liquid.
- 1/2 teaspoon vanilla extract Lend aromatic sweetness and depth with a small amount of extract; vanilla extract rounds flavors and complements the lemon zest and olive oil in the batter.
Instructions
- In a mixing bowl, whisk together flour, sugar, baking powder, baking soda, and salt until evenly incorporated.: You will notice the dry mixture turns homogenous and slightly aerated, with a faintly sweet and saline scent from the sugar and fine sea salt . This step ensures the leavening is distributed so pancakes rise uniformly. If you skip thorough whisking, you risk pockets of leavener that puff unevenly; using a whisk and sweeping the bowl sides prevents that.
- In a small bowl or 2-cup glass measuring cup, whisk together buttermilk, egg, oil, lemon zest, and vanilla until smooth. Add to bowl with dry ingredients and whisk just until smooth (it will still be a bit lumpy, just as long as there aren't any huge clumps of flour).: The wet mix should look glossy and slightly thick, with specks of lemon zest dotting the surface and a mild aroma of vanilla . Emulsifying the egg and oil creates a stable liquid phase that integrates easily into the dry ingredients. If you notice separation or cold lumps, whisk more vigorously; lukewarm buttermilk helps if your kitchen is chilly.
- Heat a nonstick skillet or griddle pan over medium heat. Be patient and let the pan come up to temperature fully.: The batter should come together with small lumps, not a perfectly silky paste. You will see a few flour pockets vanish as the batter rests briefly on the spoon. This minimal mixing prevents gluten overdevelopment, which keeps the pancakes tender. Overmixing is the main error here, leading to tough pancakes.
- Rub a little butter or olive oil on the skillet with a paper towel if necessary (a good nonstick pan will barely need any greasing at all).: Bring the pan to temperature until a drop of water skitters and hisses, signaling readiness. The correct heat gives a steady sizzle and steady browning without burning. If your pan is too hot, pancakes will brown on the outside and stay raw inside, so raise or lower the heat to find a gentle, even sizzle.
- Ladle approximately 3 tablespoons of batter for each pancake (I use a large cookie scoop for this, filling it just barely level), leaving enough space between pancakes so they don’t touch as they spread out. Use the back of the scoop to gently spread into 4-inch rounds if necessary as the batter is on the thick side.: A lightly greased surface produces even contact and reliable browning, with a faint toasty aroma as the fat warms. Use just enough to coat, wiping excess to avoid frying the batter. The mistake to avoid is a sticky pan from too little fat or smoking from too much.
- Cook for about 2 to 3 minutes or until bottoms are deep golden brown; then flip and cook for another 1 to 2 minutes until browned. If you find your pancakes are browning more quickly, turn down the heat (the centers need time to cook through).: The batter should pour with some body, forming rounds that hold together. You will hear a soft settling sound as batter meets pan and see edges begin to set. If pancakes spread into irregular shapes, your pan may be slightly too cool or your batter too thin; adjust accordingly.
- Transfer to serving plates and serve, or place on a baking sheet in a 200 degree F oven to keep warm while you finish cooking the rest of the pancakes. Enjoy warm, drizzled with maple syrup.: Gently coaxing the batter into uniform rounds helps achieve even cooking and pretty presentation, and the surface should look matte and slightly bumpy before flipping. Avoid pressing down which compresses the air pockets and yields dense pancakes.
- Cook for about 2 to 3 minutes or until bottoms are deep golden brown: Look for a deep golden hue and small bubbles forming at the surface edges that stay open, that is your visual cue. You should hear a soft, sustained sizzle but not aggressive crackling. If you smell burning, reduce the heat immediately; undercooked centers indicate the temperature was too high.
- Then flip and cook for another 1 to 2 minutes until browned: After flipping, the second side cooks quicker, so watch for a uniform golden color and a springy center when pressed gently. The aroma will shift to a richer, toasty note and you will see slight steaming. Flipping too often or pressing the pancake flattens it and robs it of airiness.
- If you find your pancakes are browning more quickly, turn down the heat: Slowing the heat gives the center time to set without overbrowning the surface, and you will notice a steadier, lower sizzle. This adjustment is crucial for thicker pancakes that need more time to cook through. A common oversight is leaving the burner unchanged; small adjustments yield consistent results.
- Transfer to serving plates and serve, or place on a baking sheet in a 200 degree F oven to keep warm while you finish cooking the rest of the pancakes: The stack will maintain warmth and texture in the low oven, and the aroma in the kitchen becomes gently sweet and toasty. Use a wire rack over the sheet if you want to prevent steam softening. Avoid piling them directly on top of each other while finishing; trapped steam will make edges limp.
- Enjoy warm, drizzled with maple syrup: The final service brings the bright citrus and olive oil notes together with sweet syrup, creating a balanced bite that is warm and satisfying. Serve immediately for best texture, as residual steam will soften the crisp edges over time. If serving later, reheat briefly on a skillet to refresh the surface.
Notes
- Measure flour correctly: Spoon the all purpose flour into your measuring cup and level it with a knife rather than scooping directly from the bag, which can compact the flour and yield dense pancakes.
- Test the pan temperature: Flick a few drops of water on the skillet, they should dance and evaporate quickly, signaling the right heat for even browning.
- Keep the batter slightly lumpy: Overmixing develops gluten and makes pancakes chewy, so stop when the batter is just combined with small streaks of flour still visible.
- Use a large cookie scoop for consistency: Portioning with a scoop ensures uniform pancake sizes so they cook at the same rate; I fill mine just barely level for three tablespoon rounds.
- Control browning with heat: If the bottoms darken too fast, reduce the burner slightly and give the center extra time to cook through without burning the exterior.
- Store leftovers properly: Cool completely before stacking and refrigerate in an airtight container; reheat on a skillet to restore the edges rather than microwaving which can make them limp.