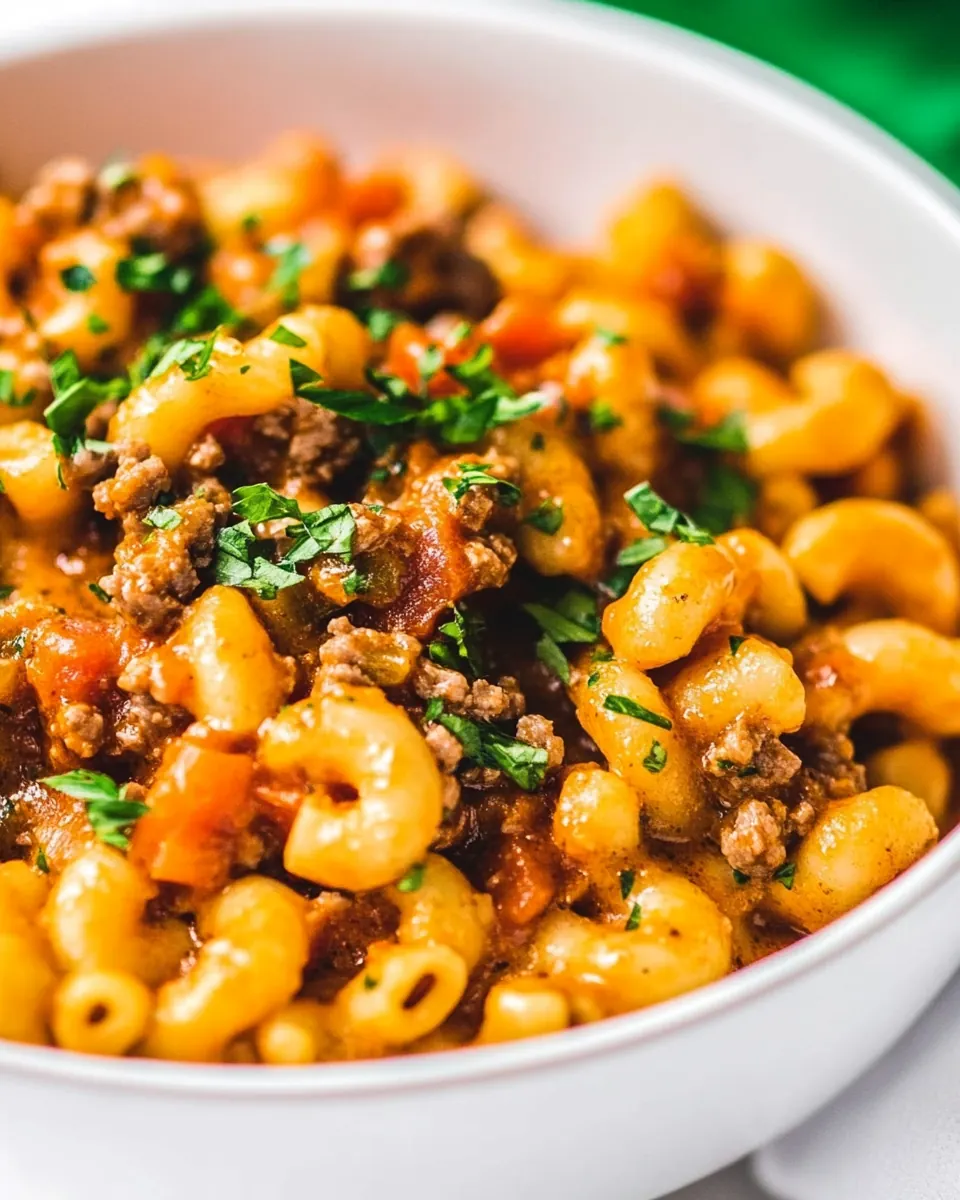
Instant Pot Goulash
Instant Pot Goulash is the kind of dinner I reach for when the week has worn me out and I need something comforting, practical, and full of flavor. The very first time I made this, the house smelled like a cozy diner, with the scent of sautéed ground beef and garlic filling every room, and I remember thinking this would be a perfect go to for busy nights when I want a single pot to do the heavy lifting.
Over the years I’ve tweaked the little things, like letting the cheese sit on top off heat so it melts into creamy pockets rather than becoming a gloopy mess. I love how the tomato layers mingle with the browned bits from the pan, and how the elbow macaroni soaks up that savory broth. Friends who visit always comment on the way it tastes like a hug in a bowl, and I never mind sharing the recipe because it comes together so quickly.
When I make Instant Pot Goulash for company, I usually double the batch and let everyone help themselves family style, but it’s just as satisfying when it’s a solo dinner with leftovers packed for the next day. The balance of tangy tomato, a touch of brown sugar, and the umami from Worcestershire sauce is simple yet addictive. I also appreciate how adaptable it is, whether you want it extra cheesy or packed with extra veggies during colder months.
Recipe Snapshot
15 mins
10 mins
5 mins
Easy
350 kcal
American
Gluten-Free, Paleo
Dinner
Instant Pot, Wooden spoon, Measuring cup
Why You Need This Instant Pot Goulash
Fast, reliable comfort food
I love how Instant Pot Goulash turns a handful of pantry staples into a complete, satisfying meal in minutes, which makes it one of my top picks for weeknight dinners. The Instant Pot seals in savory aromas and cooks the elbow macaroni perfectly without babysitting, so I can focus on other things while dinner is happening.
One pot, less cleanup
There is something liberating about finishing dinner without a sink full of dishes. Browning the ground beef and then adding everything else to the same pot means the fond at the bottom adds deep flavor, and you only have one vessel to wash, which I genuinely appreciate after a long day.
Kid friendly and flexible
My family always responds well to the familiar shapes of macaroni and the mild, cheesy finish. You can easily adjust texture by letting it rest a little longer, and the creamy top layer of cheddar cheese brings everyone to the table. I like that small swaps are possible without breaking the recipe’s spirit.
Great for leftovers
Leftovers reheat beautifully, and the flavors actually deepen after a day. When I rewarm a bowl, I usually add a splash of broth to revive the sauce. This makes it a weekday lunch hero, and I always plan for a few extra servings when I know my week will be busy.
Simple ingredients, big payoff
This recipe uses straightforward pantry items like canned tomatoes and tomato soup, but the combination creates a layered, comforting sauce. I appreciate recipes that respect the basics, and this Instant Pot Goulash is a reminder that good food does not need to be complicated to be memorable.
What’s In This Instant Pot Goulash
I think of the ingredients for Instant Pot Goulash as a team where each player has a distinct role. The ground beef brings savory depth, canned tomatoes and tomato soup provide acidity and silkiness, and the elbow macaroni soaks up the saucy goodness. Small additions like Worcestershire sauce and brown sugar round out the flavor profile, and the finishing cheddar cheese gives the dish its comforting, melty crown.
- 1 lb ground beef: Brown thoroughly to develop savory depth and render fat, creating a flavorful base for the goulash; break into small pieces while cooking to ensure even texture. Season while browning to infuse the meat with salt and pepper, and deglaze the pot if necessary to capture browned bits. Finish cooking until no pink remains to ensure safe consumption and optimal texture.
- 1 yellow onion diced: Sauté until translucent to add sweetness and aromatic complexity that balances the tomato components; dice uniformly so it softens evenly during pressure cooking. Cook briefly with the beef to release natural sugars and meld flavors; avoid overbrowning which can introduce bitterness. Retain moisture by not overcooking before adding liquids to the Instant Pot.
- 1/2 tsp salt: Season sparingly to enhance overall flavor and help season the meat and sauce without overpowering other components. Dissolve into the cooking liquids to distribute saltiness evenly throughout the dish. Adjust to taste at the end if necessary, keeping in mind the sodium in broth and canned items.
- 1/4 tsp black pepper: Season lightly to provide subtle heat and aromatic accent that complements the savory profile; grind fresh if possible for brighter flavor. Add during cooking so its volatile oils disperse into the sauce, enhancing complexity. Use measured amount to avoid dominating the dish.
- 3 cloves garlic minced: Mince and sauté briefly to release pungent, savory aromatics that deepen the sauce’s flavor; add after onions start to soften to prevent burning. Allow garlic to become fragrant but not brown for a mellow, sweet note. Distribute evenly so every bite benefits from its aromatic character.
- 14.5 oz can petite diced tomatoes do not drain: Include undrained to contribute chunky tomato texture and concentrated tomato flavor while preserving liquid for the sauce; the juices help build the cooking liquid balance for pressure cooking. Stir into the browned meat and aromatics to combine solids and juices, ensuring even tomato presence. Adjust seasoning after incorporation since canned tomatoes can vary in acidity and salt.
- 1 1/2 tbsp Worcestershire sauce: Add to introduce a tangy, umami-rich boost that complements beef and tomatoes; Worcestershire adds depth and subtle sweetness. Stir into the sauce early to allow its complex flavors to meld during pressure cooking. Use measured amount to avoid overwhelming the tomato profile.
- 1 c low sodium beef broth: Pour in as the primary cooking liquid to provide body and meaty richness while controlling overall sodium when using low-sodium variety. Ensure enough liquid for pressure cooking and to hydrate the pasta; add gradually if adjusting consistency. Use as a solvent for seasonings and to capture flavors from the browned bits.
- 10.75 oz can tomato soup: Stir in to thicken the sauce and impart concentrated tomato flavor with creamy texture; canned tomato soup adds both body and a slightly sweet profile. Mix well with the other liquids to prevent clumping and ensure an even, smooth sauce for the pasta to cook in. Consider its added sweetness when balancing with brown sugar and Worcestershire.
- 1 tsp brown sugar: Sweeten subtly to balance tomato acidity and enhance overall flavor harmony; brown sugar contributes molasses notes that round out the sauce. Dissolve fully into the hot liquids so it integrates rather than settling, and adjust quantity if using sweeter canned components. Use sparingly to prevent turning the dish overly sweet.
- 2 c elbow macaroni: Add uncooked to cook directly in the sauce, absorbing flavors and thickening the mixture; elbow macaroni provides classic goulash texture and bite. Stir into the assembled liquids to ensure even cooking and prevent sticking, and monitor cook time to avoid overcooking. Use the specified amount for balanced pasta-to-sauce ratio.
- 2 bay leaves: Infuse whole to add subtle herbal aroma and a slightly floral bay leaf note that complements long-simmered tomato and beef flavors; remove before serving. Tuck into the pot early so its essential oils slowly release into the sauce during pressure cooking. Use only the listed number to avoid overpowering bitterness.
- 1/2 c shredded cheddar cheese.: Melt on top to provide creamy, sharp finish and a gooey, cheesy contrast when sprinkled over hot goulash before serving. Grate freshly for best melting quality and sprinkle after cooking to create a rich topping that enhances mouthfeel. Use as garnish to add both flavor and visual appeal.
Preparation Steps for Instant Pot Goulash

These directions transform pantry staples into a hearty, saucy meal. Take your time with the initial browning for deep flavor, then let the Instant Pot do the rest. Be mindful of visual and aromatic cues at each stage to know you are on track.
- Turn the Instant Pot to saute. When it is hot add the ground beef, onion, salt and pepper. Cook until the meat is browned. During the last minute of cooking, add the minced garlic and stir to combine.: When the pot heats, you'll notice a shimmering surface on the bottom and a faint sizzle once you add the ground beef and onion . The smell of browning meat and softened onion is deeply savory and signals flavor development through the Maillard reaction, which creates the browned bits that enrich the final sauce. Listen for a steady sizzle rather than a rapid spit, which means the heat is about right. One common mistake is overcrowding the pot, which causes the beef to steam instead of brown; if this happens, brown in two batches so you still get those caramelized bits.
- Cancel the saute function on the Instant Pot.: As the ground beef hits the hot surface, you should hear a louder sizzle and see juices begin to release. Break the meat up with a wooden spoon so it browns evenly, and stir the diced onion into the mix so it softens and caramelizes alongside the beef. The added salt helps draw moisture from the onion for faster softening, while the black pepper adds warmth. Avoid stirring constantly, because allowing the meat to sit for short periods helps deeper browning; over stirring prevents fond from forming.
- Drain any excess grease off of hamburger mixture.: Watch for deep golden brown color on the meat and darkened bits on the pot bottom, and smell the rich roasted aroma. This step builds the backbone of flavor, and those browned fragments will dissolve into the sauce later, giving complexity. A typical sign it's ready is when the meat is uniformly colored and the onion is translucent. A common pitfall is undercooking, which leaves a raw note, or overcooking, which dries the meat out, so aim for a moist, browned texture.
- Add tomatoes, Worcestershire sauce, beef broth, tomato soup, brown sugar, noodles and bay leaves. Stir to mix.: When you throw in the garlic , the kitchen will fill with a bright, aromatic scent that complements the browned meat. Add it at the end to avoid burning, which would create bitterness. Stir for about a minute until the raw edge is gone, then move to the next step. If garlic turns dark quickly, reduce the heat because burned garlic ruins the flavor.
- Seal the lid, making sure the pressure release valve is set to 'sealing'. Set your Instant Pot to manual high pressure for 5 minutes.: Turning off sauteing lets the pot cool slightly and prevents continued high heat which could scorch the base once more liquid is added. This pause also gives you a chance to drain rendered fat safely if needed. Avoid leaving the pot on saute while adding large amounts of liquid, because sudden splatter can occur.
- When the timer is up perform a quick release of pressure. Take the pot out of the pressure cooker, remove bay leaves and add cheese to the top. Let rest for 5 minutes allowing cheese to melt and mixture to thicken.: Removing excess grease prevents an overly oily final sauce and helps the seasoning shine through. Use a heatproof measuring cup or spoon to skim off the fat, or pour briefly into a separate container. A frequent error is leaving too much grease, which can make the dish heavy; conversely removing every bit can strip flavor, so leave a small sheen for richness.
- Add tomatoes, Worcestershire sauce, beef broth, tomato soup, brown sugar, noodles and bay leaves: At this point add the canned tomatoes with their juices, Worcestershire sauce , low sodium beef broth , canned tomato soup , brown sugar , dry elbow macaroni , and bay leaves . Stir so the pasta is submerged and the ingredients combine into a cohesive mixture. The sound will shift to a gentle swish as you incorporate liquids with the browned base, and you'll see the sauce become uniform. Make sure the pasta is below the surface to prevent any dry spots after pressure cooking. A common mishap is not scraping up browned bits first, which can cause a burn notice; deglaze the pot with a splash of broth if needed.
- Stir to mix: As you stir everything together, notice how the sauce becomes glossy and homogenous, with bits of beef and onion suspended within. This is the moment to taste a spoonful of the raw sauce for seasoning, knowing the flavors will intensify with pressure. If the mixture seems too thick to gently move, add a touch more broth so the pasta reaches the proper liquid ratio. Avoid over stirring after adding dry pasta because agitating too much can release starch and create a gluey texture.
- Seal the lid, making sure the pressure release valve is set to 'sealing': Placing the lid and setting the valve creates the environment the Instant Pot needs to build steam pressure. You'll hear the faint hiss as it begins to come to pressure, and the pot will become quieter as it locks in heat. Confirm the valve is correctly positioned because an open valve prevents pressure buildup and undercooked pasta. A common oversight is not aligning the lid before twisting, which prevents proper sealing.
- Set your Instant Pot to manual high pressure for 5 minutes: Choosing high pressure for a short time cooks the elbow macaroni through while keeping it slightly firm, and the tomato soup and broth meld into a cohesive sauce. The machine will take time to come to pressure before the countdown begins, so factor that into total time. If you prefer a softer pasta texture, add an extra minute, but be careful because overcooking can make the pasta mushy.
- When the timer is up perform a quick release of pressure: Quickly releasing the pressure stops the cooking immediately, preserving the pasta's texture and preventing overcooking. Expect a loud steam release and a change in aroma as the steam vents. Use a long utensil to switch the valve if steam is hot, and keep hands and face away. A mistake here is performing a natural release, which continues cooking and may produce too soft a pasta texture.
- Take the pot out of the pressure cooker, remove bay leaves and add cheese to the top: After opening, remove the bay leaves and sprinkle the cheddar cheese across the surface; the residual heat will melt it into creamy pockets. Visually you should see melted ribbons and a glossy surface forming, with a richer aroma of dairy joining the tomato and beef. If the mixture seems thin, resting will help it thicken. A common issue is leaving the bay leaves in the pot while serving, which results in unpleasant bites, so always fish them out.
- Let rest for 5 minutes allowing cheese to melt and mixture to thicken: Resting is essential because it lets starches relax and the sauce set up, creating a creamier final texture and allowing flavors to marry. During these minutes you'll notice steam fade and the sauce become slightly less fluid, clinging to the pasta. Resist stirring immediately, because letting it settle produces better texture. A common temptation is to dig in right away, which can result in a looser, less cohesive dish.
Substitutions and Tips

I often keep a running list of small changes that preserve the spirit of a recipe while tailoring it to what I have on hand. Below are practical tips and substitutions that I have tested, plus notes that make the process smoother the first time you try it.
- Instant Pot size note I tested this in a 6 quart Instant Pot, and an 8 quart model may need slight adjustments to liquid and cook time because the larger volume affects how the pot reaches pressure. If you use an 8 quart, monitor the first run and be ready to add a little more broth if you get a burn notice.
- Cheese tip Grab a block of cheddar and grate it yourself, as fresh shredding melts much better and creates silkier pockets of cheese than pre shredded varieties, which often contain anti clumping agents that affect melt.
- Protein swap Mix it up and replace the ground beef with Italian sausage for a spicier, herb forward flavor; cook thoroughly in the same way and drain excess fat as needed to keep the sauce balanced.
- Vegetable add in Sneak some vegetables in by adding chopped bell peppers when sautéeing the beef, which brings a fresh texture and a sweet counterpoint to the tomato base without overwhelming the dish.
- Pasta alternatives Swap out the elbow macaroni for other short pastas, but keep an eye on cooking times because shapes with different thicknesses will require time adjustments to avoid mushy or underdone textures.
- Storage and reheating Store leftovers in an airtight container for up to three days in the refrigerator, and when reheating add a splash of broth or water to loosen the sauce as the pasta soaks up liquid while chilled.
- Burn notice remedy If you encounter a burn notice, release pressure, stir the pot to scrape up stuck bits, add about 1/2 cup extra broth to deglaze, and continue cooking; this usually clears the issue and prevents repeated notices.
What Goes Well With This Instant Pot Goulash
Instant Pot Goulash is hearty enough to stand alone, but pairing it thoughtfully elevates the meal. Consider contrasts in texture and freshness to balance the warm, saucy character. Below I outline serving ideas, occasions, and storage notes that help you present this dish beautifully.
- Fresh green salad A crisp salad with a simple vinaigrette provides a bright contrast to the rich, tomato based sauce and melty cheddar cheese, cleansing the palate between bites and adding a refreshing crunch to the meal.
- Crusty bread or rolls Warm bread for sopping up the sauce complements the creamy texture of the goulash; a sturdy roll lets guests scoop up the last bits from the bowl without disintegrating.
- Weeknight dinner occasions This dish is ideal for easy weeknight dinners when time is short and you want a family pleasing plate, because it cooks quickly and appeals to both kids and adults with its familiar pasta and cheesy finish.
- Comfort food for colder months Serve this during winter dinners when you want something warming and filling; the combination of beef broth and canned tomatoes creates a cozy aroma and sturdy body that fits colder evenings.
- Make ahead and storage Leftovers keep well for up to three days in an airtight container, and you can portion into individual containers for quick lunches; add a splash of broth when reheating to restore sauce consistency.
- Casual gatherings For potlucks or informal family meals, bring the goulash in a warmed casserole dish and top with extra shredded cheddar cheese just before serving so it looks fresh and appealing on the table.
- Seasonal pairings In cooler months, pair with roasted root vegetables as a side for a heartier spread; in milder seasons, rely on lighter sides like a lemon dressed arugula to add brightness and balance.
FAQ
Conclusion
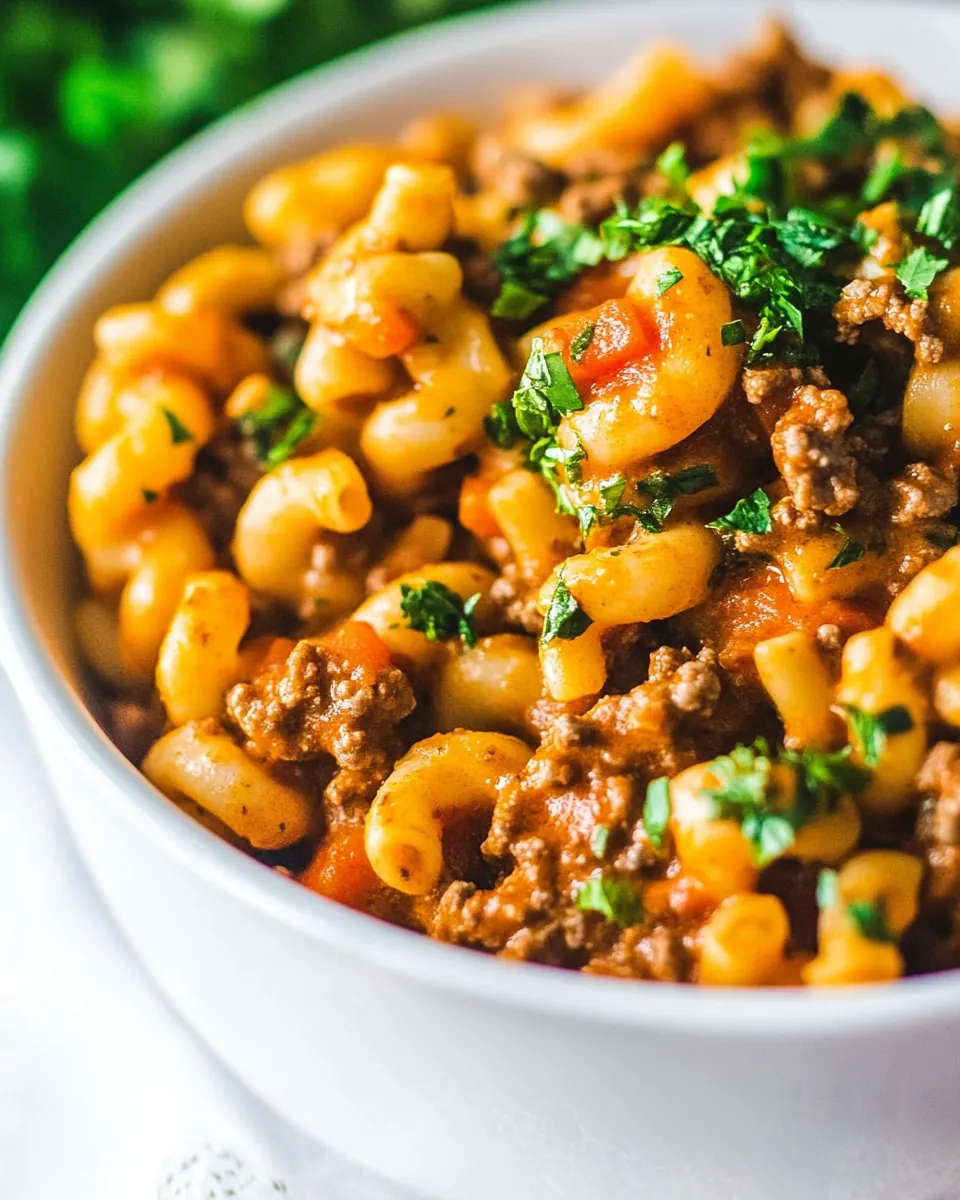
Instant Pot Goulash stands out because it turns simple pantry ingredients into a deeply comforting, cheesy one pot meal that pleases the whole family. The combination of browned ground beef, tomato richness, and melted cheddar cheese creates a balanced, satisfying bowl that is quick enough for weeknights yet comforting like a weekend classic. Give it a try on a busy evening, and you might find it becoming one of your go to meals for both convenience and flavor.

Instant Pot Goulash
Equipment
- Instant Pot
- Wooden Spoon
- Measuring Cup
Ingredients
- 1 lb ground beef Brown thoroughly to develop savory depth and render fat, creating a flavorful base for the goulash; break into small pieces while cooking to ensure even texture. Season while browning to infuse the meat with salt and pepper, and deglaze the pot if necessary to capture browned bits. Finish cooking until no pink remains to ensure safe consumption and optimal texture.
- 1 yellow onion diced Sauté until translucent to add sweetness and aromatic complexity that balances the tomato components; dice uniformly so it softens evenly during pressure cooking. Cook briefly with the beef to release natural sugars and meld flavors; avoid overbrowning which can introduce bitterness. Retain moisture by not overcooking before adding liquids to the Instant Pot.
- 1/2 tsp salt Season sparingly to enhance overall flavor and help season the meat and sauce without overpowering other components. Dissolve into the cooking liquids to distribute saltiness evenly throughout the dish. Adjust to taste at the end if necessary, keeping in mind the sodium in broth and canned items.
- 1/4 tsp black pepper Season lightly to provide subtle heat and aromatic accent that complements the savory profile; grind fresh if possible for brighter flavor. Add during cooking so its volatile oils disperse into the sauce, enhancing complexity. Use measured amount to avoid dominating the dish.
- 3 cloves garlic minced Mince and sauté briefly to release pungent, savory aromatics that deepen the sauce’s flavor; add after onions start to soften to prevent burning. Allow garlic to become fragrant but not brown for a mellow, sweet note. Distribute evenly so every bite benefits from its aromatic character.
- 14.5 oz can petite diced tomatoes do not drain Include undrained to contribute chunky tomato texture and concentrated tomato flavor while preserving liquid for the sauce; the juices help build the cooking liquid balance for pressure cooking. Stir into the browned meat and aromatics to combine solids and juices, ensuring even tomato presence. Adjust seasoning after incorporation since canned tomatoes can vary in acidity and salt.
- 1 1/2 tbsp Worcestershire sauce Add to introduce a tangy, umami-rich boost that complements beef and tomatoes; Worcestershire adds depth and subtle sweetness. Stir into the sauce early to allow its complex flavors to meld during pressure cooking. Use measured amount to avoid overwhelming the tomato profile.
- 1 c low sodium beef broth Pour in as the primary cooking liquid to provide body and meaty richness while controlling overall sodium when using low-sodium variety. Ensure enough liquid for pressure cooking and to hydrate the pasta; add gradually if adjusting consistency. Use as a solvent for seasonings and to capture flavors from the browned bits.
- 10.75 oz can tomato soup Stir in to thicken the sauce and impart concentrated tomato flavor with creamy texture; canned tomato soup adds both body and a slightly sweet profile. Mix well with the other liquids to prevent clumping and ensure an even, smooth sauce for the pasta to cook in. Consider its added sweetness when balancing with brown sugar and Worcestershire.
- 1 tsp brown sugar Sweeten subtly to balance tomato acidity and enhance overall flavor harmony; brown sugar contributes molasses notes that round out the sauce. Dissolve fully into the hot liquids so it integrates rather than settling, and adjust quantity if using sweeter canned components. Use sparingly to prevent turning the dish overly sweet.
- 2 c elbow macaroni Add uncooked to cook directly in the sauce, absorbing flavors and thickening the mixture; elbow macaroni provides classic goulash texture and bite. Stir into the assembled liquids to ensure even cooking and prevent sticking, and monitor cook time to avoid overcooking. Use the specified amount for balanced pasta-to-sauce ratio.
- 2 bay leaves Infuse whole to add subtle herbal aroma and a slightly floral bay leaf note that complements long-simmered tomato and beef flavors; remove before serving. Tuck into the pot early so its essential oils slowly release into the sauce during pressure cooking. Use only the listed number to avoid overpowering bitterness.
- 1/2 c shredded cheddar cheese. Melt on top to provide creamy, sharp finish and a gooey, cheesy contrast when sprinkled over hot goulash before serving. Grate freshly for best melting quality and sprinkle after cooking to create a rich topping that enhances mouthfeel. Use as garnish to add both flavor and visual appeal.
Instructions
- Turn the Instant Pot to saute. When it is hot add the ground beef, onion, salt and pepper. Cook until the meat is browned. During the last minute of cooking, add the minced garlic and stir to combine.: When the pot heats, you'll notice a shimmering surface on the bottom and a faint sizzle once you add the ground beef and onion . The smell of browning meat and softened onion is deeply savory and signals flavor development through the Maillard reaction, which creates the browned bits that enrich the final sauce. Listen for a steady sizzle rather than a rapid spit, which means the heat is about right. One common mistake is overcrowding the pot, which causes the beef to steam instead of brown; if this happens, brown in two batches so you still get those caramelized bits.
- Cancel the saute function on the Instant Pot.: As the ground beef hits the hot surface, you should hear a louder sizzle and see juices begin to release. Break the meat up with a wooden spoon so it browns evenly, and stir the diced onion into the mix so it softens and caramelizes alongside the beef. The added salt helps draw moisture from the onion for faster softening, while the black pepper adds warmth. Avoid stirring constantly, because allowing the meat to sit for short periods helps deeper browning; over stirring prevents fond from forming.
- Drain any excess grease off of hamburger mixture.: Watch for deep golden brown color on the meat and darkened bits on the pot bottom, and smell the rich roasted aroma. This step builds the backbone of flavor, and those browned fragments will dissolve into the sauce later, giving complexity. A typical sign it's ready is when the meat is uniformly colored and the onion is translucent. A common pitfall is undercooking, which leaves a raw note, or overcooking, which dries the meat out, so aim for a moist, browned texture.
- Add tomatoes, Worcestershire sauce, beef broth, tomato soup, brown sugar, noodles and bay leaves. Stir to mix.: When you throw in the garlic , the kitchen will fill with a bright, aromatic scent that complements the browned meat. Add it at the end to avoid burning, which would create bitterness. Stir for about a minute until the raw edge is gone, then move to the next step. If garlic turns dark quickly, reduce the heat because burned garlic ruins the flavor.
- Seal the lid, making sure the pressure release valve is set to 'sealing'. Set your Instant Pot to manual high pressure for 5 minutes.: Turning off sauteing lets the pot cool slightly and prevents continued high heat which could scorch the base once more liquid is added. This pause also gives you a chance to drain rendered fat safely if needed. Avoid leaving the pot on saute while adding large amounts of liquid, because sudden splatter can occur.
- When the timer is up perform a quick release of pressure. Take the pot out of the pressure cooker, remove bay leaves and add cheese to the top. Let rest for 5 minutes allowing cheese to melt and mixture to thicken.: Removing excess grease prevents an overly oily final sauce and helps the seasoning shine through. Use a heatproof measuring cup or spoon to skim off the fat, or pour briefly into a separate container. A frequent error is leaving too much grease, which can make the dish heavy; conversely removing every bit can strip flavor, so leave a small sheen for richness.
- Add tomatoes, Worcestershire sauce, beef broth, tomato soup, brown sugar, noodles and bay leaves: At this point add the canned tomatoes with their juices, Worcestershire sauce , low sodium beef broth , canned tomato soup , brown sugar , dry elbow macaroni , and bay leaves . Stir so the pasta is submerged and the ingredients combine into a cohesive mixture. The sound will shift to a gentle swish as you incorporate liquids with the browned base, and you'll see the sauce become uniform. Make sure the pasta is below the surface to prevent any dry spots after pressure cooking. A common mishap is not scraping up browned bits first, which can cause a burn notice; deglaze the pot with a splash of broth if needed.
- Stir to mix: As you stir everything together, notice how the sauce becomes glossy and homogenous, with bits of beef and onion suspended within. This is the moment to taste a spoonful of the raw sauce for seasoning, knowing the flavors will intensify with pressure. If the mixture seems too thick to gently move, add a touch more broth so the pasta reaches the proper liquid ratio. Avoid over stirring after adding dry pasta because agitating too much can release starch and create a gluey texture.
- Seal the lid, making sure the pressure release valve is set to 'sealing': Placing the lid and setting the valve creates the environment the Instant Pot needs to build steam pressure. You'll hear the faint hiss as it begins to come to pressure, and the pot will become quieter as it locks in heat. Confirm the valve is correctly positioned because an open valve prevents pressure buildup and undercooked pasta. A common oversight is not aligning the lid before twisting, which prevents proper sealing.
- Set your Instant Pot to manual high pressure for 5 minutes: Choosing high pressure for a short time cooks the elbow macaroni through while keeping it slightly firm, and the tomato soup and broth meld into a cohesive sauce. The machine will take time to come to pressure before the countdown begins, so factor that into total time. If you prefer a softer pasta texture, add an extra minute, but be careful because overcooking can make the pasta mushy.
- When the timer is up perform a quick release of pressure: Quickly releasing the pressure stops the cooking immediately, preserving the pasta's texture and preventing overcooking. Expect a loud steam release and a change in aroma as the steam vents. Use a long utensil to switch the valve if steam is hot, and keep hands and face away. A mistake here is performing a natural release, which continues cooking and may produce too soft a pasta texture.
- Take the pot out of the pressure cooker, remove bay leaves and add cheese to the top: After opening, remove the bay leaves and sprinkle the cheddar cheese across the surface; the residual heat will melt it into creamy pockets. Visually you should see melted ribbons and a glossy surface forming, with a richer aroma of dairy joining the tomato and beef. If the mixture seems thin, resting will help it thicken. A common issue is leaving the bay leaves in the pot while serving, which results in unpleasant bites, so always fish them out.
- Let rest for 5 minutes allowing cheese to melt and mixture to thicken: Resting is essential because it lets starches relax and the sauce set up, creating a creamier final texture and allowing flavors to marry. During these minutes you'll notice steam fade and the sauce become slightly less fluid, clinging to the pasta. Resist stirring immediately, because letting it settle produces better texture. A common temptation is to dig in right away, which can result in a looser, less cohesive dish.
Notes
- Instant Pot size note I tested this in a 6 quart Instant Pot, and an 8 quart model may need slight adjustments to liquid and cook time because the larger volume affects how the pot reaches pressure. If you use an 8 quart, monitor the first run and be ready to add a little more broth if you get a burn notice.
- Cheese tip Grab a block of cheddar and grate it yourself, as fresh shredding melts much better and creates silkier pockets of cheese than pre shredded varieties, which often contain anti clumping agents that affect melt.
- Protein swap Mix it up and replace the ground beef with Italian sausage for a spicier, herb forward flavor; cook thoroughly in the same way and drain excess fat as needed to keep the sauce balanced.
- Vegetable add in Sneak some vegetables in by adding chopped bell peppers when sautéeing the beef, which brings a fresh texture and a sweet counterpoint to the tomato base without overwhelming the dish.
- Pasta alternatives Swap out the elbow macaroni for other short pastas, but keep an eye on cooking times because shapes with different thicknesses will require time adjustments to avoid mushy or underdone textures.
- Storage and reheating Store leftovers in an airtight container for up to three days in the refrigerator, and when reheating add a splash of broth or water to loosen the sauce as the pasta soaks up liquid while chilled.
- Burn notice remedy If you encounter a burn notice, release pressure, stir the pot to scrape up stuck bits, add about 1/2 cup extra broth to deglaze, and continue cooking; this usually clears the issue and prevents repeated notices.