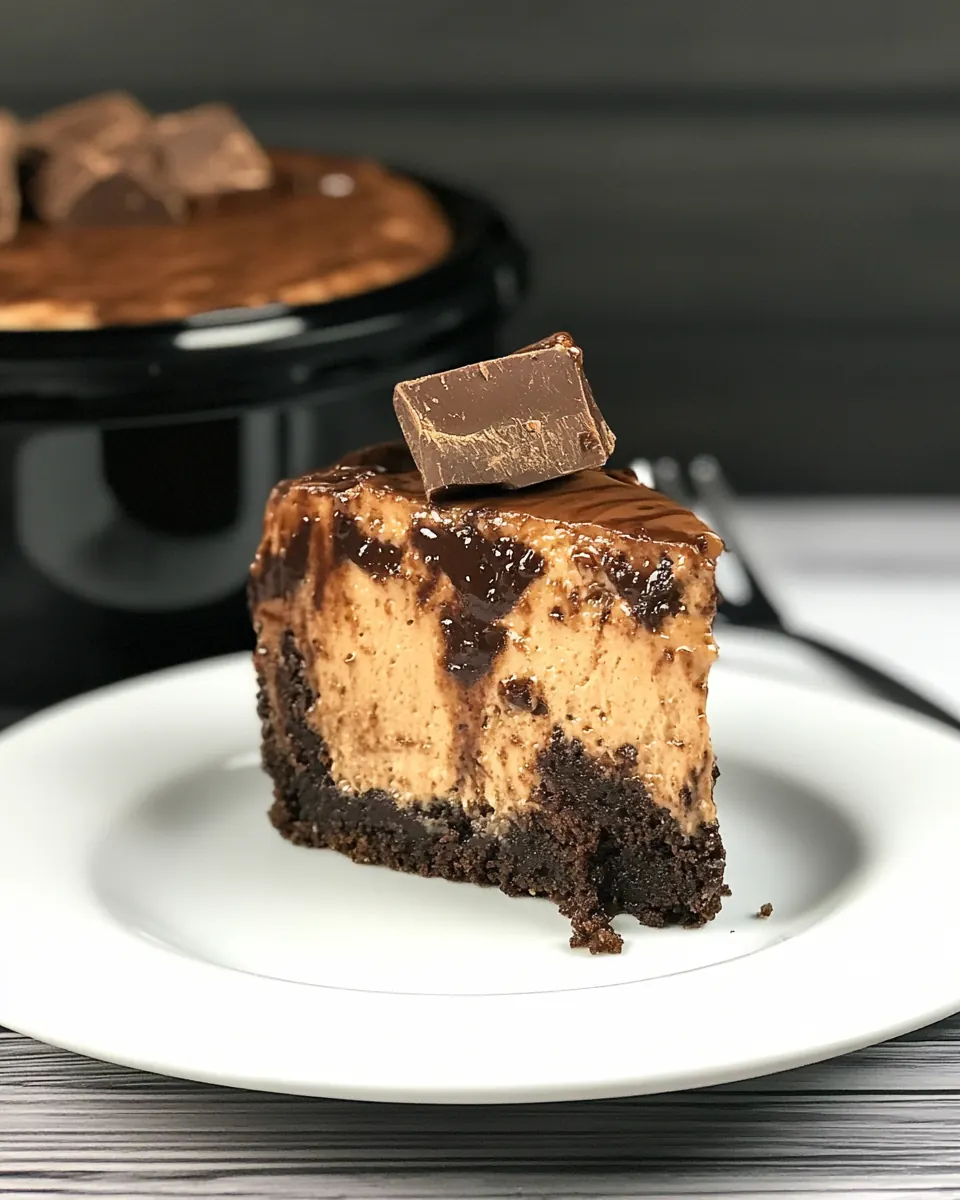
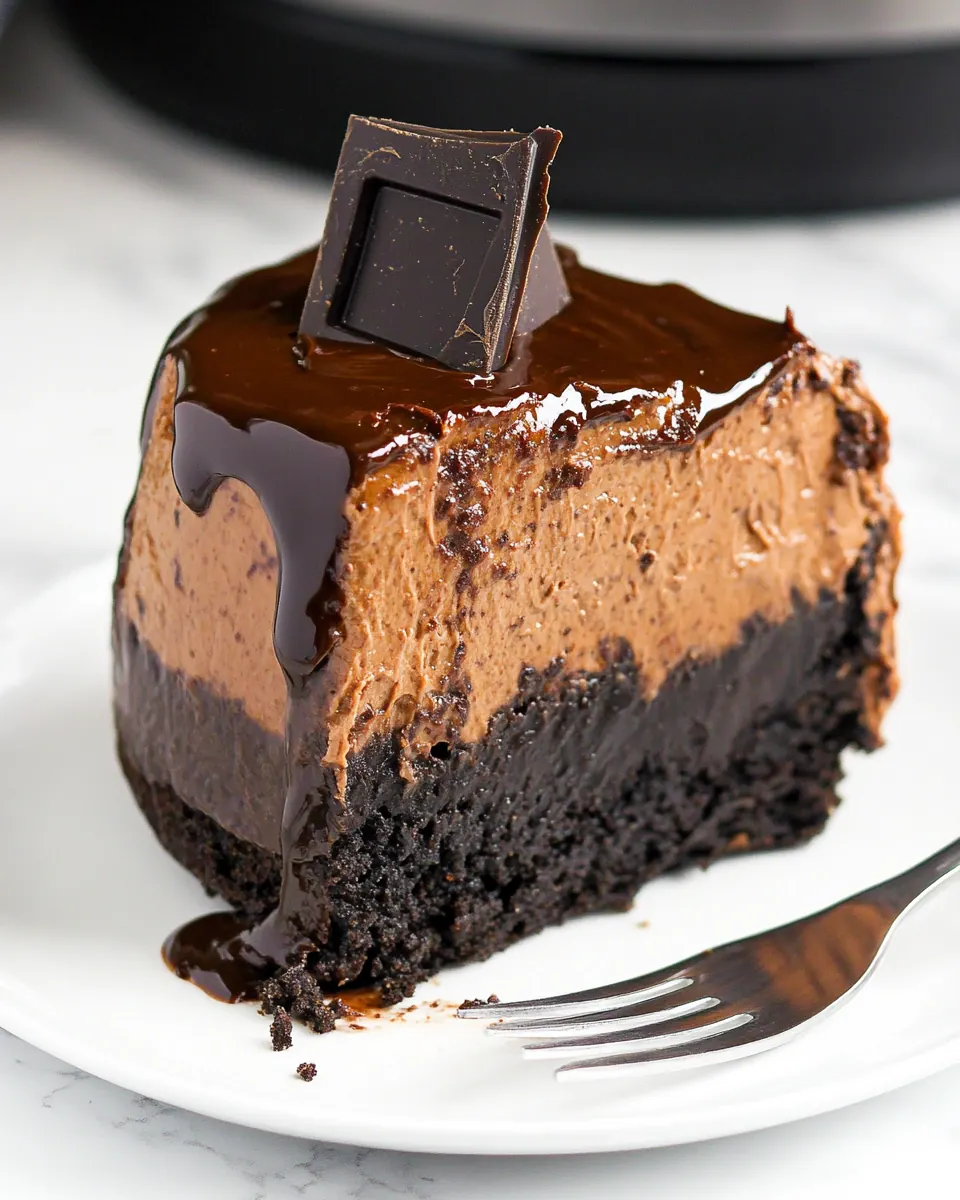
Instant Pot Chocolate Marble Cheesecake
Instant Pot Chocolate Marble Cheesecake has become my go to showstopper when I want to bring something rich and a little dramatic to the table. The first time I made this cheesecake I remember cracking jokes with a friend while the steam hissed from the Instant Pot, and when we finally unlatched the lid the aroma of melting semi sweet chocolate chips and warm buttered crumbs filled the kitchen. That first forkful, with creamy cream cheese and chocolate ribbons, convinced me this method was a keeper.
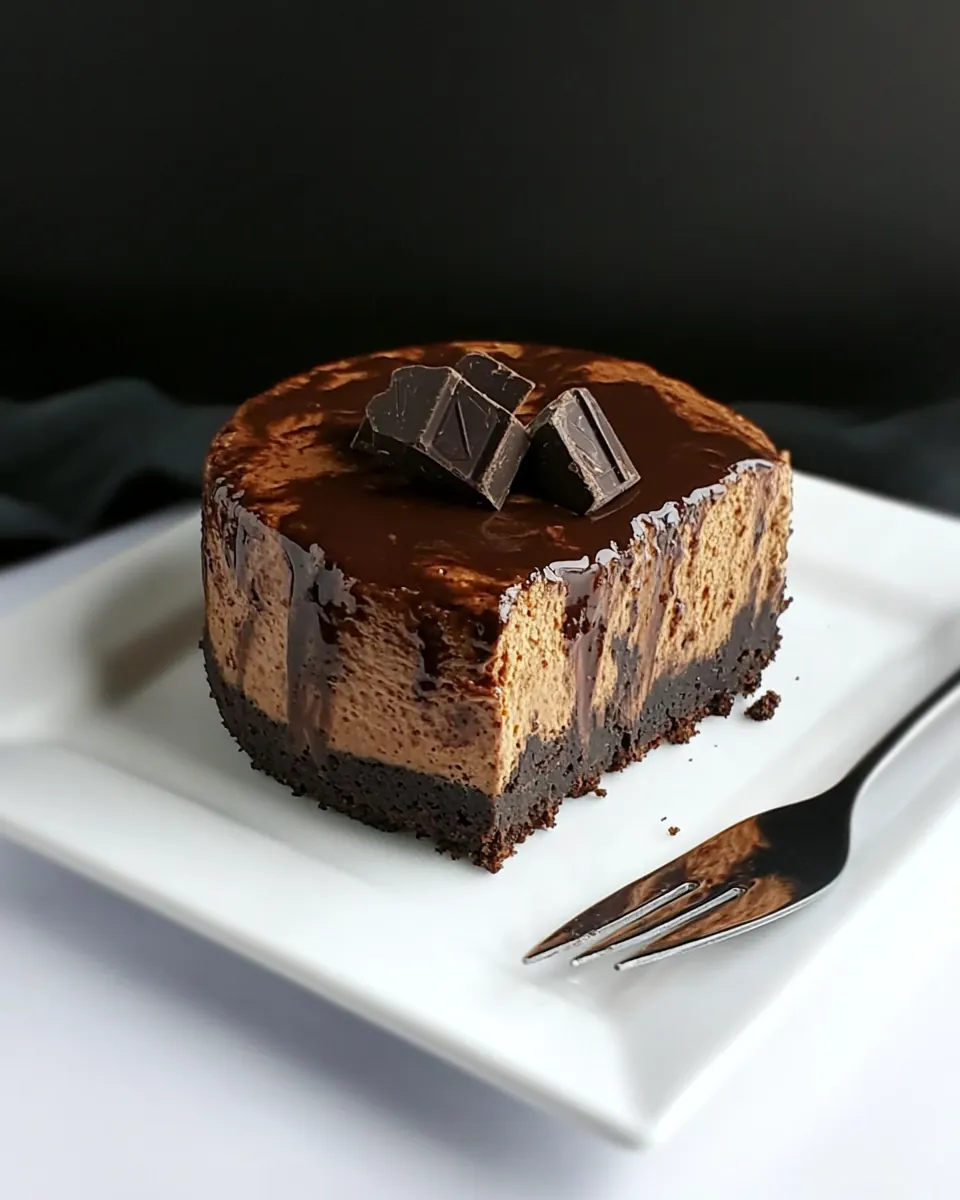
Ever since then I reach for this recipe when friends ask for dessert. It travels well to potlucks, and the texture is reliably smooth because cooking it in the pot creates an even, moist environment that keeps the edges from overcooking while the center sets slowly. I like how the marble pattern looks rustic and elegant at the same time, and the contrast between the buttery crust and the silky filling always gets compliments. I often tell guests that the magic is partly in the technique and partly in the patience to let it chill properly. That pause is worth every minute.
Recipe Snapshot
1 hr 15 mins
20 mins
55 mins
Hard
350 kcal
American
Gluten-Free, Low FODMAP
Desserts
Instant Pot
What’s Great About This Instant Pot Chocolate Marble Cheesecake
1. Creamy texture every time
I love that Instant Pot Chocolate Marble Cheesecake reliably yields a lusciously smooth center. The sealed, pressurized environment prevents harsh temperature swings, so the cream cheese sets uniformly and the surface stays glossy rather than cracked. When I pour my batter into the crust and steam it gently, the result is a custard like feel that melts on the tongue.
2. Dramatic marble appearance
Swirling the reserved plain filling with the melted semi sweet chocolate chips gives the cake a beautiful marbled top without fussy piping. I often swirl with a butter knife while chatting with guests, and the pattern always looks artisanal. It makes an ordinary dessert table feel special with minimal effort.
3. Fast hands off cooking
Using the Instant Pot cuts the active babysitting time, so I can prep the crust and filling, set the timer, and move on to other party tasks. The method is forgiving, and the one pot steam bath reduces the risk of drying out the edges, which is a common problem with oven baking. For busy hosts, that hands off convenience is a relief.
4. Simple pantry friendly ingredients
The ingredient list reads like a friendly shopping trip: chocolate wafers, butter, cream cheese, eggs, and a few flavoring staples. These items are pantry stable for many home cooks, so I rarely need a special run to the store. That familiarity makes this recipe approachable any night of the week.
5. Crowd pleasing and adaptable
This cheesecake works for weeknight indulgence or celebratory dessert. I’ve taken it to birthdays and casual dinners alike, and it always disappears. Since the flavors are classic, people of all ages tend to enjoy it, and I can dress it with chocolate sauce or keep it simple. For me the adaptability and reliable appeal are the biggest reasons to love it.
What to Gather for Instant Pot Chocolate Marble Cheesecake

These ingredients come together to create a balance of textures and flavors. The crust gives a crunchy, buttery base, while the filling delivers a creamy, slightly tangy richness. The semi sweet chocolate chips add depth and the reserved plain filling provides contrast for the marble effect. Together they form a harmonious dessert that is more than the sum of its parts.
- Cooking spray: Coat the Instant Pot insert and springform pan lightly to prevent sticking and ensure cheesecake releases cleanly after cooking. Use an even, thin layer to avoid pooling and excess oil which can alter crust texture. Choose a neutral cooking spray to keep flavors unaffected.
- 24 chocolate wafers: Crush into fine crumbs to form the base of the crust, providing structure and a chocolatey foundation for the cheesecake. Press firmly and evenly into the pan to create a compact crust that holds together after steaming. Use wafers with a strong chocolate flavor to complement the filling.
- 1 tbsp + 3/4 cup sugar divided: Measure accurately and split as instructed to balance sweetness between crust and filling; use 1 tablespoon for crust assembly and 3/4 cup for the cheesecake batter. Dissolve the smaller amount with melted butter when making the crust to help bind crumbs. Add the larger portion gradually to the cream cheese mixture, tasting for desired sweetness.
- 1/4 cup unsalted butter melted: Melt and combine with cookie crumbs to bind the crust, adding richness and helping it set firmly when pressed into the pan. Use unsalted butter to control overall salt level and prevent oversalting of the filling. Allow melted butter to cool slightly before mixing to avoid melting any added sugar.
- 1 1/4 cups semi-sweet chocolate chips: Melt and fold into part of the batter to create ribbons of chocolate and the distinctive marble effect in the cheesecake. Reserve a portion to create swirls on top or to layer in between batter for visual contrast and intensified chocolate flavor. Use quality semi–sweet chips for balanced sweetness and smooth texture when melted.
- 2 8 oz. packages cream cheese: Soften and beat until smooth to create the creamy, tangy base of the cheesecake; use two 8-ounce packages for the proper density and volume. Ensure cream cheese is at room temperature to avoid lumps and achieve a velvety batter when combined with eggs and sugar. Scrape the bowl well to fully incorporate and prevent curdling.
- 3 large eggs: Whisk in one at a time to add structure and richness, helping the cheesecake set while maintaining a smooth, custardy texture. Avoid overbeating after eggs are added to prevent incorporating excess air that can cause cracking. Use large eggs at room temperature for consistent integration.
- 1/4 cup sour cream: Fold in to add moistness and a slight tang that balances sweetness and improves texture, yielding a silkier mouthfeel. Incorporate gently to retain a smooth batter without overmixing, which can introduce bubbles. Use full-fat sour cream for best richness and stability.
- 1 teaspoon pure vanilla extract: Enhance flavor by adding a small amount for aromatic warmth and depth that complements the chocolate and cream cheese. Use pure vanilla extract for a clean, true vanilla profile rather than artificial alternatives. Measure precisely to avoid overpowering the delicate cheesecake flavors.
- Chocolate sauce for serving: Drizzle over slices when serving to add shine, extra chocolate intensity, and a contrasting sauce element that elevates presentation and flavor. Warm slightly if thick to create a pourable consistency that complements the creamy cheesecake. Offer on the side for guests to control sweetness level.
Recipe Directions for Instant Pot Chocolate Marble Cheesecake
These directions are practical and written from my experience making this cake often. Follow each step carefully and pay attention to the sensory cues to get the perfect set and marble finish. I find the ritual of prepping and lifting the cake out of the pot satisfying, and the patience during chilling pays off.
- Cut a piece of parchment paper that is the size of the bottom of the 7-inch springform pan and place in the pan. Spray the parchment paper and the inside sides of the pan with cooking spray.: When you slide the parchment into the pan the paper should sit flat and smooth, which helps the crust release cleanly after baking. Press down gently so it fits snugly, and spray the paper and the inside sides of the pan with cooking spray to ensure easy removal. You should be able to run a knife around the edge later without resistance, which is a sign you prepared the pan correctly. One mistake I see is using too small a parchment piece, which causes the crust to pull; always verify the fit before assembling the crust.
- Process the chocolate wafers in a food processor until fine, or place in a large baggie and crush with a rolling pin.: The crumbs should resemble coarse sand with no large chunks, which allows them to pack firmly into a crust. If using a food processor, pulse in short bursts so the wafers do not turn into powder. You will hear a rhythmic rattle as the wafers break down, and you should smell toasted cocoa notes once the crumbs are fine. A common slip is leaving oversized pieces, which prevents an even crust; take a moment to check for uniformity.
- Add the crushed wafers to a small bowl and add 1 tablespoon sugar and the melted butter. Stir to incorporate.: As you fold the melted unsalted butter and the tablespoon of sugar into the crumbs, they will clump slightly when pinched, indicating the right moisture level for pressing. The butter coats the crumbs so they brown and bind without drying out. If the mixture seems too dry, add a few drops more butter, but not so much that it feels greasy. Overwet crusts can become mushy during steaming, which is the pitfall here.
- Press the crumbs evenly on the bottom of the springform pan and up about 1 inch along the sides of the pan. Place in the freezer while you prepare the filling.: Using the bottom of a measuring cup or glass, press steady even pressure to compact the crust. You should see a uniform surface without gaps or loose crumbs, and the edges should form a neat rim about 1 inch high. Place the pan in the freezer while you prepare the filling to firm up the butter and prevent the crust from becoming soggy when the filling is added. The usual mistake is uneven pressing, which can create thin spots that break; take your time to pack it well.
- In a medium microwave-safe bowl, melt the chocolate chips on high, stirring every 30 seconds, until completely melted. Set aside.: The chocolate will turn glossy and pourable when fully melted, and the aroma will deepen to a warm cocoa scent. Stirring intermittently prevents scorching and ensures even heat distribution. Allow the bowl to sit a moment off heat so the chocolate cools slightly before combining with dairy so it does not seize. If you heat too quickly you can scorch the chocolate; low and patient heating avoids that.
- In a large bowl, use an electric mixer on medium speed and beat the cream cheese together with the 3/4 cup sugar until smooth and fluffy (about 2 minutes).: The cream cheese should be room temperature so it blends without lumps, transforming into a silky, nearly whipped texture after about two minutes. You will hear the mixer settle into a steady hum and see the mixture lighten in color. Properly beating incorporates air for a lighter crumb, but overbeating can create bubbles that later cause small fissures; stop once it is smooth and fluffy.
- Add the eggs one at a time, beating well after each addition.: Incorporating each egg individually ensures an even emulsion and prevents curdling. After each addition, the mixture will feel silkier and slightly looser, and the sound of the mixer will smooth out. If you added eggs too quickly, the batter can split; always scrape the bowl and ensure each egg is fully blended before adding the next.
- Beat in the sour cream and vanilla.: Folding in the sour cream and vanilla extract brings extra silk and a subtle tang that balances the sweetness. The batter will become glossy and supple, and the scent of vanilla will lift the chocolate notes. Avoid vigorous whipping at this point because you do not want to incorporate excess air which could cause tunneling as it cooks.
- Remove 1/2 cup of the cream cheese mixture and place in a small bowl.: Setting aside the reserved plain portion creates the light ribbons needed for the marble effect. The reserved bowl should be smooth and slightly thick, which helps it hold when dolloped across the chocolate batter. Don’t skip chilling this bit briefly if your kitchen is very warm, as it helps maintain contrast when swirling.
- With the mixer on low speed, pour the chocolate in and mix thoroughly.: The melted semi sweet chocolate chips will fold into the remaining batter turning it a uniform chocolate color and scent. Mixing on low prevents splashing and keeps the finished chocolate batter silky. If the chocolate is too hot you risk melting the structure, so ensure it is warm, not boiling. A common error is adding very hot chocolate which can loosen the batter excessively.
- Pour the filling into the prepared crust.: The moment you pour you will notice the filling settle and the crust hold its shape; tap the pan gently on the counter to release trapped air bubbles that can mar the surface. The visual should be even, with the chocolate filling meeting the crust edges neatly. If you see large bubbles, smooth and tap again to remove them.
- Dollop the reserved cream cheese mixture across the top of the cheesecake and use a knife to swirl the cream cheese mixture with the chocolate mixture to give a marbled look.: As you dollop the reserved cream cheese over the chocolate filling, the contrast will be stark, which is perfect for swirling. Use a thin knife to create flowing patterns without over mixing; you want visible ribbons rather than a homogenized color. Go slow and let the motion guide the design. Over swirling will blur the marble effect.
- Tightly wrap the entire pan in aluminum foil.: Sealing the pan with foil prevents water from seeping in during the pressure cook and keeps the top from getting damp spots. Smooth the foil snugly around the edges, ensuring full coverage. A loose wrap can allow steam to contact the cake, creating uneven texture, so wrap firmly but without pressing into the filling.
- Using another piece of foil that is 24 x 3 inches long and make a 'sling' by folding it in half, lengthwise, and then fold in half two more times.: This sling gives you a safe, balanced way to lower and lift the pan from the pot, reducing the risk of spills or burns. Fold evenly so the sling is sturdy and narrow enough to thread under the pan. If the sling is uneven you could tip the pan when lowering it; make neat folds for a stable handle.
- Place the steam rack (that came with the IP) into the Instant Pot and add 1 1/2 cups water.: The water will create the steam bath that cooks the cheesecake gently. You should hear a faint simmer begin as the pot comes to pressure, and the humidity inside prevents drying and cracking. Be sure to measure the water accurately because too little will interrupt the steam, and too much might touch the pan if the rack is low.
- Place the cheesecake on the sling and use the sling to lower the pan onto the steam rack and gently fold the sides of the sling over the top, careful not to press into the cake.: Lowering the pan slowly keeps the filling intact and the sling allows you to center the pan on the rack. The cake should sit level and the sling edges should be folded so they do not indent the top. If you press into the filling you can leave marks, so handle with steady hands.
- Lock the lid and press PRESSURE COOK or MANUAL and cook on HIGH PRESSURE for 55 minutes.: As the pot builds pressure you will notice a rising hum and eventual change to a steady low whistle. The 55 minute high pressure cook sets the cheesecake thoroughly while maintaining moisture. Avoid opening the lid during this period, as sudden depressurization can affect the set. A common error is reducing time too much; undercooked centers will be overly wobbly after chilling.
- Use the QUICK RELEASE method to vent the steam (be careful of the escaping steam), and then open the lid once finished releasing.: The rapid escape of steam will hiss loudly, and you should keep hands and face away from the valve to prevent burns. Once the pin drops you can open the lid and the cake will look puffed but stable. Be cautious because hot moisture will cling to the foil; do not rush this step or you risk steam burns.
- Use the sling to lift the pan out of the Instant Pot (be careful, it will still be hot).: The pan will be hot to the touch and the foil will be warm and slightly steamy, so lift carefully using oven mitts. Place it on a cooling rack to release residual heat gradually. Avoid tipping the pan, which could cause the filling to shift while still soft.
- Remove the foil and let cool on a rack for 30 minutes (the center will still seem wobbly at this point).: The center will still seem wobbly and that is normal, the residual heat will continue gentle cooking while it cools. You will notice condensation on the foil and a faint chocolate aroma as it settles. If you see a glossy top with slight jiggle the internal texture is correct; a firm, set center at this point may indicate overcooking.
- Run a knife around the edges to loosen the cake from the pan and remove the sides of the springform pan.: A thin-bladed knife helps release the cake without tearing the crust. The edge should release smoothly and you will see the defined rim of crust. If the knife sticks, wait a few more minutes because cutting too early can mar the sides.
- Refrigerate for at least 6 hours or overnight.: Chilling is crucial to fully set the filling and to develop flavor depth. The texture firms and slices cleanly after long refrigeration, and the chocolate ribbons integrate beautifully into the filling. Skipping this chill is the most common mistake for an under structured slice, so plan ahead.
- Serve with chocolate sauce, if desired.: Adding chocolate sauce lends an elegant finish and extra decadence. Drizzle sparingly so it complements rather than drowns the slice. Serve chilled and use a hot knife for clean slices if you want polished presentation.
Variations to Try
If you want to vary the dessert without changing the method, here are ideas that respect the core flavors while adding a twist. These suggestions keep the same ingredient list but alter presentation or texture subtly.
- Swap the crust concentration Press a slightly thicker layer of chocolate wafers into the pan for extra crunch and a pronounced chocolate base.
- Adjust the chocolate intensity Use a slightly larger proportion of melted semi sweet chocolate chips in the chocolate batter for a deeper, more intense swirl.
- Chill for texture variations Refrigerate longer for a firmer slice, or slightly less time for a creamier, spoonable center.
- Presentation boost Drizzle chocolate sauce over slices just before serving to add shine and a little extra sweetness on the plate.
- Make it ahead Once cooled, wrap tightly and chill up to 48 hours to free up time on the day of serving while preserving texture.
Serving This Instant Pot Chocolate Marble Cheesecake
This cheesecake deserves thoughtful presentation and a little planning. Below I outline pairing ideas, occasions, and storage tips to help you serve it beautifully and keep leftovers at peak quality.
- Presentation Slices look best when cut with a hot, clean knife; wipe the blade between cuts for polished edges.
- Pairings Serve with a drizzle of chocolate sauce or a simple dusting around the plate to elevate the dessert visually.
- Occasions Ideal for birthdays, dinner parties, or special gatherings where a refined dessert makes the evening feel memorable.
- Storage short term Wrap the cake tightly and refrigerate up to four days; keep chilled until serving for the best texture.
- Make ahead Prepare fully and store in the fridge overnight to free up time on the day you plan to serve.
- Serving size Cut into eight generous slices for a dessert course, or into smaller pieces for a potluck to allow more guests to sample.
FAQ
Conclusion
This recipe stands out because it combines a simple ingredient list with a pressure cooking technique that produces reliably creamy, elegant results. The balance of a crisp chocolate wafer crust and a silky marble filling makes it a crowd pleaser that looks impressive but is surprisingly straightforward to make. I encourage you to try making this cheesecake when you want a dessert that feels special without demanding nonstop attention. Take your time with the chilling step and enjoy the rich, smooth slices you will be rewarded with.

Instant Pot Chocolate Marble Cheesecake
Equipment
- Instant Pot
Ingredients
- Cooking spray Coat the Instant Pot insert and springform pan lightly to prevent sticking and ensure cheesecake releases cleanly after cooking. Use an even, thin layer to avoid pooling and excess oil which can alter crust texture. Choose a neutral cooking spray to keep flavors unaffected.
- 24 chocolate wafers Crush into fine crumbs to form the base of the crust, providing structure and a chocolatey foundation for the cheesecake. Press firmly and evenly into the pan to create a compact crust that holds together after steaming. Use wafers with a strong chocolate flavor to complement the filling.
- 1 tbsp , + 3/4 cup sugar divided Measure accurately and split as instructed to balance sweetness between crust and filling; use 1 tablespoon for crust assembly and 3/4 cup for the cheesecake batter. Dissolve the smaller amount with melted butter when making the crust to help bind crumbs. Add the larger portion gradually to the cream cheese mixture, tasting for desired sweetness.
- 1/4 cup unsalted butter melted Melt and combine with cookie crumbs to bind the crust, adding richness and helping it set firmly when pressed into the pan. Use unsalted butter to control overall salt level and prevent oversalting of the filling. Allow melted butter to cool slightly before mixing to avoid melting any added sugar.
- 1 1/4 cups semi-sweet chocolate chips Melt and fold into part of the batter to create ribbons of chocolate and the distinctive marble effect in the cheesecake. Reserve a portion to create swirls on top or to layer in between batter for visual contrast and intensified chocolate flavor. Use quality semi-sweet chips for balanced sweetness and smooth texture when melted.
- 2 8 oz. packages cream cheese Soften and beat until smooth to create the creamy, tangy base of the cheesecake; use two 8-ounce packages for the proper density and volume. Ensure cream cheese is at room temperature to avoid lumps and achieve a velvety batter when combined with eggs and sugar. Scrape the bowl well to fully incorporate and prevent curdling.
- 3 large eggs Whisk in one at a time to add structure and richness, helping the cheesecake set while maintaining a smooth, custardy texture. Avoid overbeating after eggs are added to prevent incorporating excess air that can cause cracking. Use large eggs at room temperature for consistent integration.
- 1/4 cup sour cream Fold in to add moistness and a slight tang that balances sweetness and improves texture, yielding a silkier mouthfeel. Incorporate gently to retain a smooth batter without overmixing, which can introduce bubbles. Use full-fat sour cream for best richness and stability.
- 1 teaspoon pure vanilla extract Enhance flavor by adding a small amount for aromatic warmth and depth that complements the chocolate and cream cheese. Use pure vanilla extract for a clean, true vanilla profile rather than artificial alternatives. Measure precisely to avoid overpowering the delicate cheesecake flavors.
- Chocolate sauce for serving Drizzle over slices when serving to add shine, extra chocolate intensity, and a contrasting sauce element that elevates presentation and flavor. Warm slightly if thick to create a pourable consistency that complements the creamy cheesecake. Offer on the side for guests to control sweetness level.
Instructions
- Cut a piece of parchment paper that is the size of the bottom of the 7-inch springform pan and place in the pan. Spray the parchment paper and the inside sides of the pan with cooking spray.: When you slide the parchment into the pan the paper should sit flat and smooth, which helps the crust release cleanly after baking. Press down gently so it fits snugly, and spray the paper and the inside sides of the pan with cooking spray to ensure easy removal. You should be able to run a knife around the edge later without resistance, which is a sign you prepared the pan correctly. One mistake I see is using too small a parchment piece, which causes the crust to pull; always verify the fit before assembling the crust.
- Process the chocolate wafers in a food processor until fine, or place in a large baggie and crush with a rolling pin.: The crumbs should resemble coarse sand with no large chunks, which allows them to pack firmly into a crust. If using a food processor, pulse in short bursts so the wafers do not turn into powder. You will hear a rhythmic rattle as the wafers break down, and you should smell toasted cocoa notes once the crumbs are fine. A common slip is leaving oversized pieces, which prevents an even crust; take a moment to check for uniformity.
- Add the crushed wafers to a small bowl and add 1 tablespoon sugar and the melted butter. Stir to incorporate.: As you fold the melted unsalted butter and the tablespoon of sugar into the crumbs, they will clump slightly when pinched, indicating the right moisture level for pressing. The butter coats the crumbs so they brown and bind without drying out. If the mixture seems too dry, add a few drops more butter, but not so much that it feels greasy. Overwet crusts can become mushy during steaming, which is the pitfall here.
- Press the crumbs evenly on the bottom of the springform pan and up about 1 inch along the sides of the pan. Place in the freezer while you prepare the filling.: Using the bottom of a measuring cup or glass, press steady even pressure to compact the crust. You should see a uniform surface without gaps or loose crumbs, and the edges should form a neat rim about 1 inch high. Place the pan in the freezer while you prepare the filling to firm up the butter and prevent the crust from becoming soggy when the filling is added. The usual mistake is uneven pressing, which can create thin spots that break; take your time to pack it well.
- In a medium microwave-safe bowl, melt the chocolate chips on high, stirring every 30 seconds, until completely melted. Set aside.: The chocolate will turn glossy and pourable when fully melted, and the aroma will deepen to a warm cocoa scent. Stirring intermittently prevents scorching and ensures even heat distribution. Allow the bowl to sit a moment off heat so the chocolate cools slightly before combining with dairy so it does not seize. If you heat too quickly you can scorch the chocolate; low and patient heating avoids that.
- In a large bowl, use an electric mixer on medium speed and beat the cream cheese together with the 3/4 cup sugar until smooth and fluffy (about 2 minutes).: The cream cheese should be room temperature so it blends without lumps, transforming into a silky, nearly whipped texture after about two minutes. You will hear the mixer settle into a steady hum and see the mixture lighten in color. Properly beating incorporates air for a lighter crumb, but overbeating can create bubbles that later cause small fissures; stop once it is smooth and fluffy.
- Add the eggs one at a time, beating well after each addition.: Incorporating each egg individually ensures an even emulsion and prevents curdling. After each addition, the mixture will feel silkier and slightly looser, and the sound of the mixer will smooth out. If you added eggs too quickly, the batter can split; always scrape the bowl and ensure each egg is fully blended before adding the next.
- Beat in the sour cream and vanilla.: Folding in the sour cream and vanilla extract brings extra silk and a subtle tang that balances the sweetness. The batter will become glossy and supple, and the scent of vanilla will lift the chocolate notes. Avoid vigorous whipping at this point because you do not want to incorporate excess air which could cause tunneling as it cooks.
- Remove 1/2 cup of the cream cheese mixture and place in a small bowl.: Setting aside the reserved plain portion creates the light ribbons needed for the marble effect. The reserved bowl should be smooth and slightly thick, which helps it hold when dolloped across the chocolate batter. Don’t skip chilling this bit briefly if your kitchen is very warm, as it helps maintain contrast when swirling.
- With the mixer on low speed, pour the chocolate in and mix thoroughly.: The melted semi sweet chocolate chips will fold into the remaining batter turning it a uniform chocolate color and scent. Mixing on low prevents splashing and keeps the finished chocolate batter silky. If the chocolate is too hot you risk melting the structure, so ensure it is warm, not boiling. A common error is adding very hot chocolate which can loosen the batter excessively.
- Pour the filling into the prepared crust.: The moment you pour you will notice the filling settle and the crust hold its shape; tap the pan gently on the counter to release trapped air bubbles that can mar the surface. The visual should be even, with the chocolate filling meeting the crust edges neatly. If you see large bubbles, smooth and tap again to remove them.
- Dollop the reserved cream cheese mixture across the top of the cheesecake and use a knife to swirl the cream cheese mixture with the chocolate mixture to give a marbled look.: As you dollop the reserved cream cheese over the chocolate filling, the contrast will be stark, which is perfect for swirling. Use a thin knife to create flowing patterns without over mixing; you want visible ribbons rather than a homogenized color. Go slow and let the motion guide the design. Over swirling will blur the marble effect.
- Tightly wrap the entire pan in aluminum foil.: Sealing the pan with foil prevents water from seeping in during the pressure cook and keeps the top from getting damp spots. Smooth the foil snugly around the edges, ensuring full coverage. A loose wrap can allow steam to contact the cake, creating uneven texture, so wrap firmly but without pressing into the filling.
- Using another piece of foil that is 24 x 3 inches long and make a 'sling' by folding it in half, lengthwise, and then fold in half two more times.: This sling gives you a safe, balanced way to lower and lift the pan from the pot, reducing the risk of spills or burns. Fold evenly so the sling is sturdy and narrow enough to thread under the pan. If the sling is uneven you could tip the pan when lowering it; make neat folds for a stable handle.
- Place the steam rack (that came with the IP) into the Instant Pot and add 1 1/2 cups water.: The water will create the steam bath that cooks the cheesecake gently. You should hear a faint simmer begin as the pot comes to pressure, and the humidity inside prevents drying and cracking. Be sure to measure the water accurately because too little will interrupt the steam, and too much might touch the pan if the rack is low.
- Place the cheesecake on the sling and use the sling to lower the pan onto the steam rack and gently fold the sides of the sling over the top, careful not to press into the cake.: Lowering the pan slowly keeps the filling intact and the sling allows you to center the pan on the rack. The cake should sit level and the sling edges should be folded so they do not indent the top. If you press into the filling you can leave marks, so handle with steady hands.
- Lock the lid and press PRESSURE COOK or MANUAL and cook on HIGH PRESSURE for 55 minutes.: As the pot builds pressure you will notice a rising hum and eventual change to a steady low whistle. The 55 minute high pressure cook sets the cheesecake thoroughly while maintaining moisture. Avoid opening the lid during this period, as sudden depressurization can affect the set. A common error is reducing time too much; undercooked centers will be overly wobbly after chilling.
- Use the QUICK RELEASE method to vent the steam (be careful of the escaping steam), and then open the lid once finished releasing.: The rapid escape of steam will hiss loudly, and you should keep hands and face away from the valve to prevent burns. Once the pin drops you can open the lid and the cake will look puffed but stable. Be cautious because hot moisture will cling to the foil; do not rush this step or you risk steam burns.
- Use the sling to lift the pan out of the Instant Pot (be careful, it will still be hot).: The pan will be hot to the touch and the foil will be warm and slightly steamy, so lift carefully using oven mitts. Place it on a cooling rack to release residual heat gradually. Avoid tipping the pan, which could cause the filling to shift while still soft.
- Remove the foil and let cool on a rack for 30 minutes (the center will still seem wobbly at this point).: The center will still seem wobbly and that is normal, the residual heat will continue gentle cooking while it cools. You will notice condensation on the foil and a faint chocolate aroma as it settles. If you see a glossy top with slight jiggle the internal texture is correct; a firm, set center at this point may indicate overcooking.
- Run a knife around the edges to loosen the cake from the pan and remove the sides of the springform pan.: A thin-bladed knife helps release the cake without tearing the crust. The edge should release smoothly and you will see the defined rim of crust. If the knife sticks, wait a few more minutes because cutting too early can mar the sides.
- Refrigerate for at least 6 hours or overnight.: Chilling is crucial to fully set the filling and to develop flavor depth. The texture firms and slices cleanly after long refrigeration, and the chocolate ribbons integrate beautifully into the filling. Skipping this chill is the most common mistake for an under structured slice, so plan ahead.
- Serve with chocolate sauce, if desired.: Adding chocolate sauce lends an elegant finish and extra decadence. Drizzle sparingly so it complements rather than drowns the slice. Serve chilled and use a hot knife for clean slices if you want polished presentation.
Notes
- Swap the crust concentration Press a slightly thicker layer of chocolate wafers into the pan for extra crunch and a pronounced chocolate base.
- Adjust the chocolate intensity Use a slightly larger proportion of melted semi sweet chocolate chips in the chocolate batter for a deeper, more intense swirl.
- Chill for texture variations Refrigerate longer for a firmer slice, or slightly less time for a creamier, spoonable center.
- Presentation boost Drizzle chocolate sauce over slices just before serving to add shine and a little extra sweetness on the plate.
- Make it ahead Once cooled, wrap tightly and chill up to 48 hours to free up time on the day of serving while preserving texture.