Homemade Apple Pie
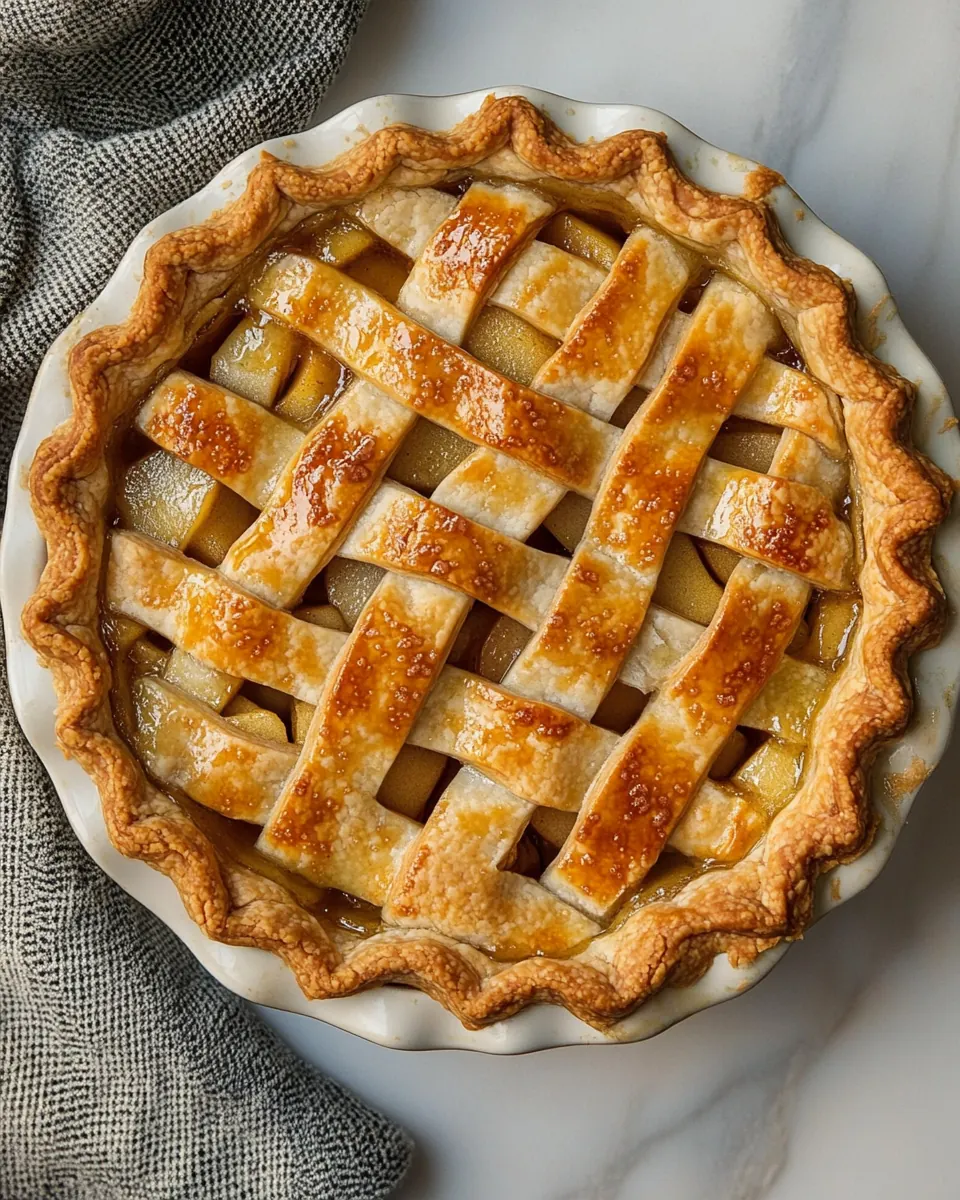
Homemade Apple Pie has been my cozy kitchen ritual for years, the recipe I pull out when I want warmth and simple comfort in a slice. I still remember the first time I baked this pie for a chilly autumn family gathering, the house filling with that unmistakable perfume of apples and cinnamon, and how everyone paused mid conversation to follow the scent into the kitchen. That evening taught me that a great pie is more than dessert, it is a small, perfect celebration of ordinary moments.
When I roll out the dough for Homemade Apple Pie, I picture the hands that taught me to press the crust edges just so, and I smile. The tactile comfort of working with cold butter and flour, the little flurries of white dusting the counter, and the gentle weight of a well filled pie dish are part of why I keep returning to this recipe. Over time I tweaked details to balance sweetness with a bright lemon note, and to coax the apple filling into tender, not soggy, perfection.
The best pies tell a story through texture; the flaky, crisp crust contrasts the soft, slightly saucy apple filling. I love serving it warm, with the crust still whispering as I slice, and watching forkfuls dissolve into creamy ice cream. Every time I bake Homemade Apple Pie I find a new reason to be grateful for small rituals, and I hope this version becomes one of yours too.
Recipe Snapshot
1 hr 55 mins
45 mins
70 mins
Medium
350 kcal
American
Gluten-Free, Low FODMAP
Desserts
1 (9-inch) glass or stainless steel pie dish
What Sets This Homemade Apple Pie Apart
Classic, reliable flavor
I love that Homemade Apple Pie delivers a timeless flavor profile that everyone recognizes. The combination of tender apples, warm cinnamon, and a slightly caramelized edge is comforting and nostalgic. When I want a dessert that feels like home, this is the one I reach for, because it never disappoints and always brings people together around the table.
Texture with purpose
One of the reasons I keep making this recipe is the way the crust and filling play off each other. The flaky butter laden crust gives a satisfying crunch while the filling becomes soft and lusciously saucy. I pay attention to chilling the dough and the timing in the oven because that’s what preserves the flaky layers. When you follow those cues, you end up with texture that makes each bite interesting.
Straightforward technique
This pie uses approachable methods that I can teach to friends and family. Grating cold butter into the flour and working quickly to keep everything cold are small steps that yield big results. I find people get confident fast when they see how few complicated tricks there are. It is easy to adapt without losing the essence, which makes it a dependable go to for holidays and weeknight baking alike.
Ingredient driven
I love that the recipe relies on pantry basics rather than fussy components. Good quality apples, all purpose flour, and unsalted butter are the headline acts, and they sing when used well. The little additions like a squeeze of lemon and a touch of vanilla lift the filling from pleasant to memorable. This simplicity means the pie tastes honest and bright.
Make ahead friendly
Finally, this pie is forgiving when planned ahead. I often prepare the dough in advance or assemble the whole pie and freeze it for later baking. That flexibility makes Homemade Apple Pie my favorite choice for busy holidays when I want to minimize last minute stress but still serve something spectacular.
Everything You Need for Homemade Apple Pie
The philosophy here is simple, every ingredient plays a clear role in producing a perfectly balanced pie. The all purpose flour forms the structure of the crust, while cold unsalted butter creates flakiness. The apples and a touch of acid from lemon brighten the filling, and spices and sugars round out the flavor. These players work in harmony to give you a pie that is texturally crisp and full of warmly spiced fruit.
- 2 1/2 cups all-purpose flour: Provide structure and bulk to the crust and filling, creating a tender but sturdy pastry when mixed with fat and liquid; sifts or measures precisely for consistent texture and prevents dense results.
- 2 tablespoons white granulated sugar: Add subtle sweetness and help balance flavors in the crust or filling; dissolves easily and aids slight browning on exposed pastry edges when sprinkled.
- 1 1/2 teaspoons kosher salt: Enhance overall flavor depth and control seasoning in both crust and filling; strengthens dough by tightening gluten slightly and helps balance sweetness and acidity.
- 1 cup unsalted butter, cold and straight from the fridge: Incorporate cold fat into flour to create flaky layers in the pastry; cutting into small pieces and keeping chilled prevents grease absorption and yields a tender, flaky crust.
- 3/4 cup very cold water, divided: Bind the dough and hydrate flour while keeping pastry cold to prevent melting the butter; adding gradually ensures proper consistency and prevents a gummy crust.
- 1/2 small lemon, juiced (about 1 1/2 tablespoons): Brighten and preserve apple slices with acidity, preventing browning and adding a fresh citrus note that balances sweetness in the filling.
- 3 4 whole medium to large apples (pink lady, gala and honeycrisp are my favorites), peeled, halved, cored and thinly sliced: Provide the main fruit component, offering texture, sweetness, and natural pectin; selecting firm, flavorful varieties and slicing evenly ensures consistent baking and a pleasant mouthfeel.
- 1/4 cup all-purpose flour: Thicken fruit juices released during baking to prevent a runny filling and help the slices cling together; dusting apples with flour before adding sugar promotes proper consistency.
- 1/2 cup light brown sugar: Contribute caramel-like sweetness and moisture to the filling, complementing apples and enhancing browning for a rich, rounded flavor profile.
- 1 1/2 teaspoons ground cinnamon: Impart warm, aromatic spice to the filling, accentuating the apples and rounding overall flavor; moderate use prevents overpowering the fruit.
- 1 teaspoon pure vanilla extract or 1/2 teaspoon vanilla paste: Add floral, creamy sweetness and enhance the filling's aromatic profile; a small amount brightens flavor complexity without additional sweetness.
- 1/2 teaspoon kosher salt: Season the filling to enhance and balance sweetness and spice; a pinch adjusts flavor depth and prevents blandness.
- 2 tablespoons crème fraîche or sour cream: Introduce slight tang and richness to the filling, improving mouthfeel and lending a smooth, creamy note that balances sweet and acidic elements.
- 1 large egg, beaten (for egg wash): Promote even browning and glossy finish on the crust while helping toppings adhere; brushing lightly creates an attractive, golden appearance.
- 1 tablespoon turbinado sugar, for topping () (optional): Provide a crunchy, sweet finish on the baked crust when sprinkled before baking; optional use adds texture and decorative sparkle to the pie.
Preparation Steps for Homemade Apple Pie
These steps walk you through making a classic pie from mixing the dough to baking that golden, lattice crowned masterpiece. Read each step fully before starting, and keep your ingredients chilled for the flakiest crust and the most structural filling.
- In a large bowl, mix together the flour, sugar and salt. Using a box grater, grate the cold butter atop the flour mixture. Transfer to the freezer to chill for 10 minutes. Working quickly, and using your hands, break the butter bits into the flour until they’re evenly distributed and resemble the size of teeny, small peas. Add a 50% of the recommended water and mix.: The moment you begin, inhale the simple dry scent of all purpose flour and sugar blending, it signals the start of something comforting. You will notice a dusty, soft texture as you whisk the dry ingredients, which is important so the small pockets of butter have an even bed to sit in. Use a fork or whisk to distribute the salt and sugar so no single bite tastes odd. A key reason this step matters is to ensure even seasoning and consistent browning, and a common mistake is skipping a proper mix which leads to uneven salted or sweet spots in the crust.
- The mixture will be shaggy at this point. From here, add 1 tablespoon of water at a time until the dough comes together. Flour your counter and dump the dough onto it. Knead a few times more until it comes together into one cohesive mass.: Grating cold butter creates tiny, uniform flakes that stay cold and discrete, which later puff into flaky layers. You will hear the gentle rasp of butter against the grater and see pale butter ribbons falling into the flour, like little clouds. This texture keeps the dough from becoming greasy because the butter pieces remain solid until they melt in the oven. Avoid letting the butter soften in your hands, since warm butter will smear instead of forming pockets.
- Divide the dough, forming two discs. Wrap the discs in plastic wrap and transfer to the refrigerator to chill for at least 1 hour, ideally overnight.: Chilling the grated mixture makes the butter firmer and easier to break into pea sized bits, which enhances cold handling. You will notice the bowl cooling quickly, and the scent will be restrained, not buttery. This pause protects the texture, and skipping it risks warming the butter , causing a denser crust later.
- You're welcome to peel your apples. This is optional. I personally like to peel the apples. Halve the apples, remove the core and then slice the apples into thin 1/4-inch pieces. OR, you can use a mandolin and slice them very thinly. Add the apple slices to a large bowl. Squeeze in the lemon juice, being sure to catch any seeds.: As you work, the mixture should feel granular, not paste like. The tactile feedback is crucial, you will sense whether the butter has been evenly integrated or if there are still large chunks. The why here is simple, even pea sized bits ensure steam pockets during baking, creating flakiness. One common trouble is overworking the mix until it becomes homogenized, which prevents flakiness.
- Next, add the flour, brown sugar, cinnamon, vanilla extract and salt; toss until the apples are evenly coated.: Adding half the water at first allows you to hydrate the dough gradually so you can control the final consistency. You may hear the barely audible squeak of hydration as liquid meets flour. The dough should look shaggy and not fully smooth at this stage, and that is correct; it will come together with gentle handling. Pouring all the water at once is a frequent error that leads to an overly sticky dough.
- Add the crème fraîche and toss until it's evenly distributed throughout.: When the dough looks rough and uneven, that tells you the gluten has not been overdeveloped. At this point, the texture is your guide, not rigid timing. You will feel a slight tackiness but nothing that clings badly to your hands. This shaggy texture preserves tenderness, and if you knead too long you will develop gluten and end up with a tough crust which is a mistake to avoid.
- Remove the first disc of dough from the refrigerator and allow to come to room temperature for about 5 minutes. Liberally flour your work surface and rolling pin. Begin to roll the dough, being sure to rotate it every so often to avoid sticking, to a 13-inch round. Wrap the dough around the rolling pin and unroll it over the pie dish.: Slow addition of water lets you stop the moment the dough holds, preventing excess hydration. Watch for the dough to form a cohesive mass that moves away from the bowl sides, that visual cue means you are done. Over adding water can require more flour and leads to a dense pastry, which is a common pitfall.
- Gently fit the dough into the bottom and up the sides of the pie tin. Trim the dough around the pie tin, leaving about a 1/2-inch overhang. Recombine the scraps and set them aside. We’ll use them for the lattice. Transfer the pie shell to the refrigerator while you roll out the second disc.: The minute the dough hits the counter you will feel the coolness of the surface and its coarse resistance as you gently knead. Keep movements minimal, just a few turns to bring it together; you want a smooth exterior without activating too much gluten. The dough should feel slightly tacky but manageable. Excessive kneading will tighten the dough and reduce flakiness.
- Remove the second disc from the fridge and repeat the rolling process. Using a knife, cut the dough into 3-inch strips.: These brief folds create a uniform dough without overworking it. You will hear soft smacks and see the dough round up into a tidy ball, and that tactile finish is what you are aiming for. A cohesive mass ensures even rolling later on, but if you knead too long, the crust can spring back when rolled, a sign you overdeveloped the gluten.
- I cut as many 3-inch strips as I can. Reroll the scraps you have set aside, too, you’ll need all of the pie dough. (If at any time your pie dough becomes too soft, transfer to a cutting board and put in the fridge to chill so it’s easier to work with.) Fill your pie shell with the apple filling. Lay out 5 strips of pie dough on top of the filling, leaving about 1/2-inch of space in between them. Lay the remainder of your strips running perpendicular. This will give you a good idea of how it will go. Next, fold back every strip. Start one at the top, running horizontally. and weave it under and over, rotating, each strip running vertically. Repeat this process until you’ve worked your way through every strip. If my directions are confusing, go to Youtube. The videos on there are super easy to follow. Much easier than written instructions!: Cutting the dough and shaping discs helps with chilling and makes rolling easier. Press lightly into flat, even discs so they chill uniformly and don’t keep cold spots. A well chilled disc will sound slightly firm when tapped. If you leave one disc much thicker it will take longer to roll and may warm before you finish, which complicates handling.
- Trim the edges of the strips, being sure to leave about 1-inch overhand. Going all the way around, tuck the edges under. To make a pronounced crimp, like you see pictured, set your thumb on the outside edge of the crust. With your opposite pointer and thumb fingers, create a v, and push the two together. Repeat this process all the way around the pie crust.: Chilling relaxes the gluten and re solidifies the butter , which helps with flakiness and easier rolling. You will notice the surface firms as it chills, and the dough becomes less sticky and more cooperative. Overnight chilling deepens flavor too. Attempting to roll immediately after a brief rest often leads to tearing and a tough crust.
- Transfer to the freezer to chill for 30 minutes. Meanwhile, preheat the oven to 400 degrees F. Brush the entire pie, liberally, with egg wash and sprinkle with turbinado sugar.: The aroma of freshly cut apples is bright and fruity; I prefer peeling because it makes the filling silkier. The thin quarter inch slices should be even so they cook consistently, and if you use a mandolin you will get uniform pieces quickly. A frequent mistake is inconsistent slice thickness which gives you some bites that are mushy and others that are underdone.
- Transfer the pie to a baking sheet and place in the oven to for 20 to 25 minutes, until the edges are just lightly brown. Turn the heat down to 350 degrees F and bake for another 40 to 45 minutes, until the edges and top are deep golden brown. Be sure to check on it intermittently, if at any time the pie crust begins to turn too dark, use foil to cover those areas to stop browning. Allow to stand for at least two hours so it can firm up before slicing the pie.: Slicing to a uniform thickness ensures every piece softens at the same rate and helps the filling structure properly. The sound of the knife through apple is crisp and clean, and the citrus tang from the lemon juice will brighten the cut fruit. If you slice too thin they may disintegrate, and if too thick they may remain undercooked in the center.
- Serve with ice cream or a dollop of whipped cream.: Using a mandolin speeds the process and gives thin, even slices that layer beautifully. As you slide each apple the thin ribbons will fan across your bowl and glisten with juice. Be mindful of safety and use a guard, because slicing quickly without protection leads to mishaps, which I have seen often.
- Add the apple slices to a large bowl: Tossing the sliced apples in a roomy bowl prevents bruising and allows you to incorporate the other filling ingredients without crushing them. The large bowl also gives you space to taste and adjust seasoning if needed, and it keeps the slices airy until you are ready to fill the pie. Crowding the bowl can bruise the fruit and cause extra juices.
- Squeeze in the lemon juice, being sure to catch any seeds: The bright citrus aroma will lift the mixture immediately and you may notice tiny beads of juice clinging to the slices. This acid balances the sugars and helps the apples retain color and brightness during baking. Forgetting the lemon can leave the filling tasting flat, and leaving seeds in will create unwelcome bitter bites.
- Next, add the flour, brown sugar, cinnamon, vanilla extract and salt: The dry coating will begin to hug each slice, and you will feel the mixture change from slick fruit to a lightly dusted assembly that promises caramelization. These components thicken and season the filling, ensuring it tastes complete after baking. A common error is under mixing which leaves pockets of dry flour or unevenly spiced fruit.
- Toss until the apples are evenly coated: Proper tossing ensures every mouthful has a balanced flavor and the filling will thicken evenly. You will hear soft shuffles and see glossy slices joined by sugar and spice, which indicates readiness. If some pieces remain uncoated they may undercook or explode with uneven texture.
- Add the crème fraîche and toss until it's evenly distributed throughout: The addition of crème fraîche lends a silky, slightly tangy richness that rounds the filling, making each bite feel decadent without being cloying. It will bind the sugars and help create a pleasant sauce as the pie bakes. Omitting this will leave the filling less cohesive and a bit more syrupy.
- Remove the first disc of dough from the refrigerator and allow to come to room temperature for about 5 minutes: A brief rest softens the edges just enough to make rolling easier while keeping the core cold. You will notice the disc becomes slightly more pliable and less likely to crack when rolled. If you wait too long the butter will soften too much, making it harder to achieve flakiness.
- Liberally flour your work surface and rolling pin: The floured surface prevents sticking and lets you roll confidently to the target size. You will hear a gentle scraping as the pin glides and see the dough spread into a smooth circle. Using too much flour will dry the dough, while too little causes sticking and tearing.
- Begin to roll the dough, being sure to rotate it every so often to avoid sticking, to a 13 inch round: Rolling to size is visual work, and you should see a uniform thickness across the circle; thin areas will brown faster. Rotate and dust as needed, and aim for even pressure so the crust bakes uniformly. Over rolling can make the crust paper thin and prone to tearing when transferred.
- Wrap the dough around the rolling pin and unroll it over the pie dish: This transfer technique preserves the shape and prevents stretching. You will feel the satisfying give as the dough settles into the dish and conforms to its contours. Stretching the dough during transfer will cause shrinkage when baked, which is a common problem.
- Gently fit the dough into the bottom and up the sides of the pie tin: Ease the dough into place rather than stretching, pressing gently to remove large air pockets while keeping the surface smooth. The tactile process ensures the crust sits flush against the dish for even baking. If you press too hard you can compress layers and lose flakiness.
- Trim the dough around the pie tin, leaving about a 1/2 inch overhang: Leaving a modest overhang gives you material to seal and crimp the edge, which helps contain the filling. The trimmed edge should be neat; ragged edges can burn and look uneven. Cutting too close leaves nothing to crimp and can cause filling leaks.
- Recombine the scraps and set them aside: Saving scraps is practical for creating lattice strips or decorative edges, and it keeps waste to a minimum. Rechilling scraps makes them easier to reroll. Trying to reroll warm scraps leads to sticky, difficult dough that loses structure.
- Transfer the pie shell to the refrigerator while you roll out the second disc: Chilling the shell firms it up so it holds shape when filled and prevents slumping during baking. You will notice it becomes taut and less tacky, which makes filling neat and easy. Skipping this chill can result in a soggy bottom and misshapen crust.
- Remove the second disc from the fridge and repeat the rolling process: Rolling the top disc while the bottom is chilled ensures both pieces are handled at optimal temperatures, preserving flakiness. Aim for consistent thickness so your lattice or cover bakes evenly. If the second disc becomes too warm, pop it back in the fridge before cutting strips.
- Using a knife, cut the dough into 3 inch strips: These strips will form the lattice top, and you should feel the clean give of even cuts. Uniform strip width makes weaving straightforward and yields an attractive, even bake. Uneven strips complicate weaving and produce inconsistent baking across the top.
- I cut as many 3 inch strips as I can: Maximizing usable strips minimizes rerolling and cold work. As you cut, stack neatly and keep them chilled so they stay crisp when woven. If strips get warm, they will sag while weaving, making the top sloppy and harder to crimp.
- Reroll the scraps you have set aside, too, you’ll need all of the pie dough: Reworking scraps lets you use every bit of dough and keeps the aesthetic consistent. Chill these rerolled pieces briefly so they are firm enough to handle. Overworking scraps will toughen them and make the top less tender.
- Fill your pie shell with the apple filling: Mounding the filling in the center and spreading slightly toward the edges helps avoid leaks and ensures even baking. You will hear soft settling sounds as the apples nest into the shell and see juices begin to glisten, signaling readiness. Overpacking the pie can lead to spilled filling and uneven cooking.
- Lay out 5 strips of pie dough on top of the filling, leaving about 1/2 inch of space in between them: Placing the first set of strips gives a foundation for the lattice and lets you judge spacing visually. The contrast of dough and fruit looks appealing already, and the gaps will allow steam to escape. Crowding strips too close will prevent proper evaporation and cause a soggy top.
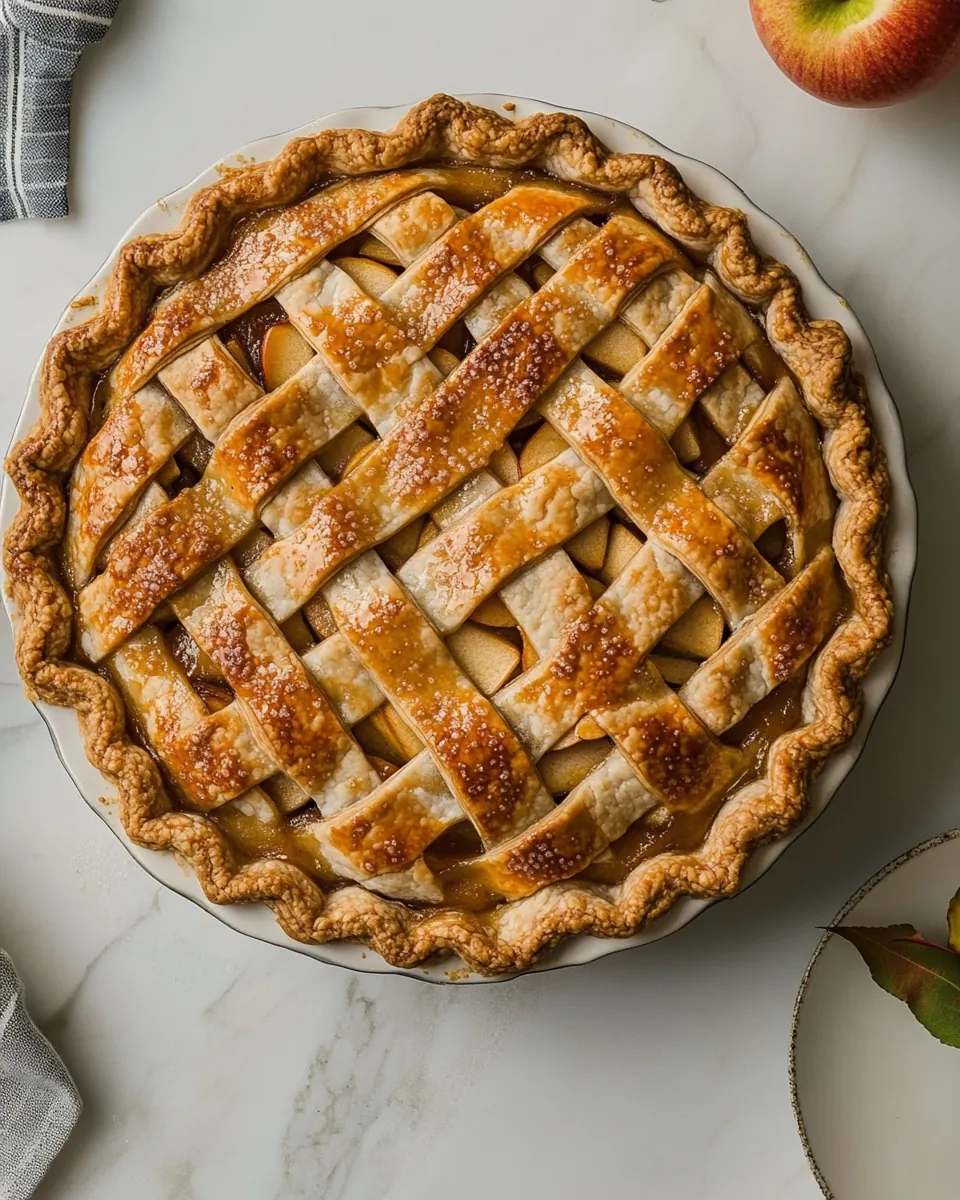
- Lay the remainder of your strips running perpendicular: The perpendicular strips create the woven lattice that lets juices bubble through while maintaining structure. This intersecting pattern traps heat and promotes even caramelization. If strips are not well chilled they will stretch and tear while weaving.
- This will give you a good idea of how it will go: Previewing the lattice helps you plan the final weave and trim cleanly for a neat edge. You will see the visual rhythm of strips and can adjust spacing before committing. Failing to preview often leads to awkward final adjustments under pressure.
- Next, fold back every strip: Folding strips back as you weave lets you interlace cleanly and maintain tension so the lattice looks crisp. The gentle fold and tuck sound and feel precise, and this technique prevents messy overlaps. Skipping the fold method frequently results in a sloppy finish and uneven baking.
- Start one at the top, running horizontally: Beginning from the top gives you control over the weave and helps align strips for the entire lattice. The first strip sets the grid, so ensure it sits straight. A crooked first strip often forces awkward corrections later.
- and weave it under and over, rotating, each strip running vertically: The rhythmic motion of weaving creates a stable top that vents properly and bakes attractively. As you alternate under and over, you will notice a satisfying firming of the top that signals success. If you rush this step you can tear strips or create gaps that spill filling.
- Repeat this process until you’ve worked your way through every strip: Continue patiently, and the lattice will come together into a coherent pattern that bakes evenly and looks professional. The completed weave should sit neatly and hold the filling well. Trying to hurry often results in uneven coverage and structural weaknesses.
- If my directions are confusing, go to Youtube: Watching the weaving in motion can clarify hand positions and timing, since video shows the tactile sequence I describe. Seeing the process helps some bakers avoid common fumbling with strips. Relying only on text when you learn visually may make the first attempt harder, but practice makes it intuitive.
- The videos on there are super easy to follow: A short demonstration will reveal subtle wrist and finger techniques for clean weaving and crimping that text cannot fully convey. Observing those movements will reduce anxiety when you try it yourself and give you confidence. Expect a learning curve, and know that even imperfect lattices taste great.
- Much easier than written instructions: The visual reference anchors the process and helps you see how tight to pull strips and how to tuck edges without stretching them. This is particularly useful for the first few pies you make until the motions become second nature. Avoid copying poor technique videos; choose reputable sources for guidance.
- Trim the edges of the strips, being sure to leave about 1 inch overhand: Leaving that inch gives you material to tuck and crimp, creating a secure seal that looks finished. The trimmed edge should be even, and neat trimming reduces burning risks from ragged pieces. Cutting too close leaves nothing to work with when crimping.
- Going all the way around, tuck the edges under: Tucking creates a double thickness at the rim which helps prevent sogginess and leaking. You will notice a firmer ring where the crust is reinforced, and that contributes to an attractive, durable slice. Forgetting to tuck often causes the filling to seep out during baking.
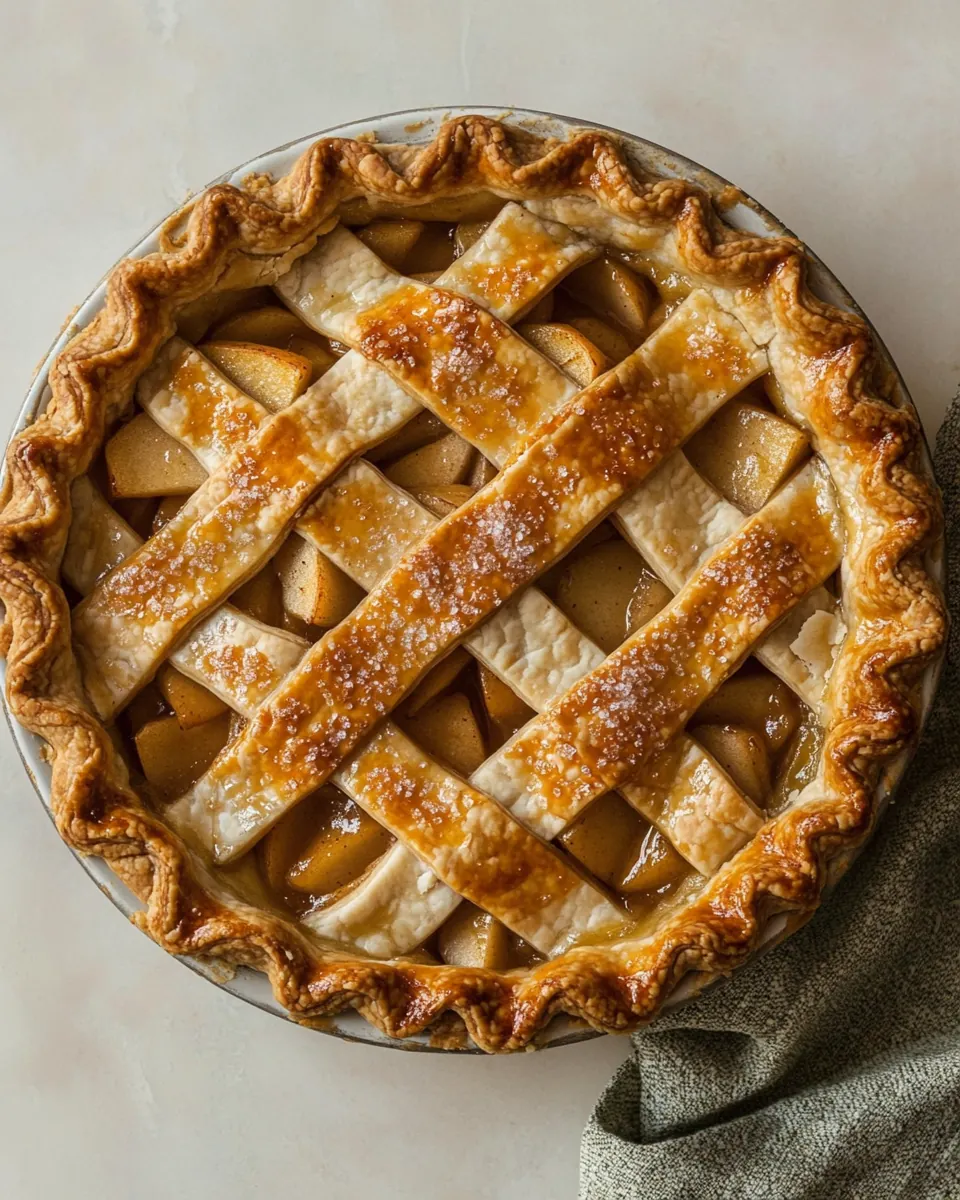
- To make a pronounced crimp, like you see pictured, set your thumb on the outside edge of the crust: This thumb anchor is the decorator’s secret to a uniform edge, and it gives the pie that bakery look. The pressure and motion should be firm but gentle, producing a repeating pattern that holds up in the oven. Pressing too hard can flatten the edge and reduce its flakiness.
- With your opposite pointer and thumb fingers, create a v, and push the two together: This pairing motion sculpts a neat, attractive border that captures juices and browns evenly. The small sound of dough meeting under your fingers is satisfying and reveals when you have the rhythm right. Heavy handed crimping can compress layers and reduce lamination.
- Repeat this process all the way around the pie crust: Consistency in the crimp makes for even baking and an attractive presentation. As you work, the rhythm will speed up and the crust will take on a professional finish. Uneven crimps can look messy and brown irregularly.
- Transfer to the freezer to chill for 30 minutes: A final chill firms the entire assembly so the lattice and edges keep their shape as the pie hits the oven. You will hear the faint click of the baking sheet as you slide it in, and after chilling the dough will feel taut. Skipping this step risks slumping and spreading of the crust during the initial high heat.
- Meanwhile, preheat the oven to 400 degrees F: High initial heat encourages strong puff and sets the crust structure quickly. You will sense the oven warming and smell a faint toasty scent as it climbs to temperature. Not preheating leads to uneven rise and can make the bottom underbaked.
- Brush the entire pie, liberally, with egg wash and sprinkle with turbinado sugar: The egg wash provides glossy color and helps the coarse sugar stick, producing a shimmering browned top. Brushing should be gentle and even to avoid puddles that can burn. Over brushing can cause the wash to drip into the filling and make the crust heavy.
- Transfer the pie to a baking sheet and place in the oven to for 20 to 25 minutes, until the edges are just lightly brown: The baking sheet helps catch any drips and promotes even heat circulation, while the initial hot stage sets the crust quickly. Watch the color change from pale to light golden at the edges during this phase. If the edges brown too quickly cover them with foil to prevent burning.
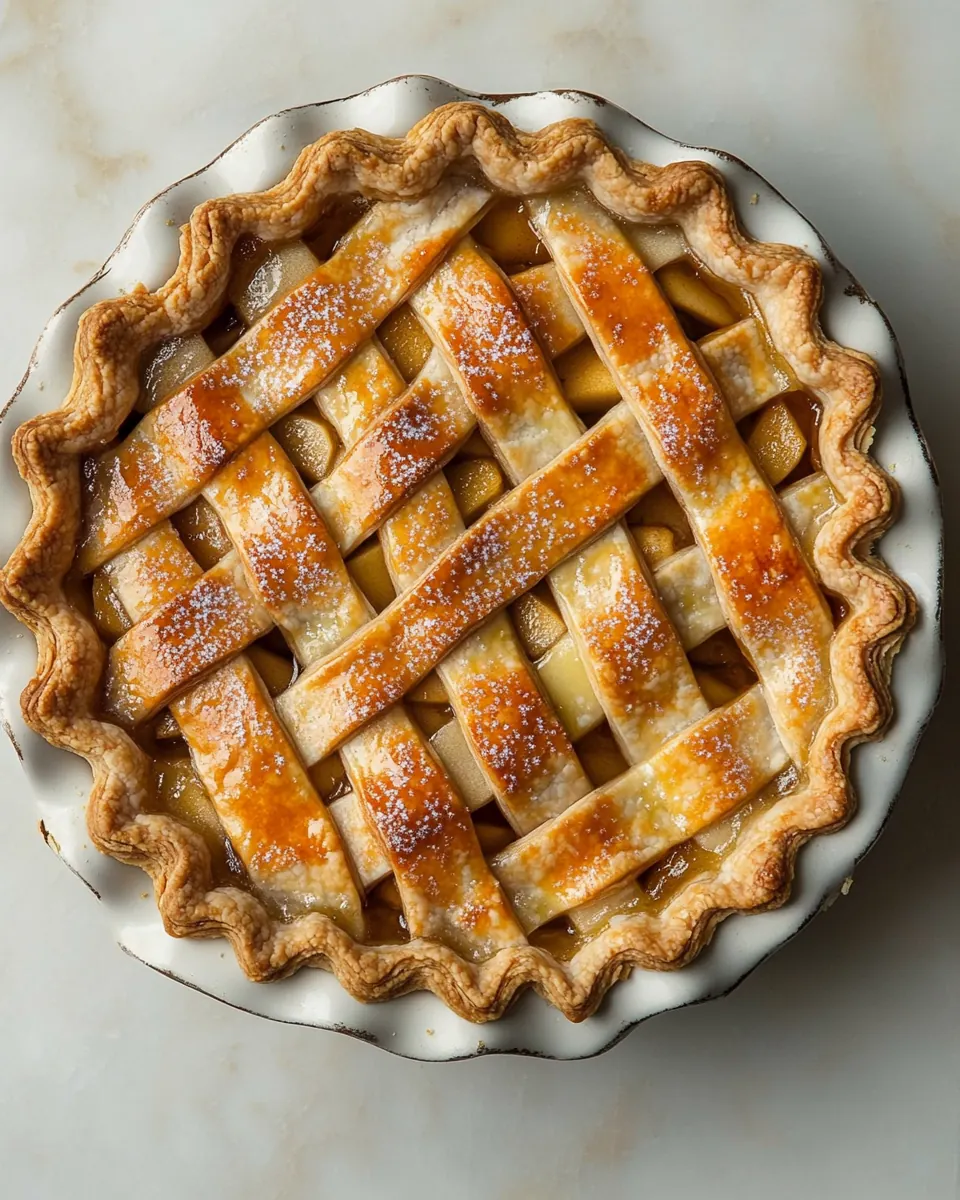
- Turn the heat down to 350 degrees F and bake for another 40 to 45 minutes, until the edges and top are deep golden brown: Lowering the temperature lets the filling finish cooking gently while the top develops a deep golden tone without burning. You will see bubbling juices and smell a rich caramel note as sugars concentrate. If the center is still mushy after this time consider tenting with foil and baking a bit longer, but avoid overbaking which dries the filling.
- Be sure to check on it intermittently, if at any time the pie crust begins to turn too dark, use foil to cover those areas to stop browning: Checking visually allows you to protect the crust while ensuring the filling fully cooks. I recommend glancing every 10 to 15 minutes toward the end. The common error is ignoring color development until it is too late and losing a beautifully browned rim to scorching.
- Allow to stand for at least two hours so it can firm up before slicing the pie: Resting time is crucial because the filling sets as it cools, preventing a runny slice. You will notice the bubbling slow and the filling thicken into a scoopable consistency. Cutting too soon produces sloppy slices and a mess on the plate.
- Serve with ice cream or a dollop of whipped cream: The warm pie with a cold scoop of ice cream creates a delightful contrast of temperature and texture, the ice cream melting slightly into the lattice pockets. A spoonful of whipped cream adds a silky note that complements the spiced fruit. Serving without a cool accompaniment is fine, but you miss the contrast many people love.
Customization Ideas
I love how a classic recipe like Homemade Apple Pie can be tailored to your mood without losing its soul. Below are ideas to nudge flavor, texture, and presentation so the pie reflects your personal style or the occasion.
- Switch the apple mix: Try more Honeycrisp for extra crunch or add a few Gala for sweetness, my preferred balance gives both structure and flavor contrast.
- Adjust the spice level: If you prefer more warmth, add a pinch of nutmeg or increase cinnamon slightly, but do so in small increments to keep the fruit bright.
- Make it ahead: Prepare the dough or assemble the pie and freeze it; bake from frozen adding a few extra minutes to the total time for convenience and stress free planning.
- Try a decorative edge: Use fluted crimps or rope edges for an elegant presentation, chilling the edge before baking helps the detail hold its shape.
- Brighten with citrus: A bit more lemon juice or a touch of zest can enhance the apple aromatics, just avoid overpowering the delicate fruit profile.
Accompaniments for Homemade Apple Pie
Serving Homemade Apple Pie is as much about setting a mood as it is about plating. A few simple choices make the experience more memorable, whether you are serving a casual family dessert or presenting a pie for a holiday table.
- Classic scoop: Serve warm pie slices with a scoop of vanilla ice cream, the melting ice cream creates a creamy, temperature contrast that guests adore.
- Whipped finish: A dollop of lightly sweetened whipped cream adds an airy complement to the dense filling and flaky crust.
- Holiday centerpiece: For Thanksgiving, present the pie on a wooden board with autumnal garnishes, making the pie a centerpiece that invites conversation.
- Casual weekend: Pair a slice with coffee for a relaxed afternoon treat, and keep extra slices loosely covered at room temperature for a day or two.
- Storage tips: Cover loosely with a towel at room temperature for up to two days to prevent sogginess, and if you must refrigerate, know the crust may soften due to moisture.
- Seasonal pairings: In fall, serve alongside spiced beverages and roasted nuts for a tasting spread that complements the pie’s warm spices.
FAQ
Conclusion
This Homemade Apple Pie stands out because it pairs a flaky, butter rich crust with a tender, well spiced apple filling that holds together beautifully. Try it soon for a crowd pleasing dessert that feels both comforting and elevated. I hope you enjoy the ritual of rolling, weaving, and baking as much as I do, and that each warm slice brings a little extra comfort to your table.
Homemade Apple Pie
Equipment
- 1 (9-inch) glass or stainless steel pie dish
Ingredients
- 2 1/2 cups all-purpose flour Provide structure and bulk to the crust and filling, creating a tender but sturdy pastry when mixed with fat and liquid; sifts or measures precisely for consistent texture and prevents dense results.
- 2 tablespoons white granulated sugar Add subtle sweetness and help balance flavors in the crust or filling; dissolves easily and aids slight browning on exposed pastry edges when sprinkled.
- 1 1/2 teaspoons kosher salt Enhance overall flavor depth and control seasoning in both crust and filling; strengthens dough by tightening gluten slightly and helps balance sweetness and acidity.
- 1 cup unsalted butter, cold and straight from the fridge Incorporate cold fat into flour to create flaky layers in the pastry; cutting into small pieces and keeping chilled prevents grease absorption and yields a tender, flaky crust.
- 3/4 cup very cold water, divided Bind the dough and hydrate flour while keeping pastry cold to prevent melting the butter; adding gradually ensures proper consistency and prevents a gummy crust.
- 1/2 small lemon, juiced (about 1 1/2 tablespoons) Brighten and preserve apple slices with acidity, preventing browning and adding a fresh citrus note that balances sweetness in the filling.
- 3 -4 whole medium to large apples (pink lady, gala and honeycrisp are my favorites), peeled, halved, cored and thinly sliced Provide the main fruit component, offering texture, sweetness, and natural pectin; selecting firm, flavorful varieties and slicing evenly ensures consistent baking and a pleasant mouthfeel.
- 1/4 cup all-purpose flour Thicken fruit juices released during baking to prevent a runny filling and help the slices cling together; dusting apples with flour before adding sugar promotes proper consistency.
- 1/2 cup light brown sugar Contribute caramel-like sweetness and moisture to the filling, complementing apples and enhancing browning for a rich, rounded flavor profile.
- 1 1/2 teaspoons ground cinnamon Impart warm, aromatic spice to the filling, accentuating the apples and rounding overall flavor; moderate use prevents overpowering the fruit.
- 1 teaspoon pure vanilla extract or 1/2 teaspoon vanilla paste Add floral, creamy sweetness and enhance the filling's aromatic profile; a small amount brightens flavor complexity without additional sweetness.
- 1/2 teaspoon kosher salt Season the filling to enhance and balance sweetness and spice; a pinch adjusts flavor depth and prevents blandness.
- 2 tablespoons crème fraîche or sour cream Introduce slight tang and richness to the filling, improving mouthfeel and lending a smooth, creamy note that balances sweet and acidic elements.
- 1 large egg, beaten (for egg wash) Promote even browning and glossy finish on the crust while helping toppings adhere; brushing lightly creates an attractive, golden appearance.
- 1 tablespoon turbinado sugar, for topping (optional) Provide a crunchy, sweet finish on the baked crust when sprinkled before baking; optional use adds texture and decorative sparkle to the pie.
Instructions
- In a large bowl, mix together the flour, sugar and salt. Using a box grater, grate the cold butter atop the flour mixture. Transfer to the freezer to chill for 10 minutes. Working quickly, and using your hands, break the butter bits into the flour until they’re evenly distributed and resemble the size of teeny, small peas. Add a 50% of the recommended water and mix.: The moment you begin, inhale the simple dry scent of all purpose flour and sugar blending, it signals the start of something comforting. You will notice a dusty, soft texture as you whisk the dry ingredients, which is important so the small pockets of butter have an even bed to sit in. Use a fork or whisk to distribute the salt and sugar so no single bite tastes odd. A key reason this step matters is to ensure even seasoning and consistent browning, and a common mistake is skipping a proper mix which leads to uneven salted or sweet spots in the crust.
- The mixture will be shaggy at this point. From here, add 1 tablespoon of water at a time until the dough comes together. Flour your counter and dump the dough onto it. Knead a few times more until it comes together into one cohesive mass.: Grating cold butter creates tiny, uniform flakes that stay cold and discrete, which later puff into flaky layers. You will hear the gentle rasp of butter against the grater and see pale butter ribbons falling into the flour, like little clouds. This texture keeps the dough from becoming greasy because the butter pieces remain solid until they melt in the oven. Avoid letting the butter soften in your hands, since warm butter will smear instead of forming pockets.
- Divide the dough, forming two discs. Wrap the discs in plastic wrap and transfer to the refrigerator to chill for at least 1 hour, ideally overnight.: Chilling the grated mixture makes the butter firmer and easier to break into pea sized bits, which enhances cold handling. You will notice the bowl cooling quickly, and the scent will be restrained, not buttery. This pause protects the texture, and skipping it risks warming the butter , causing a denser crust later.
- You're welcome to peel your apples. This is optional. I personally like to peel the apples. Halve the apples, remove the core and then slice the apples into thin 1/4-inch pieces. OR, you can use a mandolin and slice them very thinly. Add the apple slices to a large bowl. Squeeze in the lemon juice, being sure to catch any seeds.: As you work, the mixture should feel granular, not paste like. The tactile feedback is crucial, you will sense whether the butter has been evenly integrated or if there are still large chunks. The why here is simple, even pea sized bits ensure steam pockets during baking, creating flakiness. One common trouble is overworking the mix until it becomes homogenized, which prevents flakiness.
- Next, add the flour, brown sugar, cinnamon, vanilla extract and salt; toss until the apples are evenly coated.: Adding half the water at first allows you to hydrate the dough gradually so you can control the final consistency. You may hear the barely audible squeak of hydration as liquid meets flour. The dough should look shaggy and not fully smooth at this stage, and that is correct; it will come together with gentle handling. Pouring all the water at once is a frequent error that leads to an overly sticky dough.
- Add the crème fraîche and toss until it's evenly distributed throughout.: When the dough looks rough and uneven, that tells you the gluten has not been overdeveloped. At this point, the texture is your guide, not rigid timing. You will feel a slight tackiness but nothing that clings badly to your hands. This shaggy texture preserves tenderness, and if you knead too long you will develop gluten and end up with a tough crust which is a mistake to avoid.
- Remove the first disc of dough from the refrigerator and allow to come to room temperature for about 5 minutes. Liberally flour your work surface and rolling pin. Begin to roll the dough, being sure to rotate it every so often to avoid sticking, to a 13-inch round. Wrap the dough around the rolling pin and unroll it over the pie dish.: Slow addition of water lets you stop the moment the dough holds, preventing excess hydration. Watch for the dough to form a cohesive mass that moves away from the bowl sides, that visual cue means you are done. Over adding water can require more flour and leads to a dense pastry, which is a common pitfall.
- Gently fit the dough into the bottom and up the sides of the pie tin. Trim the dough around the pie tin, leaving about a 1/2-inch overhang. Recombine the scraps and set them aside. We’ll use them for the lattice. Transfer the pie shell to the refrigerator while you roll out the second disc.: The minute the dough hits the counter you will feel the coolness of the surface and its coarse resistance as you gently knead. Keep movements minimal, just a few turns to bring it together; you want a smooth exterior without activating too much gluten. The dough should feel slightly tacky but manageable. Excessive kneading will tighten the dough and reduce flakiness.
- Remove the second disc from the fridge and repeat the rolling process. Using a knife, cut the dough into 3-inch strips.: These brief folds create a uniform dough without overworking it. You will hear soft smacks and see the dough round up into a tidy ball, and that tactile finish is what you are aiming for. A cohesive mass ensures even rolling later on, but if you knead too long, the crust can spring back when rolled, a sign you overdeveloped the gluten.
- I cut as many 3-inch strips as I can. Reroll the scraps you have set aside, too, you’ll need all of the pie dough. (If at any time your pie dough becomes too soft, transfer to a cutting board and put in the fridge to chill so it’s easier to work with.) Fill your pie shell with the apple filling. Lay out 5 strips of pie dough on top of the filling, leaving about 1/2-inch of space in between them. Lay the remainder of your strips running perpendicular. This will give you a good idea of how it will go. Next, fold back every strip. Start one at the top, running horizontally. and weave it under and over, rotating, each strip running vertically. Repeat this process until you’ve worked your way through every strip. If my directions are confusing, go to Youtube. The videos on there are super easy to follow. Much easier than written instructions!: Cutting the dough and shaping discs helps with chilling and makes rolling easier. Press lightly into flat, even discs so they chill uniformly and don’t keep cold spots. A well chilled disc will sound slightly firm when tapped. If you leave one disc much thicker it will take longer to roll and may warm before you finish, which complicates handling.
- Trim the edges of the strips, being sure to leave about 1-inch overhand. Going all the way around, tuck the edges under. To make a pronounced crimp, like you see pictured, set your thumb on the outside edge of the crust. With your opposite pointer and thumb fingers, create a v, and push the two together. Repeat this process all the way around the pie crust.: Chilling relaxes the gluten and re solidifies the butter , which helps with flakiness and easier rolling. You will notice the surface firms as it chills, and the dough becomes less sticky and more cooperative. Overnight chilling deepens flavor too. Attempting to roll immediately after a brief rest often leads to tearing and a tough crust.
- Transfer to the freezer to chill for 30 minutes. Meanwhile, preheat the oven to 400 degrees F. Brush the entire pie, liberally, with egg wash and sprinkle with turbinado sugar.: The aroma of freshly cut apples is bright and fruity; I prefer peeling because it makes the filling silkier. The thin quarter inch slices should be even so they cook consistently, and if you use a mandolin you will get uniform pieces quickly. A frequent mistake is inconsistent slice thickness which gives you some bites that are mushy and others that are underdone.
- Transfer the pie to a baking sheet and place in the oven to for 20 to 25 minutes, until the edges are just lightly brown. Turn the heat down to 350 degrees F and bake for another 40 to 45 minutes, until the edges and top are deep golden brown. Be sure to check on it intermittently, if at any time the pie crust begins to turn too dark, use foil to cover those areas to stop browning. Allow to stand for at least two hours so it can firm up before slicing the pie.: Slicing to a uniform thickness ensures every piece softens at the same rate and helps the filling structure properly. The sound of the knife through apple is crisp and clean, and the citrus tang from the lemon juice will brighten the cut fruit. If you slice too thin they may disintegrate, and if too thick they may remain undercooked in the center.
- Serve with ice cream or a dollop of whipped cream.: Using a mandolin speeds the process and gives thin, even slices that layer beautifully. As you slide each apple the thin ribbons will fan across your bowl and glisten with juice. Be mindful of safety and use a guard, because slicing quickly without protection leads to mishaps, which I have seen often.
- Add the apple slices to a large bowl: Tossing the sliced apples in a roomy bowl prevents bruising and allows you to incorporate the other filling ingredients without crushing them. The large bowl also gives you space to taste and adjust seasoning if needed, and it keeps the slices airy until you are ready to fill the pie. Crowding the bowl can bruise the fruit and cause extra juices.
- Squeeze in the lemon juice, being sure to catch any seeds: The bright citrus aroma will lift the mixture immediately and you may notice tiny beads of juice clinging to the slices. This acid balances the sugars and helps the apples retain color and brightness during baking. Forgetting the lemon can leave the filling tasting flat, and leaving seeds in will create unwelcome bitter bites.
- Next, add the flour, brown sugar, cinnamon, vanilla extract and salt: The dry coating will begin to hug each slice, and you will feel the mixture change from slick fruit to a lightly dusted assembly that promises caramelization. These components thicken and season the filling, ensuring it tastes complete after baking. A common error is under mixing which leaves pockets of dry flour or unevenly spiced fruit.
- Toss until the apples are evenly coated: Proper tossing ensures every mouthful has a balanced flavor and the filling will thicken evenly. You will hear soft shuffles and see glossy slices joined by sugar and spice, which indicates readiness. If some pieces remain uncoated they may undercook or explode with uneven texture.
- Add the crème fraîche and toss until it's evenly distributed throughout: The addition of crème fraîche lends a silky, slightly tangy richness that rounds the filling, making each bite feel decadent without being cloying. It will bind the sugars and help create a pleasant sauce as the pie bakes. Omitting this will leave the filling less cohesive and a bit more syrupy.
- Remove the first disc of dough from the refrigerator and allow to come to room temperature for about 5 minutes: A brief rest softens the edges just enough to make rolling easier while keeping the core cold. You will notice the disc becomes slightly more pliable and less likely to crack when rolled. If you wait too long the butter will soften too much, making it harder to achieve flakiness.
- Liberally flour your work surface and rolling pin: The floured surface prevents sticking and lets you roll confidently to the target size. You will hear a gentle scraping as the pin glides and see the dough spread into a smooth circle. Using too much flour will dry the dough, while too little causes sticking and tearing.
- Begin to roll the dough, being sure to rotate it every so often to avoid sticking, to a 13 inch round: Rolling to size is visual work, and you should see a uniform thickness across the circle; thin areas will brown faster. Rotate and dust as needed, and aim for even pressure so the crust bakes uniformly. Over rolling can make the crust paper thin and prone to tearing when transferred.
- Wrap the dough around the rolling pin and unroll it over the pie dish: This transfer technique preserves the shape and prevents stretching. You will feel the satisfying give as the dough settles into the dish and conforms to its contours. Stretching the dough during transfer will cause shrinkage when baked, which is a common problem.
- Gently fit the dough into the bottom and up the sides of the pie tin: Ease the dough into place rather than stretching, pressing gently to remove large air pockets while keeping the surface smooth. The tactile process ensures the crust sits flush against the dish for even baking. If you press too hard you can compress layers and lose flakiness.
- Trim the dough around the pie tin, leaving about a 1/2 inch overhang: Leaving a modest overhang gives you material to seal and crimp the edge, which helps contain the filling. The trimmed edge should be neat; ragged edges can burn and look uneven. Cutting too close leaves nothing to crimp and can cause filling leaks.
- Recombine the scraps and set them aside: Saving scraps is practical for creating lattice strips or decorative edges, and it keeps waste to a minimum. Rechilling scraps makes them easier to reroll. Trying to reroll warm scraps leads to sticky, difficult dough that loses structure.
- Transfer the pie shell to the refrigerator while you roll out the second disc: Chilling the shell firms it up so it holds shape when filled and prevents slumping during baking. You will notice it becomes taut and less tacky, which makes filling neat and easy. Skipping this chill can result in a soggy bottom and misshapen crust.
- Remove the second disc from the fridge and repeat the rolling process: Rolling the top disc while the bottom is chilled ensures both pieces are handled at optimal temperatures, preserving flakiness. Aim for consistent thickness so your lattice or cover bakes evenly. If the second disc becomes too warm, pop it back in the fridge before cutting strips.
- Using a knife, cut the dough into 3 inch strips: These strips will form the lattice top, and you should feel the clean give of even cuts. Uniform strip width makes weaving straightforward and yields an attractive, even bake. Uneven strips complicate weaving and produce inconsistent baking across the top.
- I cut as many 3 inch strips as I can: Maximizing usable strips minimizes rerolling and cold work. As you cut, stack neatly and keep them chilled so they stay crisp when woven. If strips get warm, they will sag while weaving, making the top sloppy and harder to crimp.
- Reroll the scraps you have set aside, too, you’ll need all of the pie dough: Reworking scraps lets you use every bit of dough and keeps the aesthetic consistent. Chill these rerolled pieces briefly so they are firm enough to handle. Overworking scraps will toughen them and make the top less tender.
- Fill your pie shell with the apple filling: Mounding the filling in the center and spreading slightly toward the edges helps avoid leaks and ensures even baking. You will hear soft settling sounds as the apples nest into the shell and see juices begin to glisten, signaling readiness. Overpacking the pie can lead to spilled filling and uneven cooking.
- Lay out 5 strips of pie dough on top of the filling, leaving about 1/2 inch of space in between them: Placing the first set of strips gives a foundation for the lattice and lets you judge spacing visually. The contrast of dough and fruit looks appealing already, and the gaps will allow steam to escape. Crowding strips too close will prevent proper evaporation and cause a soggy top.
- Lay the remainder of your strips running perpendicular: The perpendicular strips create the woven lattice that lets juices bubble through while maintaining structure. This intersecting pattern traps heat and promotes even caramelization. If strips are not well chilled they will stretch and tear while weaving.
- This will give you a good idea of how it will go: Previewing the lattice helps you plan the final weave and trim cleanly for a neat edge. You will see the visual rhythm of strips and can adjust spacing before committing. Failing to preview often leads to awkward final adjustments under pressure.
- Next, fold back every strip: Folding strips back as you weave lets you interlace cleanly and maintain tension so the lattice looks crisp. The gentle fold and tuck sound and feel precise, and this technique prevents messy overlaps. Skipping the fold method frequently results in a sloppy finish and uneven baking.
- Start one at the top, running horizontally: Beginning from the top gives you control over the weave and helps align strips for the entire lattice. The first strip sets the grid, so ensure it sits straight. A crooked first strip often forces awkward corrections later.
- and weave it under and over, rotating, each strip running vertically: The rhythmic motion of weaving creates a stable top that vents properly and bakes attractively. As you alternate under and over, you will notice a satisfying firming of the top that signals success. If you rush this step you can tear strips or create gaps that spill filling.
- Repeat this process until you’ve worked your way through every strip: Continue patiently, and the lattice will come together into a coherent pattern that bakes evenly and looks professional. The completed weave should sit neatly and hold the filling well. Trying to hurry often results in uneven coverage and structural weaknesses.
- If my directions are confusing, go to Youtube: Watching the weaving in motion can clarify hand positions and timing, since video shows the tactile sequence I describe. Seeing the process helps some bakers avoid common fumbling with strips. Relying only on text when you learn visually may make the first attempt harder, but practice makes it intuitive.
- The videos on there are super easy to follow: A short demonstration will reveal subtle wrist and finger techniques for clean weaving and crimping that text cannot fully convey. Observing those movements will reduce anxiety when you try it yourself and give you confidence. Expect a learning curve, and know that even imperfect lattices taste great.
- Much easier than written instructions: The visual reference anchors the process and helps you see how tight to pull strips and how to tuck edges without stretching them. This is particularly useful for the first few pies you make until the motions become second nature. Avoid copying poor technique videos; choose reputable sources for guidance.
- Trim the edges of the strips, being sure to leave about 1 inch overhand: Leaving that inch gives you material to tuck and crimp, creating a secure seal that looks finished. The trimmed edge should be even, and neat trimming reduces burning risks from ragged pieces. Cutting too close leaves nothing to work with when crimping.
- Going all the way around, tuck the edges under: Tucking creates a double thickness at the rim which helps prevent sogginess and leaking. You will notice a firmer ring where the crust is reinforced, and that contributes to an attractive, durable slice. Forgetting to tuck often causes the filling to seep out during baking.
- To make a pronounced crimp, like you see pictured, set your thumb on the outside edge of the crust: This thumb anchor is the decorator’s secret to a uniform edge, and it gives the pie that bakery look. The pressure and motion should be firm but gentle, producing a repeating pattern that holds up in the oven. Pressing too hard can flatten the edge and reduce its flakiness.
- With your opposite pointer and thumb fingers, create a v, and push the two together: This pairing motion sculpts a neat, attractive border that captures juices and browns evenly. The small sound of dough meeting under your fingers is satisfying and reveals when you have the rhythm right. Heavy handed crimping can compress layers and reduce lamination.
- Repeat this process all the way around the pie crust: Consistency in the crimp makes for even baking and an attractive presentation. As you work, the rhythm will speed up and the crust will take on a professional finish. Uneven crimps can look messy and brown irregularly.
- Transfer to the freezer to chill for 30 minutes: A final chill firms the entire assembly so the lattice and edges keep their shape as the pie hits the oven. You will hear the faint click of the baking sheet as you slide it in, and after chilling the dough will feel taut. Skipping this step risks slumping and spreading of the crust during the initial high heat.
- Meanwhile, preheat the oven to 400 degrees F: High initial heat encourages strong puff and sets the crust structure quickly. You will sense the oven warming and smell a faint toasty scent as it climbs to temperature. Not preheating leads to uneven rise and can make the bottom underbaked.
- Brush the entire pie, liberally, with egg wash and sprinkle with turbinado sugar: The egg wash provides glossy color and helps the coarse sugar stick, producing a shimmering browned top. Brushing should be gentle and even to avoid puddles that can burn. Over brushing can cause the wash to drip into the filling and make the crust heavy.
- Transfer the pie to a baking sheet and place in the oven to for 20 to 25 minutes, until the edges are just lightly brown: The baking sheet helps catch any drips and promotes even heat circulation, while the initial hot stage sets the crust quickly. Watch the color change from pale to light golden at the edges during this phase. If the edges brown too quickly cover them with foil to prevent burning.
- Turn the heat down to 350 degrees F and bake for another 40 to 45 minutes, until the edges and top are deep golden brown: Lowering the temperature lets the filling finish cooking gently while the top develops a deep golden tone without burning. You will see bubbling juices and smell a rich caramel note as sugars concentrate. If the center is still mushy after this time consider tenting with foil and baking a bit longer, but avoid overbaking which dries the filling.
- Be sure to check on it intermittently, if at any time the pie crust begins to turn too dark, use foil to cover those areas to stop browning: Checking visually allows you to protect the crust while ensuring the filling fully cooks. I recommend glancing every 10 to 15 minutes toward the end. The common error is ignoring color development until it is too late and losing a beautifully browned rim to scorching.
- Allow to stand for at least two hours so it can firm up before slicing the pie: Resting time is crucial because the filling sets as it cools, preventing a runny slice. You will notice the bubbling slow and the filling thicken into a scoopable consistency. Cutting too soon produces sloppy slices and a mess on the plate.
- Serve with ice cream or a dollop of whipped cream: The warm pie with a cold scoop of ice cream creates a delightful contrast of temperature and texture, the ice cream melting slightly into the lattice pockets. A spoonful of whipped cream adds a silky note that complements the spiced fruit. Serving without a cool accompaniment is fine, but you miss the contrast many people love.
Notes
- Switch the apple mix: Try more Honeycrisp for extra crunch or add a few Gala for sweetness, my preferred balance gives both structure and flavor contrast.
- Adjust the spice level: If you prefer more warmth, add a pinch of nutmeg or increase cinnamon slightly, but do so in small increments to keep the fruit bright.
- Make it ahead: Prepare the dough or assemble the pie and freeze it; bake from frozen adding a few extra minutes to the total time for convenience and stress free planning.
- Try a decorative edge: Use fluted crimps or rope edges for an elegant presentation, chilling the edge before baking helps the detail hold its shape.
- Brighten with citrus: A bit more lemon juice or a touch of zest can enhance the apple aromatics, just avoid overpowering the delicate fruit profile.