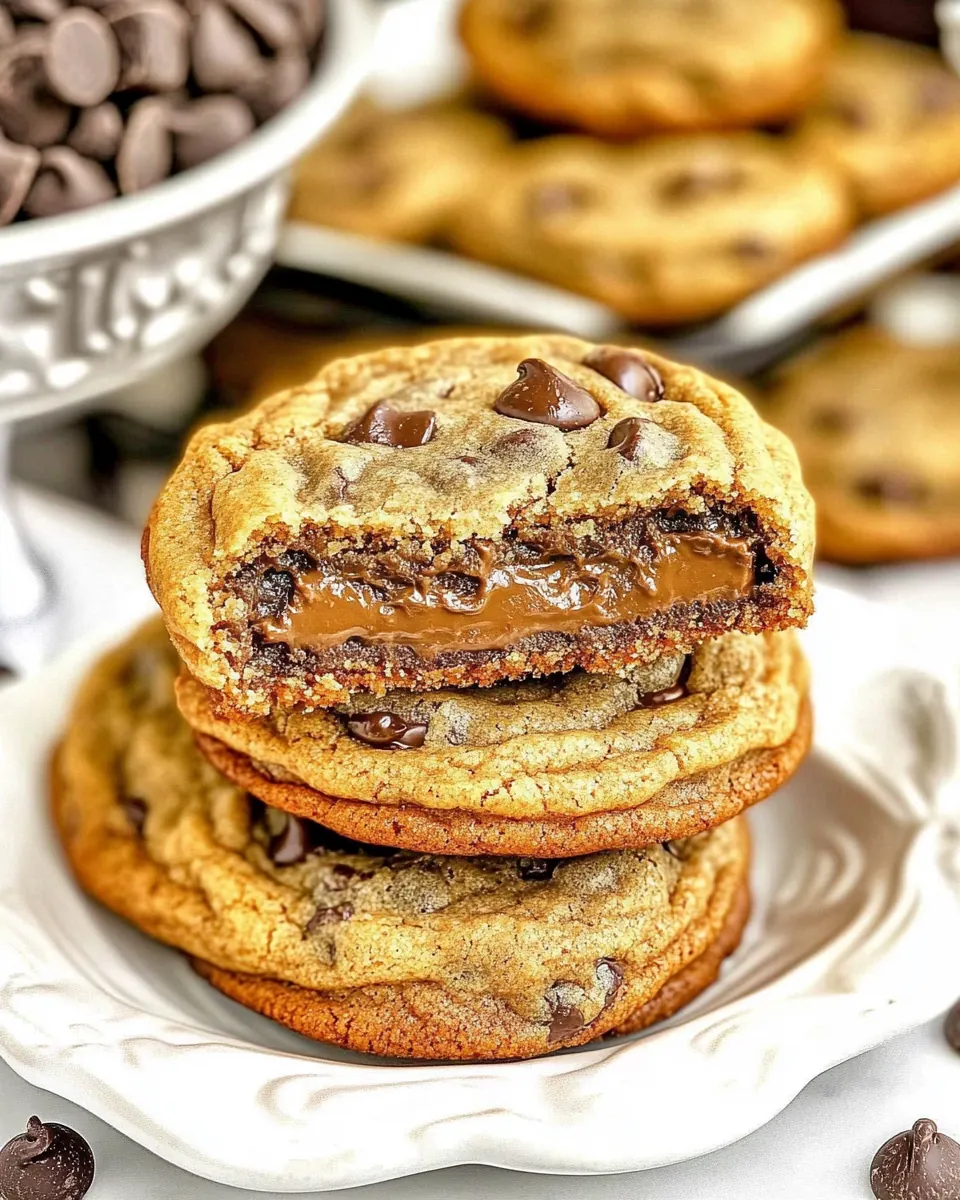
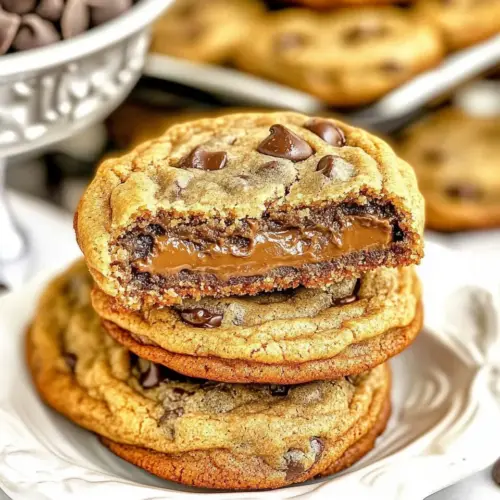
Reese’s Stuffed Giant Chewy Chocolate Chip Cookies
Reese’s Stuffed Giant Chewy Chocolate Chip Cookies started showing up in my kitchen on rainy Sundays, when I wanted something comforting and a little bit dramatic.
I remember the first time I hid a peanut butter cup inside a hulking, chewy cookie, watching the chocolate melt and the peanut center remain soft and slightly yielding, and thinking this is pure joy. Those afternoons taught me how small tweaks, like chilling the dough and using both an egg and an egg yolk, change the texture from ordinary to undeniably chewy. I love how the cookie cracks on top while the middle stays tender, and how the reheated leftovers become gooey again.
Friends have called these cookies over the top, but for me that is the point. The ritual of scooping a generous portion of dough, wrapping it entirely around a tiny surprise, and then waiting for the oven to work its magic is part of the fun. I also appreciate how forgiving the recipe is; if you prefer a mix of semi sweet and milk chocolate chips, it works beautifully. These cookies have become my go to when I want an easy impressive dessert to bring to a potluck, or when I need a pick me up that feels luxurious without being complicated.
Recipe Snapshot
32 mins
15 mins
17 mins
Medium
200 kcal
American
Gluten-Free, Low FODMAP
Desserts
Mixing bowl, Sifter, Measuring cups, Baking sheet, Parchment paper, Wire rack
Why This Reese’s Stuffed Giant Chewy Chocolate Chip Cookies Is So Good
Generous, playful presentation
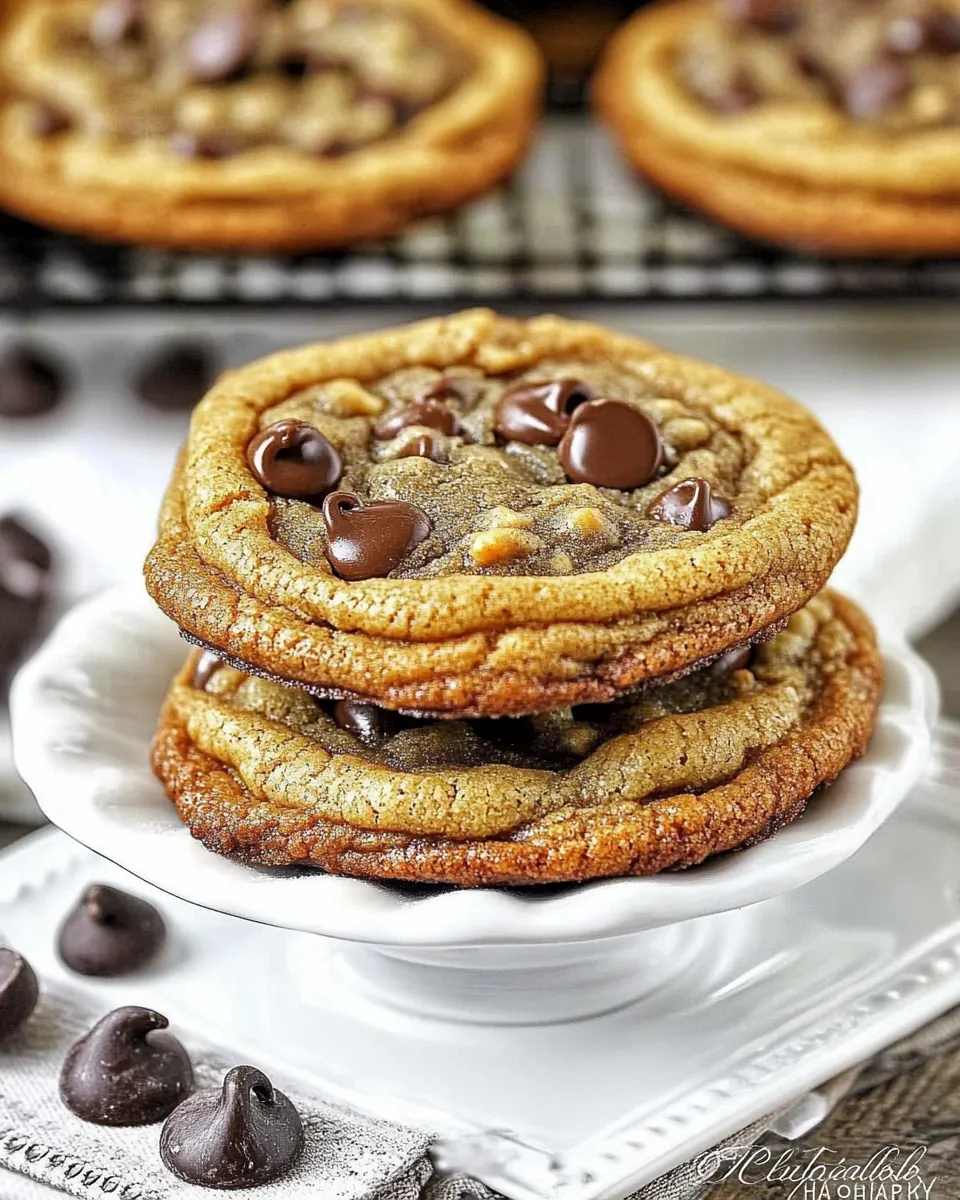
I love that Reese’s Stuffed Giant Chewy Chocolate Chip Cookies are inherently showy. They are large, slightly cracked on top, and reveal a soft center when torn open. This recipe turns a humble cookie into a centerpiece, and I find guests smile before they take a bite.
Texture that balances chew and structure
The combination of an egg plus an egg yolk, along with a short rest in the fridge, gives the dough enough moisture and binding to stay chewy, while the edges firm up. I appreciate that you get a crisp rim and a tender middle, which makes each bite interesting. When I bake them, the aroma changes from buttery to toasty in minutes, signaling they are nearly ready.
Built in surprise element
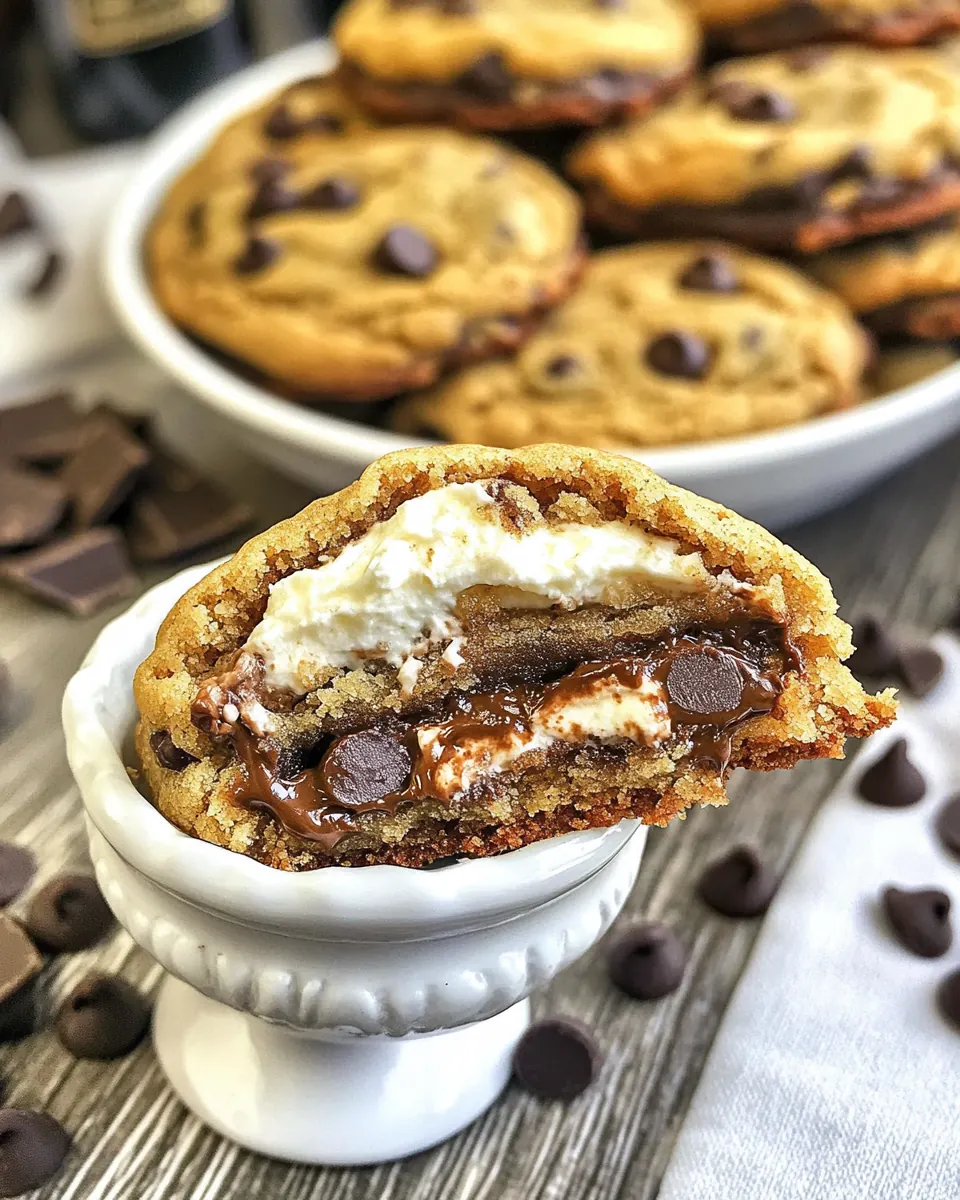
Wrapping a Reese’s Peanut Butter Cups inside each mound of dough delivers a fun contrast. I like the way the slightly salty peanut butter pairs with the sweet chocolate chips. Serving them warm reveals a molten center, and the act of unwrapping and baking is part of the experience I enjoy sharing with others.
Flexible on chocolate choices
Whether you use semi sweet chocolate chips or milk chocolate chips, the recipe adapts. I sometimes mix the two, and the cookie flavor becomes more layered. This flexibility makes the recipe approachable, since you can use what you have and still get excellent results.
Simple technique, big payoff
The methods are straightforward, and I always find the small number of steps practical for a home baker. From sifting the dry ingredients to chilling the dough, each action has a purpose. I value recipes that reward attention to small details, and this one does exactly that.
Ingredients to Make Reese’s Stuffed Giant Chewy Chocolate Chip Cookies
These ingredients form a straightforward but purposeful cast. The flour and leavening agents provide structure and lift, while the corn starch and extra yolk help create a tender, chewy crumb. The sugars and butter supply moisture and caramelized flavor, and the chips and peanut butter cups deliver texture and pockets of melty indulgence. Together they produce a cookie that is sturdy enough to encase a filling, yet soft in the center.
- 2 cups all purpose flour: Provide structure and bulk to the cookie dough, forming the base that holds other ingredients together. Combine with leavening and fats to create the proper crumb and chewiness. Use measured scoops to maintain consistent cookie size and bake times.
- 1/2 tsp baking soda: Leaven gently by reacting with acidic components to create a slight lift and tender crumb in the cookies. Balance must be struck to avoid over-rising, which can cause thin, flat cookies. Dissolve evenly into the dry mixture for uniform texture.
- 1/2 tsp salt: Season subtly to enhance overall flavor while balancing the sweetness of sugars and chocolate. Help strengthen gluten development slightly when mixed with flour, contributing to the cookie's structure. Use the listed amount to avoid an overly salty taste.
- 2 tsp corn starch: Tenderize the final texture by inhibiting gluten formation and retaining moisture, resulting in a softer, chewier cookie. Disperse evenly with the dry ingredients to ensure consistent results throughout the dough. Use corn starch particularly for a pillowy interior.
- 1 tbsp vanilla: Provide aromatic depth and a warm, sweet perfume that complements chocolate and peanut butter flavors. Add to the wet ingredients to evenly distribute flavor throughout the dough. Use pure vanilla for the most pronounced, natural taste.
- 3/4 cup unsalted buttermelted: Add rich fat that contributes to flavor, tenderness, and mouthfeel while aiding spread during baking; melted form blends easily with sugars and eggs. Ensure it is unsalted to control overall saltiness, and incorporate at the listed temperature for proper emulsion. Adjust mixing technique to avoid overbeating, preserving chewiness.
- 1 cup brown sugar: Impart deep, caramel-like sweetness and moisture, helping create a chewy texture and rich flavor profile. Work well creamed with the fat to incorporate air and develop the cookie's lift and softness. Pack firmly when measuring for accurate sweetness and moisture balance.
- 1/2 cup white sugar: Deliver clean, crystalline sweetness and contribute to caramelization and spreading during baking. Combine with brown sugar to balance moisture and texture while enhancing crisp edges. Measure precisely to avoid overly thin cookies.
- 1 egg plus 1 egg yolk, room temperature: Bind ingredients and provide moisture, richness, and structure while contributing to chewiness; the extra yolk increases fat for a tender crumb. Bring eggs to room temperature for better incorporation and emulsification with fats and sugars. Beat appropriately to avoid overmixing the dough.
- 1 1/2 cups semi-sweet chocolate chips or milk chocolate chips or a combination of chips: Introduce pockets of melted chocolate that provide bursts of sweetness and texture contrast throughout the cookies. Choose semi–sweet, milk, or a combination to control overall chocolate intensity and sweetness level. Fold in gently to distribute chips without overworking the dough.
- 12 snack size Reese's Peanut Butter Cups: Add rich peanut butter centers that offer a salty-sweet contrast and a distinctive Reese's flavor when enclosed in the dough. Nest each snack–size cup in the dough to create a filled cookie experience and prevent excessive leakage by wrapping dough completely. Chill if needed to maintain shape during baking.
How to Make Reese’s Stuffed Giant Chewy Chocolate Chip Cookies
I like to approach baking these cookies with a calm, organized workflow. Gather everything, measure carefully, and keep an eye on the chilling and baking times. The following steps expand the directions so you can sense when you are doing it right, and avoid common pitfalls along the way.
- Combine the dry ingredients (flour, baking soda, salt, corn starch) and sift together.: The airiness after sifting is immediately noticeable, and the flour smells faintly of grain while the mixture feels light between your fingers, which aids even mixing later. Sifting eliminates lumps and blends the leaveners into the flour uniformly, ensuring consistent rise and texture across all cookies. If you skip sifting, you may see pockets of unincorporated baking soda, which can create small, bitter-tasting spots. A visual cue that you are done is a uniform pale color and a fine, powdery texture. For troubleshooting, if the dough later seems too dense, double check that you did not compact the flour when measuring.
- Cream butter with sugars together in a large mixing bowl.: When creaming, you should hear a soft scraping and see the mixture go from glossy to pale and slightly fluffy, and the scent changes to a warm, buttery sweetness that hints at caramel. This step incorporates air which helps the cookies lift and creates a tender crumb. Use room temperature butter so it blends easily; cold butter will not cream and melted butter will not trap air. A common error is over beating, which can lead to overly soft cookies that spread too much. Stop when the texture looks lighter and holds a ribbon for a second when lifted.
- Beat in the vanilla and then add in the egg and egg yolk and continue beating until the mixture is light and creamy.: As you add the vanilla , the aroma brightens and becomes more complex. The emulsifying action of the egg and egg yolk creates a smoother, almost glossy batter feel. This step ensures flavors meld and the fats and proteins bind, which helps the dough hold together when wrapping the peanut butter cups. If eggs are cold they may not incorporate fully and can lead to a curdled look, so room temperature is important. If the mix looks separated, stop and scrape the bowl, then beat gently until cohesive.
- Add in the dry ingredients and mix just until combined.: You will notice the dough take on a firmer texture as the dry ingredients absorb moisture; it should come away from the sides of the bowl but remain soft and pliable. Mixing just until combined prevents overdevelopment of gluten, keeping the cookies tender rather than tough. Over mixing here is the most common mistake and will yield chewier but denser cookies. The visual cue is that streaks of flour disappear and the dough looks uniform, with no visible dry bits.
- Stir in the chocolate chips.: The chocolate chips should be evenly distributed, creating little islands of chocolate throughout the dough that will soften and ooze as they bake. You can hear a slight clinking as chips mingle into the batter, and the scent begins to promise chocolate with every stir. Folding is preferable to vigorous stirring to avoid breaking the chips and to maintain dough texture. A troubleshooting note is to avoid adding chips when the batter is too warm, which could make them sink or smear.
- Scoop out about 1/4 cup of dough and wrap around a Reese's peanut butter cup making sure to seal the edges.: The dough ball should feel dense yet pliable, and when you press it around the Reese's Peanut Butter Cups it should conform smoothly without tearing. Sealing the edges fully prevents the filling from leaking during baking. If the dough is sticky and refuses to shape, chill it briefly to firm up. A common error is leaving gaps which allow the peanut butter cup to escape and create a melt on the pan. The correct feel is a cohesive dough sphere with no visible gap where the candy is enclosed.
- Continue until all dough has been used.: Keep an eye on uniformity so cookies bake evenly; each should be approximately the same size and weight. A tray with uniform mounds produces consistent browning and texture across the batch. If some mounds are much larger, they may need longer baking and can burn on the edges before the center sets. I recommend weighing or using the same scoop for consistency.
- Place cookies on a parchment lined baking sheet and refrigerate for 20-30 minutes.: Chilling firms the dough and solidifies the fats, which reduces spread and yields a chewier center. You will notice the surface become less glossy and more matte as they chill. If you skip this, the cookies will likely flatten and the filling may break through. For troubleshooting, if your fridge is very cold and the dough becomes rock hard, let it sit a few minutes before baking so it will start to relax into the oven properly.
- Preheat oven to 325 degrees.: The oven should be fully heated so the cookies begin setting immediately, forming a defined edge and a tender center. A properly preheated oven encourages even color and texture, and you will smell a faint buttery warmth when it reaches temperature. Using a thermometer to verify accuracy is helpful, as an oven running hot will brown edges too fast while leaving centers underdone. If you are unsure of your oven calibration, reduce initial baking time and check progress early.
- Space cookies about 3 inches apart and bake for 15 to 17 minutes.: As the cookies bake, you will see the edges set and take on a golden tone while the centers remain slightly domed and soft. The surface may crack gently, which is a good sign of proper rise and chew. Avoid overcrowding which causes cookies to run into each other and bake unevenly. If the centers wobble excessively after the shorter time, add a couple more minutes rather than increasing heat, which can overbrown edges.
- The cookies are done when the edges are golden. Let the cookies cool on the baking sheet for a few minutes and then transfer to a wire racks to finish cooling.: The moment of doneness is subtle, with edges firm and centers still a touch soft, and the aroma turns toasty and sweet. Cooling briefly on the sheet lets the structure set, while transferring to a wire rack finishes the process so air circulates and prevents sogginess. Moving them too soon can cause them to break, while leaving them too long on a hot pan can overcook the bottom. Aim for a few minutes before transferring for best texture.
- Enjoy!: Warm, slightly gooey centers and crisp edges create a contrast that fills the kitchen with a comforting aroma. When you bite in, the peanut butter cup center should be soft but not completely liquid, and the chocolate chips will have softened into molten ribbons. Serve slightly warm for the best experience, and watch people light up when they discover the hidden treat. If you encounter leakage, next time enfold the dough more tightly and chill a bit longer before baking.
Making Adjustments

I like to offer practical adjustments so you can adapt these cookies to your pantry and preferences. The list below expands on small swaps and technique changes that keep the spirit of the recipe intact while letting you personalize texture and flavor.
- Swap chocolate types Use a combination of semi sweet chocolate chips and milk chocolate chips for a more nuanced chocolate profile, blending depth with creaminess, and keep the same total amount so the bake remains balanced.
- Chill longer for thicker cookies If you prefer a significantly thicker cookie, chill the shaped dough for up to two hours, which firms the fats and reduces spread, producing a taller, chewier center without changing bake time drastically.
- Prevent leaks When wrapping the Reese’s Peanut Butter Cups, press the dough firmly around the candy and smooth seams, then place seam side down on the sheet to reduce the chance of the filling escaping while baking.
- Adjust bake time for size If you make slightly larger or smaller cookies than specified, modify the bake time in small increments rather than altering temperature, checking at the earlier time to avoid overbaking.
- Store properly Once fully cooled, keep cookies in an airtight container at room temperature for up to three days, or freeze for longer storage, placing parchment between layers to avoid sticking.
How to Serve Reese’s Stuffed Giant Chewy Chocolate Chip Cookies
These cookies are versatile and festive, perfect for many occasions. Serve them warm for the gooey center, or room temperature for easier transport. They work well at casual gatherings or as an indulgent treat after dinner. Below are ideas and practical serving suggestions to match the moment.
- Serve warm with coffee Present one slightly warmed cookie alongside a cup of coffee for a comforting dessert pairing that highlights the melting chocolate and soft peanut butter interior.
- Plate for a celebration Arrange cookies on a platter for birthdays or potlucks, spacing them so guests can easily pick one without disturbing others, and include napkins because they are wonderfully messy.
- Pack for picnics Let cookies cool completely, then layer them with parchment in a tin for an easy picnic sweet, which travels well and stays fairly stable for a few hours.
- Afternoon snack Offer a single cookie with a glass of milk as a satisfying snack for kids and adults alike, the combination of textures and flavors making it feel like a special treat.
- Storage and reheating Keep cooled cookies airtight at room temperature up to three days, or freeze; to reheat, gently warm in a low oven for a few minutes so the center becomes gooey again without overcooking the edges.
- Occasions These are ideal for casual gatherings, bake sales, or anytime you want an indulgent dessert; they fit seasons and celebrations because they are comforting and shareable.
FAQ
Conclusion
These cookies stand out because they combine the classic comfort of a chewy chocolate chip cookie with the joyful surprise of a hidden peanut butter cup. The interplay of textures, from a slightly crisp edge to a tender, melty center, makes them irresistible for sharing or indulging alone. I hope you give this recipe a try and enjoy the little moments of delight when someone discovers the hidden center. Baking them is both simple and rewarding, and the reactions you get when they are warm from the oven are the best part of the process.
Reese’s Stuffed Giant Chewy Chocolate Chip Cookies
Equipment
- Mixing Bowl
- Sifter
- Measuring Cups
- Baking Sheet
- Parchment Paper
- Wire Rack
Ingredients
- 2 cups all purpose flour Provide structure and bulk to the cookie dough, forming the base that holds other ingredients together. Combine with leavening and fats to create the proper crumb and chewiness. Use measured scoops to maintain consistent cookie size and bake times.
- 1/2 tsp baking soda Leaven gently by reacting with acidic components to create a slight lift and tender crumb in the cookies. Balance must be struck to avoid over-rising, which can cause thin, flat cookies. Dissolve evenly into the dry mixture for uniform texture.
- 1/2 tsp salt Season subtly to enhance overall flavor while balancing the sweetness of sugars and chocolate. Help strengthen gluten development slightly when mixed with flour, contributing to the cookie's structure. Use the listed amount to avoid an overly salty taste.
- 2 tsp corn starch Tenderize the final texture by inhibiting gluten formation and retaining moisture, resulting in a softer, chewier cookie. Disperse evenly with the dry ingredients to ensure consistent results throughout the dough. Use corn starch particularly for a pillowy interior.
- 1 tbsp vanilla Provide aromatic depth and a warm, sweet perfume that complements chocolate and peanut butter flavors. Add to the wet ingredients to evenly distribute flavor throughout the dough. Use pure vanilla for the most pronounced, natural taste.
- 3/4 cup unsalted buttermelted Add rich fat that contributes to flavor, tenderness, and mouthfeel while aiding spread during baking; melted form blends easily with sugars and eggs. Ensure it is unsalted to control overall saltiness, and incorporate at the listed temperature for proper emulsion. Adjust mixing technique to avoid overbeating, preserving chewiness.
- 1 cup brown sugar Impart deep, caramel-like sweetness and moisture, helping create a chewy texture and rich flavor profile. Work well creamed with the fat to incorporate air and develop the cookie's lift and softness. Pack firmly when measuring for accurate sweetness and moisture balance.
- 1/2 cup white sugar Deliver clean, crystalline sweetness and contribute to caramelization and spreading during baking. Combine with brown sugar to balance moisture and texture while enhancing crisp edges. Measure precisely to avoid overly thin cookies.
- 1 egg plus 1 egg yolk, room temperature Bind ingredients and provide moisture, richness, and structure while contributing to chewiness; the extra yolk increases fat for a tender crumb. Bring eggs to room temperature for better incorporation and emulsification with fats and sugars. Beat appropriately to avoid overmixing the dough.
- 1 1/2 cups semi-sweet chocolate chips or milk chocolate chips or a combination of chips Introduce pockets of melted chocolate that provide bursts of sweetness and texture contrast throughout the cookies. Choose semi-sweet, milk, or a combination to control overall chocolate intensity and sweetness level. Fold in gently to distribute chips without overworking the dough.
- 12 snack size Reese's Peanut Butter Cups Add rich peanut butter centers that offer a salty-sweet contrast and a distinctive Reese's flavor when enclosed in the dough. Nest each snack-size cup in the dough to create a filled cookie experience and prevent excessive leakage by wrapping dough completely. Chill if needed to maintain shape during baking.
Instructions
- Combine the dry ingredients (flour, baking soda, salt, corn starch) and sift together.: The airiness after sifting is immediately noticeable, and the flour smells faintly of grain while the mixture feels light between your fingers, which aids even mixing later. Sifting eliminates lumps and blends the leaveners into the flour uniformly, ensuring consistent rise and texture across all cookies. If you skip sifting, you may see pockets of unincorporated baking soda, which can create small, bitter-tasting spots. A visual cue that you are done is a uniform pale color and a fine, powdery texture. For troubleshooting, if the dough later seems too dense, double check that you did not compact the flour when measuring.
- Cream butter with sugars together in a large mixing bowl.: When creaming, you should hear a soft scraping and see the mixture go from glossy to pale and slightly fluffy, and the scent changes to a warm, buttery sweetness that hints at caramel. This step incorporates air which helps the cookies lift and creates a tender crumb. Use room temperature butter so it blends easily; cold butter will not cream and melted butter will not trap air. A common error is over beating, which can lead to overly soft cookies that spread too much. Stop when the texture looks lighter and holds a ribbon for a second when lifted.
- Beat in the vanilla and then add in the egg and egg yolk and continue beating until the mixture is light and creamy.: As you add the vanilla , the aroma brightens and becomes more complex. The emulsifying action of the egg and egg yolk creates a smoother, almost glossy batter feel. This step ensures flavors meld and the fats and proteins bind, which helps the dough hold together when wrapping the peanut butter cups. If eggs are cold they may not incorporate fully and can lead to a curdled look, so room temperature is important. If the mix looks separated, stop and scrape the bowl, then beat gently until cohesive.
- Add in the dry ingredients and mix just until combined.: You will notice the dough take on a firmer texture as the dry ingredients absorb moisture; it should come away from the sides of the bowl but remain soft and pliable. Mixing just until combined prevents overdevelopment of gluten, keeping the cookies tender rather than tough. Over mixing here is the most common mistake and will yield chewier but denser cookies. The visual cue is that streaks of flour disappear and the dough looks uniform, with no visible dry bits.
- Stir in the chocolate chips.: The chocolate chips should be evenly distributed, creating little islands of chocolate throughout the dough that will soften and ooze as they bake. You can hear a slight clinking as chips mingle into the batter, and the scent begins to promise chocolate with every stir. Folding is preferable to vigorous stirring to avoid breaking the chips and to maintain dough texture. A troubleshooting note is to avoid adding chips when the batter is too warm, which could make them sink or smear.
- Scoop out about 1/4 cup of dough and wrap around a Reese's peanut butter cup making sure to seal the edges.: The dough ball should feel dense yet pliable, and when you press it around the Reese's Peanut Butter Cups it should conform smoothly without tearing. Sealing the edges fully prevents the filling from leaking during baking. If the dough is sticky and refuses to shape, chill it briefly to firm up. A common error is leaving gaps which allow the peanut butter cup to escape and create a melt on the pan. The correct feel is a cohesive dough sphere with no visible gap where the candy is enclosed.
- Continue until all dough has been used.: Keep an eye on uniformity so cookies bake evenly; each should be approximately the same size and weight. A tray with uniform mounds produces consistent browning and texture across the batch. If some mounds are much larger, they may need longer baking and can burn on the edges before the center sets. I recommend weighing or using the same scoop for consistency.
- Place cookies on a parchment lined baking sheet and refrigerate for 20-30 minutes.: Chilling firms the dough and solidifies the fats, which reduces spread and yields a chewier center. You will notice the surface become less glossy and more matte as they chill. If you skip this, the cookies will likely flatten and the filling may break through. For troubleshooting, if your fridge is very cold and the dough becomes rock hard, let it sit a few minutes before baking so it will start to relax into the oven properly.
- Preheat oven to 325 degrees.: The oven should be fully heated so the cookies begin setting immediately, forming a defined edge and a tender center. A properly preheated oven encourages even color and texture, and you will smell a faint buttery warmth when it reaches temperature. Using a thermometer to verify accuracy is helpful, as an oven running hot will brown edges too fast while leaving centers underdone. If you are unsure of your oven calibration, reduce initial baking time and check progress early.
- Space cookies about 3 inches apart and bake for 15 to 17 minutes.: As the cookies bake, you will see the edges set and take on a golden tone while the centers remain slightly domed and soft. The surface may crack gently, which is a good sign of proper rise and chew. Avoid overcrowding which causes cookies to run into each other and bake unevenly. If the centers wobble excessively after the shorter time, add a couple more minutes rather than increasing heat, which can overbrown edges.
- The cookies are done when the edges are golden. Let the cookies cool on the baking sheet for a few minutes and then transfer to a wire racks to finish cooling.: The moment of doneness is subtle, with edges firm and centers still a touch soft, and the aroma turns toasty and sweet. Cooling briefly on the sheet lets the structure set, while transferring to a wire rack finishes the process so air circulates and prevents sogginess. Moving them too soon can cause them to break, while leaving them too long on a hot pan can overcook the bottom. Aim for a few minutes before transferring for best texture.
- Enjoy!: Warm, slightly gooey centers and crisp edges create a contrast that fills the kitchen with a comforting aroma. When you bite in, the peanut butter cup center should be soft but not completely liquid, and the chocolate chips will have softened into molten ribbons. Serve slightly warm for the best experience, and watch people light up when they discover the hidden treat. If you encounter leakage, next time enfold the dough more tightly and chill a bit longer before baking.
Notes
- Swap chocolate types Use a combination of semi sweet chocolate chips and milk chocolate chips for a more nuanced chocolate profile, blending depth with creaminess, and keep the same total amount so the bake remains balanced.
- Chill longer for thicker cookies If you prefer a significantly thicker cookie, chill the shaped dough for up to two hours, which firms the fats and reduces spread, producing a taller, chewier center without changing bake time drastically.
- Prevent leaks When wrapping the Reese's Peanut Butter Cups, press the dough firmly around the candy and smooth seams, then place seam side down on the sheet to reduce the chance of the filling escaping while baking.
- Adjust bake time for size If you make slightly larger or smaller cookies than specified, modify the bake time in small increments rather than altering temperature, checking at the earlier time to avoid overbaking.
- Store properly Once fully cooled, keep cookies in an airtight container at room temperature for up to three days, or freeze for longer storage, placing parchment between layers to avoid sticking.