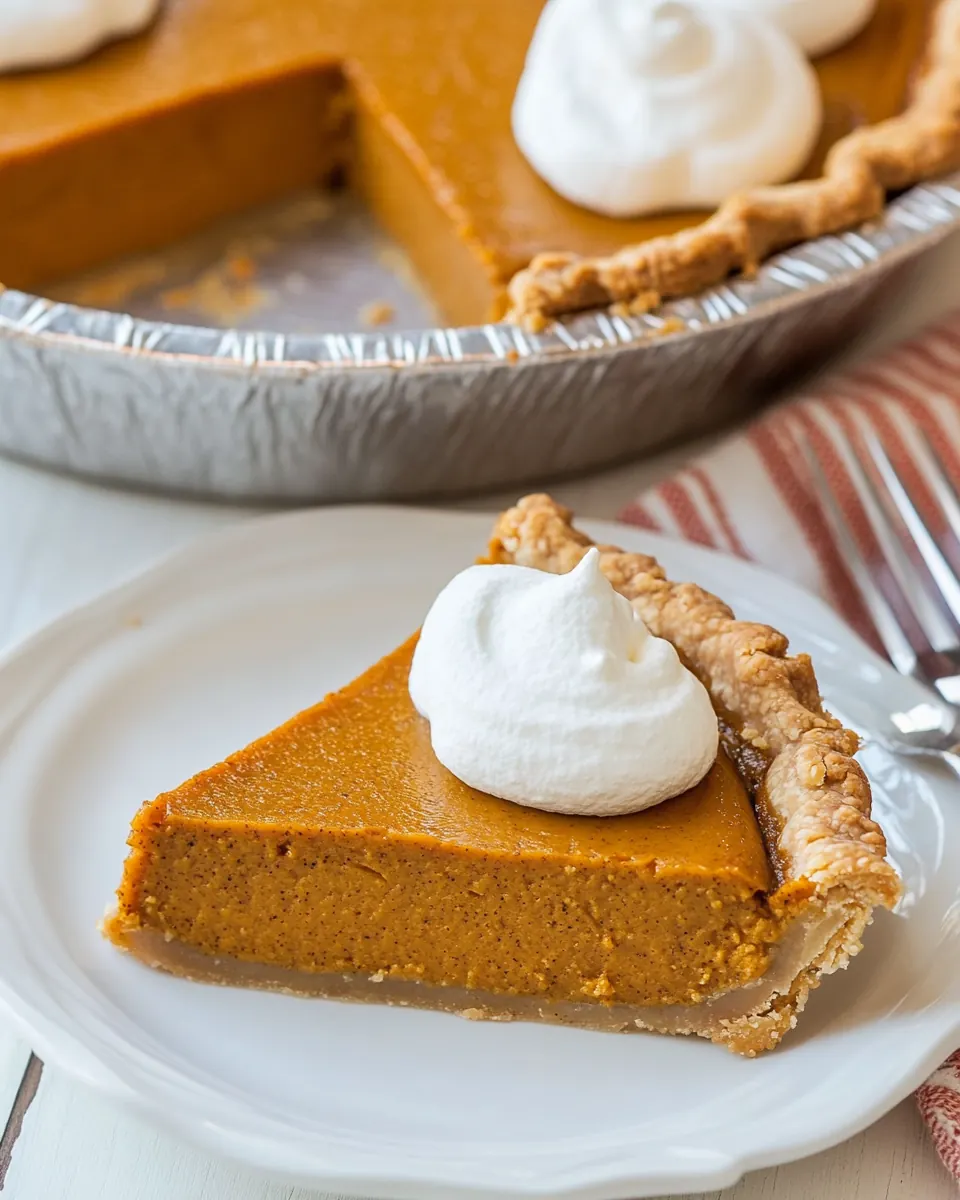
Healthy Pumpkin Pie
Healthy Pumpkin Pie is the kind of recipe that always makes an appearance when the leaves start to turn and my kitchen smells like cinnamon and toasted coconut. The first time I made this, I was chasing a balance between comfort and conscience, wanting a slice that felt indulgent without derailing the whole day. I remember setting a warm mug on the counter and slicing into a pie that had a tender, slightly crumbly crust and a filling that was luxuriously smooth yet light on the sweetness. From that moment, it became my go to when friends asked for dessert that felt honest and satisfying.
Over the years I’ve tweaked ratios and techniques, learning small tricks that make a big difference. I started with a simple idea, and then tested it at holiday tables and casual weeknights, listening to feedback and adjusting spice levels until it sang. I like that this pie works for a relaxed Sunday or a more formal gathering, and that it keeps well in the fridge so I can slice off a modest piece midweek. The texture, to me, is the real win here the filling should wobble just a hair in the center before it finishes setting, and the crust should be light and slightly crisp around the edges.
When I bring out this pie I often tell the story of the trial where the crust came out too oily, which taught me patience when handling the coconut oil. Small habits like letting the crust cool before filling it or using a blender to fully emulsify the filling make the difference between a good pie and one people remember. I love how approachable the process is even though the result feels grown up and deliberate. If you want a dessert that is cozy, approachable, and a little unexpected, this recipe is worth the attention it asks for.
Recipe Snapshot
1 hr 15 mins
15 mins
60 mins
Medium
300 kcal
American
Gluten-Free, Paleo
Desserts
Oven, 9-inch pie pan, Stand mixer or food processor, Blender
What Sets This Healthy Pumpkin Pie Apart
Comfort without compromise
I adore Healthy Pumpkin Pie because it manages to be both comforting and lighter at the same time. The filling is creamy and warmly spiced, giving you that classic pumpkin pie sensation, while the ingredient choices keep the mouthfeel rich without relying on heavy dairy. I find this especially satisfying when guests want something familiar yet slightly different.
Real texture, not gimmicks
The texture is a standout for me, from the slightly crisp rim of the crust to the smooth, custardy filling. I especially love how the coconut flour crust provides a delicate crumb that supports the filling without becoming dense. I’ve tried multiple bases, and this one consistently strikes the best balance for both daily and holiday servings.
Flexible sweetness and flavor
One of the reasons I keep coming back to this pie is how easy it is to adapt the sweetness without losing structure. Whether you prefer pure maple syrup or a sugar free option, the filling still sets beautifully. I often nudge the spices to taste, which lets me tailor the pie to different palates while keeping the familiar pumpkin profile front and center.
Make ahead friendly
I appreciate how forgiving this recipe is when planned in advance. You can bake the crust and chill it, make the filling and refrigerate it, then assemble everything the day before you serve. This reduces stress on the big day while still delivering a pie that slices cleanly and tastes freshly finished.
Great for special diets
This recipe sits nicely within many eating preferences because of its ingredient choices. I’ve shared it with friends who were exploring grain free options, and it has always been welcomed. The combination of pantry friendly items and straightforward techniques makes it a reliable go to when you want dessert that feels thoughtful and intentional.
Ingredients for Healthy Pumpkin Pie
These ingredients are selected to build a pie that is both satisfying and streamlined. The crust uses dry, absorbent coconut flour paired with solid coconut oil to create structure and a tender crumb, while the filling leans on canned pumpkin puree and full fat canned coconut milk for creamy body. Spices and sweeteners are calibrated to deliver warmth without overpowering the natural pumpkin flavor.
- 3/4 cup coconut flour: Provides a nutty, grain-free base that absorbs moisture and creates structure in the crust; use measured amount to prevent dryness and ensure proper texture. Adds subtle sweetness and a tender crumb when combined with wet ingredients, contributing to a gluten-free profile. Works well with coconut oil to bind and hold the crust together during baking.
- 1/2 cup coconut oil solid: Adds richness and acts as the primary fat to bind the crust ingredients together while imparting a subtle coconut flavor. Should be solid to properly be cut or mixed into the flour for flaky texture and moisture retention. Helps create a cohesive dough that browns gently in the oven.
- 3 tbsp pure maple syrup: Contributes natural sweetness and moisture while keeping the recipe refined-sugar-free; balance carefully to avoid overly sweet filling or crust. Brings a mild maple flavor that complements pumpkin and spices without overpowering. Also helps thin mixtures slightly for smoother blending.
- 1 tsp vanilla extract: Provides aromatic sweetness and enhances other flavors in both crust and filling; add as specified to boost depth and roundness. Works especially well with maple and spice, creating a warm, fragrant profile. Avoid overuse to keep vanilla subtle and supporting.
- 1/4 tsp sea salt: Balances sweetness and enhances overall flavor by providing a mineral edge; small amount is sufficient to highlight other ingredients. Helps stabilize batter and dough by moderating flavors. Use measured amount to prevent salinity.
- 2 large eggs: Contributes structure, stability, and lift through protein when beaten into the mixture; eggs act as natural binders for both crust and filling. Add at room temperature for better emulsification and smoother batter. Also provides moisture and helps set the pie during baking.
- 15 ounce can pumpkin puree: Delivers the pumpkin flavor and creamy base for the filling, supplying moisture, fiber, and color; use pure puree for authentic texture. Blends with spices and sweeteners to create the characteristic pumpkin profile. Avoid watery or canned mixtures with additives to maintain consistency.
- 1 cup full-fat canned coconut milk: Adds rich creaminess and healthy fats to the filling for a silky mouthfeel and fuller flavor; full-fat ensures the filling sets properly and tastes decadent. Coconut milk contributes a subtle tropical note that pairs well with pumpkin and spices. Shake or stir the can well to incorporate solids and liquids evenly.
- 2 large eggs: Further contributes structure and richness; eggs help the filling set and provide a custardy texture when baked. Incorporate at room temperature for homogeneous mixing and prevent curdling. They also improve volume and stability of the pie.
- 2 tsp pure vanilla extract: Boosts and layers vanilla flavor in the filling, enhancing sweetness and aromatic complexity; use pure extract for best results. Complements spices and maple, rounding out the overall taste profile. Measure carefully to avoid an overly perfumed filling.
- 1/3 cup pure maple syrup: Adds sweetness and helps achieve a smooth, well-blended filling without refined sugar; maple syrup also contributes a touch of caramel-like flavor. Helps thin the puree slightly for easier mixing and a smoother bake. Adjust minorly if you prefer a less sweet pie.
- 2 tsp fresh ginger peeled and grated: Introduces fresh, zesty warmth that livens the pumpkin filling and complements the spice blend; grated ginger should be finely processed to distribute flavor evenly. Fresh ginger provides brighter, sharper notes than dried forms and pairs well with maple and vanilla. Use as specified to avoid overpowering delicate pumpkin flavors.
- 2 tsp pumpkin pie spice: Provides the characteristic warm, aromatic blend for pumpkin pie, combining cinnamon, nutmeg, cloves, and other spices to create depth. Sprinkle or mix evenly into the filling to ensure consistent flavor in every slice. Adjust slightly to taste but adhere to recipe balance for traditional profile.
- 1/2 tsp sea salt: Enhances and balances the sweetness and spice in the filling by adding a small, precise touch of salt to amplify flavors. Use the specified amount to avoid salting the custard too heavily while bringing out pumpkin and maple notes. Dissolve thoroughly to ensure even seasoning.
The Process for Making Healthy Pumpkin Pie
I like to walk through this recipe with a calm, steady pace. The first part focuses on making a stable crust that will cradle the custard, and the second part is all about achieving a silky filling that sets properly. Keep your tools ready and expect some gentle waiting as the pie does its work in the oven and the fridge.
- Preheat the oven to 350 degrees Fahrenheit and lightly grease a 9-inch pie pan.: The aroma of a warm oven primes your senses and helps set expectations for the bake. As the oven climbs to 350 degrees Fahrenheit , you should notice a dry, warm air in your kitchen, a cue that the pie will encounter consistent heat. Greasing the pan ensures the crust releases cleanly when sliced, and I prefer a light coating to avoid interfering with the crust texture. A common mistake is skipping preheating, which can cause uneven baking and a soggy bottom. Tap the pan gently to feel for any residue after greasing so the surface is evenly coated.
- Add the coconut flour, coconut oil, pure maple syrup, vanilla extract and sea salt to a stand mixer (or food processor) and beat until combined. Scrape the sides of the bowl and add the eggs. Beat until completely combined and a thick dough forms.: When you begin combining these ingredients you will notice the coconut flour absorbing the melted notes of the coconut oil , creating a sandy, crumb like mixture. The pure maple syrup adds moisture and shine while the vanilla extract lifts the scent. Mixing until combined helps ensure even hydration so the crust is uniform. A frequent error here is over mixing, which can make the dough dense instead of tender. Pause to scrape the bowl so there are no dry pockets of flour that would bake into gritty bits.
- Press the dough into the pie pan into an even layer. There is enough pie dough to form sides. If you’re fancier than I am, you can make little pie crust pleats. Poke the dough several times with a fork – this ensures it will bake evenly and will not bow out during the baking process.: As you incorporate the eggs , the mixture will transform from granular to a stickier dough with a cohesive sheen. The eggs introduce proteins that bind the crust, and you will see strands of glossy dough form as the paddle or blade works. This step matters because without properly mixed eggs the dough can crumble and fail to hold its shape when pressed into the pan. A common slip up is adding the eggs cold, which can make the oil firm up unevenly. Use room temperature eggs for smoother integration.
- Bake on the center rack of the preheated oven for 12 to 15 minutes, just until the crust begins to show a little color.: The act of pressing the dough should feel tactile and slightly firm under your fingers, forming a uniform base and walls. You want the thickness to be consistent so it bakes evenly, and there should be no large air gaps. Poking the dough several times with a fork reduces trapped steam and prevents the crust from puffing, which is why this tactile step is so important. Avoid stretching the dough thin in spots, which can lead to burning during baking.
- Remove the pie crust from the oven and allow it to cool before proceeding with the rest of your pie recipe.: As the crust gently bakes, a faint nutty aroma will emerge and the edges will firm up. You should look for a subtle golden tone rather than deep browning, which indicates it is ready for the next stage. Baking on the center rack allows even air circulation. A common mistake is leaving it in until it is fully brown, which risks a tough crust. Keep an eye on the color and remove when it is only beginning to tan.
- Add the ingredients for the pie filling to a blender and blend until completely smooth (If you prefer, you can mix it together in a mixing bowl with an electric hand mixer).: Cooling stabilizes the structure so the filling does not melt the crust upon contact. You will feel the crust firming as it drops to room temperature, and the aroma will mellow. If you try to pour a warm filling into a hot crust, the base can become greasy or fall apart. Resist the urge to hurry this step; a cooled crust yields cleaner slices.
- Pour the pumpkin pie filling into the prepared pie crust.: When you blend the pumpkin puree , full-fat canned coconut milk , eggs , pure maple syrup , ginger , pumpkin pie spice , vanilla extract , and sea salt , you will notice the mixture turn glossy and velvety. The blender breaks down fibers and aerates the custard slightly, leading to an even set. Mixing by hand with a hand mixer works too but may leave tiny streaks of unincorporated ingredients. A frequent oversight is not scraping the blender, which leaves pockets of spice or egg, so pour out and inspect the texture for uniformity.
- Bake the pie at 350 for 45 minutes to 1 hour, or until the pie has set up in the center. Check on the pie after about 15 to 20 minutes and cover with foil, as the edges of the crust should be golden-brown at this point.: As you pour, the filling should look thick and ribbon like, falling smoothly into the center and spreading toward the edges. The contrast between the pale orange custard and the tan crust is visually pleasing. Pour slowly to avoid trapping air bubbles, and shake the pan gently to level the surface. A common issue is overfilling, which leads to spillage and uneven baking, so stop when the filling is just below the rim.
- Allow the pie to cool then transfer to the refrigerator and chill until completely cool.: During this longer bake, the kitchen will fill with spice and a toasted sugar aroma. The surface should become matte and slightly taut, with the center showing only a gentle wobble. Check after about 15 to 20 minutes to cover the edges with foil if they are browning too quickly, preserving a uniform color. Underbaking will leave a loose center, while overbaking produces a dry, crumbly texture, so test gently with a jiggle not a toothpick.
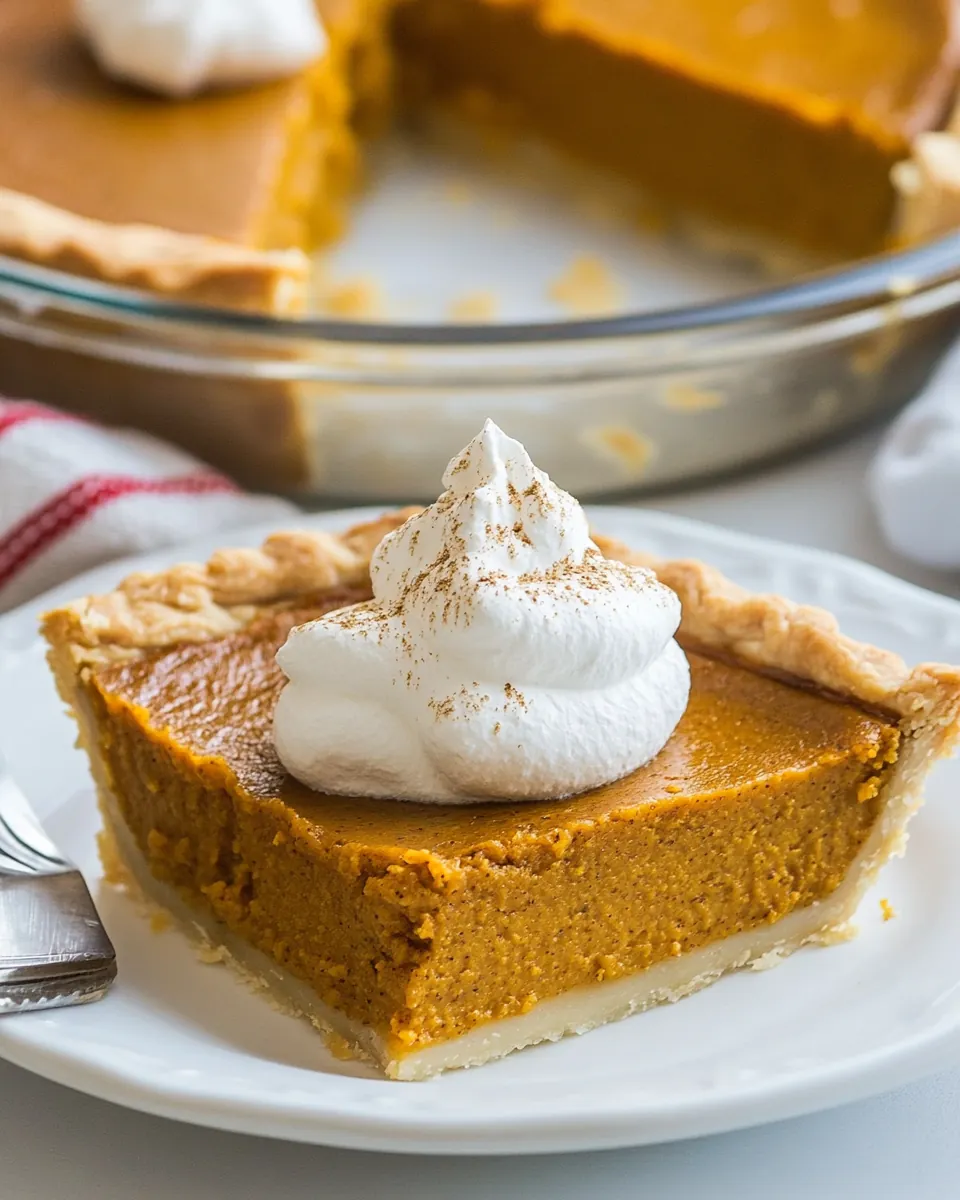
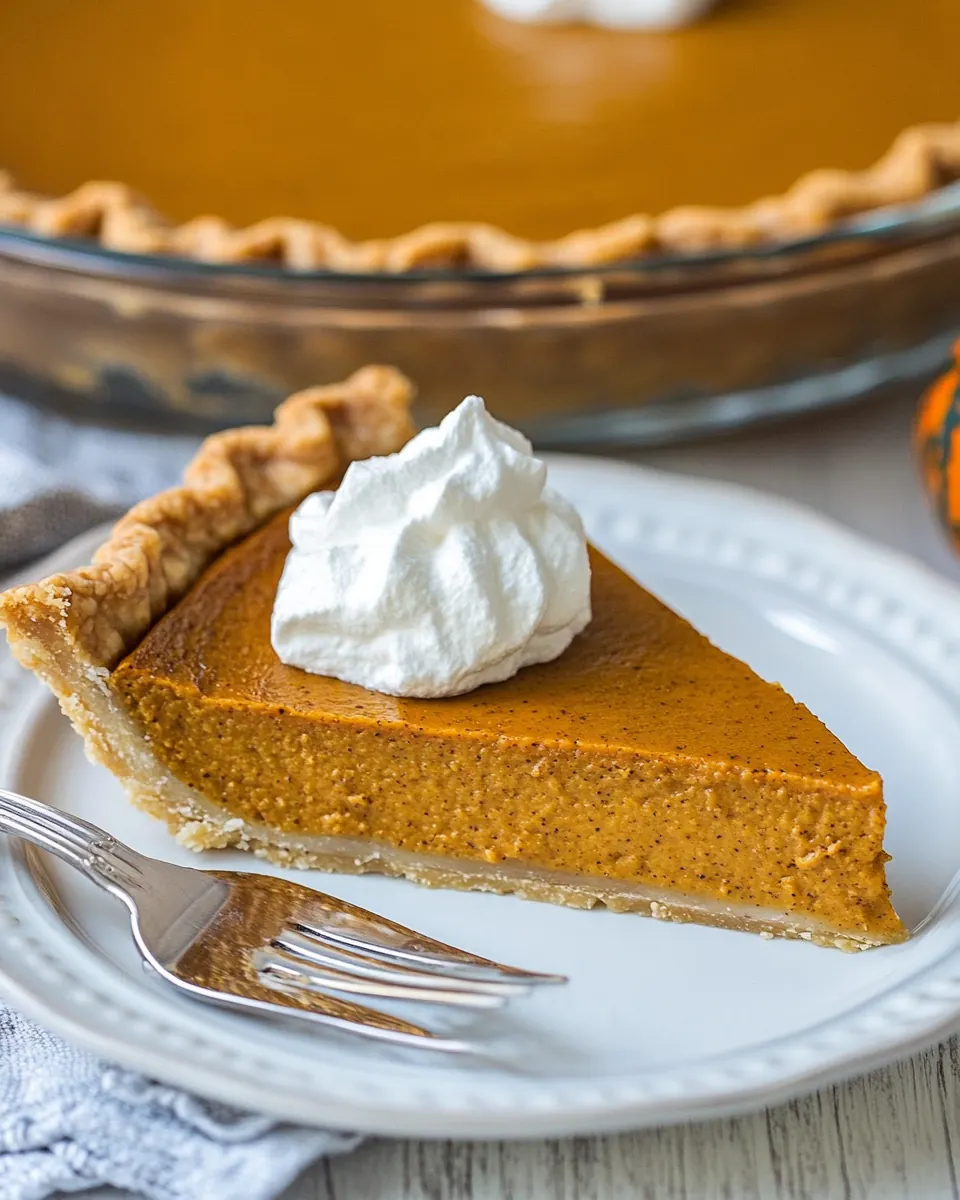
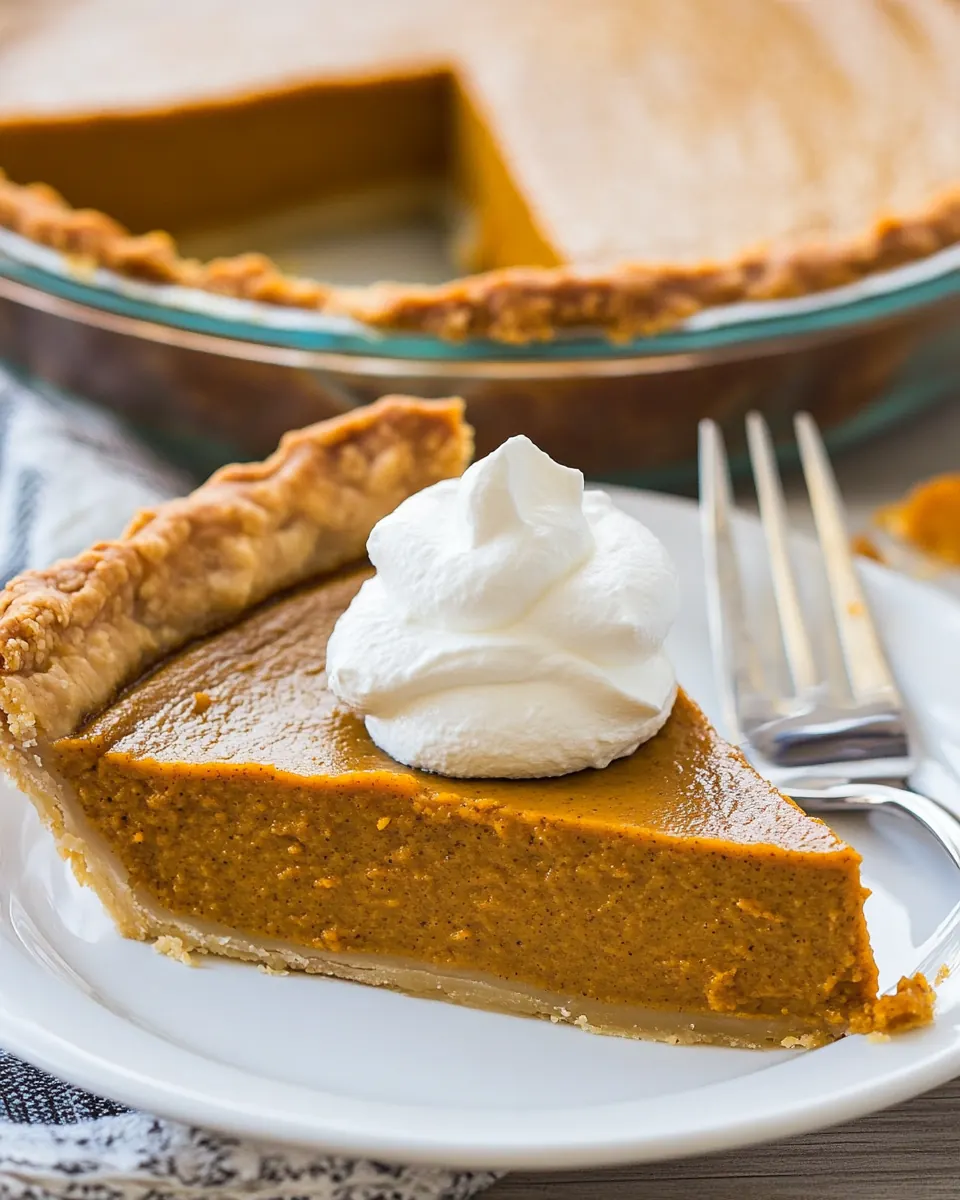
- Serve with homemade or store-bought whipped cream and enjoy!: Cooling at room temperature first helps the residual heat finish the set, and refrigerating completes the custard firming. You will notice the texture densify as it chills and flavors meld. Skipping the chill will make slicing messy and less appealing. Refrigerate for several hours for best results, and avoid rapid chilling that can cause condensation on the surface.
- Serve with homemade or store-bought whipped cream and enjoy: When served, the pie should present clean slices with a glossy top and a defined crust edge. A dollop of whipped cream brings lightness and a creamy contrast to the spiced custard. Listen for pleased murmurs and appreciate the balance you achieved. A mistake people make is adding too much garnish that overpowers the pumpkin; keep it modest to let the pie shine.
Variations to Try
I like offering variations so you can tailor Healthy Pumpkin Pie to different tastes without changing the core technique. Below are ideas to swap flavors, textures, and sweetness while keeping the pie structure intact. Each tip highlights one simple change that shifts the final character in a pleasing way.
- Swap sweeteners Use a sugar free granulated sweetener or powdered sugar free confectioners in place of some or all of the maple syrup to reduce sugar while maintaining structure. If you choose a non liquid sweetener, taste and adjust the spice to compensate for any aftertaste, and note the texture can be slightly drier, so monitor the set carefully.
- Spice adjustments Increase or decrease the pumpkin pie spice and fresh ginger to match your preference for warmth or brightness. A touch more ginger adds a lively counterpoint to the cinnamon notes, while a milder blend keeps things classic. Mix spices thoroughly into the filling to avoid pockets of intense flavor.
- Crust shaping Press the crust with varying thickness to create a crisp or more tender edge depending on your preference. Thinner edges brown faster so watch the oven closely, while slightly thicker walls provide a more pronounced bite. Use gentle, even pressure when forming the crust to avoid cracks.
- Vegan friendly adjustments To move further toward vegan by intent, explore egg replacements designed for baking, but be aware the set may be different. Achieving the same custard firmness can be challenging, so consider chilling longer or adding a stabilizer if needed. Test one small pie first to confirm texture and flavor.
- Advance prep Make the crust a day ahead and keep it wrapped in the refrigerator to save time on the day you plan to serve. The filling can be blended and refrigerated separately, then assembled before the final bake. This reduces stress and keeps flavors bright and fresh for serving.
What Goes Well With This Healthy Pumpkin Pie
This pie pairs nicely with simple, complementary elements that either echo its warmth or provide a bright contrast. Think light beverages, modest accompaniments, and occasions where a slice can be savored. It is versatile for casual or slightly formal settings and stores well for make ahead menus.
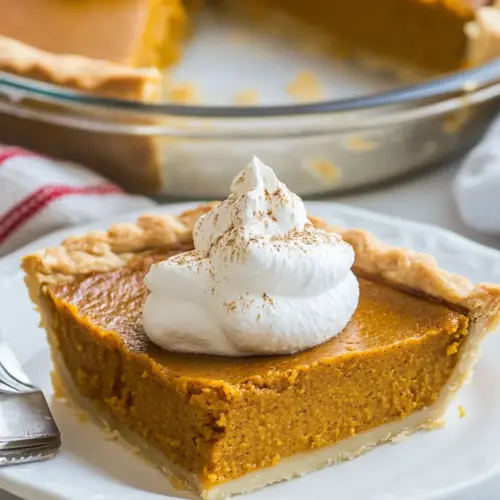
- Light whipped cream A small spoonful of chilled whipped cream adds a creamy counterpoint without overpowering the spiced filling, and it makes each bite feel more luscious.
- Hot beverages Serve alongside coffee or warm spiced tea for a cozy pairing that extends the pie experience and complements the pumpkin spice profile.
- Occasions This pie is well suited for fall gatherings, Thanksgiving dessert spreads, and relaxed weekend dinners where a seasonal finish is desired.
- Storage tips Cover and refrigerate leftover slices, they will keep well for several days, and chilling helps maintain clean slices. For longer storage, freeze individual slices wrapped tightly to preserve texture.
- Seasonal pairings Pair with late fall fruits like poached pears or a simple compote for a menu that leans into autumn produce without clashing with the pie’s spices.
FAQ
Conclusion
What makes this recipe special is its ability to deliver the classic pumpkin pie experience with thoughtful ingredient choices that keep the profile both rich and approachable. I encourage you to give it a try because the process is straightforward and the result is a slice that feels indulgent yet balanced. Sharing this pie has become one of my favorite ways to bring people together during the cooler months, and I hope it earns a spot on your dessert rotation as well.
Healthy Pumpkin Pie
Equipment
- Oven
- 9-inch pie pan
- Stand mixer or food processor
- Blender
Ingredients
- 3/4 cup coconut flour Provides a nutty, grain-free base that absorbs moisture and creates structure in the crust; use measured amount to prevent dryness and ensure proper texture. Adds subtle sweetness and a tender crumb when combined with wet ingredients, contributing to a gluten-free profile. Works well with coconut oil to bind and hold the crust together during baking.
- 1/2 cup coconut oil solid Adds richness and acts as the primary fat to bind the crust ingredients together while imparting a subtle coconut flavor. Should be solid to properly be cut or mixed into the flour for flaky texture and moisture retention. Helps create a cohesive dough that browns gently in the oven.
- 3 tbsp pure maple syrup Contributes natural sweetness and moisture while keeping the recipe refined-sugar-free; balance carefully to avoid overly sweet filling or crust. Brings a mild maple flavor that complements pumpkin and spices without overpowering. Also helps thin mixtures slightly for smoother blending.
- 1 tsp vanilla extract Provides aromatic sweetness and enhances other flavors in both crust and filling; add as specified to boost depth and roundness. Works especially well with maple and spice, creating a warm, fragrant profile. Avoid overuse to keep vanilla subtle and supporting.
- 1/4 tsp sea salt Balances sweetness and enhances overall flavor by providing a mineral edge; small amount is sufficient to highlight other ingredients. Helps stabilize batter and dough by moderating flavors. Use measured amount to prevent salinity.
- 2 large eggs Contributes structure, stability, and lift through protein when beaten into the mixture; eggs act as natural binders for both crust and filling. Add at room temperature for better emulsification and smoother batter. Also provides moisture and helps set the pie during baking.
- 15 -ounce can pumpkin puree Delivers the pumpkin flavor and creamy base for the filling, supplying moisture, fiber, and color; use pure puree for authentic texture. Blends with spices and sweeteners to create the characteristic pumpkin profile. Avoid watery or canned mixtures with additives to maintain consistency.
- 1 cup full-fat canned coconut milk Adds rich creaminess and healthy fats to the filling for a silky mouthfeel and fuller flavor; full-fat ensures the filling sets properly and tastes decadent. Coconut milk contributes a subtle tropical note that pairs well with pumpkin and spices. Shake or stir the can well to incorporate solids and liquids evenly.
- 2 large eggs Further contributes structure and richness; eggs help the filling set and provide a custardy texture when baked. Incorporate at room temperature for homogeneous mixing and prevent curdling. They also improve volume and stability of the pie.
- 2 tsp pure vanilla extract Boosts and layers vanilla flavor in the filling, enhancing sweetness and aromatic complexity; use pure extract for best results. Complements spices and maple, rounding out the overall taste profile. Measure carefully to avoid an overly perfumed filling.
- 1/3 cup pure maple syrup Adds sweetness and helps achieve a smooth, well-blended filling without refined sugar; maple syrup also contributes a touch of caramel-like flavor. Helps thin the puree slightly for easier mixing and a smoother bake. Adjust minorly if you prefer a less sweet pie.
- 2 tsp fresh ginger peeled and grated Introduces fresh, zesty warmth that livens the pumpkin filling and complements the spice blend; grated ginger should be finely processed to distribute flavor evenly. Fresh ginger provides brighter, sharper notes than dried forms and pairs well with maple and vanilla. Use as specified to avoid overpowering delicate pumpkin flavors.
- 2 tsp pumpkin pie spice Provides the characteristic warm, aromatic blend for pumpkin pie, combining cinnamon, nutmeg, cloves, and other spices to create depth. Sprinkle or mix evenly into the filling to ensure consistent flavor in every slice. Adjust slightly to taste but adhere to recipe balance for traditional profile.
- 1/2 tsp sea salt Enhances and balances the sweetness and spice in the filling by adding a small, precise touch of salt to amplify flavors. Use the specified amount to avoid salting the custard too heavily while bringing out pumpkin and maple notes. Dissolve thoroughly to ensure even seasoning.
Instructions
- Preheat the oven to 350 degrees Fahrenheit and lightly grease a 9-inch pie pan.: The aroma of a warm oven primes your senses and helps set expectations for the bake. As the oven climbs to 350 degrees Fahrenheit , you should notice a dry, warm air in your kitchen, a cue that the pie will encounter consistent heat. Greasing the pan ensures the crust releases cleanly when sliced, and I prefer a light coating to avoid interfering with the crust texture. A common mistake is skipping preheating, which can cause uneven baking and a soggy bottom. Tap the pan gently to feel for any residue after greasing so the surface is evenly coated.
- Add the coconut flour, coconut oil, pure maple syrup, vanilla extract and sea salt to a stand mixer (or food processor) and beat until combined. Scrape the sides of the bowl and add the eggs. Beat until completely combined and a thick dough forms.: When you begin combining these ingredients you will notice the coconut flour absorbing the melted notes of the coconut oil , creating a sandy, crumb like mixture. The pure maple syrup adds moisture and shine while the vanilla extract lifts the scent. Mixing until combined helps ensure even hydration so the crust is uniform. A frequent error here is over mixing, which can make the dough dense instead of tender. Pause to scrape the bowl so there are no dry pockets of flour that would bake into gritty bits.
- Press the dough into the pie pan into an even layer. There is enough pie dough to form sides. If you’re fancier than I am, you can make little pie crust pleats. Poke the dough several times with a fork – this ensures it will bake evenly and will not bow out during the baking process.: As you incorporate the eggs , the mixture will transform from granular to a stickier dough with a cohesive sheen. The eggs introduce proteins that bind the crust, and you will see strands of glossy dough form as the paddle or blade works. This step matters because without properly mixed eggs the dough can crumble and fail to hold its shape when pressed into the pan. A common slip up is adding the eggs cold, which can make the oil firm up unevenly. Use room temperature eggs for smoother integration.
- Bake on the center rack of the preheated oven for 12 to 15 minutes, just until the crust begins to show a little color.: The act of pressing the dough should feel tactile and slightly firm under your fingers, forming a uniform base and walls. You want the thickness to be consistent so it bakes evenly, and there should be no large air gaps. Poking the dough several times with a fork reduces trapped steam and prevents the crust from puffing, which is why this tactile step is so important. Avoid stretching the dough thin in spots, which can lead to burning during baking.
- Remove the pie crust from the oven and allow it to cool before proceeding with the rest of your pie recipe.: As the crust gently bakes, a faint nutty aroma will emerge and the edges will firm up. You should look for a subtle golden tone rather than deep browning, which indicates it is ready for the next stage. Baking on the center rack allows even air circulation. A common mistake is leaving it in until it is fully brown, which risks a tough crust. Keep an eye on the color and remove when it is only beginning to tan.
- Add the ingredients for the pie filling to a blender and blend until completely smooth (If you prefer, you can mix it together in a mixing bowl with an electric hand mixer).: Cooling stabilizes the structure so the filling does not melt the crust upon contact. You will feel the crust firming as it drops to room temperature, and the aroma will mellow. If you try to pour a warm filling into a hot crust, the base can become greasy or fall apart. Resist the urge to hurry this step; a cooled crust yields cleaner slices.
- Pour the pumpkin pie filling into the prepared pie crust.: When you blend the pumpkin puree , full-fat canned coconut milk , eggs , pure maple syrup , ginger , pumpkin pie spice , vanilla extract , and sea salt , you will notice the mixture turn glossy and velvety. The blender breaks down fibers and aerates the custard slightly, leading to an even set. Mixing by hand with a hand mixer works too but may leave tiny streaks of unincorporated ingredients. A frequent oversight is not scraping the blender, which leaves pockets of spice or egg, so pour out and inspect the texture for uniformity.
- Bake the pie at 350 for 45 minutes to 1 hour, or until the pie has set up in the center. Check on the pie after about 15 to 20 minutes and cover with foil, as the edges of the crust should be golden-brown at this point.: As you pour, the filling should look thick and ribbon like, falling smoothly into the center and spreading toward the edges. The contrast between the pale orange custard and the tan crust is visually pleasing. Pour slowly to avoid trapping air bubbles, and shake the pan gently to level the surface. A common issue is overfilling, which leads to spillage and uneven baking, so stop when the filling is just below the rim.
- Allow the pie to cool then transfer to the refrigerator and chill until completely cool.: During this longer bake, the kitchen will fill with spice and a toasted sugar aroma. The surface should become matte and slightly taut, with the center showing only a gentle wobble. Check after about 15 to 20 minutes to cover the edges with foil if they are browning too quickly, preserving a uniform color. Underbaking will leave a loose center, while overbaking produces a dry, crumbly texture, so test gently with a jiggle not a toothpick.
- Serve with homemade or store-bought whipped cream and enjoy!: Cooling at room temperature first helps the residual heat finish the set, and refrigerating completes the custard firming. You will notice the texture densify as it chills and flavors meld. Skipping the chill will make slicing messy and less appealing. Refrigerate for several hours for best results, and avoid rapid chilling that can cause condensation on the surface.
- Serve with homemade or store-bought whipped cream and enjoy: When served, the pie should present clean slices with a glossy top and a defined crust edge. A dollop of whipped cream brings lightness and a creamy contrast to the spiced custard. Listen for pleased murmurs and appreciate the balance you achieved. A mistake people make is adding too much garnish that overpowers the pumpkin; keep it modest to let the pie shine.
Notes
- Swap sweeteners Use a sugar free granulated sweetener or powdered sugar free confectioners in place of some or all of the maple syrup to reduce sugar while maintaining structure. If you choose a non liquid sweetener, taste and adjust the spice to compensate for any aftertaste, and note the texture can be slightly drier, so monitor the set carefully.
- Spice adjustments Increase or decrease the pumpkin pie spice and fresh ginger to match your preference for warmth or brightness. A touch more ginger adds a lively counterpoint to the cinnamon notes, while a milder blend keeps things classic. Mix spices thoroughly into the filling to avoid pockets of intense flavor.
- Crust shaping Press the crust with varying thickness to create a crisp or more tender edge depending on your preference. Thinner edges brown faster so watch the oven closely, while slightly thicker walls provide a more pronounced bite. Use gentle, even pressure when forming the crust to avoid cracks.
- Vegan friendly adjustments To move further toward vegan by intent, explore egg replacements designed for baking, but be aware the set may be different. Achieving the same custard firmness can be challenging, so consider chilling longer or adding a stabilizer if needed. Test one small pie first to confirm texture and flavor.
- Advance prep Make the crust a day ahead and keep it wrapped in the refrigerator to save time on the day you plan to serve. The filling can be blended and refrigerated separately, then assembled before the final bake. This reduces stress and keeps flavors bright and fresh for serving.