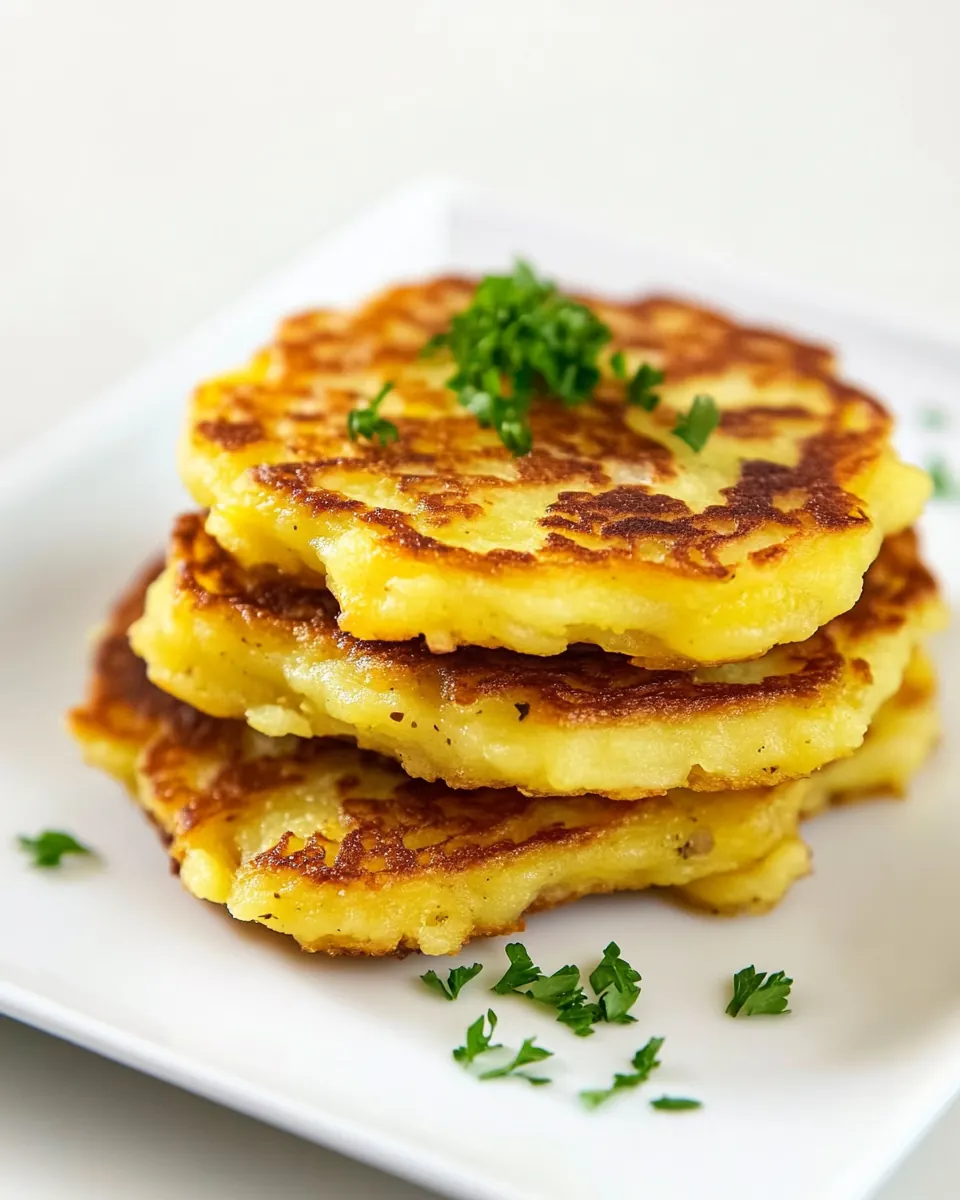
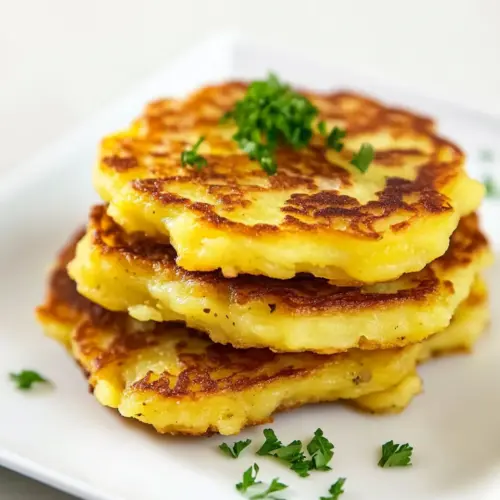
Golden Pan Fried Potato Cakes
Golden Pan Fried Potato Cakes are the kind of recipe I fall back on when I want something comforting, crunchy on the outside, and tender within. The first time I made these I was short on time but wanted something that felt special. I ended up turning a sack of Yukon Gold into golden discs that sang with a buttery sizzle in the skillet, and a neighbor who stopped by ended up staying for dinner.
I remember the texture debate at my kitchen counter, whether to peel every spud or leave a few skins for character. I opted for a mix, and that decision gave the cakes a little rustic bite that I still love. These Golden Pan Fried Potato Cakes became my go to for weekend brunches and busy weeknights when I need a crowd pleasing side that travels well from skillet to oven. The combination of Yukon Gold potatoes, eggs, and parmesan cheese creates a binding richness, while a dusting of all purpose flour keeps each cake crisp and stable.
Recipe Snapshot
1 hr 20 mins
20 mins
60 mins
Medium
200 kcal
American
Gluten-Free, Low FODMAP
Side Dishes
Large saucepot, Potato masher, Large skillet, Spatula, Baking sheet
Why This Golden Pan Fried Potato Cakes Is So Good
Crispy exterior with a tender heart
I love how the heat transforms the batter into a deeply golden crust that crunches when you bite in, revealing a creamy interior. When I press a spatula and hear that short, satisfying hiss, I know the texture is right. This contrast is the reason I keep coming back to Golden Pan Fried Potato Cakes.
Minimal, pantry friendly ingredients
We do not need an arsenal of specialty items to get great results. With Yukon Gold potatoes, eggs, parmesan cheese, and a little all purpose flour, you have everything required for a crowd pleasing plate. I often throw together a batch when I want an easy weeknight dish that still feels thoughtful.
Flexible for make ahead and freezing
I value recipes that respect my time. These cakes freeze brilliantly, so I can double the batch and keep a stash for rushed mornings. I usually cool them completely, wrap them individually, and freeze in a sealed bag. When reheating, a quick pan crisp brings back the original crunch, a trick I rely on when I want convenience without compromise.
Great for gathering and serving
These cakes scale well, which makes them a natural for gatherings. They travel from skillet to table with minimal fuss, and while I serve them as a side more often than not, I also enjoy them as a main with a leafy salad. Their familiar flavors and textures are universally liked, which is why I find them so reliable for company.
Textural tuning with simple technique
What I appreciate most is how tiny adjustments control the final result. Mash smooth for a creamy interior, or leave a few lumps for rustic texture. A spoonful more parmesan cheese tightens the crumb and adds savory depth. Those small choices let me tailor the recipe to the moment.
Shopping List for Golden Pan Fried Potato Cakes
The ingredient list here reflects a simple philosophy: use starchy, flavorful potatoes as the base, bind with eggs and cheese, and add just enough flour and aromatics to make each cake crisp and tasty. The key players are the Yukon Gold potatoes for their creamy texture, the eggs to bind, and the parmesan cheese for savory depth. Together they create a batter that fries beautifully and holds up for reheating or freezing.
- 5 pounds Yukon Gold potatoes peeled or unpeeled: Mashed or grated to provide the starchy base and tender interior for the cakes; Yukon Golds contribute a naturally buttery flavor and creamy texture that helps bind ingredients when combined with eggs and flour. Keep pieces uniformly sized for even cooking and to achieve a smooth, cohesive patty. Adjust peeling based on preference for extra rustic texture or smoother finish.
- 5 large eggs: Whisked into the potato mixture to bind ingredients and add richness; large eggs introduce structure through coagulation when heated, holding the cakes together during frying. Use room-temperature eggs for easier blending and consistent set in the center.
- 1 cup grated parmesan cheese: Sprinkled in to add savory depth, umami, and a slightly nutty sharpness; grated Parmesan helps season the mixture while also contributing subtle dryness that improves the cake's exterior crispness. Finely grate for even distribution and better melting into the potato base.
- 3/4 cup all-purpose flour or GF baking mix: Folded into the mixture to absorb moisture and provide additional structure; all-purpose flour or a gluten-free baking mix helps create cohesive patties that hold shape while frying. Measure carefully to avoid a gummy texture, and adjust quantity slightly if potatoes are especially wet.
- 1/2 cup chopped scallions: Chopped and folded in to contribute fresh, mild oniony notes and a bright contrast to rich potatoes and cheese; scallions also add small pops of color and texture in every bite. Add more of the green tops for a lighter flavor and the white parts for more pungency.
- 1 tablespoon salt: Seasoned into the batter to enhance overall flavor and balance the richness from eggs and cheese; salt brings out natural potato sweetness and deepens savory notes. Dissolve evenly through the mixture to avoid concentrated salty pockets.
- Butter for frying: Melted in the skillet to achieve a golden, crispy exterior while preventing sticking; butter contributes rich flavor and helps develop a savory, caramelized crust during pan-frying. Use clarified butter for higher smoke point if cooking at higher heat.
Cooking Instructions for Golden Pan Fried Potato Cakes

These instructions walk you from boiling the potatoes to crisping the cakes in a skillet and keeping them warm in the oven. I like to move deliberately through each stage so the texture develops properly. Follow each step and pay attention to the sensory cues described below for the best results.
- Cut the potatoes into large chunks. (You can peel the potatoes if you don’t like the texture of the skins, or leave the peels on and remove some or all of the skins after peeling.) Place in a large saucepot and cover with water. Set over high heat and bring to a boil. Boil the potatoes for 10-15 minutes, until fork-tender.: When the potatoes hit the water you should hear a steady simmer and see gentle rolling bubbles, not a violent boil. The goal here is even cooking, so large uniform chunks cook at the same rate and avoid gummy centers. A common mistake is cutting uneven pieces, which leads to some chunks overcooking while others remain firm. If you notice a few pieces breaking apart early, reduce the heat slightly to maintain a steady simmer.
- Drain the potatoes. Peel off the skins (or some of the skins) if desired. Place the potatoes back in the pot. Use a potato masher to mash the potatoes. Based on your preference, you can roughly mash them, or mash them until smooth.: Covering with cold water ensures the potatoes cook evenly from the outside in, preventing mealy texture. The water level should be about an inch above the potatoes so they cook through without exposing tops to air. You will smell the faint minerality of the potato as the pot warms, and steam will begin to rise at the edges. Avoid adding salt to the water at this stage if you plan to judge seasoning later, as it can change the way the potatoes absorb flavors.
- Then stir in the eggs, parmesan cheese, flour, scallions, and salt. Mix well.: Listen for an energetic but controlled boil, with consistent bubbling across the surface; that steady sound tells you the heat is high enough to cook in the expected time. Boiling too vigorously can break the pieces into fragments, creating gluey texture. Keep an eye on the pot and lower the heat if the foam becomes excessive, and skim any foam away so the water remains clear for even heat transfer.
- Preheat the oven to 225 degrees F, to act as a warmer. Set a baking sheet in the oven. Set a large skillet over medium heat on the stovetop.: The right test is visual and tactile use a fork to pierce the thickest chunk, and it should slide in with little resistance and the potato should flake slightly. Overcooked potatoes will fall apart when handled, producing a watery mash; undercooked pieces will be firm and uneven. If you find some pieces cooking faster, remove them early to avoid excess water absorption which dilutes the flavor.
- Add one tablespoon butter to the skillet. Use a 3 tablespoon scoop to portion out 6-8 potato cakes into the melted butter. Use the back of a spatula to smash them flat, about 1/2 – 3/4 inch thick. Fry the potato cakes for 3-5 minutes per side.: After pouring off the cooking water, give the pot a minute to let steam escape so the potatoes dry slightly. Excess moisture is the enemy of crispness, so allow the pot to sit inverted for a short moment or return the potatoes to the warm pot over low heat for a brief shake to drive off surface water. You may smell a concentrated potato aroma as the steam lifts away. A common slip is rushing to mash while potatoes are waterlogged, which produces a gluey mix.
- Move the fried potato cakes to the warm oven. Repeat in small batches until all the potato mixture is gone.: Peeling now is easier because the skins slip away after boiling; the tactile memory of warm skins coming off is satisfying. Leaving some skins on will contribute rustic texture and subtle earthiness. If you remove all skins, the resulting mash becomes silkier. Avoid aggressively scraping with a knife which can remove more flesh than intended, reducing yield.
- Place the potatoes back in the pot: Returning the potatoes to the original pot lets residual heat finish any slight undercooking and helps evaporate remaining moisture. You will notice the pot warming and a dry steam rising a moment after stirring. This step primes the potatoes for a controlled mash, preventing excess water from undermining the binding phase later.
- Use a potato masher to mash the potatoes: Mash until you reach your preferred texture, whether roughly mashed for rustic pockets or smooth for a creamier interior. The sound changes as you work from clumps to a smooth mass a soft scraping and gentle tearing. If you overwork starchy potatoes they can become gluey, so stop once the lumps are gone or at your chosen texture point. A metal masher offers more control than a ricer for this recipe.
- Stir in the eggs parmesan cheese flour scallions and salt: When you fold these ingredients in, the mixture should feel slightly tacky but not wet; the eggs and parmesan cheese bring richness and binding, while the all purpose flour gives structure. You will see the batter become cohesive and slightly glossy from the eggs. If the mixture feels too loose, add a small dusting of flour gradually. Avoid over mixing which can make the cakes tight rather than tender.
- Preheat the oven to 225 degrees F to act as a warmer: A low oven keeps cooked cakes warm without further browning. You will feel a gentle dry heat when you open the door, and the baking sheet will be warm to the touch. This step lets you maintain crispness while finishing batches. Forgetting the warming oven can lead to cold, soggy cakes as you finish the skillet batches.
- Set a baking sheet in the oven: Place the sheet so it is centered and ready to receive finished cakes, which prevents them from sitting on room temperature surfaces and sweating. The immediate transfer to a warm sheet preserves the crust; you will hear minimal steam when you place the cakes because the oven is low. Using a cold tray will shock the cakes and draw moisture out, softening the crust prematurely.
- Set a large skillet over medium heat on the stovetop: The pan should be hot enough that a drop of water skitters across the surface, but not so hot that butter smokes. This moderate heat allows the exterior to brown slowly, creating deep color and a crisp shell while the interior gently firms. If your pan is too hot, the outside will char before the inside cooks; too cool, and the cakes will absorb fat and become greasy.
- Add one tablespoon butter to the skillet: As the butter melts you will see it foam and then quiet, and that foam subsiding is your cue to add the cakes. The butter contributes nutty flavor and helps achieve even browning. If the butter begins to brown excessively, lower the heat and wipe the pan if necessary to avoid burnt notes transferring to the cakes.
- Use a 3 tablespoon scoop to portion out 6 to 8 potato cakes into the melted butter: A consistent scoop size ensures uniform cooking time and predictable browning. When the batter hits the pan you will hear a gentle sizzle signifying immediate contact and searing. Crowding the pan reduces heat and results in steaming rather than frying, so work in small batches. If you notice splattering that is excessive, reduce the heat slightly to maintain control.
- Use the back of a spatula to smash them flat about 1/2 to 3/4 inch thick: Flattening creates more surface area for crisping and helps the cakes set evenly through the center. You should see the edges spread and begin to firm, with the center still slightly soft. Pressing too thin will make them fragile and quick to overbrown, while too thick can leave the center underdone. Aim for that moderate thickness for the best contrast.
- Fry the potato cakes for 3 to 5 minutes per side: Cook until the underside is deeply golden brown and releases easily from the pan, then flip and repeat. The sound here is key a steady, controlled sizzle without aggressive popping tells you the heat is in the right zone. The aroma will be rich and buttery with a toasty note from the cheese. Overcooking leads to a dry interior, so check visually and by touch to judge doneness.
- Move the fried potato cakes to the warm oven: Transferring to the preheated baking sheet keeps them warm and lets residual heat finish setting the centers without changing the crust. You will notice the cakes remain crisp after the move, and the oven environment prevents steam from softening them. Skipping this can result in cold centers as you continue frying batches.
- Repeat in small batches until all the potato mixture is gone: Working in batches preserves pan temperature and ensures each cake gets that perfect golden crust. As you continue, you will develop a rhythm and the pan will hold even heat between additions. Rushing by overloading the skillet will produce unevenly cooked cakes and a greasy finish, so be patient and maintain consistent portioning.
Helpful Hints
Below are practical tips I use every time I make Golden Pan Fried Potato Cakes. They focus on texture control, make ahead strategies, and reheating so you consistently get a crisp crust and tender interior.
- Room temperature eggs: Let the eggs sit at room temperature for about 10 to 15 minutes before mixing so they incorporate smoothly, preventing cold pockets that can affect binding.
- Dry the potatoes: After draining, return potatoes to the hot pot briefly to evaporate excess moisture, this avoids a wet batter that will not crisp in the skillet.
- Test one cake first: Fry a single cake as a test to check seasoning and texture before cooking the entire batch, then adjust salt or flour as needed.
- Use a metal spatula: A sturdy metal spatula gives better leverage for smashing and flipping without tearing the cakes than a flimsy plastic tool.
- Keep warm in oven: Set the oven to low heat and transfer finished cakes there so the whole batch stays crisp and warm until serving.
- Freeze individually: Wrap cooled cakes in plastic and store in a sealed bag for up to 3 months, then re crisp in a skillet when ready to eat.
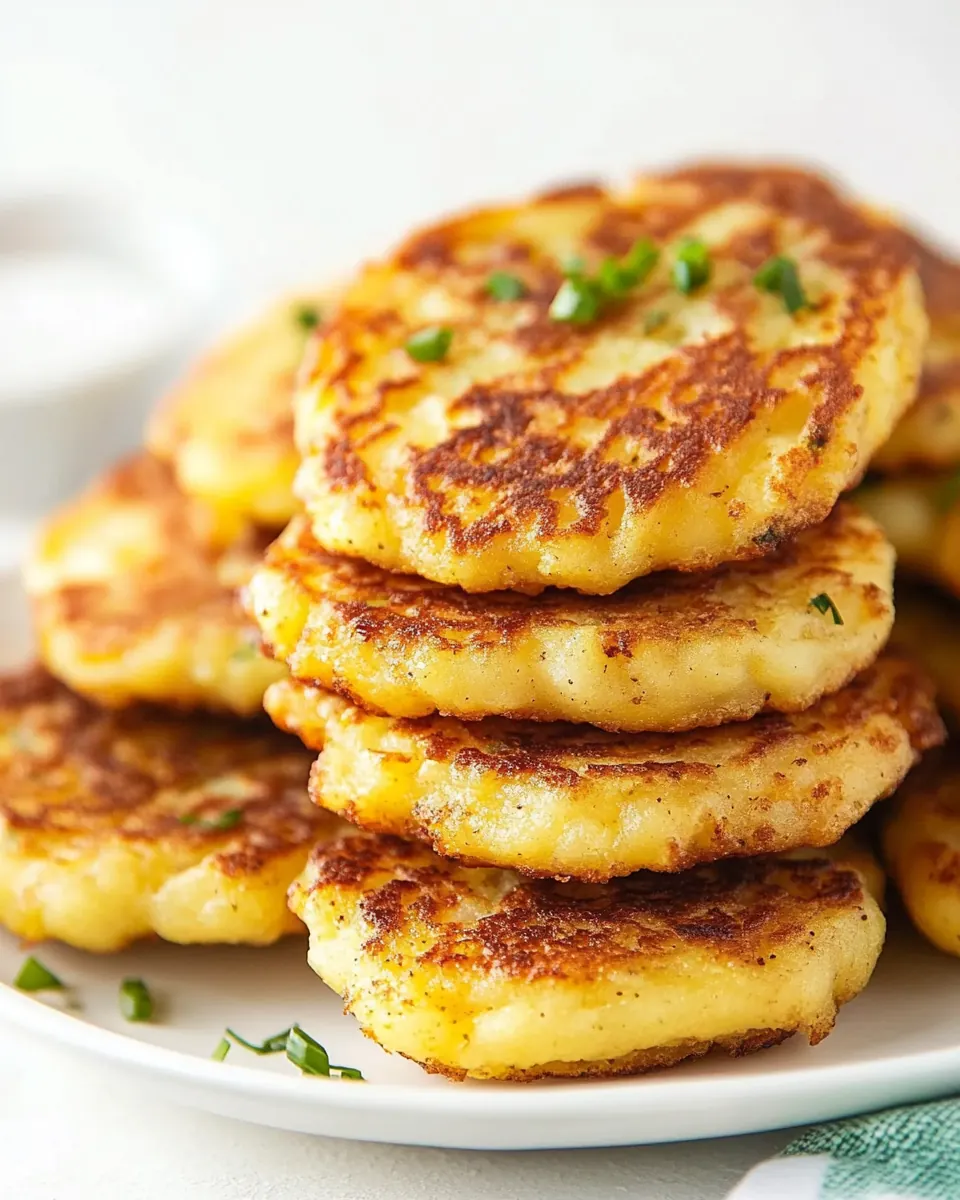
Serving Ideas for Golden Pan Fried Potato Cakes
These cakes are versatile and fit many occasions from brunch to holiday sides. Below I outline serving styles, pairings, and storage suggestions to make the most of the recipe.
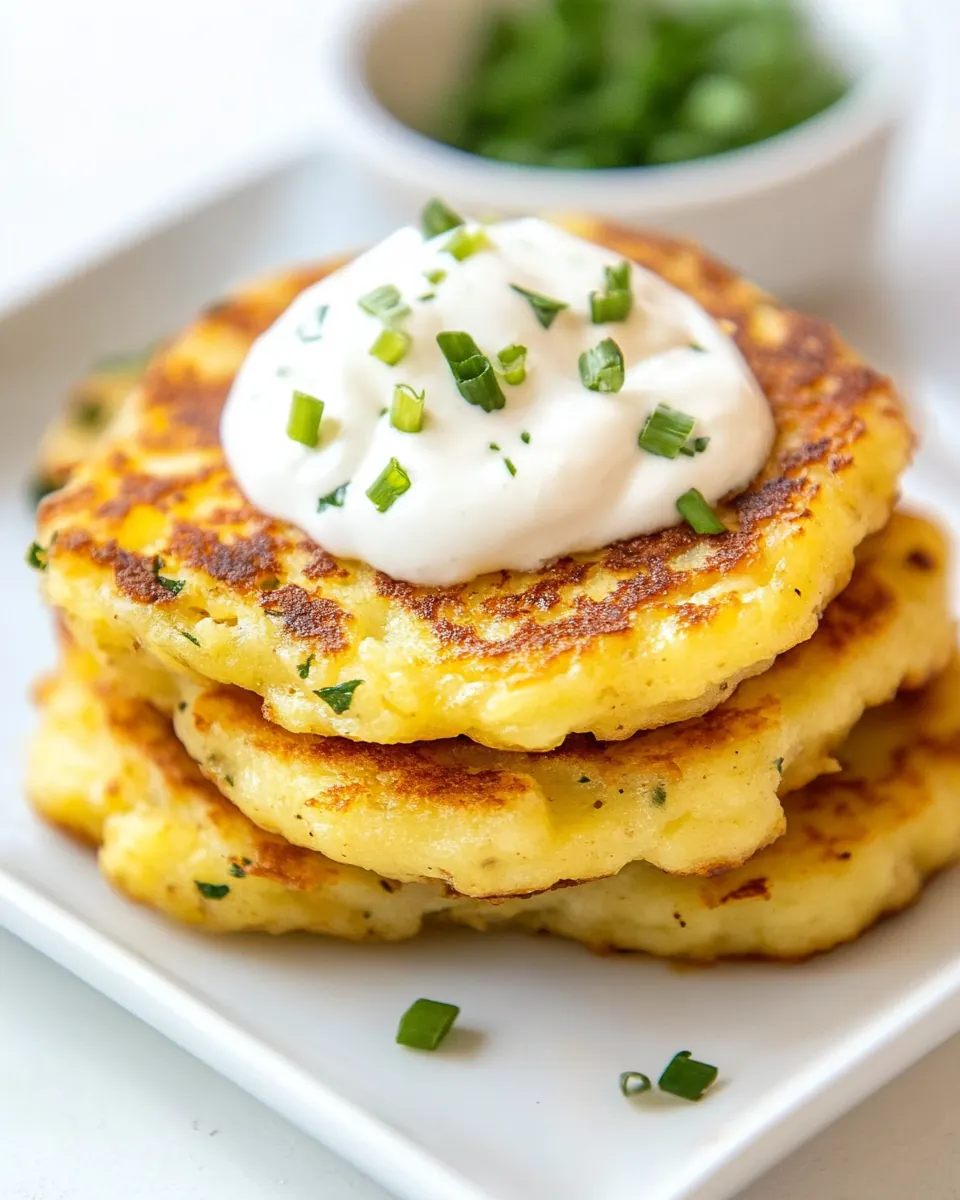
- Brunch plate: Serve a stack of Golden Pan Fried Potato Cakes with a side of fresh salad greens and a dollop of yogurt or sour cream for a relaxed mid morning meal.
- Weeknight side: Pair with roasted vegetables and a simple protein for an easy weeknight dinner, letting the cakes add texture and comfort to the plate.
- Gatherings and parties: Keep a tray in the oven and pass the cakes hot from the kitchen, they work well as finger food for casual entertaining.
- Ramadan or special occasions: These travel and reheat well, making them practical for shared meals when you need dishes that hold up over time.
- Storage tips: Refrigerate in an airtight container for 4 to 5 days, or freeze individually wrapped for up to 3 months. Reheat in a skillet to restore crispness.
- Seasonal pairings: In fall serve alongside roasted root vegetables, while in spring try lighter green salads to balance the richness of the cakes.
FAQ
Conclusion
These Golden Pan Fried Potato Cakes stand out for their golden, crisp exterior and creamy, savory interior, making them a dependable favorite for brunch, weeknight dinners, and large gatherings. Give them a try when you want a simple recipe with big texture and flavor payoff, and consider making a double batch to freeze for quick meals later. I hope you enjoy the comforting crunch and versatility as much as I do, and that these cakes become a regular in your cooking rotation.
Golden Pan Fried Potato Cakes
Equipment
- Large saucepot
- Potato Masher
- Large Skillet
- Spatula
- Baking Sheet
Ingredients
- 5 pounds Yukon Gold potatoes peeled or unpeeled Mashed or grated to provide the starchy base and tender interior for the cakes; Yukon Golds contribute a naturally buttery flavor and creamy texture that helps bind ingredients when combined with eggs and flour. Keep pieces uniformly sized for even cooking and to achieve a smooth, cohesive patty. Adjust peeling based on preference for extra rustic texture or smoother finish.
- 5 large eggs Whisked into the potato mixture to bind ingredients and add richness; large eggs introduce structure through coagulation when heated, holding the cakes together during frying. Use room-temperature eggs for easier blending and consistent set in the center.
- 1 cup grated parmesan cheese Sprinkled in to add savory depth, umami, and a slightly nutty sharpness; grated Parmesan helps season the mixture while also contributing subtle dryness that improves the cake's exterior crispness. Finely grate for even distribution and better melting into the potato base.
- 3/4 cup all-purpose flour or GF baking mix Folded into the mixture to absorb moisture and provide additional structure; all-purpose flour or a gluten-free baking mix helps create cohesive patties that hold shape while frying. Measure carefully to avoid a gummy texture, and adjust quantity slightly if potatoes are especially wet.
- 1/2 cup chopped scallions Chopped and folded in to contribute fresh, mild oniony notes and a bright contrast to rich potatoes and cheese; scallions also add small pops of color and texture in every bite. Add more of the green tops for a lighter flavor and the white parts for more pungency.
- 1 tablespoon salt Seasoned into the batter to enhance overall flavor and balance the richness from eggs and cheese; salt brings out natural potato sweetness and deepens savory notes. Dissolve evenly through the mixture to avoid concentrated salty pockets.
- Butter for frying Melted in the skillet to achieve a golden, crispy exterior while preventing sticking; butter contributes rich flavor and helps develop a savory, caramelized crust during pan-frying. Use clarified butter for higher smoke point if cooking at higher heat.
Instructions
- Cut the potatoes into large chunks. (You can peel the potatoes if you don’t like the texture of the skins, or leave the peels on and remove some or all of the skins after peeling.) Place in a large saucepot and cover with water. Set over high heat and bring to a boil. Boil the potatoes for 10-15 minutes, until fork-tender.: When the potatoes hit the water you should hear a steady simmer and see gentle rolling bubbles, not a violent boil. The goal here is even cooking, so large uniform chunks cook at the same rate and avoid gummy centers. A common mistake is cutting uneven pieces, which leads to some chunks overcooking while others remain firm. If you notice a few pieces breaking apart early, reduce the heat slightly to maintain a steady simmer.
- Drain the potatoes. Peel off the skins (or some of the skins) if desired. Place the potatoes back in the pot. Use a potato masher to mash the potatoes. Based on your preference, you can roughly mash them, or mash them until smooth.: Covering with cold water ensures the potatoes cook evenly from the outside in, preventing mealy texture. The water level should be about an inch above the potatoes so they cook through without exposing tops to air. You will smell the faint minerality of the potato as the pot warms, and steam will begin to rise at the edges. Avoid adding salt to the water at this stage if you plan to judge seasoning later, as it can change the way the potatoes absorb flavors.
- Then stir in the eggs, parmesan cheese, flour, scallions, and salt. Mix well.: Listen for an energetic but controlled boil, with consistent bubbling across the surface; that steady sound tells you the heat is high enough to cook in the expected time. Boiling too vigorously can break the pieces into fragments, creating gluey texture. Keep an eye on the pot and lower the heat if the foam becomes excessive, and skim any foam away so the water remains clear for even heat transfer.
- Preheat the oven to 225 degrees F, to act as a warmer. Set a baking sheet in the oven. Set a large skillet over medium heat on the stovetop.: The right test is visual and tactile use a fork to pierce the thickest chunk, and it should slide in with little resistance and the potato should flake slightly. Overcooked potatoes will fall apart when handled, producing a watery mash; undercooked pieces will be firm and uneven. If you find some pieces cooking faster, remove them early to avoid excess water absorption which dilutes the flavor.
- Add one tablespoon butter to the skillet. Use a 3 tablespoon scoop to portion out 6-8 potato cakes into the melted butter. Use the back of a spatula to smash them flat, about 1/2 – 3/4 inch thick. Fry the potato cakes for 3-5 minutes per side.: After pouring off the cooking water, give the pot a minute to let steam escape so the potatoes dry slightly. Excess moisture is the enemy of crispness, so allow the pot to sit inverted for a short moment or return the potatoes to the warm pot over low heat for a brief shake to drive off surface water. You may smell a concentrated potato aroma as the steam lifts away. A common slip is rushing to mash while potatoes are waterlogged, which produces a gluey mix.
- Move the fried potato cakes to the warm oven. Repeat in small batches until all the potato mixture is gone.: Peeling now is easier because the skins slip away after boiling; the tactile memory of warm skins coming off is satisfying. Leaving some skins on will contribute rustic texture and subtle earthiness. If you remove all skins, the resulting mash becomes silkier. Avoid aggressively scraping with a knife which can remove more flesh than intended, reducing yield.
- Place the potatoes back in the pot: Returning the potatoes to the original pot lets residual heat finish any slight undercooking and helps evaporate remaining moisture. You will notice the pot warming and a dry steam rising a moment after stirring. This step primes the potatoes for a controlled mash, preventing excess water from undermining the binding phase later.
- Use a potato masher to mash the potatoes: Mash until you reach your preferred texture, whether roughly mashed for rustic pockets or smooth for a creamier interior. The sound changes as you work from clumps to a smooth mass a soft scraping and gentle tearing. If you overwork starchy potatoes they can become gluey, so stop once the lumps are gone or at your chosen texture point. A metal masher offers more control than a ricer for this recipe.
- Stir in the eggs parmesan cheese flour scallions and salt: When you fold these ingredients in, the mixture should feel slightly tacky but not wet; the eggs and parmesan cheese bring richness and binding, while the all purpose flour gives structure. You will see the batter become cohesive and slightly glossy from the eggs. If the mixture feels too loose, add a small dusting of flour gradually. Avoid over mixing which can make the cakes tight rather than tender.
- Preheat the oven to 225 degrees F to act as a warmer: A low oven keeps cooked cakes warm without further browning. You will feel a gentle dry heat when you open the door, and the baking sheet will be warm to the touch. This step lets you maintain crispness while finishing batches. Forgetting the warming oven can lead to cold, soggy cakes as you finish the skillet batches.
- Set a baking sheet in the oven: Place the sheet so it is centered and ready to receive finished cakes, which prevents them from sitting on room temperature surfaces and sweating. The immediate transfer to a warm sheet preserves the crust; you will hear minimal steam when you place the cakes because the oven is low. Using a cold tray will shock the cakes and draw moisture out, softening the crust prematurely.
- Set a large skillet over medium heat on the stovetop: The pan should be hot enough that a drop of water skitters across the surface, but not so hot that butter smokes. This moderate heat allows the exterior to brown slowly, creating deep color and a crisp shell while the interior gently firms. If your pan is too hot, the outside will char before the inside cooks; too cool, and the cakes will absorb fat and become greasy.
- Add one tablespoon butter to the skillet: As the butter melts you will see it foam and then quiet, and that foam subsiding is your cue to add the cakes. The butter contributes nutty flavor and helps achieve even browning. If the butter begins to brown excessively, lower the heat and wipe the pan if necessary to avoid burnt notes transferring to the cakes.
- Use a 3 tablespoon scoop to portion out 6 to 8 potato cakes into the melted butter: A consistent scoop size ensures uniform cooking time and predictable browning. When the batter hits the pan you will hear a gentle sizzle signifying immediate contact and searing. Crowding the pan reduces heat and results in steaming rather than frying, so work in small batches. If you notice splattering that is excessive, reduce the heat slightly to maintain control.
- Use the back of a spatula to smash them flat about 1/2 to 3/4 inch thick: Flattening creates more surface area for crisping and helps the cakes set evenly through the center. You should see the edges spread and begin to firm, with the center still slightly soft. Pressing too thin will make them fragile and quick to overbrown, while too thick can leave the center underdone. Aim for that moderate thickness for the best contrast.
- Fry the potato cakes for 3 to 5 minutes per side: Cook until the underside is deeply golden brown and releases easily from the pan, then flip and repeat. The sound here is key a steady, controlled sizzle without aggressive popping tells you the heat is in the right zone. The aroma will be rich and buttery with a toasty note from the cheese. Overcooking leads to a dry interior, so check visually and by touch to judge doneness.
- Move the fried potato cakes to the warm oven: Transferring to the preheated baking sheet keeps them warm and lets residual heat finish setting the centers without changing the crust. You will notice the cakes remain crisp after the move, and the oven environment prevents steam from softening them. Skipping this can result in cold centers as you continue frying batches.
- Repeat in small batches until all the potato mixture is gone: Working in batches preserves pan temperature and ensures each cake gets that perfect golden crust. As you continue, you will develop a rhythm and the pan will hold even heat between additions. Rushing by overloading the skillet will produce unevenly cooked cakes and a greasy finish, so be patient and maintain consistent portioning.
Notes
- Room temperature eggs: Let the eggs sit at room temperature for about 10 to 15 minutes before mixing so they incorporate smoothly, preventing cold pockets that can affect binding.
- Dry the potatoes: After draining, return potatoes to the hot pot briefly to evaporate excess moisture, this avoids a wet batter that will not crisp in the skillet.
- Test one cake first: Fry a single cake as a test to check seasoning and texture before cooking the entire batch, then adjust salt or flour as needed.
- Use a metal spatula: A sturdy metal spatula gives better leverage for smashing and flipping without tearing the cakes than a flimsy plastic tool.
- Keep warm in oven: Set the oven to low heat and transfer finished cakes there so the whole batch stays crisp and warm until serving.
- Freeze individually: Wrap cooled cakes in plastic and store in a sealed bag for up to 3 months, then re crisp in a skillet when ready to eat.