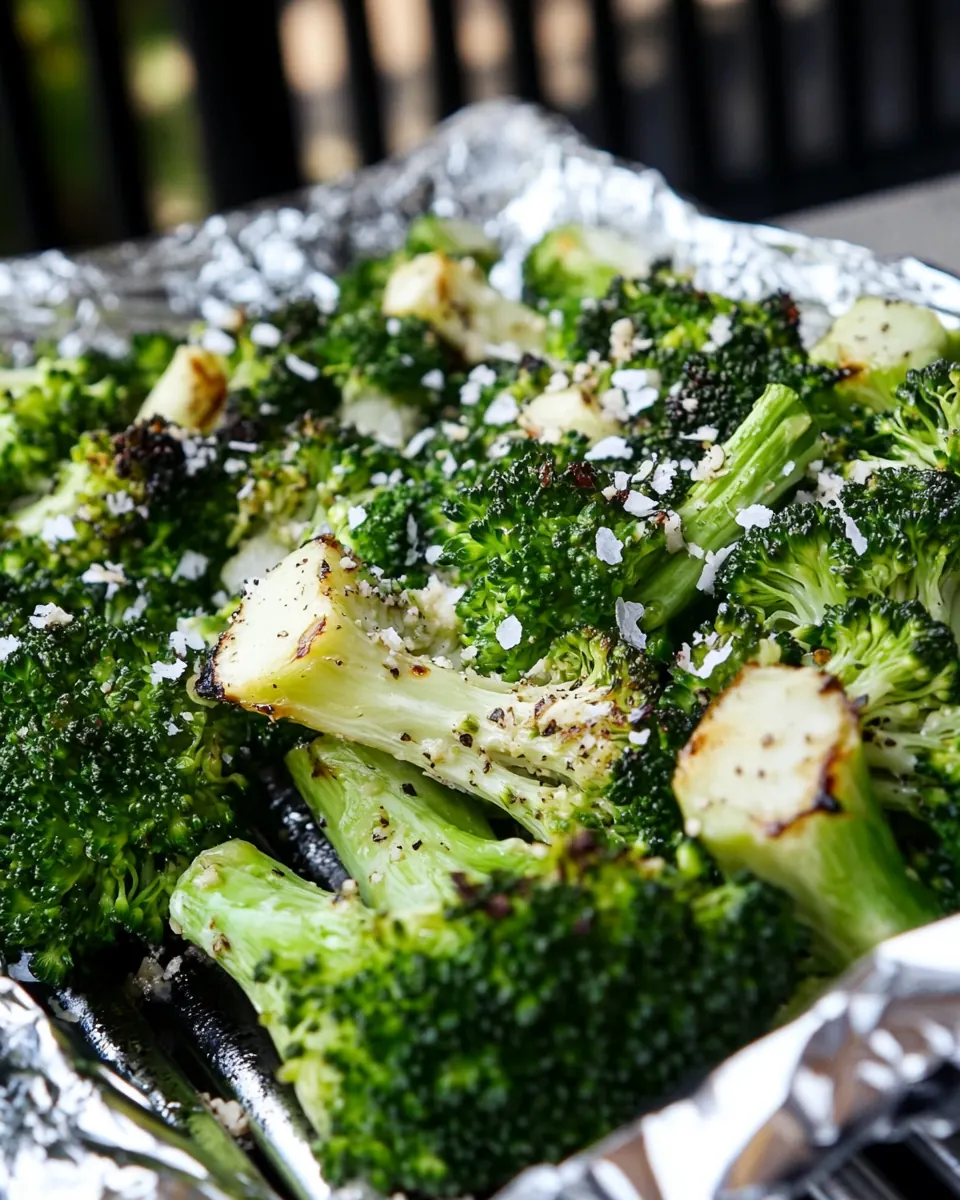
Gas Grill Broccoli Side Dish
Gas Grill Broccoli Side Dish began as a late summer rescue plan the first time I grilled for friends and realized my usual sides felt boring next to smoky steaks. I remember hauling a head of bright broccoli to the grill because it was quick and unfussy, and before long the backyard smelled like char and garlic. That first batch had those blistered edges and tender stems that made everyone ask for more. I still reach for this simple approach when I want a vegetable that stands up to big flavors and outdoor heat.
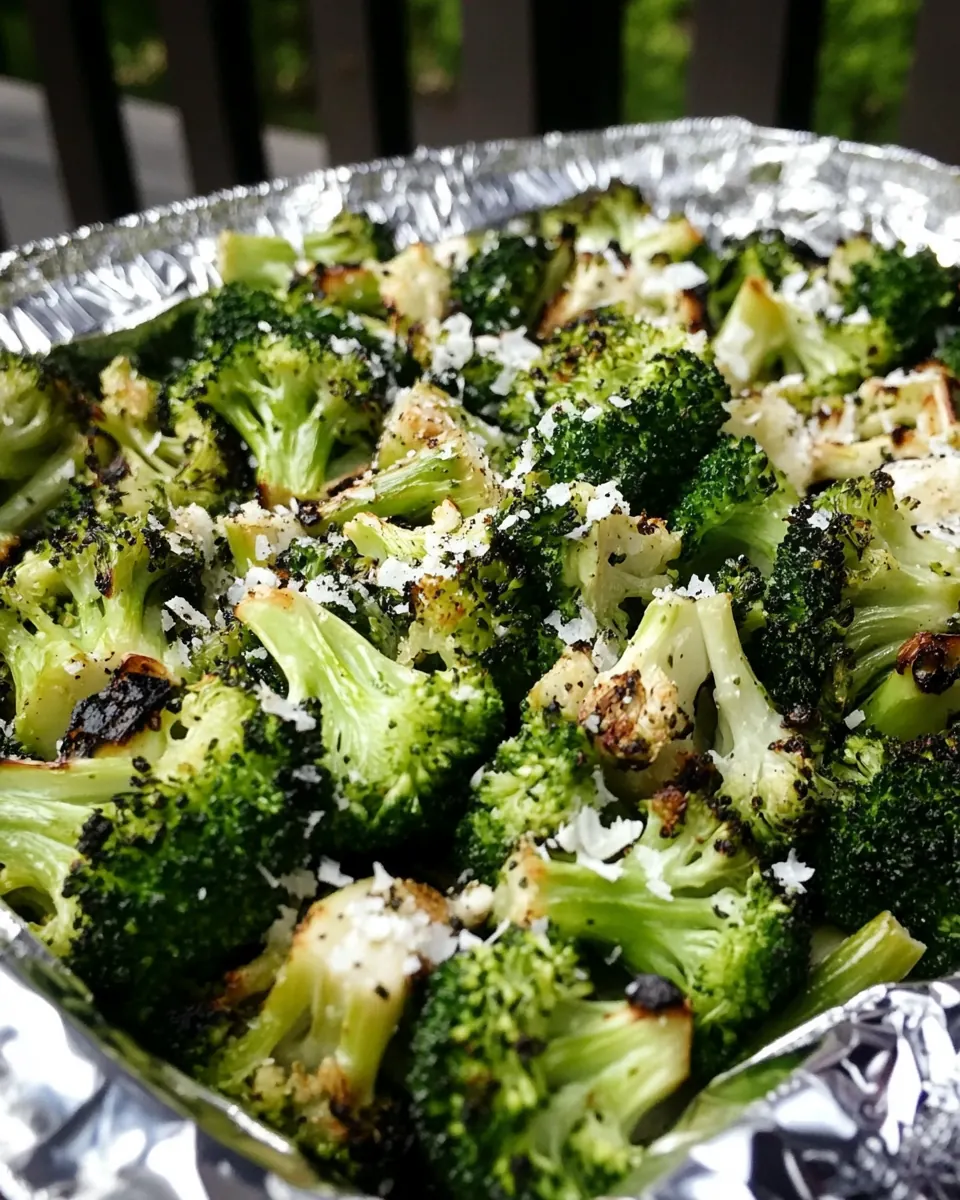
Over the years I learned a few little habits that keep the results consistent. I parboil the florets so they stay vibrant green and give the grill a moment to add texture without turning everything to mush. I toss onion and garlic with olive oil and a seasoning blend, then either grill on a foil tray or place larger pieces directly on the grates for charring. Each method has its mood, and I switch depending on whether I want smoky crispness or soft caramelized bites.
Serving this Gas Grill Broccoli Side Dish has become my go to when time is short and I still want something that feels thoughtful. It pairs beautifully with weeknight dinners, picnic spreads, and weekend barbecues. I often make a double batch and scoop leftovers into bowls for lunches, because the flavors seem to develop as it cools. If you love vegetables with personality, this is one to keep in rotation.
Recipe Snapshot
15 mins
5 mins
10 mins
Medium
150 kcal
American
Keto, Paleo
Side Dishes
Weber Spirit 3 Burner Gas Grill (similar to mine), Foil
Why You Need This Gas Grill Broccoli Side Dish
Smoky flavor with minimal fuss
I love how the grill transforms plain broccoli into something bold, without a lot of hands on time. The high heat creates those toasted edges and subtle char that balance the vegetable’s natural sweetness. You get complexity that tastes like effort, even when you only spent minutes prepping. For busy nights, it’s a cheat that still impresses.
Texture that sings
The quick blanch before grilling locks in a bright green color and a tender crisp texture. I prefer broccoli that still has a little bite, not limp and lifeless. When the florets hit the hot grates or foil, the outside gets slightly caramelized while the inside stays satisfying, so each forkful has contrast. That crunch versus char is why I keep coming back to this method.
Flexible for different occasions
Whether I need a simple weeknight side or something to bring to a potluck, this Gas Grill Broccoli Side Dish adapts. You can steamier in foil for family dinners, or move pieces to the grates for a grill party where charred bits are coveted. The basic seasoning is friendly to many mains, so you can pair it with rich proteins or light grains.
Ingredient driven and easy to scale
The recipe leans on a few honest ingredients like olive oil, onion, and garlic, so the flavors are straightforward and crowd pleasing. I can double or triple quantities without changing technique, and that makes it reliable when cooking for different group sizes. The seasoning blend ties it together and lets you adjust intensity on the fly.
Great for leftovers and make ahead
I often make an extra pan because the cooled broccoli keeps well and tastes great cold or gently reheated. Leftovers are perfect tossed into grain bowls or folded into omelets, so it’s not just a side, it’s a versatile component. That utility makes it a recipe I count on when planning meals for the week.
Ingredient List for Gas Grill Broccoli Side Dish
These few ingredients work together to create balanced, grill forward flavor. The key players are the broccoli for texture, the onion and garlic for aromatic depth, olive oil to help the seasonings cling, and the seasoning blend to lift everything. Together they keep the dish simple but layered, and they let the grill add the final touch of smoke and char.
- 1 head broccoli cut into florets: Provide structure and bulk to the dish by breaking into florets that grill evenly; offers a crisp-tender texture when charred and brings a mildly sweet, earthy flavor that pairs well with smoky notes.
- 1/2 medium onion diced in large chunks: Add savory depth and caramelized sweetness when grilled; large diced chunks hold up to high heat and release aromatic moisture that complements the broccoli.
- 1 clove garlic diced: Impart a sharp, pungent aromatics when diced and scattered over the florets; mellows with heat and integrates into the oil to enhance overall savory flavor.
- 1 tbsp olive oil: Coat vegetables for even cooking and promote browning on the grill; carries and helps distribute the seasonings while adding a subtle fruity richness.
- 1/2 tbsp seasoning any all purpose or veggie seasoning blend: Season with balanced savory and herbed flavors to elevate the dish; dissolves into the oil and clings to florets and onion pieces to create a cohesive, flavorful side.
Preparation Steps for Gas Grill Broccoli Side Dish
I like to keep directions conversational so you feel confident at each stage. These steps expand the short list from the original recipe into sensory rich guidance that helps you recognize when things are right, and how to avoid common slips. You will find tips about texture, timing, and how the grill changes flavor.
- Bring a large pot of salted water to a boil on the stove. On the counter, assemble a cold ice bath in a large bowl and set aside.: The first noticeable cue is the rolling motion of the water and the sound of bubbles breaking quickly, which means the pot is hot enough to blanch. Salting the water seasons the broccoli from the inside out, so you do not rely solely on external seasoning. You will smell the clean steam as the water rises, and that steam helps brighten the vegetable color when it hits the water. A common mistake is under salting the water, which leaves the florets tasting flat; use a handful of salt so the water tastes slightly sea like. Keep the lid off as you wait so you can see the boil forming clearly, and don't crowd the pot later or the water temperature will drop.
- Add broccoli to the pot when the water begins to boil. Boil for 1 – 2 minutes to quickly blanch broccoli. Then transfer it to the ice bath to stop it from cooking further. Strain cooled broccoli with a colander.: As the broccoli enters the pot you will hear a soft hiss and see the water react. Blanching for about 1 to 2 minutes softens the exterior just enough while preserving a bright green interior. Immediately transfer the florets to an ice bath so the cooling stops the cooking process and locks in texture and color; you should hear a faint clink as the hot florets hit the cold water. The why here is crucial, it prevents overcooking which leads to mushy, dull colored vegetables. A typical error is leaving broccoli in hot water too long, which ruins the crisp tender quality, so drain promptly and use a colander to remove excess water thoroughly.
- Dice the onion into large chunks and dice the garlic clove. Set aside.: When you cut the onion into chunks, its sugars are preserved and will caramelize rather than turn to a paste on the grill. The diced garlic releases a warm, savory scent once mixed with oil, and that aroma intensifies as it grills. You will notice the onion giving off a faint sweet onion perfume and the garlic a sharper, roasted edge as it heats. Avoid mincing the onion too finely because tiny pieces can burn or fall through the grill; keep them chunky to stay intact and to provide bites of soft sweetness alongside the broccoli.
- Add all ingredients to a large bowl and combine to season broccoli all over for the grill.: The moment you toss the prepared broccoli , onion , garlic , olive oil , and seasoning together, you will see the oil form a glossy coating and smell the mingling aromas. Mixing by hand or with tongs ensures the seasoning clings to the surfaces, which makes a visible difference when they hit the heat. This coating helps those edges brown instead of steaming excessively, which deepens flavor. One mistake is adding too much oil, which can make the foil soggy and prevent desired charring, so aim for an even light sheen rather than puddles of oil.
- With a piece of foil, make a large area like a baking sheet tray with a rim on the edges. Dump seasoned broccoli and onions on the foil sheet.: Create a shallow tray that will hold the vegetables and catch juices, and place the seasoned mixture onto this foil. The foil serves two purposes, it keeps smaller pieces from falling through the grates and it creates a steaming environment that still allows browning. You should feel a gentle resistance as you fold the rims to form the tray, and visually confirm there is enough room so vegetables lie mostly in a single layer. A common oversight is creating too flat a packet which steams instead of letting pieces brown; ensure the tray has space so air and heat circulate.
- Preheat the grill to high. Our grill reached about 450-500 degrees F.: Bring the grill up so the temperature reaches roughly 450 to 500 degrees F, which you will notice by the roar of the burners and the rising heat on your face when you open the lid. A hot grill is what creates quick searing and char on the vegetables, sealing flavors and producing those caramelized notes. Preheating also prevents sticking and reduces cook time. Do not skip this step because a cooler surface will steam the vegetables and create a limp result rather than the desirable crisp edges.
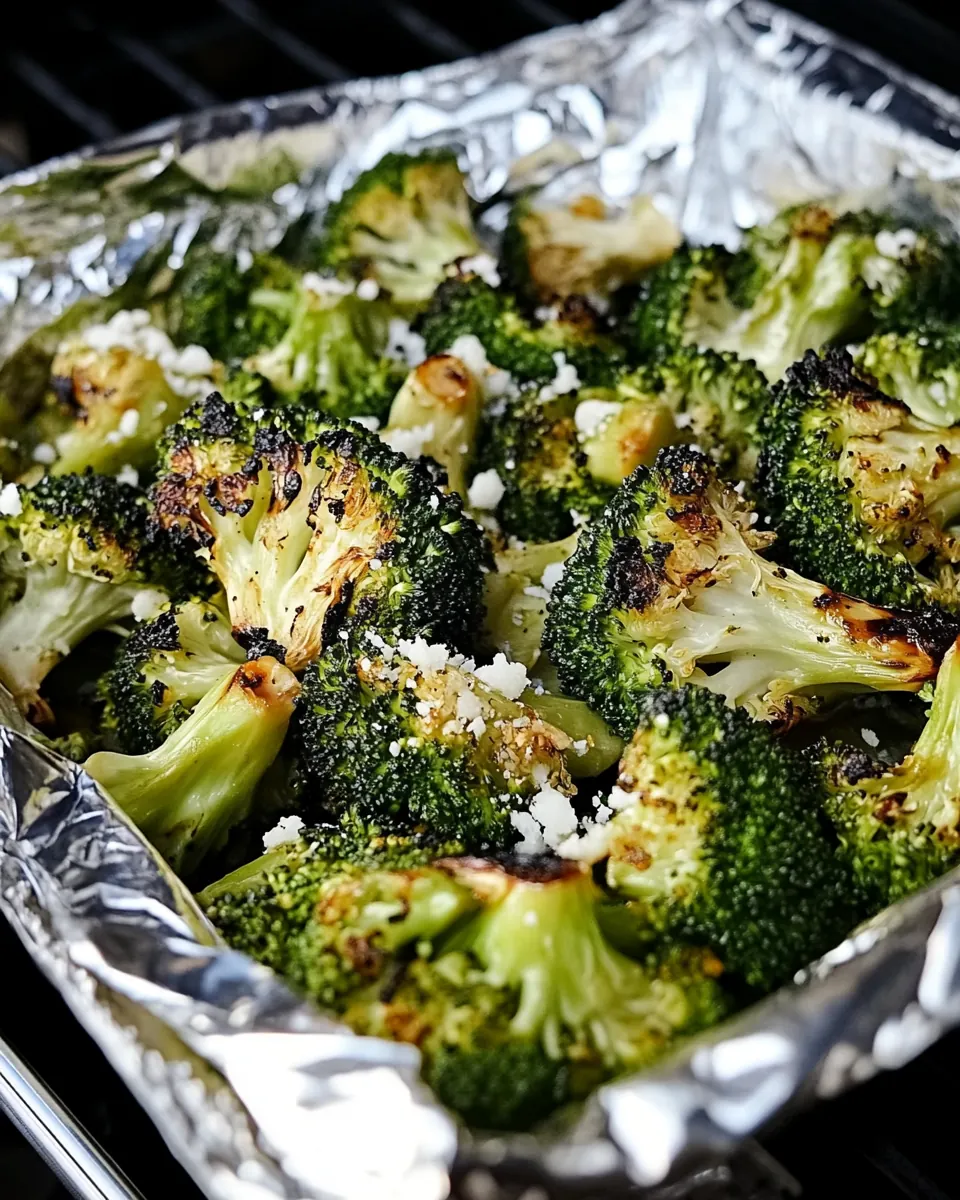
- Once the grill is hot, add broccoli and onions mixture with foil beneath it. Close the lid and grill broccoli and onions for 8-10 minutes. Every few minutes, open the lid and toss around vegetables with tongs to get seasonings all over and help the grilled veggies cook evenly.: As the tray hits the grates you will hear a sizzle and see steam rise, signaling that the surface is transforming sugars into savory browned bits. Close the lid to trap heat and smoke, which imparts that roasted, almost sweet quality to the broccoli . Every couple of minutes open the lid and toss the pieces so they brown evenly; this action distributes heat and seasoning across surfaces. A frequent mistake is leaving the lid closed for too long, which can over steam and prevent attractive charring, so plan to check and turn often.
- Optional – if desired, move large broccoli florets directly on to grill grates to get a char (otherwise they just steam in the foil, which is tasty, too). Choose ones that won’t fall through the grates. Leave the onions on the foil because they’re smaller.: If you want intensified grill marks and additional smoky flavor, place only the larger florets directly on the grates where they will hiss and caramelize. You will see clear grill marks forming within moments and smell a concentrated toasted scent. Choose florets that are substantial enough not to fall through the bars, and leave the smaller pieces on the foil where they will soften and sweeten. Avoid moving tiny pieces to the grates because they can drop into flames and char into bitterness.
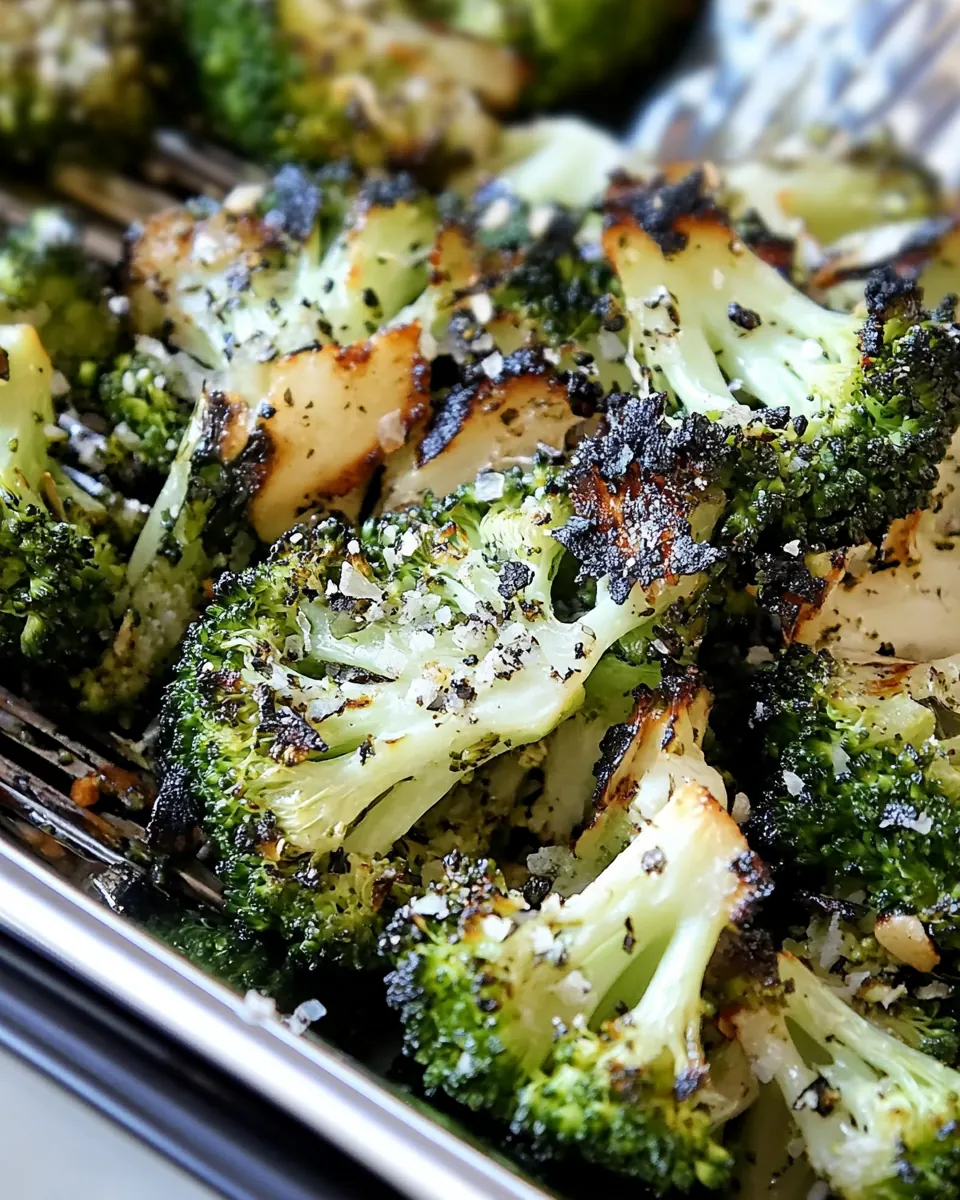
- Close the grill for 1-2 minutes longer to finish charring.: This short burst under the closed lid lets residual heat deepen the sear and finish any slight steaming in the foil tray without drying the interiors. Listen for a lower steady hiss as the vegetables finish; that indicates they are finishing rather than aggressively cooking. The brief rest under heat melds flavors together, enhancing savory notes. The common mistake here is overdoing it, which can turn the broccoli black rather than a pleasing deep brown, so watch closely and use a quick peek to check progress.
- Remove grilled broccoli and onions, enjoy when cooled.: When you lift the tray or pull the florets from the grates, expect a fragrant mix of roasted garlic and sweet onion with warm, smoky broccoli . Letting it cool for a few minutes allows juices to settle and flavors to concentrate, making it easier to taste and serve. The final texture should be tender yet with some tooth, and the surface should show golden to dark brown spots without burning. A typical error is serving immediately while piping hot, which can mask subtler flavors and be less pleasant to eat, so give it a short moment before plating.
Change It Up
These tips help you customize the recipe while keeping the essentials intact. Small tweaks change texture and flavor substantially, so the list below offers practical variations and handling notes to experiment with. Use them as jumping off points based on the meal you are building.
- Char directly for extra smokiness Move only the largest florets onto the grates to develop dark grill marks without losing too much interior moisture, which deepens flavor and gives a pleasant contrast in texture.
- Foil tray for easier cleanup Keep smaller pieces on a foil tray to prevent falling through and to create a steaming environment that softens edges while still picking up some caramelization from the heat below.
- Adjust seasoning intensity Increase the amount of seasoning blend for bolder flavor or reduce it for a lighter, vegetable forward profile; seasoning is the simplest control for how assertive the final plate will be.
- Control garlic exposure Toss garlic in near the end if you prefer a milder roasted note, or add it at the start for deeper toasty garlic aroma that permeates the dish.
- Keep some raw for crunch Reserve a few small florets raw and sprinkle them on top after grilling for fresh green pop and contrasting texture in each bite.
Perfect Pairings for Gas Grill Broccoli Side Dish
This Gas Grill Broccoli Side Dish works across many meals. Whether you are building a casual barbecue plate, a simple weeknight dinner, or a special seasonal spread, these pairing ideas show how to serve it thoughtfully. Below are serving suggestions, occasions, and storage tips to help you present it well.
- Serve with grilled proteins Pair with simply seasoned meats or plant based mains to balance savory richness with bright, charred vegetables, creating a complete plate.
- Include in lunch bowls Toss cooled broccoli into grain bowls with a drizzle of dressing and a scoop of cooked whole grains for an easy make ahead lunch that holds up well.
- Offer as a Ramadan iftar side This vegetable is gentle yet flavorful, ideal for breaking fast when you want something nutritious and easy to digest alongside heartier mains.
- Seasonal summer menus Because it grills so well, use it during summer cookouts and patio dinners when fresh market broccoli is at its best and the grill is already fired up.
- Storage and reheating Store in an airtight container in the fridge for up to three days, then reheat gently in a skillet or enjoy cold in salads; avoid microwave reheating which can make it soggy.
- Presentation notes Serve warm or at room temperature on a platter, arranging larger charred florets on top for visual appeal and scattering any pan juices back over the vegetables before serving.
FAQ
Conclusion
This Gas Grill Broccoli Side Dish stands out because it transforms simple vegetables into a smoky, textured side with minimal effort. I encourage you to give it a try when you want a dependable vegetable that impresses without fuss. It fits into weeknight dinners and summer gatherings alike, and once you taste the contrast of tender interior and charred edges, it will become one of your go to sides.
Gas Grill Broccoli Side Dish
Equipment
- Weber Spirit 3 Burner Gas Grill (similar to mine)
- Foil
Ingredients
- 1 head broccoli cut into florets Provide structure and bulk to the dish by breaking into florets that grill evenly; offers a crisp-tender texture when charred and brings a mildly sweet, earthy flavor that pairs well with smoky notes.
- 1/2 medium onion diced in large chunks Add savory depth and caramelized sweetness when grilled; large diced chunks hold up to high heat and release aromatic moisture that complements the broccoli.
- 1 clove garlic diced Impart a sharp, pungent aromatics when diced and scattered over the florets; mellows with heat and integrates into the oil to enhance overall savory flavor.
- 1 tbsp olive oil Coat vegetables for even cooking and promote browning on the grill; carries and helps distribute the seasonings while adding a subtle fruity richness.
- 1/2 tbsp seasoning any all purpose or veggie seasoning blend Season with balanced savory and herbed flavors to elevate the dish; dissolves into the oil and clings to florets and onion pieces to create a cohesive, flavorful side.
Instructions
- Bring a large pot of salted water to a boil on the stove. On the counter, assemble a cold ice bath in a large bowl and set aside.: The first noticeable cue is the rolling motion of the water and the sound of bubbles breaking quickly, which means the pot is hot enough to blanch. Salting the water seasons the broccoli from the inside out, so you do not rely solely on external seasoning. You will smell the clean steam as the water rises, and that steam helps brighten the vegetable color when it hits the water. A common mistake is under salting the water, which leaves the florets tasting flat; use a handful of salt so the water tastes slightly sea like. Keep the lid off as you wait so you can see the boil forming clearly, and don't crowd the pot later or the water temperature will drop.
- Add broccoli to the pot when the water begins to boil. Boil for 1 – 2 minutes to quickly blanch broccoli. Then transfer it to the ice bath to stop it from cooking further. Strain cooled broccoli with a colander.: As the broccoli enters the pot you will hear a soft hiss and see the water react. Blanching for about 1 to 2 minutes softens the exterior just enough while preserving a bright green interior. Immediately transfer the florets to an ice bath so the cooling stops the cooking process and locks in texture and color; you should hear a faint clink as the hot florets hit the cold water. The why here is crucial, it prevents overcooking which leads to mushy, dull colored vegetables. A typical error is leaving broccoli in hot water too long, which ruins the crisp tender quality, so drain promptly and use a colander to remove excess water thoroughly.
- Dice the onion into large chunks and dice the garlic clove. Set aside.: When you cut the onion into chunks, its sugars are preserved and will caramelize rather than turn to a paste on the grill. The diced garlic releases a warm, savory scent once mixed with oil, and that aroma intensifies as it grills. You will notice the onion giving off a faint sweet onion perfume and the garlic a sharper, roasted edge as it heats. Avoid mincing the onion too finely because tiny pieces can burn or fall through the grill; keep them chunky to stay intact and to provide bites of soft sweetness alongside the broccoli.
- Add all ingredients to a large bowl and combine to season broccoli all over for the grill.: The moment you toss the prepared broccoli , onion , garlic , olive oil , and seasoning together, you will see the oil form a glossy coating and smell the mingling aromas. Mixing by hand or with tongs ensures the seasoning clings to the surfaces, which makes a visible difference when they hit the heat. This coating helps those edges brown instead of steaming excessively, which deepens flavor. One mistake is adding too much oil, which can make the foil soggy and prevent desired charring, so aim for an even light sheen rather than puddles of oil.
- With a piece of foil, make a large area like a baking sheet tray with a rim on the edges. Dump seasoned broccoli and onions on the foil sheet.: Create a shallow tray that will hold the vegetables and catch juices, and place the seasoned mixture onto this foil. The foil serves two purposes, it keeps smaller pieces from falling through the grates and it creates a steaming environment that still allows browning. You should feel a gentle resistance as you fold the rims to form the tray, and visually confirm there is enough room so vegetables lie mostly in a single layer. A common oversight is creating too flat a packet which steams instead of letting pieces brown; ensure the tray has space so air and heat circulate.
- Preheat the grill to high. Our grill reached about 450-500 degrees F.: Bring the grill up so the temperature reaches roughly 450 to 500 degrees F, which you will notice by the roar of the burners and the rising heat on your face when you open the lid. A hot grill is what creates quick searing and char on the vegetables, sealing flavors and producing those caramelized notes. Preheating also prevents sticking and reduces cook time. Do not skip this step because a cooler surface will steam the vegetables and create a limp result rather than the desirable crisp edges.
- Once the grill is hot, add broccoli and onions mixture with foil beneath it. Close the lid and grill broccoli and onions for 8-10 minutes. Every few minutes, open the lid and toss around vegetables with tongs to get seasonings all over and help the grilled veggies cook evenly.: As the tray hits the grates you will hear a sizzle and see steam rise, signaling that the surface is transforming sugars into savory browned bits. Close the lid to trap heat and smoke, which imparts that roasted, almost sweet quality to the broccoli . Every couple of minutes open the lid and toss the pieces so they brown evenly; this action distributes heat and seasoning across surfaces. A frequent mistake is leaving the lid closed for too long, which can over steam and prevent attractive charring, so plan to check and turn often.
- Optional – if desired, move large broccoli florets directly on to grill grates to get a char (otherwise they just steam in the foil, which is tasty, too). Choose ones that won’t fall through the grates. Leave the onions on the foil because they’re smaller.: If you want intensified grill marks and additional smoky flavor, place only the larger florets directly on the grates where they will hiss and caramelize. You will see clear grill marks forming within moments and smell a concentrated toasted scent. Choose florets that are substantial enough not to fall through the bars, and leave the smaller pieces on the foil where they will soften and sweeten. Avoid moving tiny pieces to the grates because they can drop into flames and char into bitterness.
- Close the grill for 1-2 minutes longer to finish charring.: This short burst under the closed lid lets residual heat deepen the sear and finish any slight steaming in the foil tray without drying the interiors. Listen for a lower steady hiss as the vegetables finish; that indicates they are finishing rather than aggressively cooking. The brief rest under heat melds flavors together, enhancing savory notes. The common mistake here is overdoing it, which can turn the broccoli black rather than a pleasing deep brown, so watch closely and use a quick peek to check progress.
- Remove grilled broccoli and onions, enjoy when cooled.: When you lift the tray or pull the florets from the grates, expect a fragrant mix of roasted garlic and sweet onion with warm, smoky broccoli . Letting it cool for a few minutes allows juices to settle and flavors to concentrate, making it easier to taste and serve. The final texture should be tender yet with some tooth, and the surface should show golden to dark brown spots without burning. A typical error is serving immediately while piping hot, which can mask subtler flavors and be less pleasant to eat, so give it a short moment before plating.
Notes
- Char directly for extra smokiness Move only the largest florets onto the grates to develop dark grill marks without losing too much interior moisture, which deepens flavor and gives a pleasant contrast in texture.
- Foil tray for easier cleanup Keep smaller pieces on a foil tray to prevent falling through and to create a steaming environment that softens edges while still picking up some caramelization from the heat below.
- Adjust seasoning intensity Increase the amount of seasoning blend for bolder flavor or reduce it for a lighter, vegetable forward profile; seasoning is the simplest control for how assertive the final plate will be.
- Control garlic exposure Toss garlic in near the end if you prefer a milder roasted note, or add it at the start for deeper toasty garlic aroma that permeates the dish.
- Keep some raw for crunch Reserve a few small florets raw and sprinkle them on top after grilling for fresh green pop and contrasting texture in each bite.