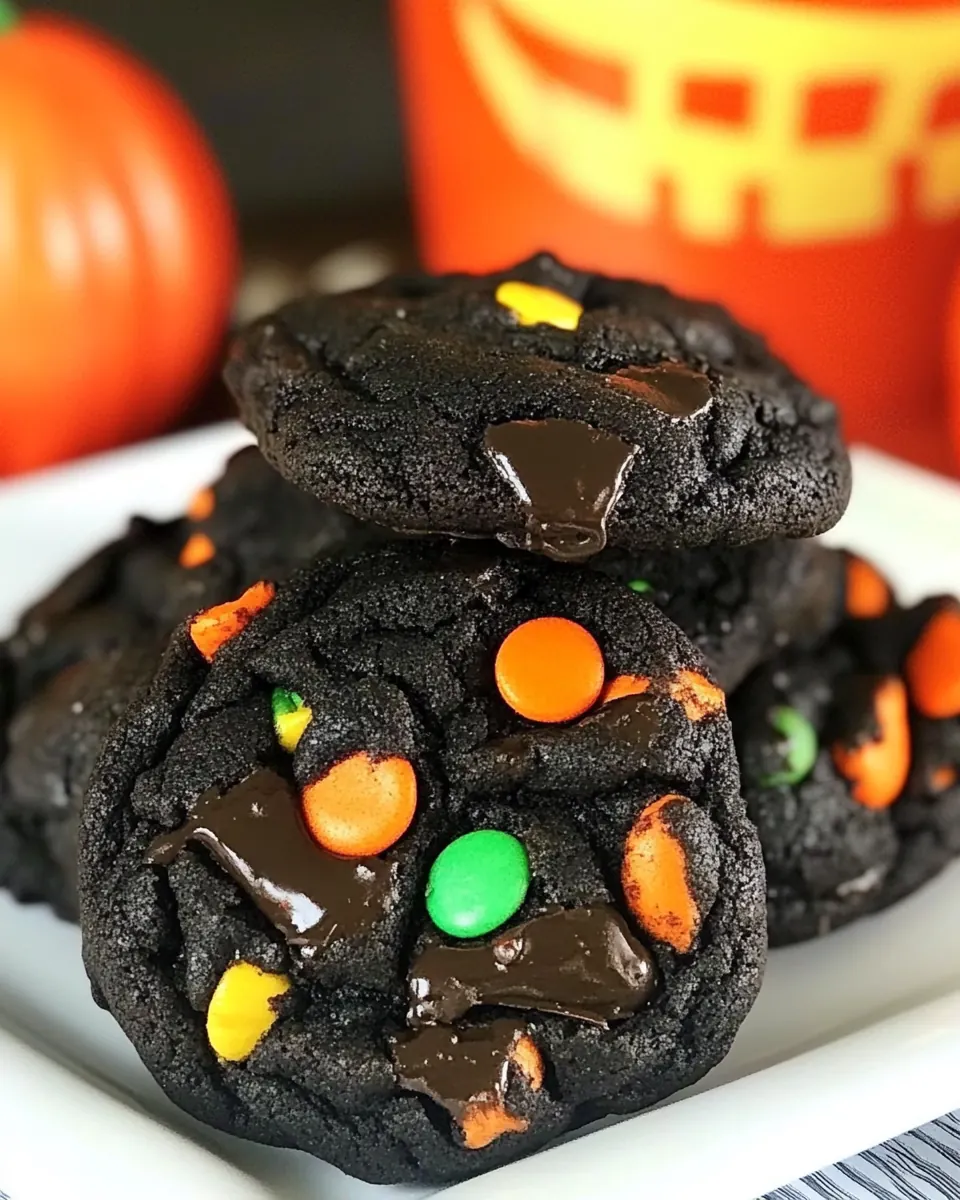
Chocolate Chocolate Halloween Cookies
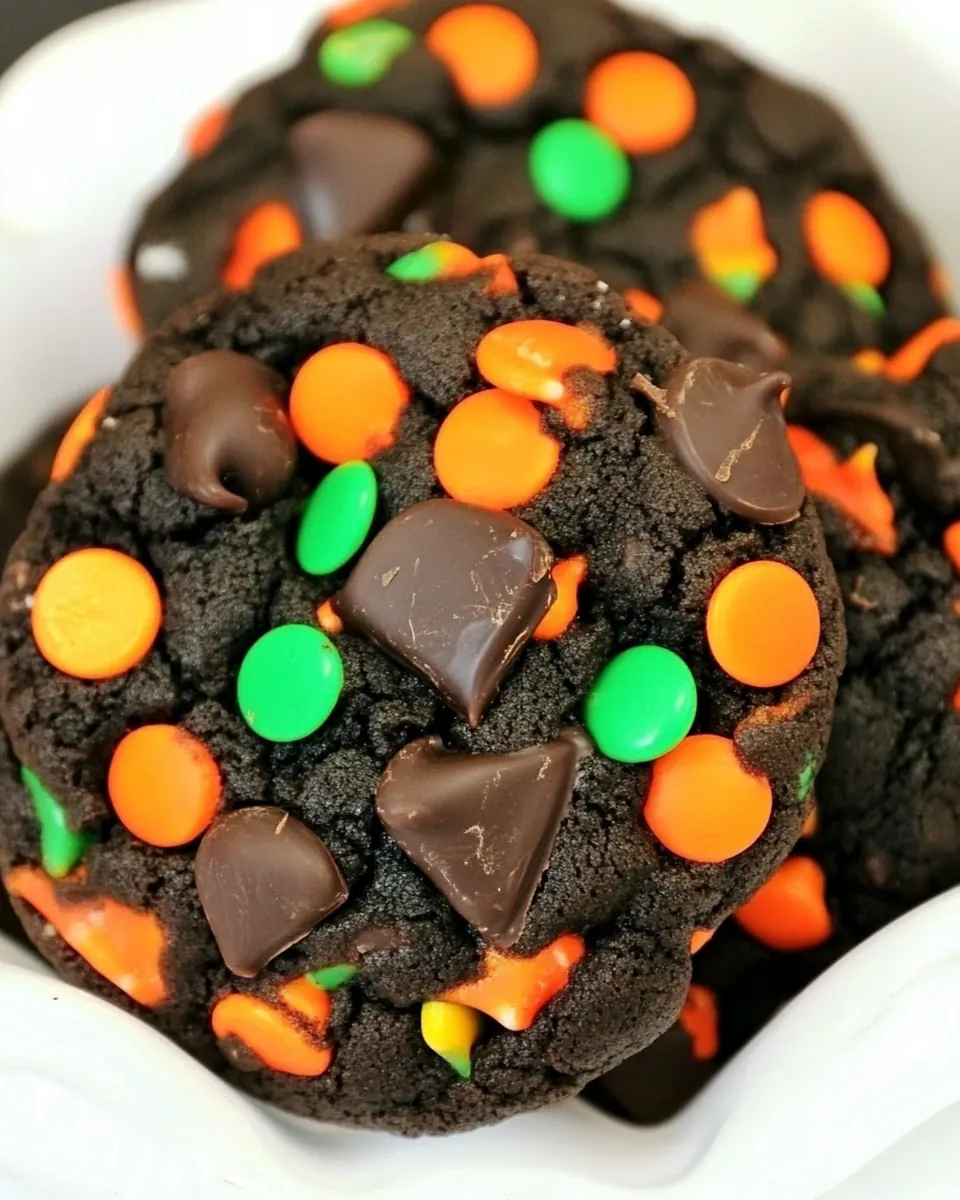
Chocolate Chocolate Halloween Cookies are the kind of treat I reach for when I want something festive, fun, and unapologetically chocolatey. The first time I made these, I was racing the clock before a neighborhood bash, juggling a toddler, a playlist, and a slow drip of rain outside, yet the kitchen filled with warm cocoa aroma and a comfort that felt like homecoming. I remember watching the colorful candy melt slightly into glossy islands on each cookie, and I felt satisfied in a way that only baking can give you.
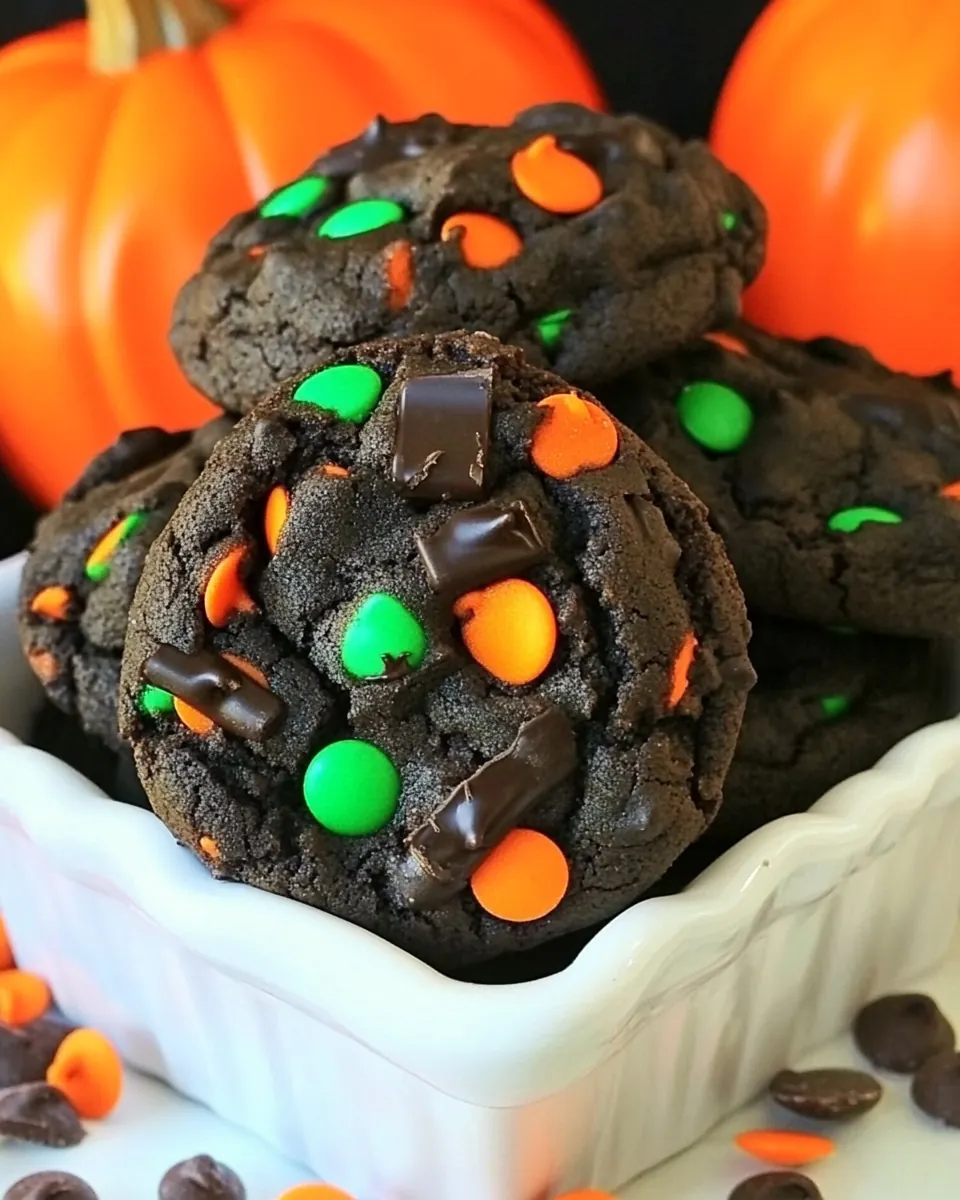
There is a particular rhythm to making these cookies that I love, from creaming the softened butter and sugars until they’re fluffy, to the quiet satisfaction of folding in glossy chocolate chips and little pops of colorful Sixlets. Each batch becomes a small celebration, whether for a spooky gathering or a simple afterschool treat. I like to tuck a few in a waxed paper bag for neighbors, and the bright candies always spark a smile.
Recipe Snapshot
30 mins
20 mins
10 mins
Easy
150 kcal
American
Gluten-Free, Low FODMAP
Desserts
Electric mixer, Mixing bowls, Baking sheets, Wire racks, Cookie scoop or tablespoon
The Beauty of This Chocolate Chocolate Halloween Cookies
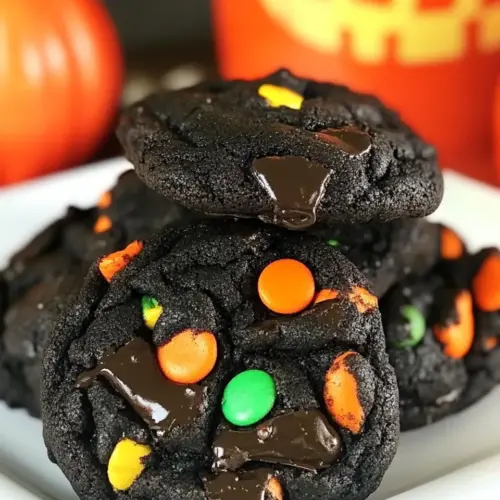
Rich, Double Chocolate Pleasure
I adore how Chocolate Chocolate Halloween Cookies deliver two layers of cocoa goodness. The dough itself uses unsweetened cocoa powder for a deep, slightly bitter backbone, while the chocolate chips add molten, sweet pockets that offset the cocoa. I find this contrast irresistible, and it keeps each bite interesting.
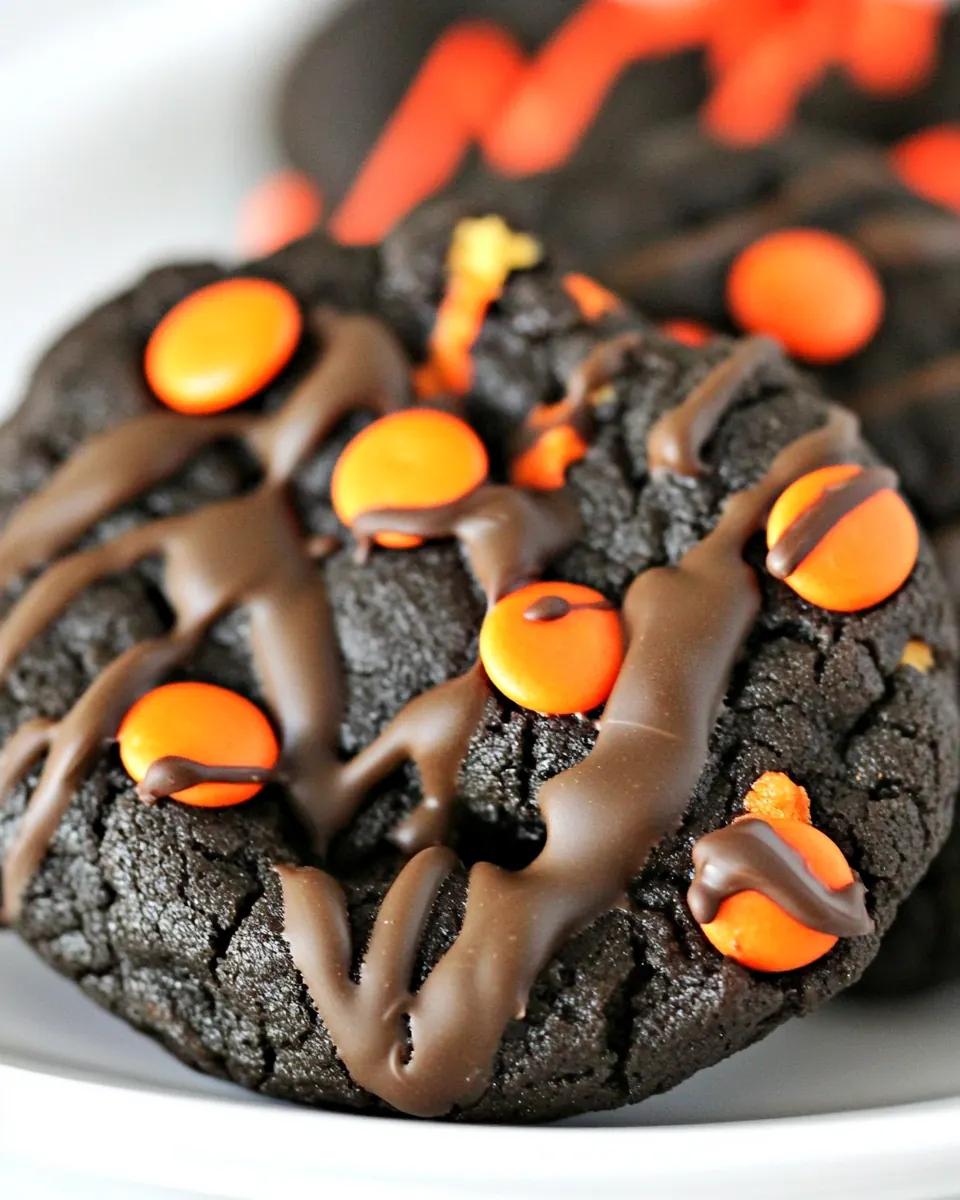
Fun and Festive Finish
These cookies are playful without being fussy. Tossing in holiday Sixlets gives a candy crunch and bright color that makes them party ready. I love that you can use regular chips if you prefer, yet the small candies bring a nostalgic, seasonal pop that children adore.
Comforting Texture Balance
The recipe gives you a tender, slightly chewy cookie with crisp edges. The combination of softened butter, two sugars, and the right amount of flour creates a dough that spreads just enough to develop golden, crisp rims while keeping a soft center. I always watch for visual cues to hit that perfect texture.
Simple, Reliable Process
I appreciate how approachable these cookies are. You do familiar techniques, like creaming and gradual mixing, and the result is consistently terrific. When I want dependable baking that still feels special, this recipe fits the bill.
Great for Sharing and Gifting
Because they hold up well, these cookies are ideal for gatherings. I often bake a double batch and package them in small boxes. They travel nicely, and the colorful candies make them instantly giftable. I find my friends ask for the recipe each year.
Chocolate Chocolate Halloween Cookies Ingredients
These ingredients are deliberately simple and purposeful. I rely on sturdy, classic pantry players to build deep chocolate flavor and a pleasing cookie texture. The key players are flour for structure, cocoa powder for chocolate intensity, and a balance of granulated sugar and light brown sugar for sweetness and chew. The butter and eggs add richness and act as binders, while the mix ins bring texture and visual interest.
- 2 cups flour: Measure carefully to provide structure and bulk to the dough; flour forms the framework that holds together fats and liquids. Sift if desired to avoid lumps and ensure even mixing for tender cookies.
- 2/3 cup unsweetened cocoa powder I use dark cocoa: Use unsweetened cocoa powder to deliver intense chocolate flavor and deep color; dark cocoa will produce a richer, more robust taste. Whisk into dry ingredients to prevent clumping and ensure even chocolate distribution.
- 1 teaspoon baking soda: Leaven with baking soda to create lightness and spread in the cookies by reacting with acidic components. Measure precisely to avoid off flavors and to achieve balanced rise and texture.
- 1/4 teaspoons salt: Season with a small amount of salt to enhance overall flavor and balance sweetness; even a quarter teaspoon has a noticeable effect. Dissolve into dry mixture so the seasoning disperses evenly through the dough.
- 1 cup 2 sticks butter, softened: Cream softened butter to add richness, moisture, and tender crumb; butter also contributes to flavor and spread during baking. Ensure it is at room temperature for proper creaming with sugars to incorporate air.
- 1 cup granulated sugar: Cream granulated sugar with butter to help aerate the dough and provide sweetness and structure; sugar affects texture and browning. Adjust creaming time to influence cookie chewiness and spread.
- 2/3 cup firmly packed light brown sugar: Add firmly packed light brown sugar to impart moisture, subtle molasses notes, and chewiness; the liquid content helps create a soft interior. Pack consistently to maintain recipe balance and mix thoroughly with butter.
- 2 eggs: Incorporate eggs to bind ingredients, provide moisture, and contribute to leavening and richness through their proteins and fats. Beat slightly before adding if a uniform texture is desired and to help with emulsification.
- 2 teaspoons McCormick® Pure Vanilla Extract: Include vanilla extract to enhance and round out the chocolate flavors with warm aromatic notes; pure vanilla gives the best depth. Add during mixing so the flavor disperses evenly through the batter.
- 1 cup holiday chocolate chips regular chocolate chips work just fine: Fold in holiday chocolate chips to add pockets of melted chocolate and bursts of sweetness throughout the cookies. Distribute evenly in the dough to ensure each cookie contains chips for texture contrast.
- 1 cup holiday Sixlets: Stir in holiday Sixlets for colorful, crunchy candy accents that provide contrasting texture and festive appearance. Add gently at the end to avoid breaking the candy shells and to keep colors vibrant.
Chocolate Chocolate Halloween Cookies Instructions
I like to think of the process as rhythmic and sensory rich. You will hear the mixer hum, smell deep cocoa as ingredients combine, and see dough transform from coarse crumbs to glossy, studded mounds. Follow the cues in your kitchen, and trust the visual and tactile signs as much as the clock.
- Preheat oven to 350°F. Mix flour, cocoa powder, baking soda and salt in medium bowl. Set aside. Beat butter and sugars in large bowl with electric mixer on medium speed until light and fluffy. Add eggs and vanilla; mix well. Gradually beat in flour mixture on low speed until well mixed. Stir in chocolate chips and Sixlets.: As the oven warms, you will notice the kitchen begin to take on a faint, warm heat that primes your baking surface. Preheating ensures even baking and correct spread. A common mistake is placing cookies into an oven that is not fully heated, which can cause uneven texture and underbaked centers. Check that racks are centered so heat circulates evenly, and if your oven has hotspots, rotate the baking sheet halfway through baking for uniform color and doneness.
- Drop by rounded tablespoons about 2 inches apart onto baking sheets sprayed with no stick cooking spray.: Right away you will smell the earthy aroma of cocoa powder mingling with the faint bite of baking soda, which is normal. Sifting or whisking helps remove lumps and ensures an even distribution of leavening, preventing streaks of raw cocoa in the dough. A troubleshooting tip, if you notice clumps of cocoa try pressing them through a fine mesh or whisking longer, because unincorporated lumps lead to uneven pockets of dry powder in the cookie.
- Bake 8 to 10 minutes or just until cookies are set. Cool on baking sheets 2 minutes. Remove to wire racks; cool completely.: As you cream, you will see the butter and sugars transform from pale to lighter and slightly aerated. This creates tiny air pockets that contribute to tender texture and slight lift. If your butter is too cold it will not cream properly, if it is too warm the mixture will be greasy. The right texture looks smooth and ribbon like when the beater is lifted, so stop when you reach that stage to avoid overbeating which can deflate the air and yield dense cookies.
- Add eggs and vanilla; mix well.: When the eggs and vanilla go in, the batter will gloss over and smell more aromatic. Eggs help emulsify the mixture, creating cohesion. If eggs are cold they can cause the batter to seize; bring them to room temperature for a smoother blend. If you see curdling, beat a spoonful of dry ingredients in to rescue the texture and keep going.
- Gradually beat in flour mixture on low speed until well mixed.: Adding the dry mix slowly keeps the dough from becoming overworked, preserving tenderness. On low speed, you will notice the dough darken and thicken, and the beaters may slow as the mass becomes more substantial. Overmixing activates gluten and yields a tougher cookie, so stop when there are no visible streaks of flour. If you still find pockets of dry mix, fold by hand with a spatula to finish gently.
- Stir in chocolate chips and Sixlets.: As you fold in the chocolate chips and Sixlets , you will see glossy pockets and bright candy peeking through the dough. Distribute them evenly so every cookie has both melty chocolate and candy crunch. If you dump them in and overmix, the candies can bleed color into the dough, so fold just until combined. A common issue is clumping of chips in one zone, so scrape the bowl and fold from the bottom to ensure even spread.
- Drop by rounded tablespoons about 2 inches apart onto baking sheets sprayed with no stick cooking spray.: Hearing the slight thud as each scoop hits the sheet is oddly satisfying, and spacing is key so cookies have room to spread and not fuse. Use a cookie scoop for uniform size; inconsistent scoops produce uneven bake times. If cookies bake into each other, reduce size or increase spacing, and consider using parchment for easier release and cleanup.
- Bake 8 to 10 minutes or just until cookies are set.: During baking, you will see the edges take on a faint sheen and the centers look slightly glossy. The aroma of cocoa and melting chocolate will intensify and waft through your kitchen. Remove at the visual cue of set centers, because overbaking can dry them out. If you find your cookies consistently overcook, lower the time or temperature slightly and test a small batch to dial in the perfect window.
- Cool on baking sheets 2 minutes.: Letting the cookies rest on the sheet allows residual heat to finish the cooking and helps them hold their shape when moved. You will notice they firm up a touch and the melted chips settle. Resist the urge to transfer immediately, because they can tear or flatten if moved while too soft. If they seem overly soft after two minutes, give them an extra minute before transferring.
- Remove to wire racks; cool completely.: As the cookies cool on wire racks, air circulates beneath them, preventing soggy bottoms and preserving crisp edges. You will see the candy set and the chocolate return to a more stable state. For storage, once completely cool, place them in an airtight container so they maintain texture. A common mistake is stacking hot cookies which can trap steam and soften them, so always ensure complete cooling first.
Recipe Notes about Chocolate Chocolate Halloween Cookies
These notes capture practical adjustments and ideas I use when baking this cookie. They address common questions and offer alternatives that respect the original ingredient list and the recipe s intent.
- Chilling Option If you want thicker cookies, chill the dough for 30 to 60 minutes before scooping. Chilled dough spreads less in the oven, producing taller cookies with tender centers. Keep in mind chilling may slightly mute aroma, so allow dough to sit briefly at room temperature if it becomes too stiff.
- Even Scoops Use a medium cookie scoop to ensure uniform size so all cookies bake evenly. Uneven scoops cause some to finish much earlier than others which complicates timing. If you lack a scoop, use a tablespoon measure for consistency.
- Baking Sheet Prep Line sheets with parchment paper or silicone mats rather than relying solely on spray, this helps prevent browning on the bottom and makes cleanup easier. Parchment also helps cookies slide off intact once cooled.
- Storage Store cooled cookies in an airtight container at room temperature for up to four days. To preserve crisp edges, separate layers with parchment. For longer storage, freeze fully cooled cookies between sheets of parchment and thaw on the counter when ready to enjoy.
- Chip Variety Regular chocolate chips are a great substitute for holiday chips if unavailable, giving the same melty pockets without seasonal shapes. Maintain the same volume to preserve texture and sweetness balance.
What to Serve With Chocolate Chocolate Halloween Cookies
These cookies pair well with simple accompaniments and suit a range of occasions from casual snack times to holiday gatherings. They travel well, make festive party platters, and are ideal for giving away. Consider pairing them with beverages or other treats to build a thoughtful spread.
- Milk or Non Dairy Milk Serving cold milk is classic, as the creaminess balances rich cocoa. Non dairy milks work equally well for guests with dietary preferences, and both accentuate the chocolate flavor.
- Coffee or Hot Chocolate A warm cup complements the cookies for an afternoon pick me up. For a cozy feel, offer it in a thermal carafe at gatherings and let guests ladle as desired.
- Cookie Platter Pair with plain sugar cookies or oatmeal for contrast in texture and flavor, and arrange by color to make a festive display. The bright candies will anchor a seasonal table visually.
- Party Occasions These are ideal for Halloween parties, school events, or neighborhood exchanges, because they are handheld and kid friendly. Place them in small treat bags for easy distribution.
- Storage Tips For make ahead, bake and cool completely, then store in an airtight container at room temperature up to four days, or freeze for longer. Thaw in the container to preserve texture.
- Seasonal Pairings In fall, present alongside spiced beverages and warm ciders to echo seasonal flavors. The rich chocolate plays nicely against cinnamon or nutmeg in companion drinks.
FAQ
Conclusion
What makes these cookies special is their unapologetic double chocolate depth and cheerful holiday crunch. They combine deep cocoa, melty chocolate chips, and colorful candies to create an irresistible bite that suits both casual snacks and festive gatherings. I encourage you to bake a batch soon, enjoy the comforting aroma while they bake, and share them with friends or family to spread a little seasonal joy.
Chocolate Chocolate Halloween Cookies
Equipment
- Electric Mixer
- Mixing Bowls
- Baking Sheets
- Wire racks
- Cookie scoop or tablespoon
Ingredients
- 2 cups flour Measure carefully to provide structure and bulk to the dough; flour forms the framework that holds together fats and liquids. Sift if desired to avoid lumps and ensure even mixing for tender cookies.
- 2/3 cup unsweetened cocoa powder I use dark cocoa Use unsweetened cocoa powder to deliver intense chocolate flavor and deep color; dark cocoa will produce a richer, more robust taste. Whisk into dry ingredients to prevent clumping and ensure even chocolate distribution.
- 1 teaspoon baking soda Leaven with baking soda to create lightness and spread in the cookies by reacting with acidic components. Measure precisely to avoid off flavors and to achieve balanced rise and texture.
- 1/4 teaspoons salt Season with a small amount of salt to enhance overall flavor and balance sweetness; even a quarter teaspoon has a noticeable effect. Dissolve into dry mixture so the seasoning disperses evenly through the dough.
- 1 cup 2 sticks butter, softened Cream softened butter to add richness, moisture, and tender crumb; butter also contributes to flavor and spread during baking. Ensure it is at room temperature for proper creaming with sugars to incorporate air.
- 1 cup granulated sugar Cream granulated sugar with butter to help aerate the dough and provide sweetness and structure; sugar affects texture and browning. Adjust creaming time to influence cookie chewiness and spread.
- 2/3 cup firmly packed light brown sugar Add firmly packed light brown sugar to impart moisture, subtle molasses notes, and chewiness; the liquid content helps create a soft interior. Pack consistently to maintain recipe balance and mix thoroughly with butter.
- 2 eggs Incorporate eggs to bind ingredients, provide moisture, and contribute to leavening and richness through their proteins and fats. Beat slightly before adding if a uniform texture is desired and to help with emulsification.
- 2 teaspoons McCormick® Pure Vanilla Extract Include vanilla extract to enhance and round out the chocolate flavors with warm aromatic notes; pure vanilla gives the best depth. Add during mixing so the flavor disperses evenly through the batter.
- 1 cup holiday chocolate chips regular chocolate chips work just fine Fold in holiday chocolate chips to add pockets of melted chocolate and bursts of sweetness throughout the cookies. Distribute evenly in the dough to ensure each cookie contains chips for texture contrast.
- 1 cup holiday Sixlets Stir in holiday Sixlets for colorful, crunchy candy accents that provide contrasting texture and festive appearance. Add gently at the end to avoid breaking the candy shells and to keep colors vibrant.
Instructions
- Preheat oven to 350°F. Mix flour, cocoa powder, baking soda and salt in medium bowl. Set aside. Beat butter and sugars in large bowl with electric mixer on medium speed until light and fluffy. Add eggs and vanilla; mix well. Gradually beat in flour mixture on low speed until well mixed. Stir in chocolate chips and Sixlets.: As the oven warms, you will notice the kitchen begin to take on a faint, warm heat that primes your baking surface. Preheating ensures even baking and correct spread. A common mistake is placing cookies into an oven that is not fully heated, which can cause uneven texture and underbaked centers. Check that racks are centered so heat circulates evenly, and if your oven has hotspots, rotate the baking sheet halfway through baking for uniform color and doneness.
- Drop by rounded tablespoons about 2 inches apart onto baking sheets sprayed with no stick cooking spray.: Right away you will smell the earthy aroma of cocoa powder mingling with the faint bite of baking soda, which is normal. Sifting or whisking helps remove lumps and ensures an even distribution of leavening, preventing streaks of raw cocoa in the dough. A troubleshooting tip, if you notice clumps of cocoa try pressing them through a fine mesh or whisking longer, because unincorporated lumps lead to uneven pockets of dry powder in the cookie.
- Bake 8 to 10 minutes or just until cookies are set. Cool on baking sheets 2 minutes. Remove to wire racks; cool completely.: As you cream, you will see the butter and sugars transform from pale to lighter and slightly aerated. This creates tiny air pockets that contribute to tender texture and slight lift. If your butter is too cold it will not cream properly, if it is too warm the mixture will be greasy. The right texture looks smooth and ribbon like when the beater is lifted, so stop when you reach that stage to avoid overbeating which can deflate the air and yield dense cookies.
- Add eggs and vanilla; mix well.: When the eggs and vanilla go in, the batter will gloss over and smell more aromatic. Eggs help emulsify the mixture, creating cohesion. If eggs are cold they can cause the batter to seize; bring them to room temperature for a smoother blend. If you see curdling, beat a spoonful of dry ingredients in to rescue the texture and keep going.
- Gradually beat in flour mixture on low speed until well mixed.: Adding the dry mix slowly keeps the dough from becoming overworked, preserving tenderness. On low speed, you will notice the dough darken and thicken, and the beaters may slow as the mass becomes more substantial. Overmixing activates gluten and yields a tougher cookie, so stop when there are no visible streaks of flour. If you still find pockets of dry mix, fold by hand with a spatula to finish gently.
- Stir in chocolate chips and Sixlets.: As you fold in the chocolate chips and Sixlets , you will see glossy pockets and bright candy peeking through the dough. Distribute them evenly so every cookie has both melty chocolate and candy crunch. If you dump them in and overmix, the candies can bleed color into the dough, so fold just until combined. A common issue is clumping of chips in one zone, so scrape the bowl and fold from the bottom to ensure even spread.
- Drop by rounded tablespoons about 2 inches apart onto baking sheets sprayed with no stick cooking spray.: Hearing the slight thud as each scoop hits the sheet is oddly satisfying, and spacing is key so cookies have room to spread and not fuse. Use a cookie scoop for uniform size; inconsistent scoops produce uneven bake times. If cookies bake into each other, reduce size or increase spacing, and consider using parchment for easier release and cleanup.
- Bake 8 to 10 minutes or just until cookies are set.: During baking, you will see the edges take on a faint sheen and the centers look slightly glossy. The aroma of cocoa and melting chocolate will intensify and waft through your kitchen. Remove at the visual cue of set centers, because overbaking can dry them out. If you find your cookies consistently overcook, lower the time or temperature slightly and test a small batch to dial in the perfect window.
- Cool on baking sheets 2 minutes.: Letting the cookies rest on the sheet allows residual heat to finish the cooking and helps them hold their shape when moved. You will notice they firm up a touch and the melted chips settle. Resist the urge to transfer immediately, because they can tear or flatten if moved while too soft. If they seem overly soft after two minutes, give them an extra minute before transferring.
- Remove to wire racks; cool completely.: As the cookies cool on wire racks, air circulates beneath them, preventing soggy bottoms and preserving crisp edges. You will see the candy set and the chocolate return to a more stable state. For storage, once completely cool, place them in an airtight container so they maintain texture. A common mistake is stacking hot cookies which can trap steam and soften them, so always ensure complete cooling first.
Notes
- Chilling Option If you want thicker cookies, chill the dough for 30 to 60 minutes before scooping. Chilled dough spreads less in the oven, producing taller cookies with tender centers. Keep in mind chilling may slightly mute aroma, so allow dough to sit briefly at room temperature if it becomes too stiff.
- Even Scoops Use a medium cookie scoop to ensure uniform size so all cookies bake evenly. Uneven scoops cause some to finish much earlier than others which complicates timing. If you lack a scoop, use a tablespoon measure for consistency.
- Baking Sheet Prep Line sheets with parchment paper or silicone mats rather than relying solely on spray, this helps prevent browning on the bottom and makes cleanup easier. Parchment also helps cookies slide off intact once cooled.
- Storage Store cooled cookies in an airtight container at room temperature for up to four days. To preserve crisp edges, separate layers with parchment. For longer storage, freeze fully cooled cookies between sheets of parchment and thaw on the counter when ready to enjoy.
- Chip Variety Regular chocolate chips are a great substitute for holiday chips if unavailable, giving the same melty pockets without seasonal shapes. Maintain the same volume to preserve texture and sweetness balance.