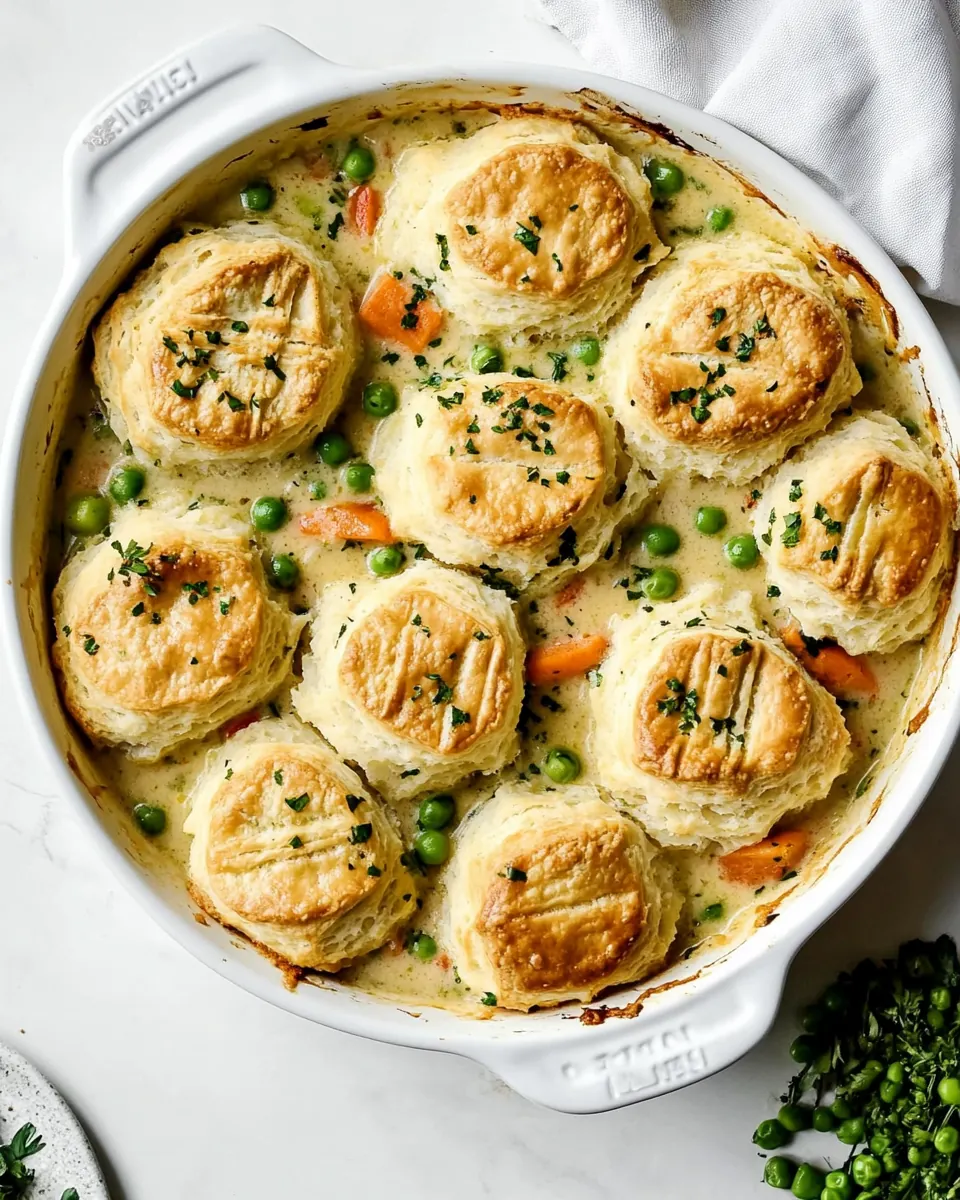
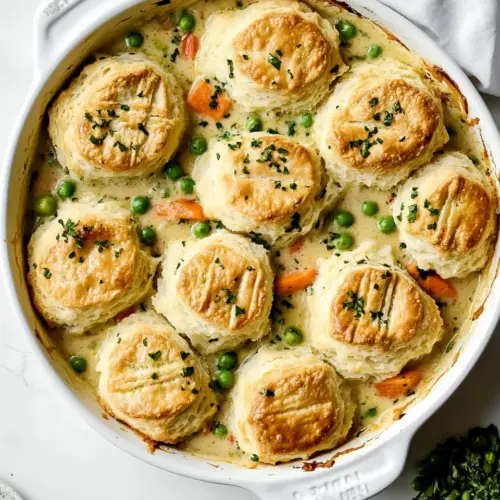
Chicken Pot Pie with Biscuits
Chicken Pot Pie with Biscuits is the kind of comfort I reach for when the evening feels like it needs a warm, honest hug from the oven.
I remember the first time I tried this version, I had a cold snap and a half eaten rotisserie chicken in the fridge, and I wanted something cozy without fuss. The skillet filled the house with a savory, buttered aroma while the biscuits rose golden and tender on top, and I kept stealing small forksfuls while I waited. That memory sticks with me because this recipe turns simple pantry items into a meal that feels thoughtfully prepared, not just thrown together.
When I bring this to the table, everyone leans in for the crispy biscuit tops and the creamy, herb scented filling. You can tell a lot about a recipe by the sound it makes while cooking, and the soft simmer, the gentle bubbling at the edges, and the faint sizzle when the biscuits hit the filling tell me it is doing right by the flavors. I like to serve it with minimal fuss, letting the pot pie be the star, and watching people tuck into generous spoonfuls makes me grin every time.
Recipe Snapshot
45 mins
20 mins
25 mins
Medium
450 kcal
American
Gluten-Free, Low FODMAP
Dinner
12-inch Cast Iron Skillet
The Beauty of This Chicken Pot Pie with Biscuits
Comfort food that warms from the inside out
I adore how Chicken Pot Pie with Biscuits brings sticky, soothing comfort to any evening. The creamy filling clings to each forkful so every bite feels indulgent, making it ideal for nights when you want warmth and familiarity on the plate.
Speed without losing soul
We often think comfort food means long days in the kitchen, but this recipe moves quickly. Using shredded chicken and a biscuit topping keeps the total time reasonable, so you get rich flavor without a full day of work. That efficiency is why I reach for it on busy weeks.
Textural contrast that sings
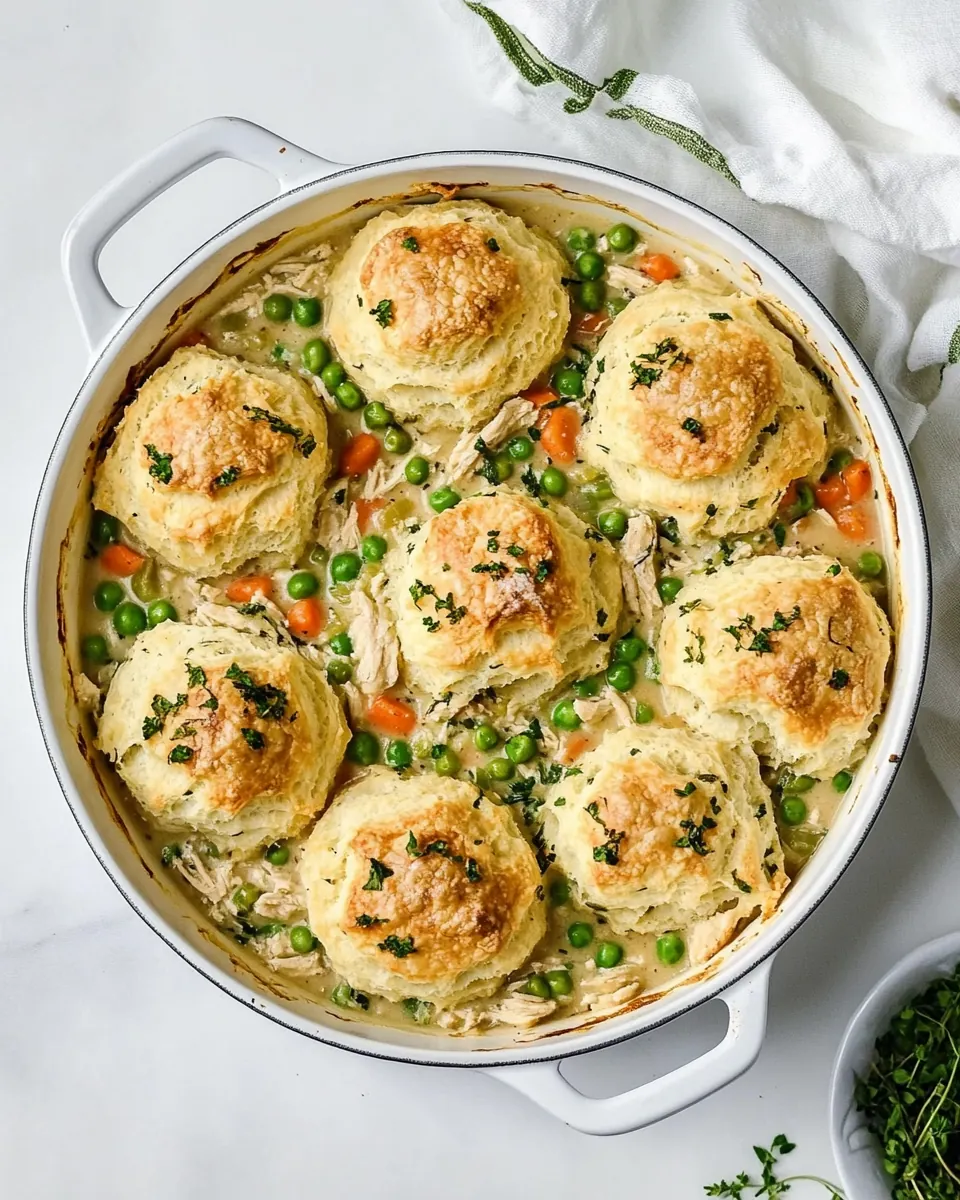
The interplay between the silky filling and the tender, slightly crisp biscuits is a big reason I come back to this dish. The vegetables offer gentle bite and the herbs give aromatic lift, so each spoonful is layered and interesting rather than one note.
Flexible and forgiving
I love recipes that let you adapt without losing the point. This pot pie accepts rotisserie chicken or leftovers, and the biscuit topping is forgiving if the dough is a touch wet. That forgiving nature means the results stay delicious even when life gets in the way.
Great for sharing and leftovers
Generous servings and easy reheating make this dish perfect for family dinners or casual gatherings. Leftovers keep their flavor, and reheating gently in a low oven restores the biscuit’s exterior crispness, so the meal stretches beyond a single sitting.
Chicken Pot Pie with Biscuits Ingredients
These ingredients come together to create a harmonious balance between a lush, savory filling and a fluffy biscuit top. The key players are the chicken, which provides hearty protein and texture, the dairy and butter that build a rich mouthfeel, and the combination of flour and baking agents that create biscuits with lift and tenderness. Vegetables like carrots and celery add sweetness and structure, while peas and parsley bring brightness.
- 1/4 cup unsalted butter: Melted to create a flavorful base for sautéing aromatics and forming the roux, contributing rich dairy fat for a silky sauce.
- 1/2 large yellow onion, diced: Diced to provide sweet, savory depth and texture when softened, balancing other vegetables and enhancing overall flavor complexity.
- 3 medium carrots, chopped: Chopped to add natural sweetness, body, and a tender bite that complements the creamy filling and adds color contrast.
- 2 celery ribs, chopped: Chopped to lend earthy, slightly bitter freshness and a satisfying crunch that melds with carrots and onions during cooking.
- 3 cloves garlic, minced: Mince finely to infuse a pungent, aromatic boost into the filling, brightening savory flavors and pairing well with herbs.
- 1/3 cup all-purpose flour: Sprinkled in to absorb fat and liquid during cooking, forming the thickening roux that yields a smooth, cohesive gravy.
- 1 teaspoon dried thyme: Sprinkled to contribute warm, woodsy notes and aromatic background that harmonizes with poultry and vegetables in the pot pie.
- 1 teaspoon kosher salt: Added to season and enhance all flavors, promoting balance and bringing out the savory qualities of the filling ingredients.
- 1/2 teaspoon black pepper: Ground to provide mild heat and aromatic lift, balancing richness and highlighting the savory, herby elements in the dish.
- 3 cups chicken broth or stock: Poured in to build the savory liquid base for the filling, supplying depth and body and helping the roux form a sauce.
- 1 cup heavy cream: Stirred into the filling to add luxurious creaminess and richness, making the sauce velvety and enhancing mouthfeel.
- 3 1/2 cups shredded chicken, we use rotisserie chicken: Shredded and folded in as the primary protein, offering tender, juicy texture and savory flavor concentrated from roasted poultry.
- 1 cup frozen peas: Added frozen to introduce pops of sweetness, a bright green color, and subtle texture contrast that warms quickly in the filling.
- 2 tablespoons minced fresh Italian parsley: Chopped finely and stirred in to add fresh herbal brightness and a clean finish that cuts through the rich sauce.
- 2 cups all-purpose flour: Measured for the biscuit dough to provide structure and gluten development while contributing tender crumb to the topping.
- 2 teaspoons baking powder: Leavening measured to help the filling thicken slightly when combined with flour and provide lift for airy biscuit dough.
- 1/2 teaspoon baking soda: Leavening included to react with acidic buttermilk, aiding biscuit rise and producing a light, tender crumb for the topping.
- 1 teaspoon granulated sugar: Sweetened slightly to balance savory flavors and support browning in the biscuit topping without making it noticeably sweet.
- 3/4 teaspoon kosher salt: Seasoned in the biscuit dough to enhance overall flavor, ensuring the topping complements the savory chicken filling.
- 1 cup cold buttermilk: Poured cold into the biscuit dough to react with baking soda, tenderize gluten, and keep biscuits moist and tangy.
- 1/2 cup unsalted butter, melted and cooled slightly: Melted then cooled to be incorporated into the biscuit dough, contributing flakiness, moisture, and rich buttery taste.
- 2 tablespoons melted butter, for brushing on biscuits: Brushed on to finish biscuits with a glossy, golden surface that adds extra buttery flavor and an attractive sheen.
Preparation Steps for Chicken Pot Pie with Biscuits
I like to move steadily through these steps, staying attentive to smells and visuals which tell me when things are right. Keep tools near and taste as you go, because small adjustments make a big difference in texture and seasoning.
- Preheat the oven to 425 degrees F.: The warm, dry heat readying the oven is essential because a properly preheated oven ensures the biscuits rise quickly and brown on the outside while staying tender within. You should feel a burst of hot air when you open the oven and hear a faint hum as it cycles. If you skip preheating, biscuits can spread and become dense rather than fluffy. Common mistake to avoid, do not set the oven too low or the biscuits will take too long to set and may become soggy from the filling's steam.
- In a deep 12-inch cast iron skillet or oven safe Dutch oven, melt the butter over medium high heat. Add the onion, carrots, and celery; cook until tender, stirring occasionally, about 5 minutes. Add the garlic and cook for 1 minute.: You will notice the butter foam and then settle as it melts, releasing a warm, nutty aroma. The vegetables will soften and the onion becomes translucent, offering a sweet scent that signals they are ready. The garlic added at the end will release a sharp, fragrant note without turning bitter because it cooks briefly. This step develops the aromatic base, helping the final filling taste layered. A frequent misstep is browning the garlic too early, which yields bitterness, so add it after the vegetables have softened.
- Stir in flour until lightly browned, about 1 minute. Add the thyme, salt, and pepper.: As you stir, the flour will coat the vegetables and start to toast, creating a slightly nutty smell and helping to eliminate any raw flour taste. This toasting also builds a roux like base that thickens the sauce when liquid is added. The dried thyme and seasoning added now become toasty and integrated, not sharp. If you skip the brief cook, you might end up with a grainy sauce, so make sure the flour loses its raw white sheen.
- Slowly pour in the chicken broth and heavy cream. Bring to a boil; reduce heat and simmer, stirring occasionally, until slightly thickened, about 3 to 5 minutes.: Pouring gradually lets the liquid incorporate smoothly so the mixture becomes glossy and uniform rather than lumpy, and you will hear a soft simmer that deepens into a gentle bubble as proteins and starches bind. The aroma turns richer and creamier, and the sauce will cling to the spoon when it is properly thickened. Avoid high rolling boils which can separate the cream or scorch the bottom; use steady heat and stir to prevent sticking.
- Stir in the chicken, peas, and parsley. Season with additional salt and pepper, if necessary. Turn off the heat and set aside while you make the biscuits.: When you fold in the shredded chicken , the filling takes on substance and the meat warms through, releasing savory notes. The frozen peas add bright color and small bursts of sweetness, while the fresh parsley lifts the whole mixture. Taste and correct seasoning now because the biscuit topping will mute some saltiness. A common issue is overseasoning early, so taste after adding the final ingredients and adjust cautiously.
- To make the biscuits, whisk together the flour, baking powder, baking soda, sugar, and salt in a large bowl. Set aside.: Dry ingredients combine into a fine, pale mix and you may notice a faint, bready smell. Even distribution of leaveners matters to ensure uniform lift, so whisk thoroughly. If you under-mix, some biscuits may not rise properly and will be dense; if you overwork later, the biscuits may become tough, so keep this step efficient.
- In a medium bowl, combine cold buttermilk and the 1/2 cup slightly cooled melted butter. Stir with a spatula until combined and small clumps form. It is ok if the mixture is lumpy.: The cold buttermilk keeps reactions under control, and the melted butter enriches the dough. Stirring yields small, chunky curdled bits that create flaky pockets when baked, and you will notice the mixture is thicker than plain milk. If the butter is too hot it can activate leaveners prematurely or melt the butter in the dough unevenly, so let it cool slightly before combining.
- Add buttermilk mixture to dry ingredients and stir with rubber spatula until just combined and the biscuit batter pulls away from sides of bowl.: The batter will look shaggy and slightly sticky, with visible lumps that indicate tender biscuits to come. Stop mixing once it holds together to avoid gluten development which makes biscuits tough. If you overmix, the texture becomes chewy instead of tender, so resist the urge to keep stirring.
- Use a large cookie scoop or a greased 1/4 cup measuring cup to scoop out the dough. Drop the biscuit dough on top of the filling, leaving a little space between each biscuit because they will spread a little in the oven. Brush with the extra melted butter.: Dropping the dough creates mounds that will rise and form a golden crust; the brushed butter adds shine and rich aroma as it melts into crevices. You will hear a soft hiss as the cold dough meets the hot filling if it is warm enough, and the biscuits will settle slightly before rising. Placing them too close can cause them to merge into an uneven crust, so space them with intention.
- Carefully transfer the skillet to the hot oven and bake for 14 to 17 minutes or until the biscuits are lightly golden brown on top.: The oven will transform the dough into a browned top that yields a faint toasty scent and a flaky interior, while the filling bubbles gently at the edges. Look for an even golden color on the biscuits and a gently bubbling filling as cues that everything is cooked through. Opening the oven too often lengthens bake time and can cause uneven rise, so check near the end of the time window.
- Remove from oven and let stand for 10 minutes before serving.: Allowing the skillet to rest helps the filling settle and thicken slightly, making serving cleaner and the textures more harmonious. The steam will calm and flavors meld during this short wait, and you will still have warm, comforting bites after resting. Cutting into it too soon can cause the filling to run and make serving messy, so be patient for the best presentation.
Recipe Notes about Chicken Pot Pie with Biscuits
I like to record little reminders that change the dish from good to memorable. These notes expand the practical howtos and small adjustments I rely on in busy kitchens.
- Alternative bakeware: If you do not have a deep 12 inch cast iron skillet or Dutch oven, assemble the filling in a regular pan and transfer it to a 9×13 inch baking dish before adding biscuits. This keeps the texture similar while using what you have.
- Freshness matters: Make sure your baking powder is fresh so the biscuits rise properly; stale leaveners lead to flat biscuits.
- Control salt: Use low sodium chicken broth if you prefer tighter control, then finish seasoning after the filling and the chicken are combined.
- Pea timing: Add frozen peas at the end so they keep their color and texture rather than turning mushy and dull.
- Butter brushing: Brush biscuits with melted butter right before baking for glossy, golden tops and extra flavor.
Serving This Chicken Pot Pie with Biscuits
This dish stands alone well, but small accompaniments elevate the meal. Think simple, bright contrasts to the creamy filling when choosing sides. It suits cozy family dinners, casual gatherings, or any time you want a filling, satisfying main.
- Family dinner: Serve generous scoops straight from the skillet for a communal, family style meal that encourages sharing and second helpings.
- Weeknight dinner: Pair the pot pie with a crisp green salad tossed with a light vinaigrette to cut through the richness and add crunch to the plate.
- Leftovers: Store covered in the refrigerator for up to three days, and reheat in a 350 degree F oven until warm and biscuits regain slight crispness, about 15 to 20 minutes depending on portion size.
- Special occasions: This dish works well for holiday casual dinners in colder seasons, offering hearty comfort that feeds a crowd without complicated plating.
- Portioning: Spoon into shallow bowls for individual servings, making it easy to balance filling and biscuit in every bowl.
- Seasonal pairings: In winter, pair with roasted root vegetables or a warm grain side to enhance the cozy feel; in spring, add a simple lemon dressed salad for brightness.
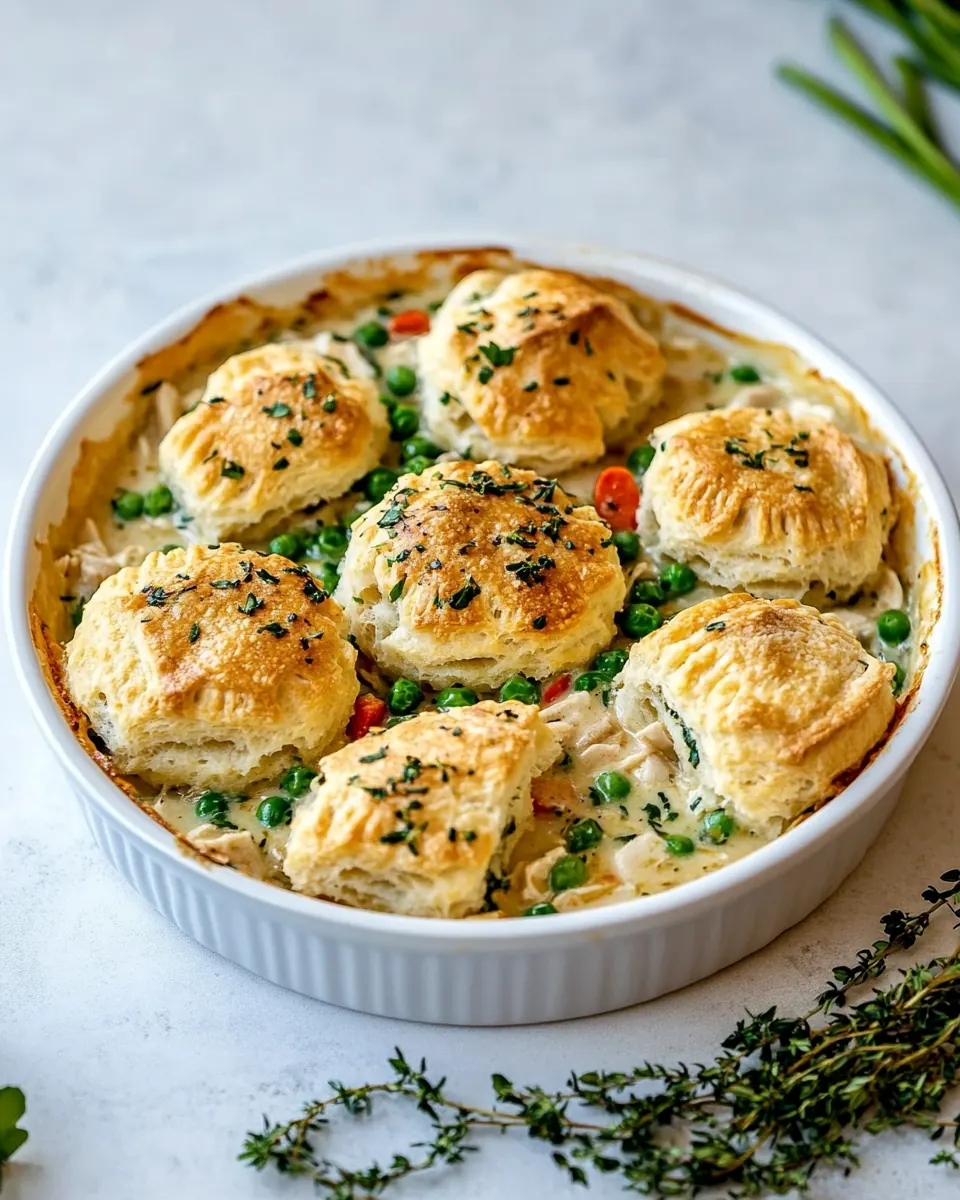
- Presentation: Garnish with a sprinkle of minced fresh parsley for color and a small herbal lift that contrasts the rich filling.
- Storage tip: If you want to keep biscuits crisper, store the filling and biscuits separately and reassemble before reheating.
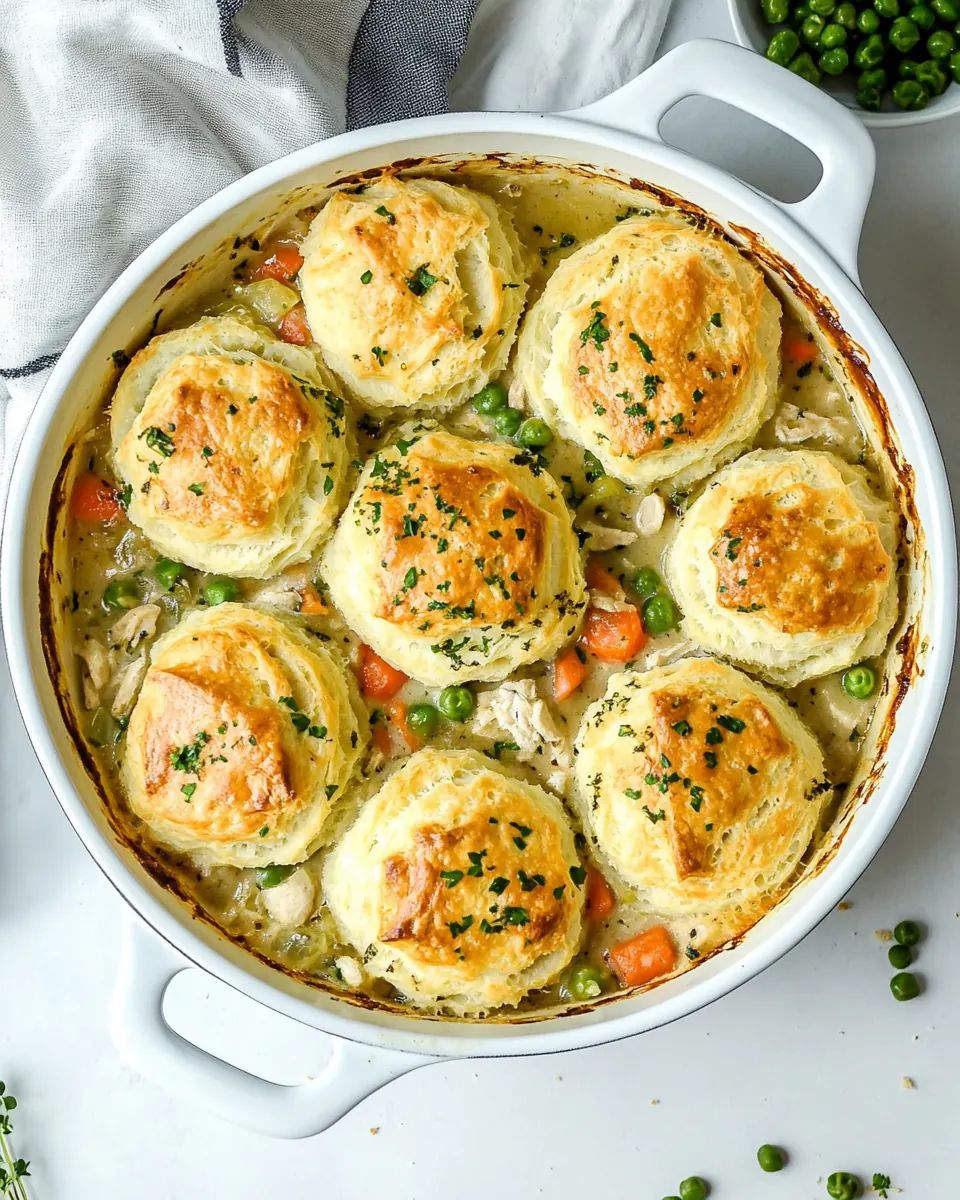
- Occasion suggestion: Great for potluck style dinners where you can bake in the skillet and bring it straight to the table, hot and bubbling.
- Serving temperature: Serve warm but not scalding to let flavors settle and to make it pleasant to eat immediately.
FAQ
Conclusion
This Chicken Pot Pie with Biscuits stands out for its blend of creamy, savory filling and tender, buttery biscuit topping, creating a meal that feels both comforting and a little celebratory. Give it a try on a chilly evening when you want something filling and familiar; the straightforward steps and forgiving technique make it approachable for cooks of many levels. Serve it straight from the skillet, savor the warm aromas, and enjoy how easily this recipe becomes a family favorite.
Chicken Pot Pie with Biscuits
Equipment
- 12-inch Cast Iron Skillet
Ingredients
- 1/4 cup unsalted butter Melted to create a flavorful base for sautéing aromatics and forming the roux, contributing rich dairy fat for a silky sauce.
- 1/2 large yellow onion, diced Diced to provide sweet, savory depth and texture when softened, balancing other vegetables and enhancing overall flavor complexity.
- 3 medium carrots, chopped Chopped to add natural sweetness, body, and a tender bite that complements the creamy filling and adds color contrast.
- 2 celery ribs, chopped Chopped to lend earthy, slightly bitter freshness and a satisfying crunch that melds with carrots and onions during cooking.
- 3 cloves garlic, minced Mince finely to infuse a pungent, aromatic boost into the filling, brightening savory flavors and pairing well with herbs.
- 1/3 cup all-purpose flour Sprinkled in to absorb fat and liquid during cooking, forming the thickening roux that yields a smooth, cohesive gravy.
- 1 teaspoon dried thyme Sprinkled to contribute warm, woodsy notes and aromatic background that harmonizes with poultry and vegetables in the pot pie.
- 1 teaspoon kosher salt Added to season and enhance all flavors, promoting balance and bringing out the savory qualities of the filling ingredients.
- 1/2 teaspoon black pepper Ground to provide mild heat and aromatic lift, balancing richness and highlighting the savory, herby elements in the dish.
- 3 cups chicken broth or stock Poured in to build the savory liquid base for the filling, supplying depth and body and helping the roux form a sauce.
- 1 cup heavy cream Stirred into the filling to add luxurious creaminess and richness, making the sauce velvety and enhancing mouthfeel.
- 3 1/2 cups shredded chicken, we use rotisserie chicken Shredded and folded in as the primary protein, offering tender, juicy texture and savory flavor concentrated from roasted poultry.
- 1 cup frozen peas Added frozen to introduce pops of sweetness, a bright green color, and subtle texture contrast that warms quickly in the filling.
- 2 tablespoons minced fresh Italian parsley Chopped finely and stirred in to add fresh herbal brightness and a clean finish that cuts through the rich sauce.
- 2 cups all-purpose flour Measured for the biscuit dough to provide structure and gluten development while contributing tender crumb to the topping.
- 2 teaspoons baking powder Leavening measured to help the filling thicken slightly when combined with flour and provide lift for airy biscuit dough.
- 1/2 teaspoon baking soda Leavening included to react with acidic buttermilk, aiding biscuit rise and producing a light, tender crumb for the topping.
- 1 teaspoon granulated sugar Sweetened slightly to balance savory flavors and support browning in the biscuit topping without making it noticeably sweet.
- 3/4 teaspoon kosher salt Seasoned in the biscuit dough to enhance overall flavor, ensuring the topping complements the savory chicken filling.
- 1 cup cold buttermilk Poured cold into the biscuit dough to react with baking soda, tenderize gluten, and keep biscuits moist and tangy.
- 1/2 cup unsalted butter, melted and cooled slightly Melted then cooled to be incorporated into the biscuit dough, contributing flakiness, moisture, and rich buttery taste.
- 2 tablespoons melted butter, for brushing on biscuits Brushed on to finish biscuits with a glossy, golden surface that adds extra buttery flavor and an attractive sheen.
Instructions
- Preheat the oven to 425 degrees F.: The warm, dry heat readying the oven is essential because a properly preheated oven ensures the biscuits rise quickly and brown on the outside while staying tender within. You should feel a burst of hot air when you open the oven and hear a faint hum as it cycles. If you skip preheating, biscuits can spread and become dense rather than fluffy. Common mistake to avoid, do not set the oven too low or the biscuits will take too long to set and may become soggy from the filling's steam.
- In a deep 12-inch cast iron skillet or oven safe Dutch oven, melt the butter over medium high heat. Add the onion, carrots, and celery; cook until tender, stirring occasionally, about 5 minutes. Add the garlic and cook for 1 minute.: You will notice the butter foam and then settle as it melts, releasing a warm, nutty aroma. The vegetables will soften and the onion becomes translucent, offering a sweet scent that signals they are ready. The garlic added at the end will release a sharp, fragrant note without turning bitter because it cooks briefly. This step develops the aromatic base, helping the final filling taste layered. A frequent misstep is browning the garlic too early, which yields bitterness, so add it after the vegetables have softened.
- Stir in flour until lightly browned, about 1 minute. Add the thyme, salt, and pepper.: As you stir, the flour will coat the vegetables and start to toast, creating a slightly nutty smell and helping to eliminate any raw flour taste. This toasting also builds a roux like base that thickens the sauce when liquid is added. The dried thyme and seasoning added now become toasty and integrated, not sharp. If you skip the brief cook, you might end up with a grainy sauce, so make sure the flour loses its raw white sheen.
- Slowly pour in the chicken broth and heavy cream. Bring to a boil; reduce heat and simmer, stirring occasionally, until slightly thickened, about 3 to 5 minutes.: Pouring gradually lets the liquid incorporate smoothly so the mixture becomes glossy and uniform rather than lumpy, and you will hear a soft simmer that deepens into a gentle bubble as proteins and starches bind. The aroma turns richer and creamier, and the sauce will cling to the spoon when it is properly thickened. Avoid high rolling boils which can separate the cream or scorch the bottom; use steady heat and stir to prevent sticking.
- Stir in the chicken, peas, and parsley. Season with additional salt and pepper, if necessary. Turn off the heat and set aside while you make the biscuits.: When you fold in the shredded chicken , the filling takes on substance and the meat warms through, releasing savory notes. The frozen peas add bright color and small bursts of sweetness, while the fresh parsley lifts the whole mixture. Taste and correct seasoning now because the biscuit topping will mute some saltiness. A common issue is overseasoning early, so taste after adding the final ingredients and adjust cautiously.
- To make the biscuits, whisk together the flour, baking powder, baking soda, sugar, and salt in a large bowl. Set aside.: Dry ingredients combine into a fine, pale mix and you may notice a faint, bready smell. Even distribution of leaveners matters to ensure uniform lift, so whisk thoroughly. If you under-mix, some biscuits may not rise properly and will be dense; if you overwork later, the biscuits may become tough, so keep this step efficient.
- In a medium bowl, combine cold buttermilk and the 1/2 cup slightly cooled melted butter. Stir with a spatula until combined and small clumps form. It is ok if the mixture is lumpy.: The cold buttermilk keeps reactions under control, and the melted butter enriches the dough. Stirring yields small, chunky curdled bits that create flaky pockets when baked, and you will notice the mixture is thicker than plain milk. If the butter is too hot it can activate leaveners prematurely or melt the butter in the dough unevenly, so let it cool slightly before combining.
- Add buttermilk mixture to dry ingredients and stir with rubber spatula until just combined and the biscuit batter pulls away from sides of bowl.: The batter will look shaggy and slightly sticky, with visible lumps that indicate tender biscuits to come. Stop mixing once it holds together to avoid gluten development which makes biscuits tough. If you overmix, the texture becomes chewy instead of tender, so resist the urge to keep stirring.
- Use a large cookie scoop or a greased 1/4 cup measuring cup to scoop out the dough. Drop the biscuit dough on top of the filling, leaving a little space between each biscuit because they will spread a little in the oven. Brush with the extra melted butter.: Dropping the dough creates mounds that will rise and form a golden crust; the brushed butter adds shine and rich aroma as it melts into crevices. You will hear a soft hiss as the cold dough meets the hot filling if it is warm enough, and the biscuits will settle slightly before rising. Placing them too close can cause them to merge into an uneven crust, so space them with intention.
- Carefully transfer the skillet to the hot oven and bake for 14 to 17 minutes or until the biscuits are lightly golden brown on top.: The oven will transform the dough into a browned top that yields a faint toasty scent and a flaky interior, while the filling bubbles gently at the edges. Look for an even golden color on the biscuits and a gently bubbling filling as cues that everything is cooked through. Opening the oven too often lengthens bake time and can cause uneven rise, so check near the end of the time window.
- Remove from oven and let stand for 10 minutes before serving.: Allowing the skillet to rest helps the filling settle and thicken slightly, making serving cleaner and the textures more harmonious. The steam will calm and flavors meld during this short wait, and you will still have warm, comforting bites after resting. Cutting into it too soon can cause the filling to run and make serving messy, so be patient for the best presentation.
Notes
- Alternative bakeware: If you do not have a deep 12 inch cast iron skillet or Dutch oven, assemble the filling in a regular pan and transfer it to a 9×13 inch baking dish before adding biscuits. This keeps the texture similar while using what you have.
- Freshness matters: Make sure your baking powder is fresh so the biscuits rise properly; stale leaveners lead to flat biscuits.
- Control salt: Use low sodium chicken broth if you prefer tighter control, then finish seasoning after the filling and the chicken are combined.
- Pea timing: Add frozen peas at the end so they keep their color and texture rather than turning mushy and dull.
- Butter brushing: Brush biscuits with melted butter right before baking for glossy, golden tops and extra flavor.