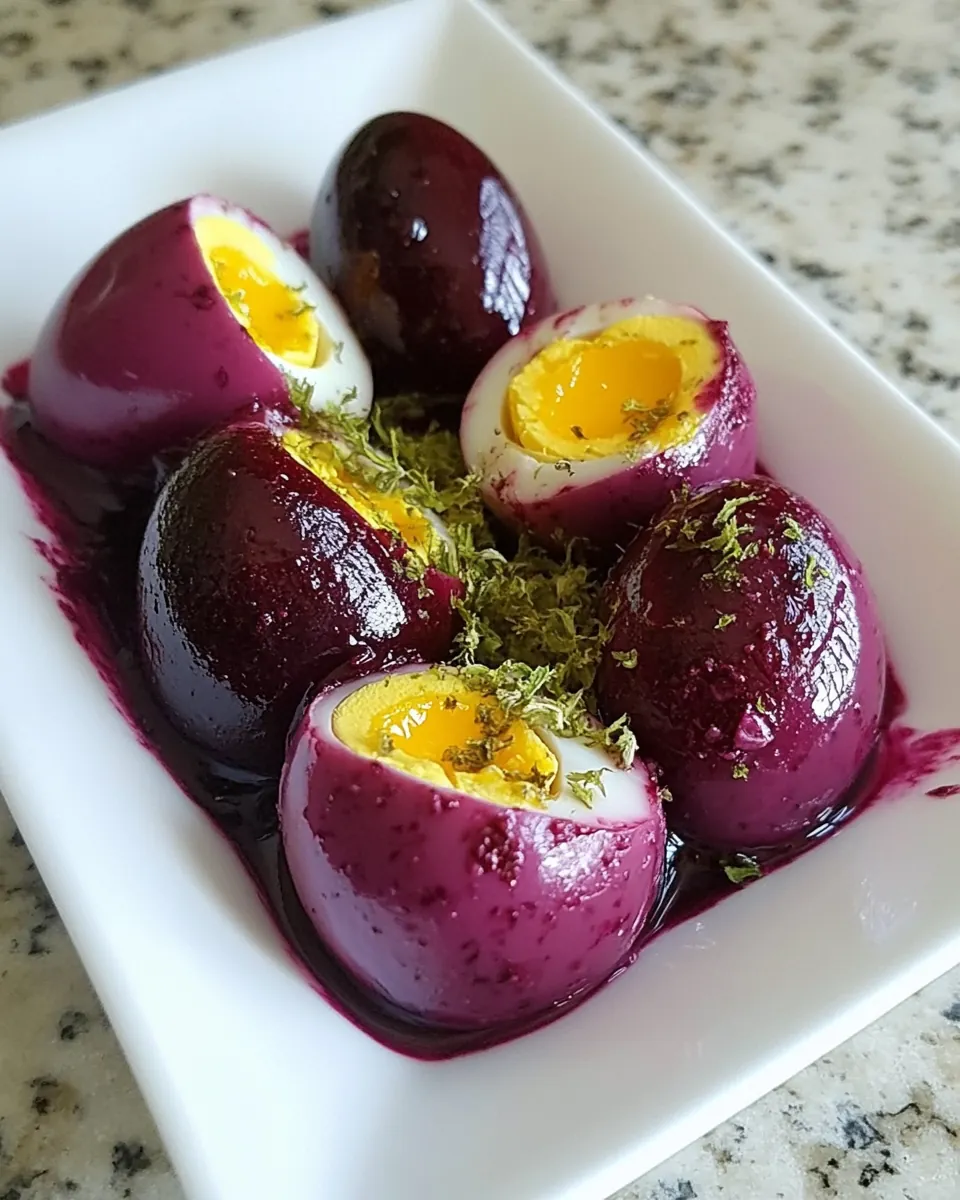
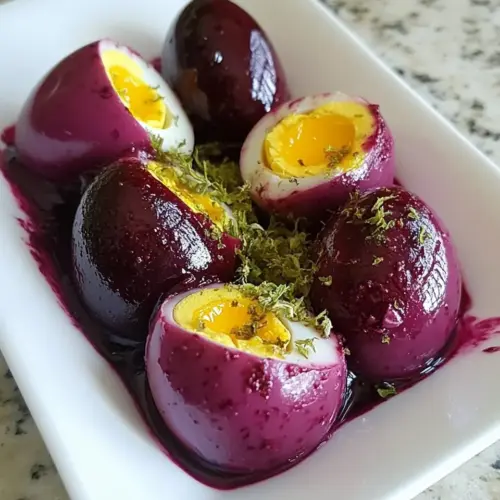
Beet Dyed Hard Boiled Eggs
Beet Dyed Hard Boiled Eggs started as a kitchen experiment for me the first spring I wanted colorful, natural eggs for an Easter brunch. I remember standing at my counter with a can of pickled beets and a pot of just boiled water, curious if the deep magenta would cling to the shells and then bleed through to the whites. That first batch did not disappoint, and now whenever I crack open one I get that little burst of color and a tiny thrill that never grows old.
Over the years I have learned small tricks that make the difference between pretty eggs that look like art, and blotchy eggs that feel accidental. I like the gentle timing and the relaxed pace of this method, because it lets the color seep in slowly while the eggs rest, which gives subtle gradients and marbling. I also prefer using a glass bowl to avoid stains and to watch the color transformation unfold. Sharing these with friends has become a ritual, because they are simple to prepare, striking on a platter, and a cheerful centerpiece for any spring gathering.
Recipe Snapshot
20 mins
10 mins
10 mins
Easy
150 kcal
American
Paleo, Gluten-Free
Side Dishes
Saucepan, Lid, Glass bowl, Colander or sink for cooling
What Makes This Beet Dyed Hard Boiled Eggs Special
Vibrant Natural Color Without Food Dye
I love that Beet Dyed Hard Boiled Eggs create such vivid hues using only pickled beets. The pigments in the beets infuse the shells and sometimes tint the whites, so you get a natural, garden fresh look. I appreciate using whole foods rather than packaged dyes, it feels cleaner and more creative.
Simple Technique That Delivers Consistent Results
The method is forgiving, so I can relax and let the eggs do their work in the fridge overnight. Because you fully cook the eggs then marinate them with the beets, the color develops steadily, producing reliable outcomes whether I make a few or a crowd sized batch.
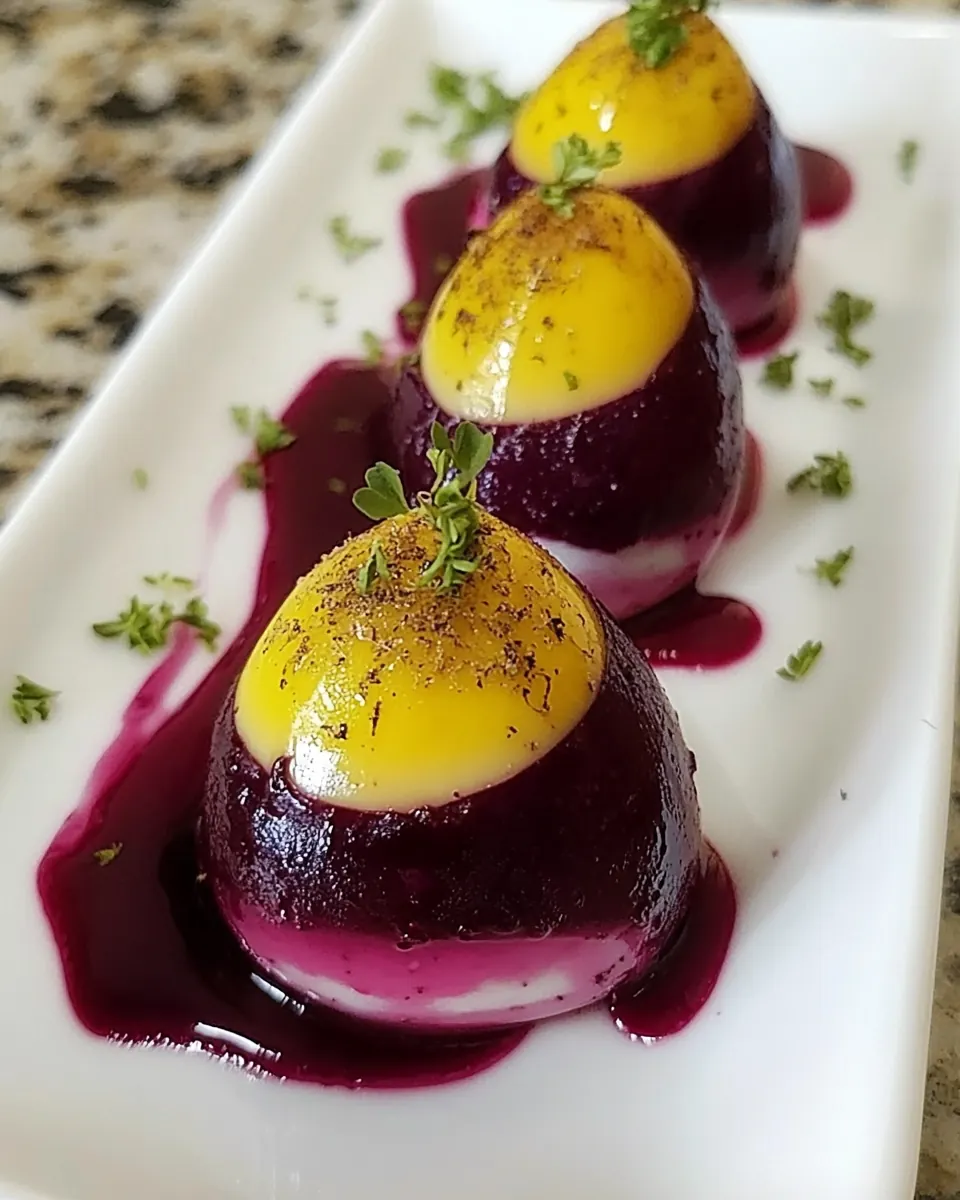
Great For Entertaining and Seasonal Tables
These eggs make a statement on an Easter buffet or a spring picnic. I often arrange them with fresh herbs and citrus wedges to set off the magenta. They give guests something to talk about, and the visual appeal elevates simple spreads.
Minimal Ingredients, Big Impact
With just eggs and a can of pickled beets, you get dramatic results. That economy is part of the charm, and it makes this recipe accessible to anyone, even last minute hosts who need a colorful centerpiece fast.
Kid Friendly and Hands On
I enjoy doing this with kids because they can help peel and arrange the eggs. The process is tactile and safe, and the colorful reveal is always a joyful moment when we crack one open at the table.
Ingredients Required for Beet Dyed Hard Boiled Eggs
These ingredients keep the recipe wonderfully focused. The two items are designed to work in tandem: fully cooked eggs provide the canvas, while the acidic, deeply pigmented liquid from the canned pickled beets supplies color and a faint tang. Together they create visually striking eggs with a subtle flavor twist.
- 6 eggs: Boil gently and provide the main protein and structure for the dish; eggs become firm when hard-cooked and hold the beet dye well in their shells and cut surfaces. Handle with care to avoid cracking during cooking and cool promptly to stop cooking and make peeling easier. Slice or crack the shells to allow the beet liquid to penetrate and create marbled patterns if desired.
- 1 can pickled beets: Add vibrant color and tangy flavor while supplying the beet juice used to dye the eggs; the pickled liquid contains vinegar and pigments that penetrate egg shells and create rich pink to magenta hues. Drain the beets if a milder color is wanted, or use the full can including brine for deeper staining; reserve the solids for another use or chop and serve alongside the eggs.
Making Beet Dyed Hard Boiled Eggs
The cooking is straightforward, and the rewarding part is the slow color development in the refrigerator. Below I expand each instruction into personal, sensory driven guidance so you can recreate the exact texture and appearance I aim for. Read each step fully before starting, and prepare a glass bowl for the last stage.
- Place eggs into a saucepan, and cover with water, heat on high until the water boils, cover saucepan with a lid, and turn off the heat. Leave the saucepan with the eggs inside on the stove for 15 minutes. This will let you cook hard boiled eggs without having to worry about over cooking them. Remove pan from stove, and run cool water through the pan. When the eggs have cooled off enough to peel, peel the eggs. Place the canned beets into a bowl and add eggs. It is a great idea to use a glass bowl here, sometimes plastic bowls can stain. Place hard boiled eggs into bowl with the beets. Cover bowl, and place in the refrigerator for 24 to 36 hours.: The sound of water sliding over the eggs is calming, and visually you want the water to sit at least an inch above the shells so heat distributes evenly. Using cold tap water helps prevent cracking from thermal shock. Why it matters, the even water coverage ensures consistent cooking from edge to center, yielding a uniformly firm yolk. A common mistake is using too little water, which causes the eggs near the top to cook differently than those submerged.
- Heat on high until the water boils: You will hear the first vigorous boil, a rolling, lively sound that signals the water is at full heat. The visual cue is steady, large bubbles breaking the surface. Bringing to a full boil sets the stage for residual heat cooking. Why this matters, boiling starts the coagulation process quickly so the yolks set reliably. Avoid leaving the burner at full power after boiling, because aggressive bubbling can crack shells and create egg white leakage.
- Cover saucepan with a lid, and turn off the heat: When you place the lid on, the trapped steam continues to cook the eggs , and the pot emits a soft hiss as heat equalizes. This residual method prevents overcooking the outer white while letting the center finish gently. The reason it works, residual heat cooks more gently than active boiling, giving a tender, non rubbery white. A common error is removing the lid too soon, which drops the internal temperature and yields undercooked yolks.
- Leave the saucepan with the eggs inside on the stove for 15 minutes: As the pot sits, the water cools slowly, and the yolks transform from jiggly to set and creamy. You can feel the minute decrease in steam as the pot settles. This timing is tuned to large eggs , producing firm but not chalky yolks. Why this matters, the rest prevents the greenish ring that overcooking causes and preserves a smooth yolk texture. Avoid the temptation to shorten this time, otherwise the center may be partially unset.
- Remove pan from stove, and run cool water through the pan: The rush of cool water is an audible refresh, and you will see the water cloud briefly as temperature equalizes. Cooling stops carryover cooking immediately and firms the whites for easier peeling. The tactile change when you touch an egg is dramatic, from hot to comfortably warm. A common pitfall is using hot water or not cooling long enough, which continues cooking and yields dry yolks.
- When the eggs have cooled off enough to peel, peel the eggs: As you tap and roll each egg , listen for the delicate crack and feel the give as the shell separates. Peeling under a thin stream of water helps the membrane release and prevents tearing the white. Why it matters, neat peeling preserves the smooth surface needed for clean color transfer later. Many people pick aggressively and end up with pitted whites, which makes the dye absorb unevenly.
- Place the canned beets into a bowl and add eggs: When you combine the brine and the peeled eggs in a clear glass bowl, the color diffusion is immediate, and it is satisfying to watch the liquid tint the shells. The aroma is a tangy, earthy vinegar note that hints at the subtle flavor shift to come. Using glass avoids staining and lets you observe the marbling develop. A common mistake is using a stained or plastic container that can hold onto pigment and dull results.
- It is a great idea to use a glass bowl here, sometimes plastic bowls can stain: Glass offers visual feedback as the color moves across the shells, and it is nonporous so it will not retain pigment or odors. When the beets sit against the eggs you might notice darker contact points that create a beautiful contrast. Why this matters, glass preserves the purity of the color and makes cleanup simpler. Avoid plastic if you care about preserving bright tones, because plastic can absorb and mute pigments.
- Place hard boiled eggs into bowl with the beets: Arrange the eggs so they have contact with both slices and brine, turning them once to ensure even exposure. The visual change happens sooner at points pressed against the beets, forming streaks and depth. This physical contact allows for marbling effects when the beet flesh presses pigment through thin spots in the shell. A common oversight is leaving eggs layered too tightly, which can create uneven coloring.
- Cover bowl, and place in the refrigerator for 24 to 36 hours: The fridge is where the slow alchemy happens, and you can hear the hum of the appliance as the world waits. Over this time the color deepens, sometimes penetrating to the outer white for a stunning effect. Why it matters, longer chilling gives richer tones, but excessive time may intensify the tang slightly. A frequent mistake is peeking too early and disturbing the arrangement; patience yields the best results.
Helpful Hints
These practical hints will help you achieve consistent, beautiful results with minimal fuss. Each tip highlights an actionable step or choice to improve texture, color, and presentation.
- Choose the right eggs, pick eggs that are not ultra fresh because slightly older eggs peel more easily, which leads to smoother surfaces for dyeing.
- Don’t overcrowd the pot, giving each egg room in the saucepan promotes even heating and reduces cracking risk during boiling.
- Cool completely before peeling, running cool water for several minutes halts carryover cooking and firms the white for cleaner peeling.
- Use the brine and slices, the liquid pigments tint the shells while pressed beet slices produce localized marbling for visual interest.
- Store in glass, a glass bowl prevents staining, allows you to monitor progress, and keeps flavors clean during the 24 to 36 hour chill.
- Label timing, mark when you started the refrigerator soak so you can choose between a lighter tint at 24 hours or a deeper color at 36 hours.
Pairing Suggestions for Beet Dyed Hard Boiled Eggs
These eggs are versatile on a brunch table, picnic platter, or festive spread. Below are detailed serving ideas, storage notes, and pairing suggestions to help you present them beautifully for different occasions and seasons.
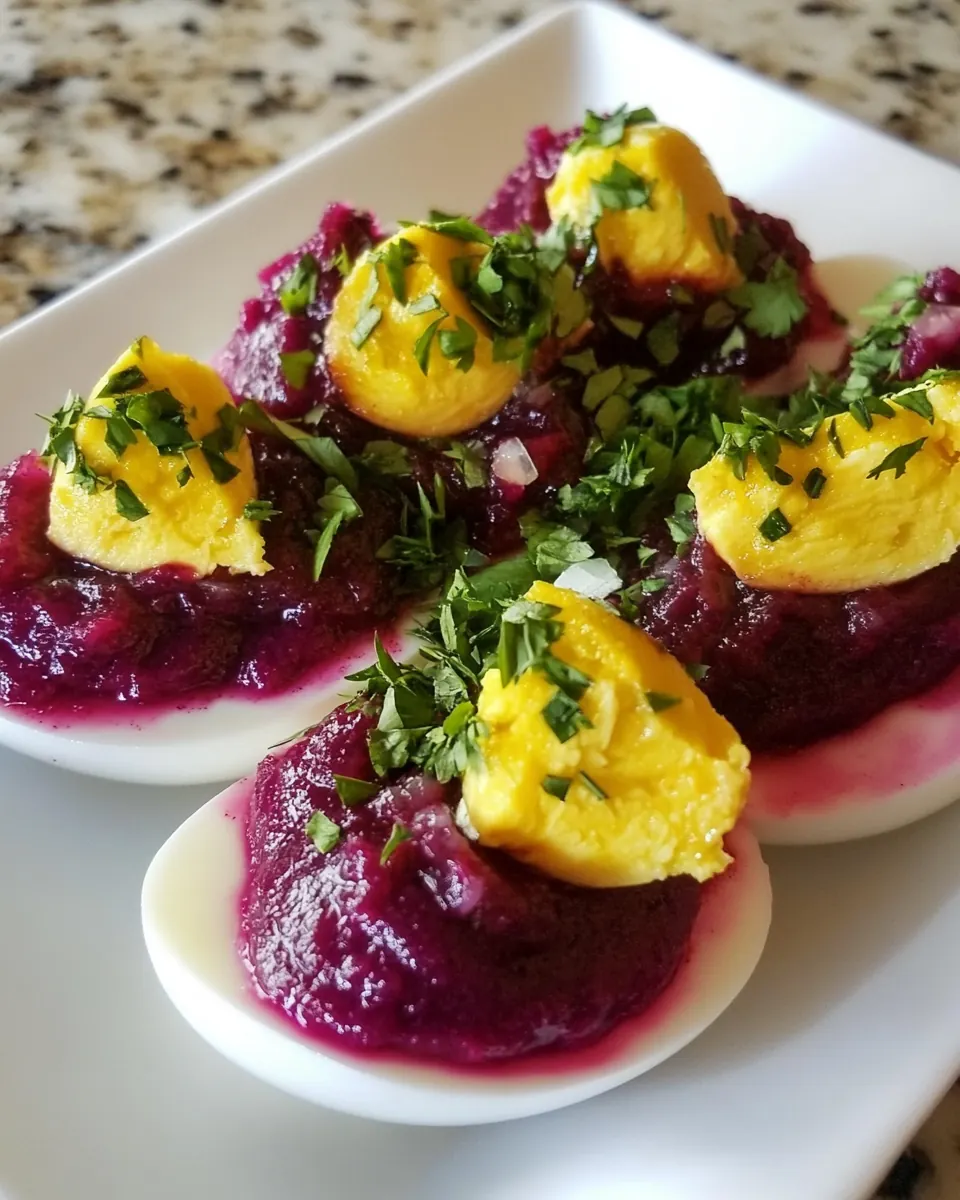
- Simple brunch platter, arrange the eggs halved on a wooden board with fresh greens and crusty bread for a relaxed spring brunch. The color pops against pale linens and fresh herbs, creating a centerpiece that feels handmade and seasonal.
- Salad accent, quarter the eggs and tuck them into a mixed green salad with roasted vegetables for visual contrast and an extra protein boost. They add a decorative touch while keeping the salad light and spring appropriate.
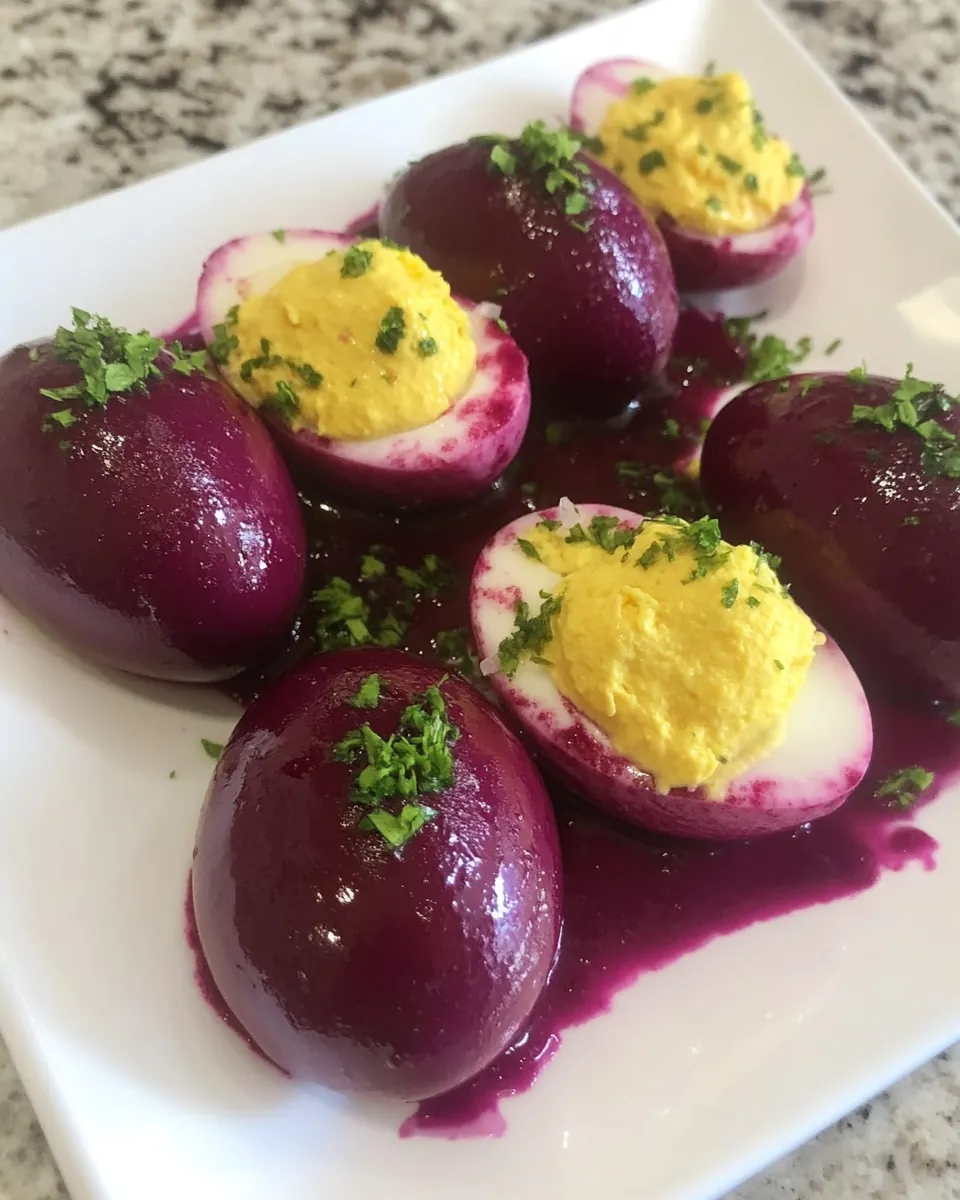
- Holiday table, these are perfect for an Easter spread, set among deviled egg platters or pickled vegetable bowls to complement the tang from the beets. Serve on a platter with labels so guests know they are naturally dyed.
- Picnic friendly, pack whole peeled eggs in a covered container for alfresco meals. Keep chilled in a cooler and slice just before serving to keep them visually fresh.
- Storage tips, keep dyed eggs refrigerated and consume within five days for best texture and flavor. Storing in the beet brine will preserve the color and add extra tang but may deepen the tint over time.
- Seasonal pairings, serve in spring when fresh herbs are abundant, or use as a colorful accent at any seasonal gathering where a natural, eye catching element is desired.
FAQ
Conclusion
Beet Dyed Hard Boiled Eggs stand out because they transform two humble ingredients into a colorful, festive dish that feels both rustic and refined. I encourage you to try this method—you will enjoy the ritual of watching natural pigments develop and the delight on your guests faces when they discover the vibrant interior. The process is forgiving, low fuss, and perfect for spring gatherings or holiday tables. Take your time with the refrigeration step, use a glass bowl so you can admire the color, and allow the eggs to rest until they reach the tint you love. This small kitchen project yields a big visual payoff and a fun, shareable moment at any meal.
Beet Dyed Hard Boiled Eggs
Equipment
- Saucepan
- Lid
- Glass bowl
- Colander or sink for cooling
Ingredients
- 6 eggs Boil gently and provide the main protein and structure for the dish; eggs become firm when hard-cooked and hold the beet dye well in their shells and cut surfaces. Handle with care to avoid cracking during cooking and cool promptly to stop cooking and make peeling easier. Slice or crack the shells to allow the beet liquid to penetrate and create marbled patterns if desired.
- 1 can pickled beets Add vibrant color and tangy flavor while supplying the beet juice used to dye the eggs; the pickled liquid contains vinegar and pigments that penetrate egg shells and create rich pink to magenta hues. Drain the beets if a milder color is wanted, or use the full can including brine for deeper staining; reserve the solids for another use or chop and serve alongside the eggs.
Instructions
- Place eggs into a saucepan, and cover with water, heat on high until the water boils, cover saucepan with a lid, and turn off the heat. Leave the saucepan with the eggs inside on the stove for 15 minutes. This will let you cook hard boiled eggs without having to worry about over cooking them. Remove pan from stove, and run cool water through the pan. When the eggs have cooled off enough to peel, peel the eggs. Place the canned beets into a bowl and add eggs. It is a great idea to use a glass bowl here, sometimes plastic bowls can stain. Place hard boiled eggs into bowl with the beets. Cover bowl, and place in the refrigerator for 24 to 36 hours.: The sound of water sliding over the eggs is calming, and visually you want the water to sit at least an inch above the shells so heat distributes evenly. Using cold tap water helps prevent cracking from thermal shock. Why it matters, the even water coverage ensures consistent cooking from edge to center, yielding a uniformly firm yolk. A common mistake is using too little water, which causes the eggs near the top to cook differently than those submerged.
- Heat on high until the water boils: You will hear the first vigorous boil, a rolling, lively sound that signals the water is at full heat. The visual cue is steady, large bubbles breaking the surface. Bringing to a full boil sets the stage for residual heat cooking. Why this matters, boiling starts the coagulation process quickly so the yolks set reliably. Avoid leaving the burner at full power after boiling, because aggressive bubbling can crack shells and create egg white leakage.
- Cover saucepan with a lid, and turn off the heat: When you place the lid on, the trapped steam continues to cook the eggs , and the pot emits a soft hiss as heat equalizes. This residual method prevents overcooking the outer white while letting the center finish gently. The reason it works, residual heat cooks more gently than active boiling, giving a tender, non rubbery white. A common error is removing the lid too soon, which drops the internal temperature and yields undercooked yolks.
- Leave the saucepan with the eggs inside on the stove for 15 minutes: As the pot sits, the water cools slowly, and the yolks transform from jiggly to set and creamy. You can feel the minute decrease in steam as the pot settles. This timing is tuned to large eggs , producing firm but not chalky yolks. Why this matters, the rest prevents the greenish ring that overcooking causes and preserves a smooth yolk texture. Avoid the temptation to shorten this time, otherwise the center may be partially unset.
- Remove pan from stove, and run cool water through the pan: The rush of cool water is an audible refresh, and you will see the water cloud briefly as temperature equalizes. Cooling stops carryover cooking immediately and firms the whites for easier peeling. The tactile change when you touch an egg is dramatic, from hot to comfortably warm. A common pitfall is using hot water or not cooling long enough, which continues cooking and yields dry yolks.
- When the eggs have cooled off enough to peel, peel the eggs: As you tap and roll each egg , listen for the delicate crack and feel the give as the shell separates. Peeling under a thin stream of water helps the membrane release and prevents tearing the white. Why it matters, neat peeling preserves the smooth surface needed for clean color transfer later. Many people pick aggressively and end up with pitted whites, which makes the dye absorb unevenly.
- Place the canned beets into a bowl and add eggs: When you combine the brine and the peeled eggs in a clear glass bowl, the color diffusion is immediate, and it is satisfying to watch the liquid tint the shells. The aroma is a tangy, earthy vinegar note that hints at the subtle flavor shift to come. Using glass avoids staining and lets you observe the marbling develop. A common mistake is using a stained or plastic container that can hold onto pigment and dull results.
- It is a great idea to use a glass bowl here, sometimes plastic bowls can stain: Glass offers visual feedback as the color moves across the shells, and it is nonporous so it will not retain pigment or odors. When the beets sit against the eggs you might notice darker contact points that create a beautiful contrast. Why this matters, glass preserves the purity of the color and makes cleanup simpler. Avoid plastic if you care about preserving bright tones, because plastic can absorb and mute pigments.
- Place hard boiled eggs into bowl with the beets: Arrange the eggs so they have contact with both slices and brine, turning them once to ensure even exposure. The visual change happens sooner at points pressed against the beets, forming streaks and depth. This physical contact allows for marbling effects when the beet flesh presses pigment through thin spots in the shell. A common oversight is leaving eggs layered too tightly, which can create uneven coloring.
- Cover bowl, and place in the refrigerator for 24 to 36 hours: The fridge is where the slow alchemy happens, and you can hear the hum of the appliance as the world waits. Over this time the color deepens, sometimes penetrating to the outer white for a stunning effect. Why it matters, longer chilling gives richer tones, but excessive time may intensify the tang slightly. A frequent mistake is peeking too early and disturbing the arrangement; patience yields the best results.
Notes
- Choose the right eggs, pick eggs that are not ultra fresh because slightly older eggs peel more easily, which leads to smoother surfaces for dyeing.
- Don’t overcrowd the pot, giving each egg room in the saucepan promotes even heating and reduces cracking risk during boiling.
- Cool completely before peeling, running cool water for several minutes halts carryover cooking and firms the white for cleaner peeling.
- Use the brine and slices, the liquid pigments tint the shells while pressed beet slices produce localized marbling for visual interest.
- Store in glass, a glass bowl prevents staining, allows you to monitor progress, and keeps flavors clean during the 24 to 36 hour chill.
- Label timing, mark when you started the refrigerator soak so you can choose between a lighter tint at 24 hours or a deeper color at 36 hours.