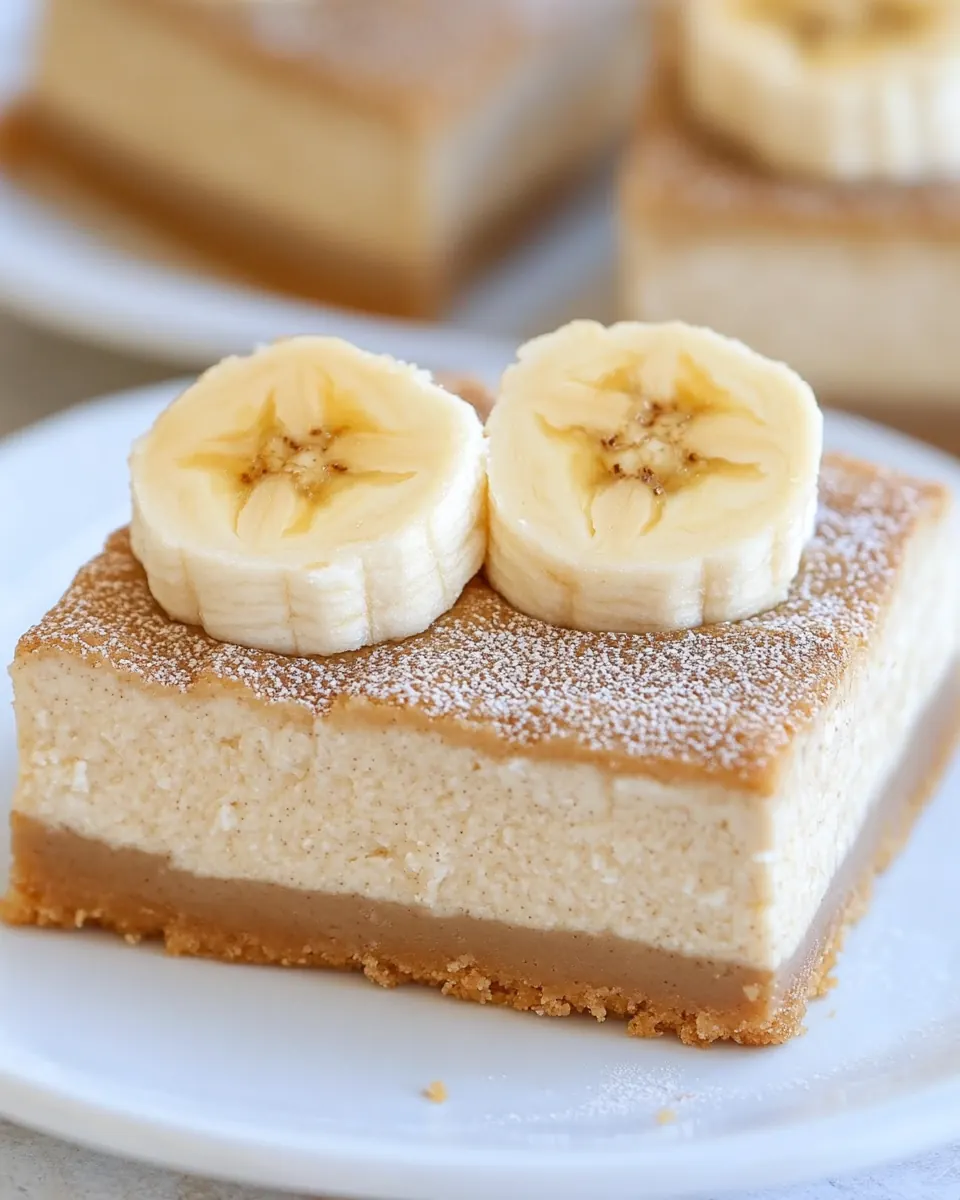
Banana Cheesecake Bars
Banana Cheesecake Bars began showing up in my kitchen the way most comfort desserts do, quietly and insistently, whenever ripe bananas stacked up on the counter.
One afternoon I had two very brown bananas and a stubborn craving for something creamy but not fussy, so I pulled out a block of cream cheese and experimented until the texture felt just right. The first batch came from a whipped, slightly sweet filling spooned into an 8-inch pan. I remember the warm, candied banana aroma filling the room while the top turned the faintest golden. Friends arrived and declared them addictive, and I learned small adjustments that tightened the crumb and kept the surface from splitting.
Since then I make Banana Cheesecake Bars whenever I want dessert that is easy to transport, slices neatly, and keeps well in the fridge. They pair beautifully with a strong cup of coffee in the morning or a light dessert wine in the evening, though I usually just reach for them cold from the fridge. Over time I swapped in alternative sweeteners and even tried a vegan cream cheese version for guests, and each variation kept the same satisfying creamy mouthfeel with that comforting banana note. In short, these bars are one of those recipes that tastes like nostalgia but is flexible enough to become part of your regular rotation.
Recipe Snapshot
35 mins
10 mins
25 mins
Easy
180 kcal
American
Gluten-Free, Vegan
Desserts
8-inch pan, Parchment paper, Blender or mixer, Spatula
Why This Banana Cheesecake Bars Stands Out
They are reliably creamy and comforting
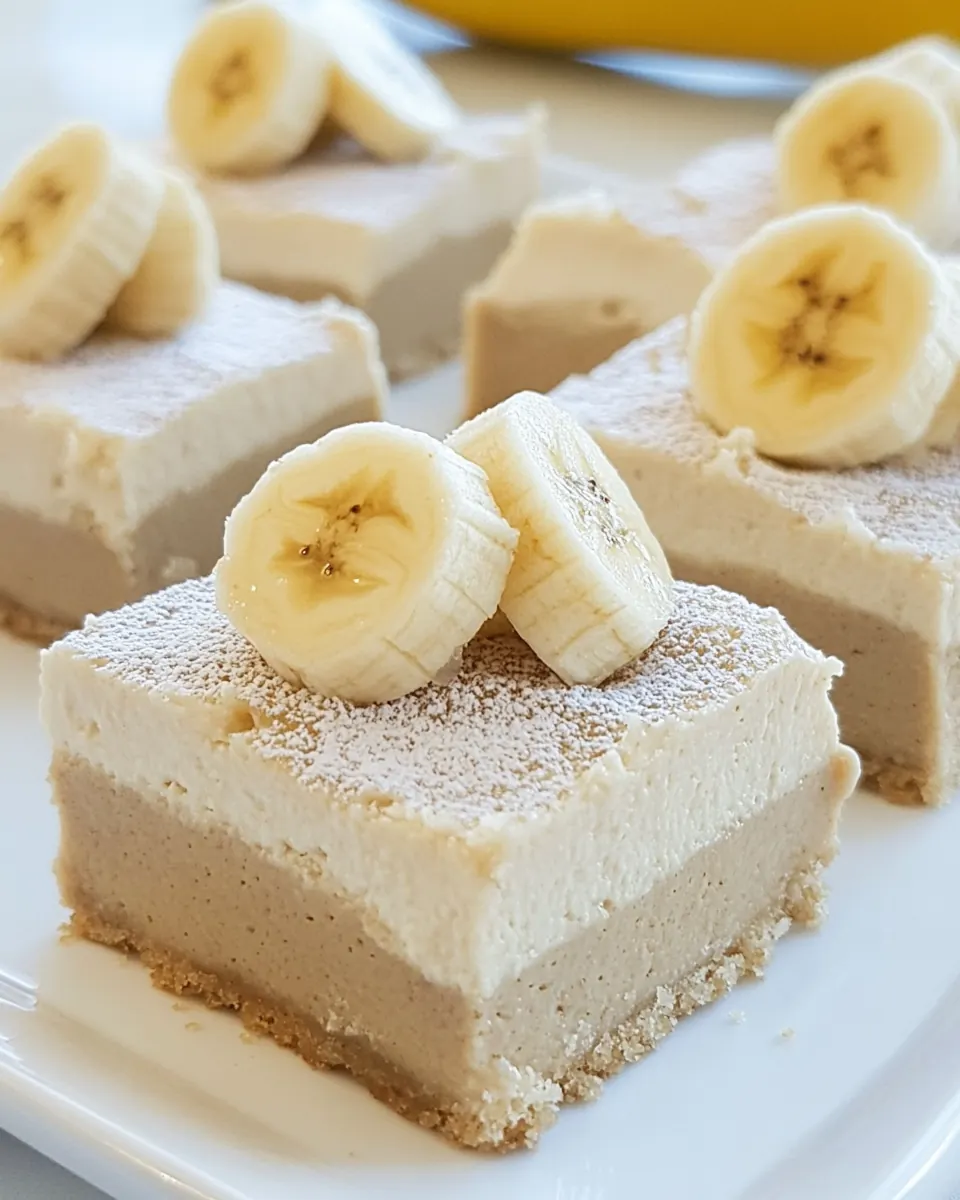
I love how the texture in Banana Cheesecake Bars hits that sweet spot between silky and firm. The use of room temperature cream cheese and just enough sweetener produces a filling that melts on the tongue without collapsing. Each bite reveals a subtle banana flavor, and the mouthfeel is what keeps people coming back for another square.
Simple ingredients that do heavy lifting
The ingredient list is lean, which is one reason I keep this recipe in my back pocket. With everyday items like mashed banana, cream cheese, and a touch of cornstarch or almond flour the bars come together quickly. These components work in harmony, the starch stabilizing the custard while the banana brings natural sweetness and moisture.
Versatile for different diets and occasions
I’ve made these for brunch, potlucks, and late night cravings, and their ability to be adapted is a standout. Swap in vegan cream cheese if needed, or choose your preferred sweetener to suit dietary needs. That flexibility means the recipe can fit into many gatherings without losing its essence.
Minimal fuss, maximum reward
From prep to slicing, Banana Cheesecake Bars feel approachable. The method has small but important steps that improve the outcome, like letting the filling rest in a turned off oven, which I now never skip. For busy evenings when you want something homemade without hours of babysitting, this is a dependable option.
Great texture control
What I particularly admire is how easy it is to manage the final texture. The optional crust makes them portable and slices cleanly, while crustless keeps them lighter. I often tweak the cornstarch versus almond flour balance to get the exact firmness friends request, so you can personalize the bite while preserving the familiar creamy profile.
Essential Ingredients for Banana Cheesecake Bars

These ingredients are thoughtfully simple, each playing a clear role in texture and flavor. The mashed banana provides natural sweetness and moisture, while the cream cheese supplies the lush, tangy base. A dash of vanilla extract brightens the overall profile, and the starch or flour helps the filling set cleanly without becoming rubbery. Together they create a balanced, sliceable bar that is both comforting and easy to adapt.
- 1 cup mashed banana (2 large bananas): Mashed thoroughly to provide natural sweetness, moisture, and banana flavor; helps bind the filling while keeping it tender and contributes a fruity aroma that complements the cream cheese.
- 12 oz cream cheese, vegan if desired: Softened and blended until smooth to create the rich, creamy base of the cheesecake layer; provides structure, tang, and a dense, silky mouthfeel whether dairy or vegan.
- 1/2 cups sweetener of choice (see above for options): Measured and added to sweeten the bars to taste, balancing banana sweetness and creaminess; can be adjusted for calorie or flavor preferences and dissolves into the batter for even sweetness.
- 1 tbsp cornstarch (or 4 tbsp almond flour): Whisked in to thicken the filling and stabilize its texture; cornstarch creates a smooth, set cheesecake, while almond flour offers a gluten-free, slightly nutty alternative and added body.
- 1 1/2 tsp pure vanilla extract: Stirred into the batter to enhance overall flavor with warm, floral vanilla notes; elevates sweetness perception and rounds out the banana and cream cheese profile.
- 1/4 tsp cinnamon (optional): Sprinkled in optionally to introduce warm, spicy complexity that complements banana and vanilla; enhances aroma and adds subtle depth without overpowering the filling.
- crust (two recipes are listed above) (optional): Prepared optionally to form a sturdy base that supports the filling; choose a crust recipe for either a tender, buttery or a nutty, wholesome foundation depending on texture preferences.
Cooking Instructions for Banana Cheesecake Bars
This recipe is straightforward but rewarding, and I like to walk through it patiently to get the best texture. Work methodically through each preparation step and pay attention to temperatures and sensory cues. With a few small rituals, like warming the cheese and resting the baked bars in the turned off oven, you get reliably smooth results that slice cleanly.
- Line an 8-inch pan with parchment paper. Press in your crust (or make the bars crustless). Bring cream cheese to room temp. Preheat the oven to 350 F. If you have an extra baking pan, fill it about halfway with water and place on the lower rack of your oven. (This step helps prevent cracking but can be skipped.) Blend all remaining ingredients. Don’t over-blend, which can also cause cracking later. Smooth the mixture evenly into the 8-inch pan. Place on the oven's middle rack. Bake 25 minutes. Leave the oven door completely closed but turn off the heat and let the bars sit in the turned-off oven another 10 minutes. Remove, and let cool completely. (Don’t skip. Putting them hot into the fridge would cause—you guessed it!—cracking.) I recommend refrigerating a few hours or overnight (loosely covered with a cloth towel), during which time they firm up considerably. Slice and serve. Store leftovers in the fridge or freezer.: The room fills with the soft scent of paper and readiness as you press the parchment into the corners, creating neat edges that will lift the cooled bars out easily. A snug parchment prevents edges from sticking, which helps you slice tidy squares without tearing the filling. If you skip properly lining the pan you risk the bars adhering to the sides and crumbling when removed.
- Press in your crust (or make the bars crustless): When adding a crust, you should feel a slight resistance as you press it into place, creating a compact base that will hold during slicing. The crust provides a textural contrast, a subtle crunch that complements the creaminess on top. Press evenly to avoid thin spots that could break, and beware of overly thick crust areas that will dominate a bite.
- Bring cream cheese to room temp: By the time the cream cheese reaches room temperature, it becomes noticeably softer and yields under a finger, which makes it smoother when blended. This step is essential for achieving a lump free filling and a silky mouthfeel. If you try to blend cold cream cheese, you will end up overmixing to break apart lumps, which incorporates air and can lead to cracks.
- Preheat the oven to 350 F: The oven heat should feel steady and ready when you open the door, and the even warmth is crucial for gentle, consistent baking. A correctly preheated oven ensures edges and center set at roughly the same rate, preventing a jiggly center or an overbrowned rim. Skipping preheating often leads to uneven baking and a disappointing texture.
- If you have an extra baking pan, fill it about halfway with water and place on the lower rack of your oven: When the water pan is in place, the oven humidity rises, which softens surface drying and reduces the chance of top cracks. The bubbling from the water is subtle but meaningful, creating a gentle steam environment. Do not skip this if you are concerned about cracking, because a dry oven often causes the cheesecake surface to split.
- Blend all remaining ingredients: As you blend the filling, listen for the motor's steady hum and watch the mixture turn gorgeously smooth, silk colored, and slightly glossy. A smooth batter ensures even baking and a cohesive texture in every slice. Over-blending, however, can introduce too much air, which expands and collapses during baking causing fissures, so stop once smooth.
- Don’t over-blend, which can also cause cracking later: You may notice tiny bubbles forming as you blend, a sign that air is being incorporated; let them settle before baking to avoid an airy top. Resting briefly helps bubbles dissipate and leads to a denser, creamier result. The common pitfall is running the blender too long, which produces a lighter, fragile filling prone to breakage when cooling.
- Smooth the mixture evenly into the 8-inch pan: As you pour and spread the filling, the surface should look level and satiny, with no significant peaks or troughs. An even surface bakes consistently and slices uniformly, so take a moment to smooth with a spatula. Neglecting to level the filling can yield uneven set, where thin edges bake faster than the center.
- Place on the oven's middle rack: Setting the pan in the center gives the most even heat exposure, which helps the cheesecake bake uniformly from sides to center. You might hear a faint settling sound as the batter meets the heat and starts to breathe. Using a higher or lower rack can cause the top to brown too quickly or the center to remain underdone.
- Bake 25 minutes: During baking you should notice a delicate wobble in the center while the edges look set and faintly golden, a key visual signal that the internal structure is forming properly. The aroma of gently cooked banana and slightly toasted dairy notes comes forward, reassuring you the process is on track. Pulling it early will produce a too-soupy center, while overbaking dries the filling and reduces creaminess.
- Leave the oven door completely closed but turn off the heat and let the bars sit in the turned-off oven another 10 minutes: The residual heat setting allows the center to finish setting slowly, eliminating sudden temperature change that can crack the surface. You may feel a gentle warmth through the oven door as the custard settles, and the wobble calms. Opening the door during this time risks thermal shock, which is the main cause of surfaces splitting.
- Remove, and let cool completely: Once out of the oven, the room temperature change is perceptible, and the bars should come to complete coolness before any chilling. Cooling fully helps flavors meld and the filling firm up enough for slicing. Rushing to refrigerate while still hot often leads to cracking from the abrupt temperature drop.
- I recommend refrigerating a few hours or overnight (loosely covered with a cloth towel): Chilling transforms the texture into a denser, sliceable bar, and the flavors deepen over time. The cloth allows breathability which prevents condensation from forming on the surface. Putting the bars directly under plastic wrap while warm traps steam and causes sogginess or surface defects.
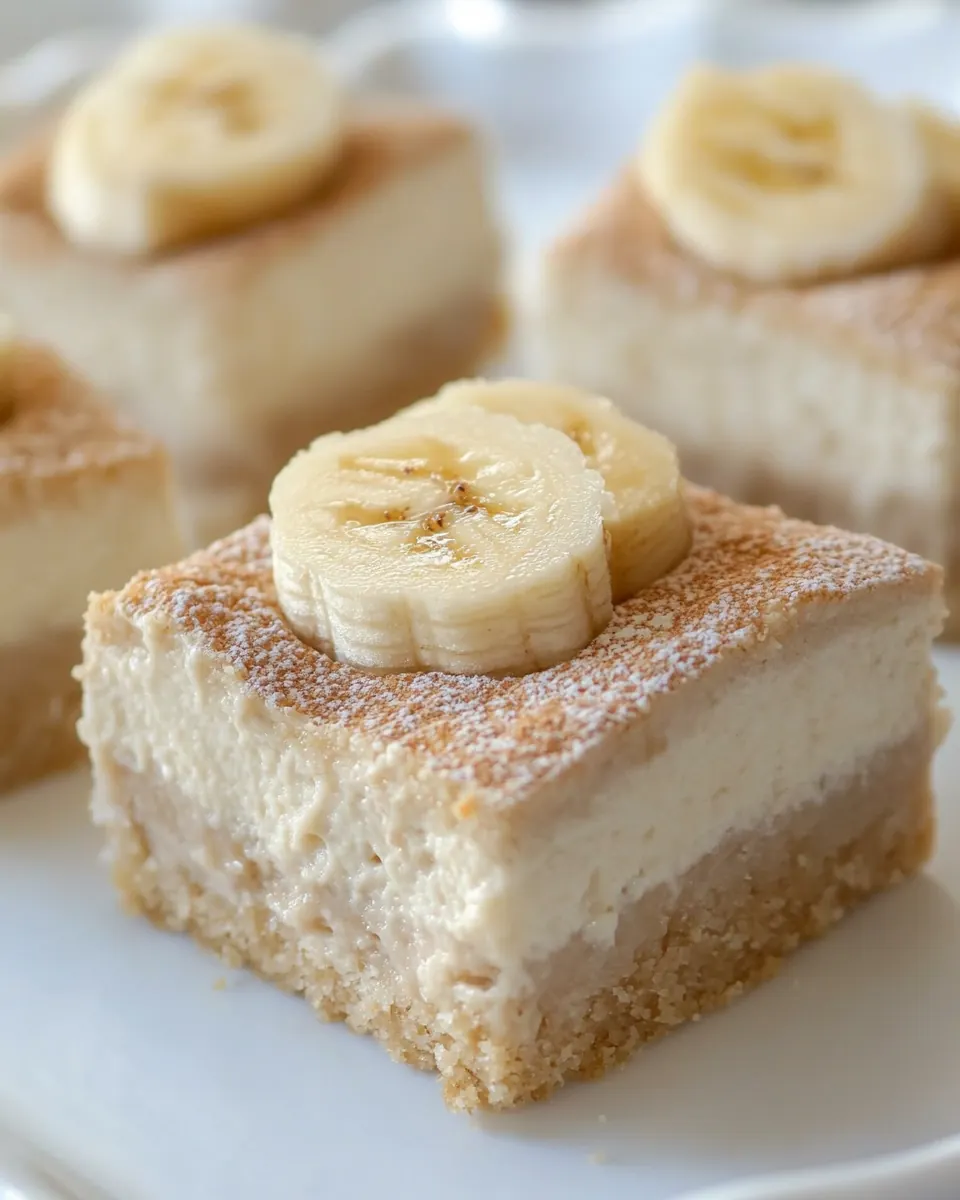
- Slice and serve: When slicing, use a sharp knife warmed under hot water and wiped dry between cuts for the cleanest edges, resulting in neat squares that present beautifully. The initial cut test reveals the ideal firmness, and you can adjust slice thickness to suit the occasion. Cutting too soon or with a dull blade will yield ragged edges and a less attractive presentation.
- Store leftovers in the fridge or freezer: Refrigerated bars keep their texture and flavor for several days, while freezing extends their life for longer storage; wrap tightly to avoid freezer burn. When thawing frozen bars, do so slowly in the fridge to preserve texture. Leaving them out at room temperature for long periods invites spoilage and textural degradation.
Customization Ideas
These ideas help you personalize Banana Cheesecake Bars without changing the recipe’s core identity. Mix and match to find your favorite variation.
- Swap sweeteners — Try coconut sugar for a deep caramel note, or erythritol if you prefer a low calorie option, watching how each affects browning and mouthfeel.
- Vegan option — Use a high quality vegan cream cheese and ensure your sweetener choice is vegan friendly for a plant based version that still slices well.
- Cinnamon boost — Add the optional cinnamon to the mix for warm spice, but use sparingly to keep the banana prominent.
- Almond flour swap — Use the almond flour measure instead of cornstarch for a nuttier, denser texture that is still stable when refrigerated.
- Crust choices — Choose a basic crumb crust for crunch, or skip it for a lighter, crustless bar that highlights the filling.
Perfect Pairings for Banana Cheesecake Bars
These bars are wonderfully versatile, working for casual snacks, dessert plates, or special meals. Below are thoughtful serving ideas and pairings to elevate the experience and help plan how to present them.
- Simple coffee service — Serve slices with a strong brewed coffee for morning coffee hours, the bitter notes balancing the creamy sweetness.
- Brunch dessert plate — Offer alongside fresh fruit and yogurt for a relaxed brunch spread, where the bars provide richness without overwhelming other dishes.
- Potluck friendly — Transport the chilled bars in a shallow container; they slice neatly and feed a crowd at gatherings and picnics.
- Special occasion dessert — Plate a single square with a small dollop of whipped topping and a light dusting of cinnamon for an elegant finish at dinner parties.
- Storage and make ahead — Refrigerate for several days or freeze for longer storage; thaw slowly in the fridge to preserve texture for serving later.
- Seasonal pairing — These bars work year round, though I especially reach for them in cooler months when warm spice notes complement the banana.
FAQ
Conclusion
What makes Banana Cheesecake Bars special is their combination of creamy texture and approachable preparation, which lets ripe bananas shine in a sliceable, crowd friendly dessert. I hope you give them a try, because a few simple steps and everyday ingredients deliver a dessert that feels homemade and celebratory at once. Try adapting the sweetener or choosing a crust to suit your preferences, and enjoy the satisfying slices with friends or as a cozy solo treat.

Banana Cheesecake Bars
Equipment
- 8-inch pan
- Parchment Paper
- Blender or mixer
- Spatula
Ingredients
- 1 cup mashed banana (2 large bananas) Mashed thoroughly to provide natural sweetness, moisture, and banana flavor; helps bind the filling while keeping it tender and contributes a fruity aroma that complements the cream cheese.
- 12 oz cream cheese, vegan if desired Softened and blended until smooth to create the rich, creamy base of the cheesecake layer; provides structure, tang, and a dense, silky mouthfeel whether dairy or vegan.
- 1/2 cups sweetener of choice (see above for options) Measured and added to sweeten the bars to taste, balancing banana sweetness and creaminess; can be adjusted for calorie or flavor preferences and dissolves into the batter for even sweetness.
- 1 tbsp cornstarch (or 4 tbsp almond flour) Whisked in to thicken the filling and stabilize its texture; cornstarch creates a smooth, set cheesecake, while almond flour offers a gluten-free, slightly nutty alternative and added body.
- 1 1/2 tsp pure vanilla extract Stirred into the batter to enhance overall flavor with warm, floral vanilla notes; elevates sweetness perception and rounds out the banana and cream cheese profile.
- optional 1/4 tsp cinnamon Sprinkled in optionally to introduce warm, spicy complexity that complements banana and vanilla; enhances aroma and adds subtle depth without overpowering the filling.
- optional crust (two recipes are listed above) Prepared optionally to form a sturdy base that supports the filling; choose a crust recipe for either a tender, buttery or a nutty, wholesome foundation depending on texture preferences.
Instructions
- Line an 8-inch pan with parchment paper. Press in your crust (or make the bars crustless). Bring cream cheese to room temp. Preheat the oven to 350 F. If you have an extra baking pan, fill it about halfway with water and place on the lower rack of your oven. (This step helps prevent cracking but can be skipped.) Blend all remaining ingredients. Don’t over-blend, which can also cause cracking later. Smooth the mixture evenly into the 8-inch pan. Place on the oven's middle rack. Bake 25 minutes. Leave the oven door completely closed but turn off the heat and let the bars sit in the turned-off oven another 10 minutes. Remove, and let cool completely. (Don’t skip. Putting them hot into the fridge would cause—you guessed it!—cracking.) I recommend refrigerating a few hours or overnight (loosely covered with a cloth towel), during which time they firm up considerably. Slice and serve. Store leftovers in the fridge or freezer.: The room fills with the soft scent of paper and readiness as you press the parchment into the corners, creating neat edges that will lift the cooled bars out easily. A snug parchment prevents edges from sticking, which helps you slice tidy squares without tearing the filling. If you skip properly lining the pan you risk the bars adhering to the sides and crumbling when removed.
- Press in your crust (or make the bars crustless): When adding a crust, you should feel a slight resistance as you press it into place, creating a compact base that will hold during slicing. The crust provides a textural contrast, a subtle crunch that complements the creaminess on top. Press evenly to avoid thin spots that could break, and beware of overly thick crust areas that will dominate a bite.
- Bring cream cheese to room temp: By the time the cream cheese reaches room temperature, it becomes noticeably softer and yields under a finger, which makes it smoother when blended. This step is essential for achieving a lump free filling and a silky mouthfeel. If you try to blend cold cream cheese, you will end up overmixing to break apart lumps, which incorporates air and can lead to cracks.
- Preheat the oven to 350 F: The oven heat should feel steady and ready when you open the door, and the even warmth is crucial for gentle, consistent baking. A correctly preheated oven ensures edges and center set at roughly the same rate, preventing a jiggly center or an overbrowned rim. Skipping preheating often leads to uneven baking and a disappointing texture.
- If you have an extra baking pan, fill it about halfway with water and place on the lower rack of your oven: When the water pan is in place, the oven humidity rises, which softens surface drying and reduces the chance of top cracks. The bubbling from the water is subtle but meaningful, creating a gentle steam environment. Do not skip this if you are concerned about cracking, because a dry oven often causes the cheesecake surface to split.
- Blend all remaining ingredients: As you blend the filling, listen for the motor's steady hum and watch the mixture turn gorgeously smooth, silk colored, and slightly glossy. A smooth batter ensures even baking and a cohesive texture in every slice. Over-blending, however, can introduce too much air, which expands and collapses during baking causing fissures, so stop once smooth.
- Don’t over-blend, which can also cause cracking later: You may notice tiny bubbles forming as you blend, a sign that air is being incorporated; let them settle before baking to avoid an airy top. Resting briefly helps bubbles dissipate and leads to a denser, creamier result. The common pitfall is running the blender too long, which produces a lighter, fragile filling prone to breakage when cooling.
- Smooth the mixture evenly into the 8-inch pan: As you pour and spread the filling, the surface should look level and satiny, with no significant peaks or troughs. An even surface bakes consistently and slices uniformly, so take a moment to smooth with a spatula. Neglecting to level the filling can yield uneven set, where thin edges bake faster than the center.
- Place on the oven's middle rack: Setting the pan in the center gives the most even heat exposure, which helps the cheesecake bake uniformly from sides to center. You might hear a faint settling sound as the batter meets the heat and starts to breathe. Using a higher or lower rack can cause the top to brown too quickly or the center to remain underdone.
- Bake 25 minutes: During baking you should notice a delicate wobble in the center while the edges look set and faintly golden, a key visual signal that the internal structure is forming properly. The aroma of gently cooked banana and slightly toasted dairy notes comes forward, reassuring you the process is on track. Pulling it early will produce a too-soupy center, while overbaking dries the filling and reduces creaminess.
- Leave the oven door completely closed but turn off the heat and let the bars sit in the turned-off oven another 10 minutes: The residual heat setting allows the center to finish setting slowly, eliminating sudden temperature change that can crack the surface. You may feel a gentle warmth through the oven door as the custard settles, and the wobble calms. Opening the door during this time risks thermal shock, which is the main cause of surfaces splitting.
- Remove, and let cool completely: Once out of the oven, the room temperature change is perceptible, and the bars should come to complete coolness before any chilling. Cooling fully helps flavors meld and the filling firm up enough for slicing. Rushing to refrigerate while still hot often leads to cracking from the abrupt temperature drop.
- I recommend refrigerating a few hours or overnight (loosely covered with a cloth towel): Chilling transforms the texture into a denser, sliceable bar, and the flavors deepen over time. The cloth allows breathability which prevents condensation from forming on the surface. Putting the bars directly under plastic wrap while warm traps steam and causes sogginess or surface defects.
- Slice and serve: When slicing, use a sharp knife warmed under hot water and wiped dry between cuts for the cleanest edges, resulting in neat squares that present beautifully. The initial cut test reveals the ideal firmness, and you can adjust slice thickness to suit the occasion. Cutting too soon or with a dull blade will yield ragged edges and a less attractive presentation.
- Store leftovers in the fridge or freezer: Refrigerated bars keep their texture and flavor for several days, while freezing extends their life for longer storage; wrap tightly to avoid freezer burn. When thawing frozen bars, do so slowly in the fridge to preserve texture. Leaving them out at room temperature for long periods invites spoilage and textural degradation.
Notes
- Swap sweeteners — Try coconut sugar for a deep caramel note, or erythritol if you prefer a low calorie option, watching how each affects browning and mouthfeel.
- Vegan option — Use a high quality vegan cream cheese and ensure your sweetener choice is vegan friendly for a plant based version that still slices well.
- Cinnamon boost — Add the optional cinnamon to the mix for warm spice, but use sparingly to keep the banana prominent.
- Almond flour swap — Use the almond flour measure instead of cornstarch for a nuttier, denser texture that is still stable when refrigerated.
- Crust choices — Choose a basic crumb crust for crunch, or skip it for a lighter, crustless bar that highlights the filling.