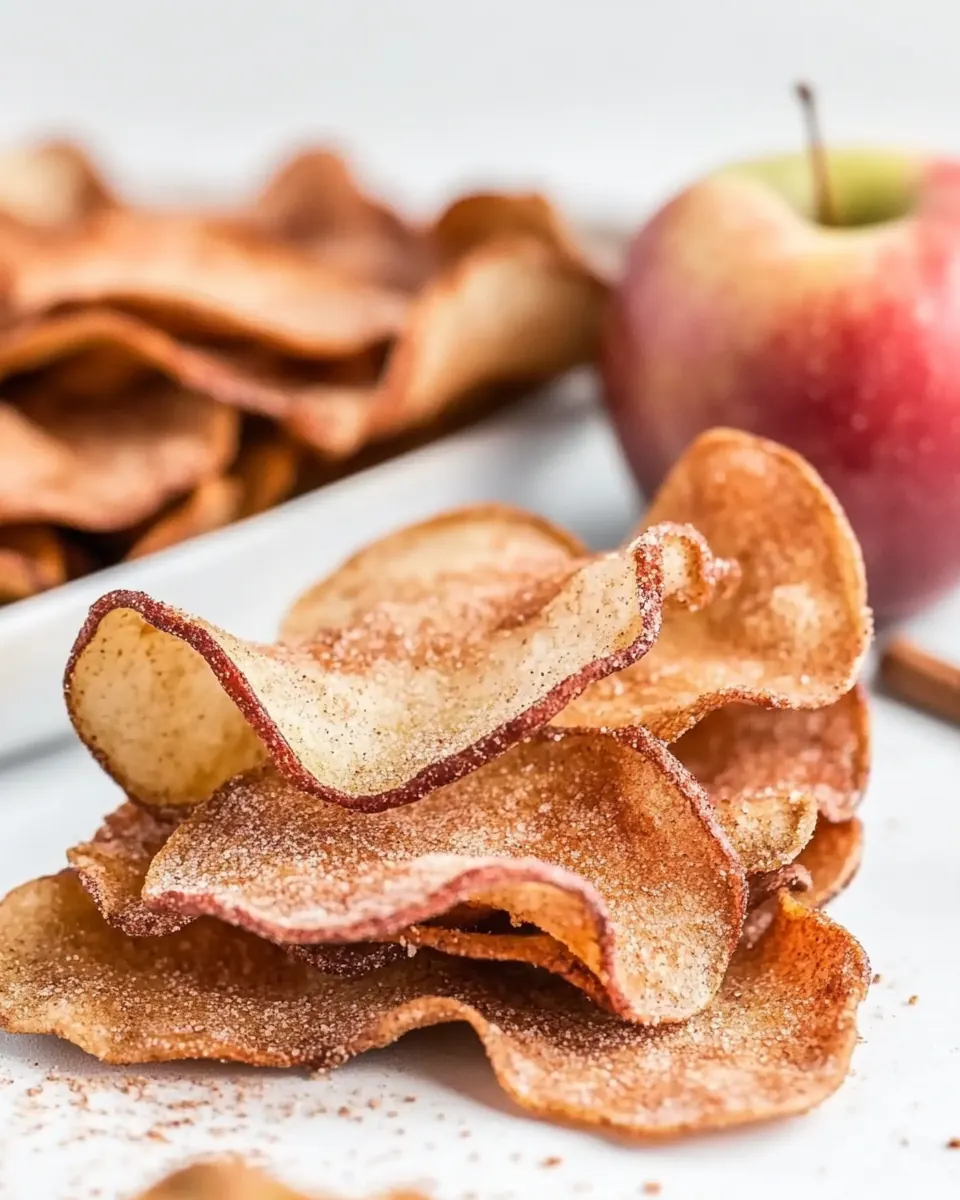
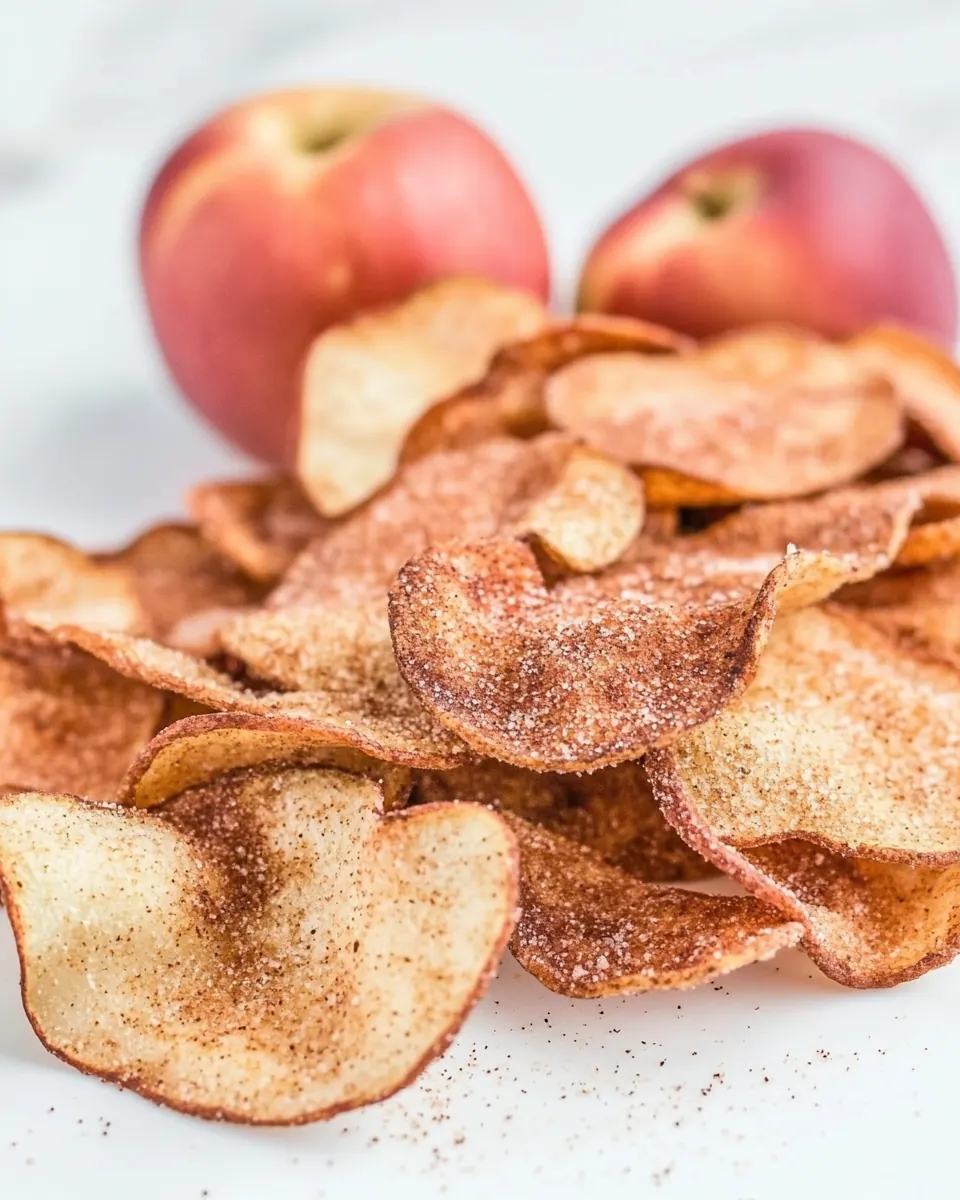
Apple Chips
Apple Chips have been a quiet obsession of mine since childhood, a snack that somehow feels like both a warm kitchen memory and a modern pantry staple.
Years ago I learned to turn overflowing fruit bowls into something unexpectedly special, and Apple Chips quickly became my go to when I wanted something crunchy, naturally sweet, and portable. I remember the first time I left a tray in the oven for a few hours while I took care of other things, and the house filled with a gentle, cinnamon scented warmth that instantly felt like fall. That little batch disappeared before dinner, and from then on I kept refining the technique until the texture was reliably crisp and the flavor bright without being cloying.
Now, whenever I want a snack for a picnic or a simple element to add to a lunchbox, I reach for Apple Chips. They travel well, they please both kids and adults, and they are forgiving enough that even imperfectly thin slices often turn out lovely. Over the years I learned small tricks about slicing uniformly, spacing the rounds, and when to flip so the chips dry evenly. Those lessons are the reason I continue to make them, and they are what I want to share with you in a friendly, hands on way. Try them once and you may find they become a regular ritual in your kitchen.
Recipe Snapshot
1 hr 45 mins
15 mins
90 mins
Medium
150 kcal
American
Vegan, Gluten-Free
Snacks
Oven, Baking sheet, Parchment paper, Knife or mandoline, Spatula or tongs
What Makes This Apple Chips Special
Simple pantry ingredients with big impact
I love that Apple Chips rely on nothing more than fresh apples, cinnamon, and a touch of granulated sugar if you like extra sweetness. These few elements work together to concentrate flavor as the apples slowly dehydrate, producing an intensified fruitiness and a warm spice note that feels irresistible. I often appreciate recipes that ask for modest effort yet reward me with a snack I reach for again and again.
Kid friendly and snack ready
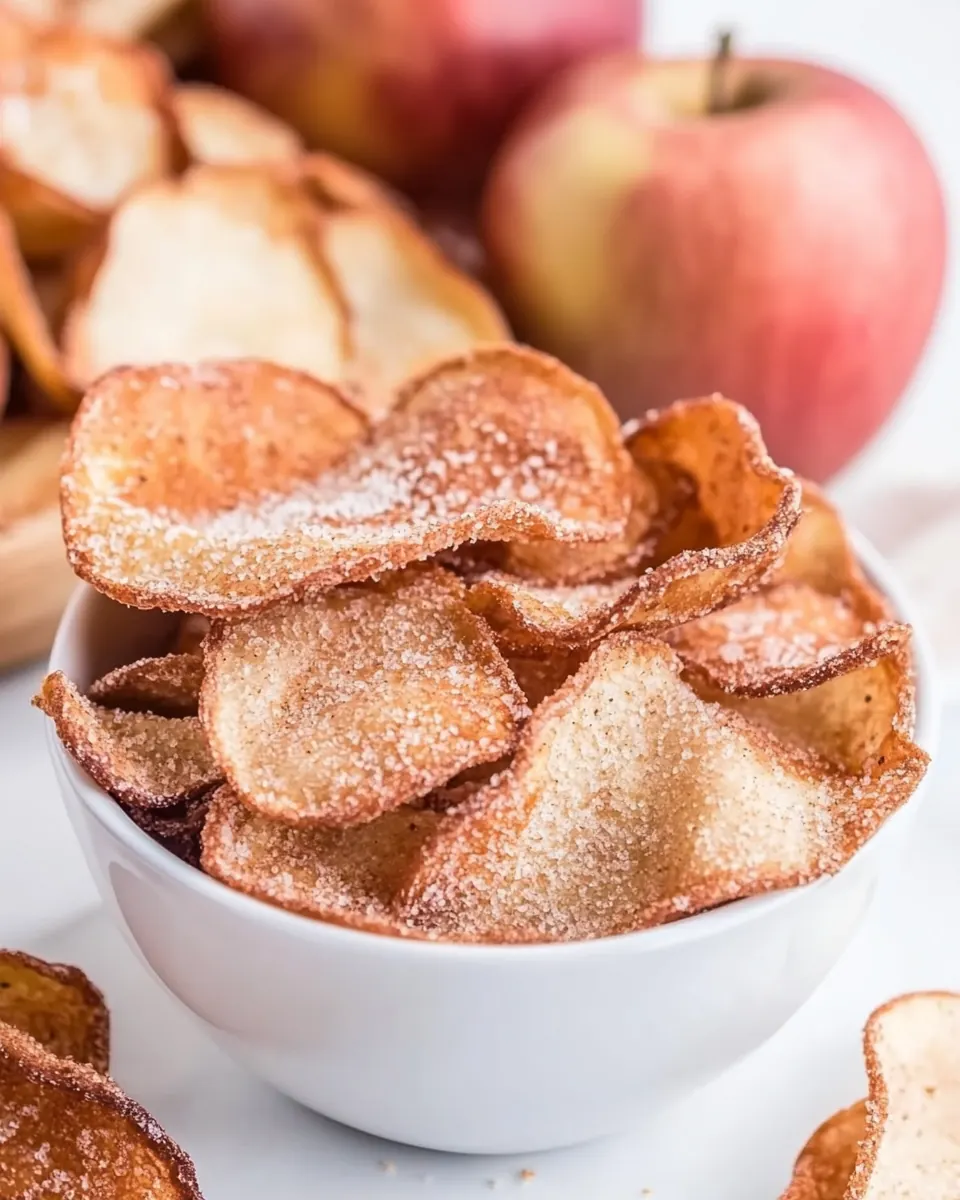
When I make Apple Chips, they disappear quickly at home. They’re naturally sweet enough for little hands, and because they are not greasy or messy, they are an easy choice for school lunches or road trips. I always keep a jar on the counter and find guests nibbling them as soon as they arrive. That ability to please a crowd while staying wholesome is one reason I keep returning to this recipe.
Low fuss, high satisfaction
What I appreciate most is the patience based technique. Slow oven drying at a low temperature transforms thin slices into crisp chips without complicated equipment. You do not need fancy dehydrators, just time and attention. For busy days I like that the work is mostly hands off, freeing me to do other things while the oven does its quiet magic.
Customizable texture and flavor
I often vary the amount of cinnamon or omit the granulated sugar depending on mood and the apple variety. Tangier apples give a contrasting zip that plays nicely against warming spice, while sweeter apples create candy like chips. Because the recipe is forgiving, experimenting with varieties and thickness is simple and fun.
Healthy alternative to packaged snacks
Making Apple Chips at home means you control the ingredients and skip preservatives. I like serving them as an everyday snack or as part of a curated picnic. They feel wholesome, light, and naturally satisfying, which makes them a staple I always recommend to friends who want a crisp, real food treat.
What You’ll Need for Apple Chips
These ingredients embrace a simple philosophy: let great fruit shine, support it with warm spice, and add optional sweetness if you like. The key players are the apples, which provide the structure and natural sugars, the cinnamon for aromatic warmth, and the granulated sugar to dial up sweetness when desired. Together they dehydrate into crisp, flavorful chips that hold up well in storage.
- 2 large apples (any variety you prefer (I used Mcintosh)): Provide sweetness and structure to the chips, offering natural sugars that caramelize slightly during baking for a pleasant chew; peel and core as desired, then thinly slice to ensure even crisping while maintaining some tender bite; choose firm apples to prevent mushiness and to develop concentrated apple flavor as moisture evaporates.
- 2 teaspoons ground cinnamon: Add warm, aromatic spice that enhances apple flavor and gives the chips a classic, cozy profile; sprinkle evenly over slices to create a balanced cinnamon presence that complements the fruit’s natural sweetness; use ground cinnamon for quick adhesion and uniform coverage during baking.
- 4 tablespoons granulated sugar ( for added sweetness) (optional): Contribute optional extra sweetness and a crisp, lightly sugary exterior when sprinkled on slices before baking; dissolve slightly and caramelize to boost browning and create contrast with the apple’s natural tartness; adjust amount to taste to avoid overpowering the fruit’s flavor.
Apple Chips Instructions
These steps are slow and mindful, but they are satisfying. I like to move through the process with patience, checking visual cues and letting the oven gently draw moisture out of the slices. Keep in mind that thickness and oven variance affect timing, so treat the recipe as a framework and rely on aroma and color as your guides.
- Preheat your oven to 225°F (110°C). Line a baking sheet with parchment paper or a silicone baking mat and set aside.: The kitchen will begin to smell faintly sweet and warm as the oven reaches 225°F , a low steady setting that draws moisture without browning too quickly. Setting up parchment paper or a silicone baking mat prevents sticking and makes it easier to lift fragile chips later. If the oven is hotter than intended the slices can brown too fast and stay chewy instead of crisp, so confirm the temperature with an oven thermometer. A common mistake is rushing this step, which can lead to uneven drying.
- Using a sharp knife or a mandoline slicer, carefully slice the apples into very thin rounds, about 1/8-inch thick. Remove the core and seeds as you go. You can leave the skin on for added texture and nutrients or peel the apples if desired.: As you slice, listen for a clean, whisper like sound from the knife or mandoline and watch the translucent edges form; thin rounds allow moisture to escape evenly, producing the satisfying crunch. The scent is fresh and green at this stage, a contrast to the oven warmed aroma to come. A frequent error is uneven slicing, which causes some pieces to burn while others remain soft, so take your time or use a mandoline with care and a guard.
- In a small bowl, mix together the cinnamon and sugar (if using). This step is optional if you prefer unsweetened apple chips.: As you stir the cinnamon into the granulated sugar , the aroma will bloom, giving you a preview of the final flavor. Preparing the mixture ahead makes it easy to dust the slices evenly. Avoid over seasoning, which can mask the apple's natural taste; a light, even sprinkle is usually best. One mistake to avoid is adding wet ingredients to this mixture, which would create clumps and uneven coverage.
- Arrange the apple slices in a single layer on the prepared baking sheet, making sure they do not overlap.: Laying the rounds with space around them is crucial for airflow, you will notice the surface dry at different rates if pieces touch. Visually the oven will transform the fruit as edges begin to curl slightly and the centers start turning translucent. Crowding the pan leads to steaming instead of drying, leaving you with limp chips instead of crisp ones.
- Sprinkle half of the cinnamon mixture evenly over the apple slices.: The first dusting will meet the warm surface of the raw slices and cling lightly, releasing that comforting spice aroma. This initial application ensures both sides get seasoning when you flip them later. Be mindful not to pile on too much, or the sugar can caramelize unevenly and leave sticky spots that interfere with drying.
- Place the baking sheet in the preheated oven and bake for 1 hour.: During this hour the room will be filled with a gentle, toasty cinnamon scent, and the apple slices will begin to lose moisture and slightly darken at the edges. You should hear nothing dramatic, just the quiet hum of the oven as the fruit slowly transforms. Resist the urge to crank the temperature, as higher heat risks browning the exterior while leaving the interior soft.
- Remove the chips from the oven and carefully flip them over to ensure even crispness.: When you lift the tray, you may feel warmth wave up from the pan and see the centers look more translucent than before. Flipping allows the underside to finish drying and helps avoid one sided chewiness. Chips will be fragile at this point, so use a thin spatula or tongs to avoid cracking. A common slip is hasty flipping, which can break the slices into unusable bits.
- Sprinkle the remaining cinnamon mixture over the apple slices and place them back in the oven.: The second application of spice hits the warm fruit and releases a more pronounced aroma. This helps create balanced seasoning across both faces of each chip and contributes to a fuller finished flavor. Ensure even distribution to avoid pockets of intense sweetness, which can burn during the remaining bake time.
- Bake for 1 more hour until the apple chips are crispy and lightly golden brown. Keep an eye on them after 30 minutes to prevent burning.: In this final hour the texture shifts from pliable to crisp. You will notice a light golden hue develop and a subtle toasted scent as sugars caramelize. After about 30 minutes, begin checking frequently, because variations in slice thickness and oven hotspots can turn golden edges into dark burned spots quickly. An overbaked chip will taste bitter and lose its natural charm.
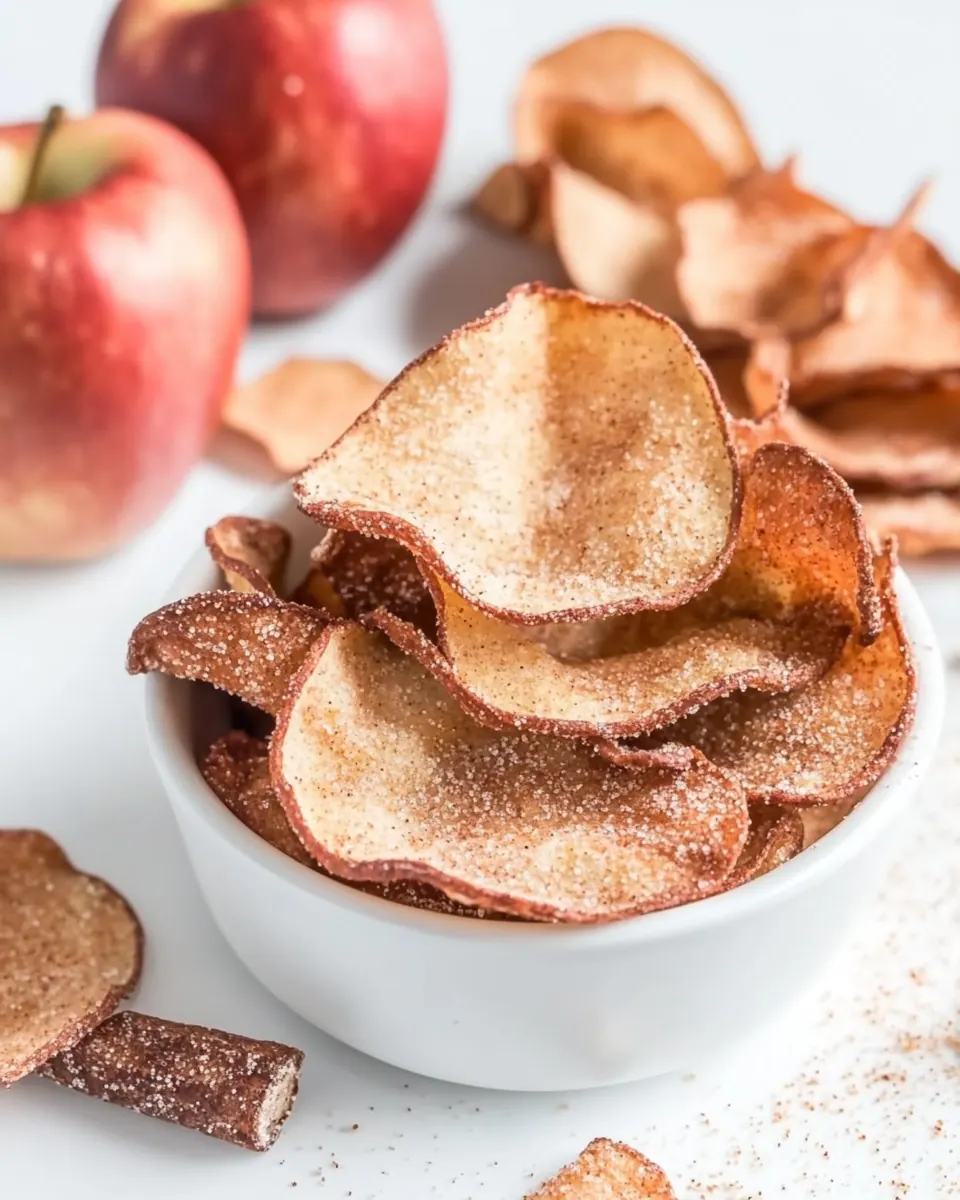
- Once the apple chips are done, remove them from the oven and let them cool completely on the baking sheet. They will continue to crisp up as they cool down.: Cooling is when the magic completes, the residual heat finishes driving out moisture and the texture becomes satisfyingly crisp. I like to leave them undisturbed on the sheet until they reach room temperature. A common misconception is that chips should be perfectly crisp right out of the oven; patience during cooling prevents premature disappointment.
Ways to Customize
These simple adjustments let you personalize Apple Chips without changing the core technique. Small swaps in apple variety, the amount of cinnamon, or whether you use granulated sugar can shift the snack from tart to candy like, and each option yields a pleasing result.
- Choose your apple variety: Try tart apples for a brighter snap or very sweet apples for a dessert like chip, both will crisp beautifully when sliced thin.
- Adjust the spice level: Increase or decrease the amount of cinnamon to match your preference, or omit it entirely for plain, naturally sweet chips.
- Skip sugar for a lighter snack: Omit the granulated sugar if you prefer a fruit forward chip with fewer added sugars.
- Peel or not to peel: Leaving the skin on adds texture and color, while peeling yields a more uniform, delicate chip.
- Thinner slices for crunch: Aim for about 1/8-inch thickness, thinner slices will crisp faster and become more brittle, so handle them gently.
Serving Options for Apple Chips
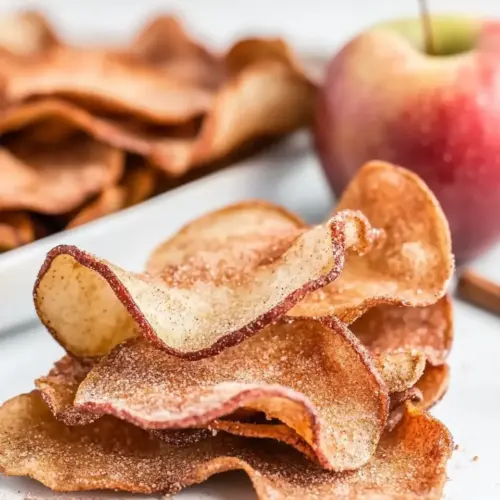
Apple Chips are versatile and travel well, making them ideal for casual snacking or more intentional presentations. Serve them alone, pair them with complementary items, or use them as a crunchy garnish. Their natural sweetness and crisp texture work across seasons and occasions.
- Snack bowls: Serve a bowl of Apple Chips for afternoon nibbling at home or on a picnic, they are light and easy to eat without utensils.
- Lunchbox addition: Pack a handful in a separate compartment to add crunch to kids or adult lunches, they keep well for a day or two.
- Party nibble: Lay them out on a grazing board alongside cheeses and dried fruit for contrast, though do not place them next to wet items that might make them soggy.
- Seasonal occasions: Because they feel cozy and warm, Apple Chips are perfect for fall gatherings, afternoon tea, or as a light treat during Ramadan evenings when you want a simple sweet bite.
- Storage tips: Store completely cooled chips in an airtight container at room temperature for several days; if they soften, re-crisp in a low oven for a few minutes.
- Serving temperature: Serve at room temperature so the chips retain their crisp texture and full flavor.
- Pairing suggestions: Try alongside nut butters or yogurt dips for contrast, but keep wet partners separate until serving to preserve crispness.
FAQ
Conclusion
Apple Chips stand out for their simplicity and the comforting, cinnamon warmed flavor they deliver from only a few ingredients. I encourage you to try this easy, hands off method to transform ordinary apples into a snack that is crunchy, portable, and widely loved. Whether you make them for gatherings, lunchboxes, or solo snacking, they bring a cozy touch to any moment and are satisfying in a way that feels both wholesome and indulgent.
Apple Chips
Equipment
- Oven
- Baking Sheet
- Parchment Paper
- Knife or mandoline
- Spatula or tongs
Ingredients
- 2 large apples (any variety you prefer (I used Mcintosh)) Provide sweetness and structure to the chips, offering natural sugars that caramelize slightly during baking for a pleasant chew; peel and core as desired, then thinly slice to ensure even crisping while maintaining some tender bite; choose firm apples to prevent mushiness and to develop concentrated apple flavor as moisture evaporates.
- 2 teaspoons ground cinnamon Add warm, aromatic spice that enhances apple flavor and gives the chips a classic, cozy profile; sprinkle evenly over slices to create a balanced cinnamon presence that complements the fruit’s natural sweetness; use ground cinnamon for quick adhesion and uniform coverage during baking.
- 4 tablespoons granulated sugar (optional for added sweetness) Contribute optional extra sweetness and a crisp, lightly sugary exterior when sprinkled on slices before baking; dissolve slightly and caramelize to boost browning and create contrast with the apple’s natural tartness; adjust amount to taste to avoid overpowering the fruit’s flavor.
Instructions
- Preheat your oven to 225°F (110°C). Line a baking sheet with parchment paper or a silicone baking mat and set aside.: The kitchen will begin to smell faintly sweet and warm as the oven reaches 225°F , a low steady setting that draws moisture without browning too quickly. Setting up parchment paper or a silicone baking mat prevents sticking and makes it easier to lift fragile chips later. If the oven is hotter than intended the slices can brown too fast and stay chewy instead of crisp, so confirm the temperature with an oven thermometer. A common mistake is rushing this step, which can lead to uneven drying.
- Using a sharp knife or a mandoline slicer, carefully slice the apples into very thin rounds, about 1/8-inch thick. Remove the core and seeds as you go. You can leave the skin on for added texture and nutrients or peel the apples if desired.: As you slice, listen for a clean, whisper like sound from the knife or mandoline and watch the translucent edges form; thin rounds allow moisture to escape evenly, producing the satisfying crunch. The scent is fresh and green at this stage, a contrast to the oven warmed aroma to come. A frequent error is uneven slicing, which causes some pieces to burn while others remain soft, so take your time or use a mandoline with care and a guard.
- In a small bowl, mix together the cinnamon and sugar (if using). This step is optional if you prefer unsweetened apple chips.: As you stir the cinnamon into the granulated sugar , the aroma will bloom, giving you a preview of the final flavor. Preparing the mixture ahead makes it easy to dust the slices evenly. Avoid over seasoning, which can mask the apple's natural taste; a light, even sprinkle is usually best. One mistake to avoid is adding wet ingredients to this mixture, which would create clumps and uneven coverage.
- Arrange the apple slices in a single layer on the prepared baking sheet, making sure they do not overlap.: Laying the rounds with space around them is crucial for airflow, you will notice the surface dry at different rates if pieces touch. Visually the oven will transform the fruit as edges begin to curl slightly and the centers start turning translucent. Crowding the pan leads to steaming instead of drying, leaving you with limp chips instead of crisp ones.
- Sprinkle half of the cinnamon mixture evenly over the apple slices.: The first dusting will meet the warm surface of the raw slices and cling lightly, releasing that comforting spice aroma. This initial application ensures both sides get seasoning when you flip them later. Be mindful not to pile on too much, or the sugar can caramelize unevenly and leave sticky spots that interfere with drying.
- Place the baking sheet in the preheated oven and bake for 1 hour.: During this hour the room will be filled with a gentle, toasty cinnamon scent, and the apple slices will begin to lose moisture and slightly darken at the edges. You should hear nothing dramatic, just the quiet hum of the oven as the fruit slowly transforms. Resist the urge to crank the temperature, as higher heat risks browning the exterior while leaving the interior soft.
- Remove the chips from the oven and carefully flip them over to ensure even crispness.: When you lift the tray, you may feel warmth wave up from the pan and see the centers look more translucent than before. Flipping allows the underside to finish drying and helps avoid one sided chewiness. Chips will be fragile at this point, so use a thin spatula or tongs to avoid cracking. A common slip is hasty flipping, which can break the slices into unusable bits.
- Sprinkle the remaining cinnamon mixture over the apple slices and place them back in the oven.: The second application of spice hits the warm fruit and releases a more pronounced aroma. This helps create balanced seasoning across both faces of each chip and contributes to a fuller finished flavor. Ensure even distribution to avoid pockets of intense sweetness, which can burn during the remaining bake time.
- Bake for 1 more hour until the apple chips are crispy and lightly golden brown. Keep an eye on them after 30 minutes to prevent burning.: In this final hour the texture shifts from pliable to crisp. You will notice a light golden hue develop and a subtle toasted scent as sugars caramelize. After about 30 minutes, begin checking frequently, because variations in slice thickness and oven hotspots can turn golden edges into dark burned spots quickly. An overbaked chip will taste bitter and lose its natural charm.
- Once the apple chips are done, remove them from the oven and let them cool completely on the baking sheet. They will continue to crisp up as they cool down.: Cooling is when the magic completes, the residual heat finishes driving out moisture and the texture becomes satisfyingly crisp. I like to leave them undisturbed on the sheet until they reach room temperature. A common misconception is that chips should be perfectly crisp right out of the oven; patience during cooling prevents premature disappointment.
Notes
- Choose your apple variety: Try tart apples for a brighter snap or very sweet apples for a dessert like chip, both will crisp beautifully when sliced thin.
- Adjust the spice level: Increase or decrease the amount of cinnamon to match your preference, or omit it entirely for plain, naturally sweet chips.
- Skip sugar for a lighter snack: Omit the granulated sugar if you prefer a fruit forward chip with fewer added sugars.
- Peel or not to peel: Leaving the skin on adds texture and color, while peeling yields a more uniform, delicate chip.
- Thinner slices for crunch: Aim for about 1/8-inch thickness, thinner slices will crisp faster and become more brittle, so handle them gently.