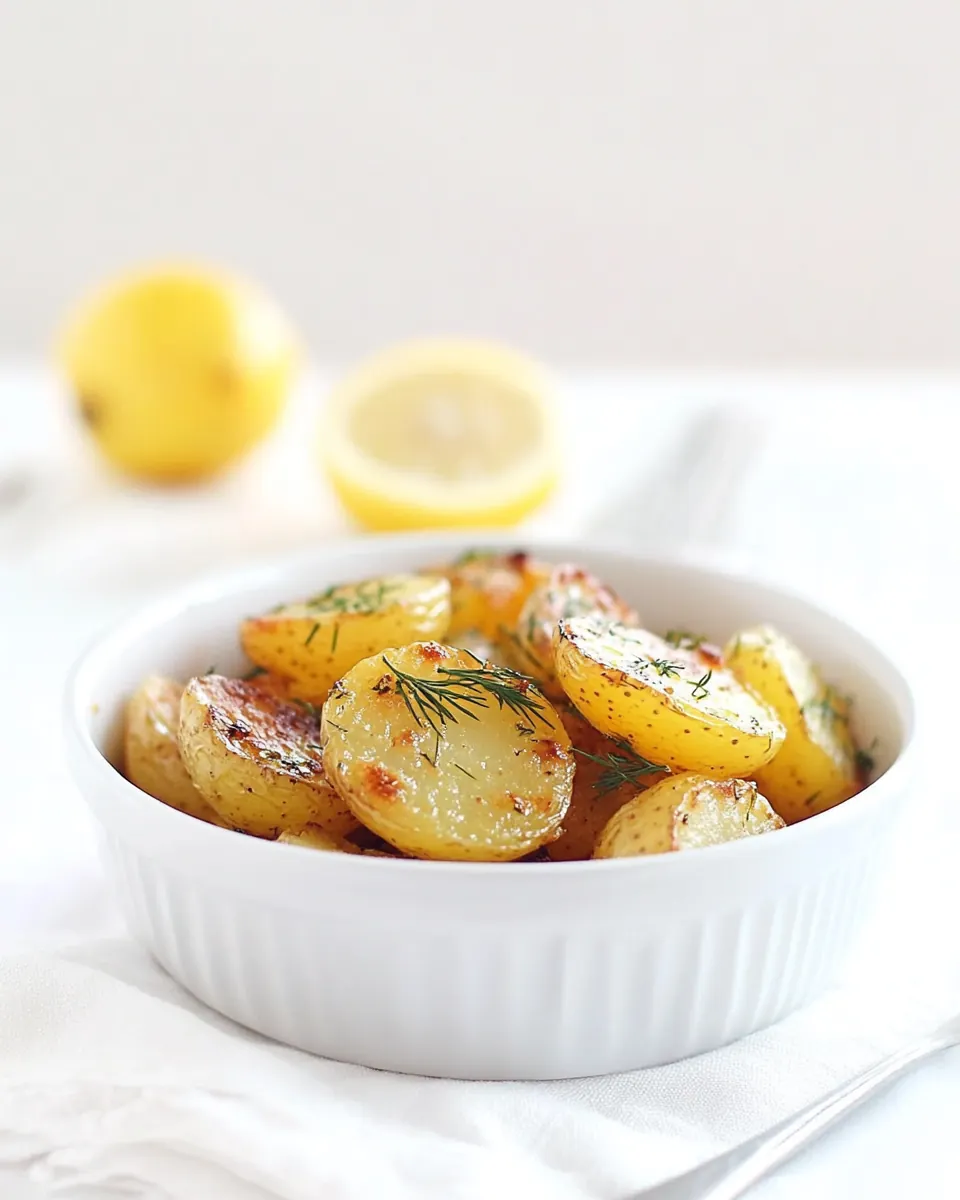
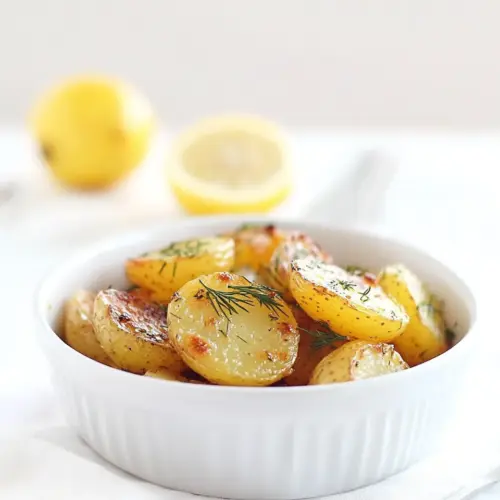
10 Minute Pan Roasted Lemon Potatoes with Dill
10 Minute Pan Roasted Lemon Potatoes with Dill came into my weeknight rotation the first spring I wanted something bright but fuss free, and these little potatoes hit the mark. I remember rushing in after a long shift, holding a bag of yellow potatoes and a stubborn craving for something tangy. I threw them in the microwave to speed things up, then finished them in a hot skillet, and the result was a crunchy exterior with a pop of lemon and the fresh whisper of dill that felt like a small celebration on the plate.
I still make this when friends stop by unannounced, because it feels special without needing me to plan. I’ll often pair it with a simple green salad and we nibble while swapping stories, the warm potatoes disappearing fast. The balance of butter, citrus, and herb is gentle enough to let the humble potatoes shine, yet bold enough that everyone asks for seconds.
There is a comforting hum in the kitchen while these cook, a steady sizzle that tells you everything is progressing as it should. Over time I learned little tricks, like not crowding the skillet and letting the pan do the work so the outsides get beautifully golden. These tweaks are what turn a quick side into a memorable one.
Recipe Snapshot
15 mins
5 mins
10 mins
Easy
200 kcal
American
Gluten-Free, Low FODMAP
Side Dishes
Microwave safe glass bowl, Plastic wrap, Large cast iron skillet, Knife, Cutting board
Why This 10 Minute Pan Roasted Lemon Potatoes with Dill Hits Different
Fast but impressive
I love how 10 Minute Pan Roasted Lemon Potatoes with Dill feels like a chef move that takes almost no time. The microwave step softens the flesh quickly, and the pan roast adds that irresistible crisp. When guests arrive, I can deliver something that looks and tastes deliberate, without hours on the stove.
Bright, layered flavors
The squeezed lemon introduces an immediate lift that cuts through the richness of the butter. Combined with fresh snipped dill, the dish tastes vibrant rather than heavy. I find this brightness pairs beautifully with proteins or a simple leafy green.
Simple ingredient magic
There are no complicated sauces or obscure pantry items here. The star is the potatoes, and a few high quality components amplify them. That simplicity invites improvisation, and I often tweak the butter amount depending on how indulgent I want the finished dish.
Easy to scale and adapt
If I need to feed a crowd, I make multiple batches or use a wider skillet. The technique translates well to different potato sizes, and you can adjust lemon and dill to suit your taste. It is flexible and forgiving, which I appreciate on busy days.
Comfort with technique
Even though the method is approachable, it teaches useful skills like judging skillet heat and timing caramelization. Those tiny lessons make future recipes better, and I always feel a little proud when the potatoes come out perfectly golden.
10 Minute Pan Roasted Lemon Potatoes with Dill Ingredients
These ingredients are intentionally few, each serving a clear role. The potatoes provide creamy interiors and crispy edges when seared. Butter carries flavor and helps caramelize the surface. Lemon juice brightens and balances richness, while snipped dill adds a fresh herbal finish. Salt and pepper tie everything together and let the primary flavors sing.
- 1 lb . yellow potatoes: Boil or roast until tender, providing the starchy base and bulk of the dish with a creamy interior and crisp exterior when pan-roasted. Cut into uniform pieces to ensure even cooking and to maximize browning during the quick pan-roast step; their mild flavor soaks up lemon and butter for balanced taste.
- 3 to 4 tbsp. butter: Melt and brown to add richness and a silky mouthfeel while promoting golden, caramelized edges on the potatoes. Use measured amounts to control fat and flavor; butter also helps carry and meld the lemon and dill into the finished potatoes for a glossy finish.
- 1 lemon, juice of: Squeeze and drizzle to introduce bright acidity that cuts through the butter and lifts the overall flavor profile of the dish. Fresh lemon juice enhances the potatoes’ natural sweetness, balances richness, and adds a subtle tang that complements the herbs.
- 2 tsp snipped dill, I use Gourmet Garden Herbs: Snip and sprinkle to contribute a fresh, herbaceous note with delicate anise-like nuances that brighten the potatoes. Use a modest amount to prevent overpowering while providing aromatic complexity and visual appeal; snipped fresh herbs release essential oils that enhance overall aroma.
- Salt and pepper: Season generously to amplify and balance all flavors, ensuring the lemon, butter, and dill are highlighted without becoming flat. Adjust to taste—salt brings out natural flavors and pepper adds mild heat and complexity, making the dish well-rounded.
How to Prepare 10 Minute Pan Roasted Lemon Potatoes with Dill
This method is quick but requires attention to timing and heat. I walk you through each phase so you can hit the sensory markers that signal success, from the steam in the microwave to the warm, buttery sizzle in the skillet.
- Place the whole potatoes in a shallow, microwave safe glass bowl in a single layer (you may need to do two batches if they don't all fit). Cover the bowl with plastic wrap, making sure the potatoes are not touching the plastic wrap.: You'll notice a faint earthy aroma as the raw whole potatoes sit in the bowl, and arranging them in a single layer ensures each one receives even microwave heat. Glass holds heat uniformly, so the texture inside softens predictably. A frequent error is overcrowding the bowl, which leads to uneven cooking and undercooked centers, so work in batches if needed. Use caution when handling the glass after microwaving because it will be hot to the touch.
- Microwave on high for 4 minutes and 30 seconds. Be careful when removing from microwave, as the dish will be very hot. Uncover and slice each potato in half.: The plastic traps steam and speeds cooking, producing a tender interior without drying the surface. You should hear a quiet hiss as steam accumulates, that hum indicates proper steaming. Avoid letting the plastic touch the potatoes , which can create condensed droplets and lead to soggy spots. Also, use microwave safe wrap and lift carefully to avoid steam burns when removing it.
- Meanwhile heat a large cast iron skillet over medium heat. When the skillet is hot toss in the potatoes, 3 tbsp of butter and 1/2 of the lemon juice, stir to coat the potatoes. Season with salt and pepper, and the dill. Let the potatoes caramelize in the pan, by stirring just twice per minute, until they are golden brown on all sides. Add more butter and more lemon juice if desired. Enjoy!: As the microwave works, you will see the skins slightly tauten and you may smell the subtle starchy sweetness that develops. This timing softens the centers so the later pan time crisps without overcooking. If you skip or shorten this step, the skillet stage takes longer and risks burning the exterior before the inside cooks; conversely, overcooking can make the potatoes too soft to hold their shape.
- Be careful when removing from microwave, as the dish will be very hot: Steam escapes rapidly when you lift the wrap, producing a hot rush. Use oven mitts or a towel and tilt the cover away from you to let steam vent safely. The sensory cue here is a sudden warm vapor and a softer feel when you press the potato gently. One mistake is digging in immediately; allow a breath for the heat to settle so you do not burn your fingers.
- Uncover and slice each potato in half: Once opened, you will see a tender interior with a slightly glossy surface from trapped steam. Slicing exposes the fleshy side that will caramelize in the skillet, creating texture contrast. Use a stable cutting board and a sharp knife to get clean halves that sit flat and sear evenly. Dull knives crush the flesh and can make the potatoes fall apart during the next step.
- Meanwhile heat a large cast iron skillet over medium heat: A properly heated skillet gives a steady sizzle when fat is introduced. I look for a faint shimmer across the surface of the pan before adding ingredients, which signals even heat. Cast iron retains and distributes heat, promoting uniform browning, but it can stay hot for a long time, so be deliberate when adjusting the flame. Using too high heat risks burning the butter , while too low prevents caramelization.
- When the skillet is hot toss in the potatoes, 3 tbsp of butter and 1/2 of the lemon juice, stir to coat the potatoes: The moment the potatoes hit the hot pan they should produce a cheerful sizzle, and the butter will begin to foam and brown slightly. Stirring right away helps distribute the melted butter and the first splash of lemon for balanced flavor. The citrus may hiss on contact, releasing bright aromatics. Avoid constant stirring at this stage, which prevents the formation of an even crust; instead, let them sit to brown, then turn them.
- Season with salt and pepper, and the dill: As the pan heats, the seasoning dissolves into the surface, enhancing the caramelized notes and the herb's freshness. You should smell the anise-like top notes of the dill combining with the citrus. A common misstep is adding all the dill too early; it loses nuance if exposed to prolonged heat, so save most of it for the finishing moments to preserve aroma.
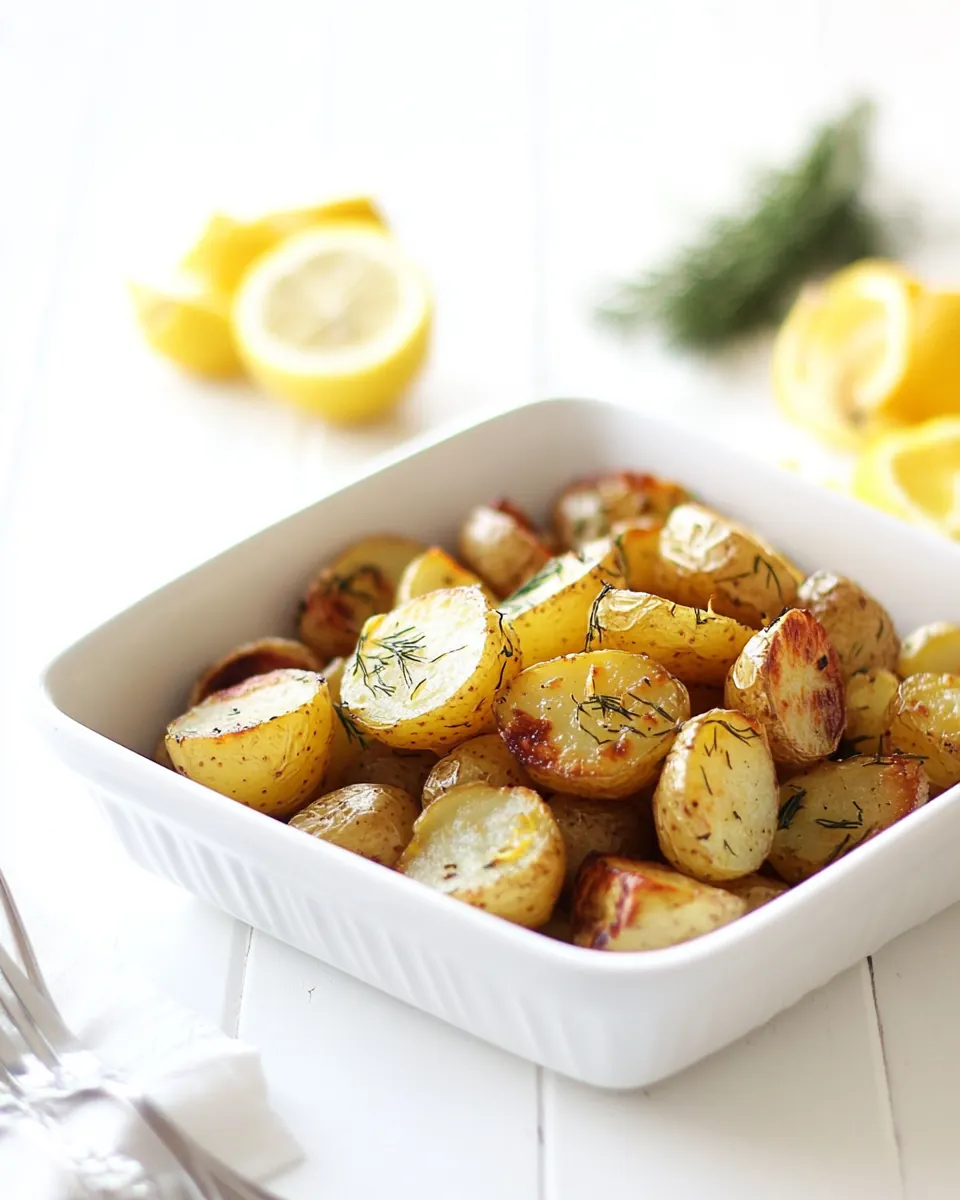
- Let the potatoes caramelize in the pan, by stirring just twice per minute, until they are golden brown on all sides: This is when the magic happens visually and sonically, with crisping edges and a steady, moderate sizzle. The golden color is the key indicator that sugars and proteins are reacting to form complex flavors. Resist the urge to stir constantly, which interrupts browning and yields a pale finish. If you find pieces sticking, that usually means the pan is not hot enough or there is too much moisture; raise the heat slightly and space the pieces out.
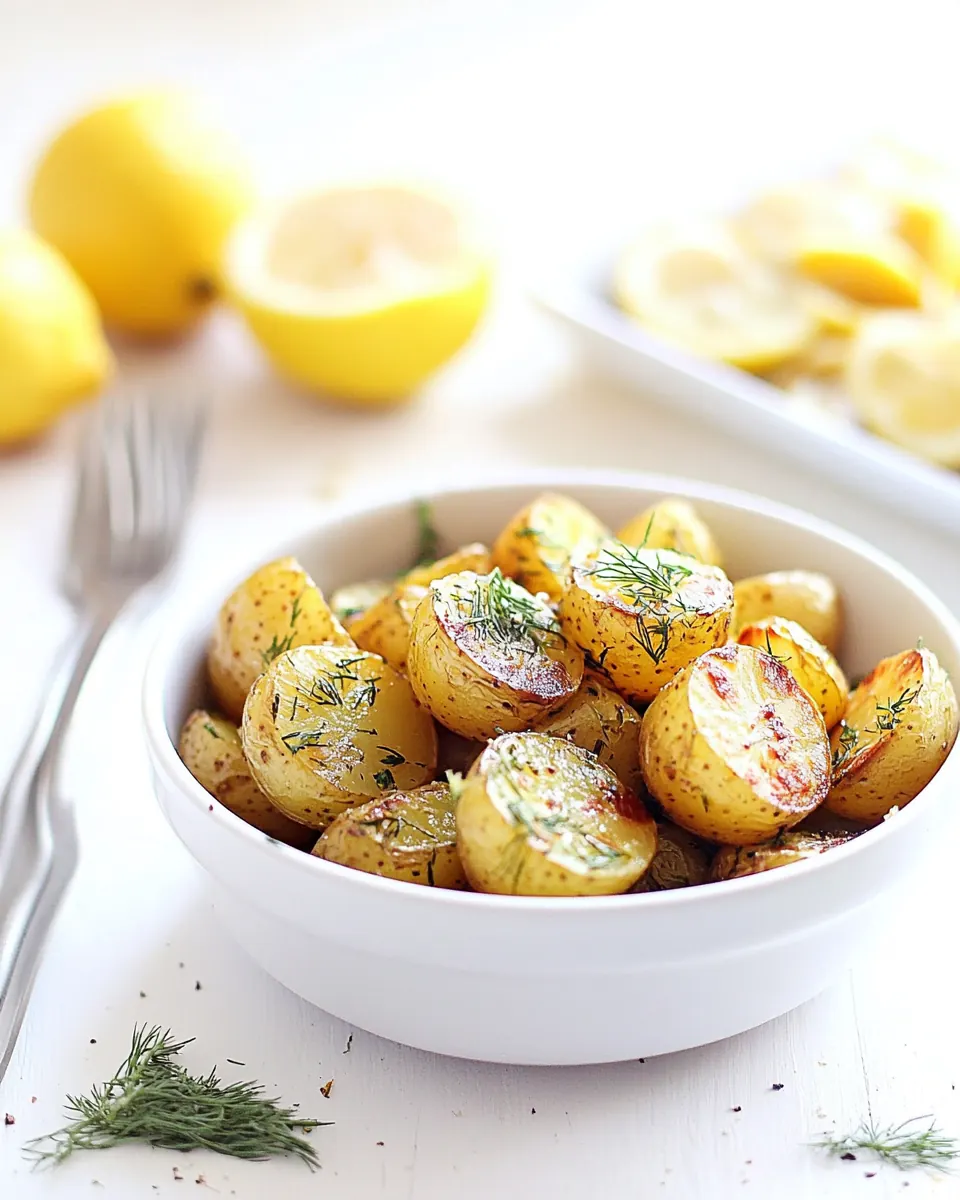
- Add more butter and more lemon juice if desired: After the initial browning, adding a touch more butter deepens the richness, and a final splash of fresh lemon brightens everything so flavors pop. You should sense a glossy sheen on the surfaces and a layered perfume of citrus and herb. Be cautious with quantities, as over-buttering can weigh the dish down and too much lemon can overwhelm the delicate balance.
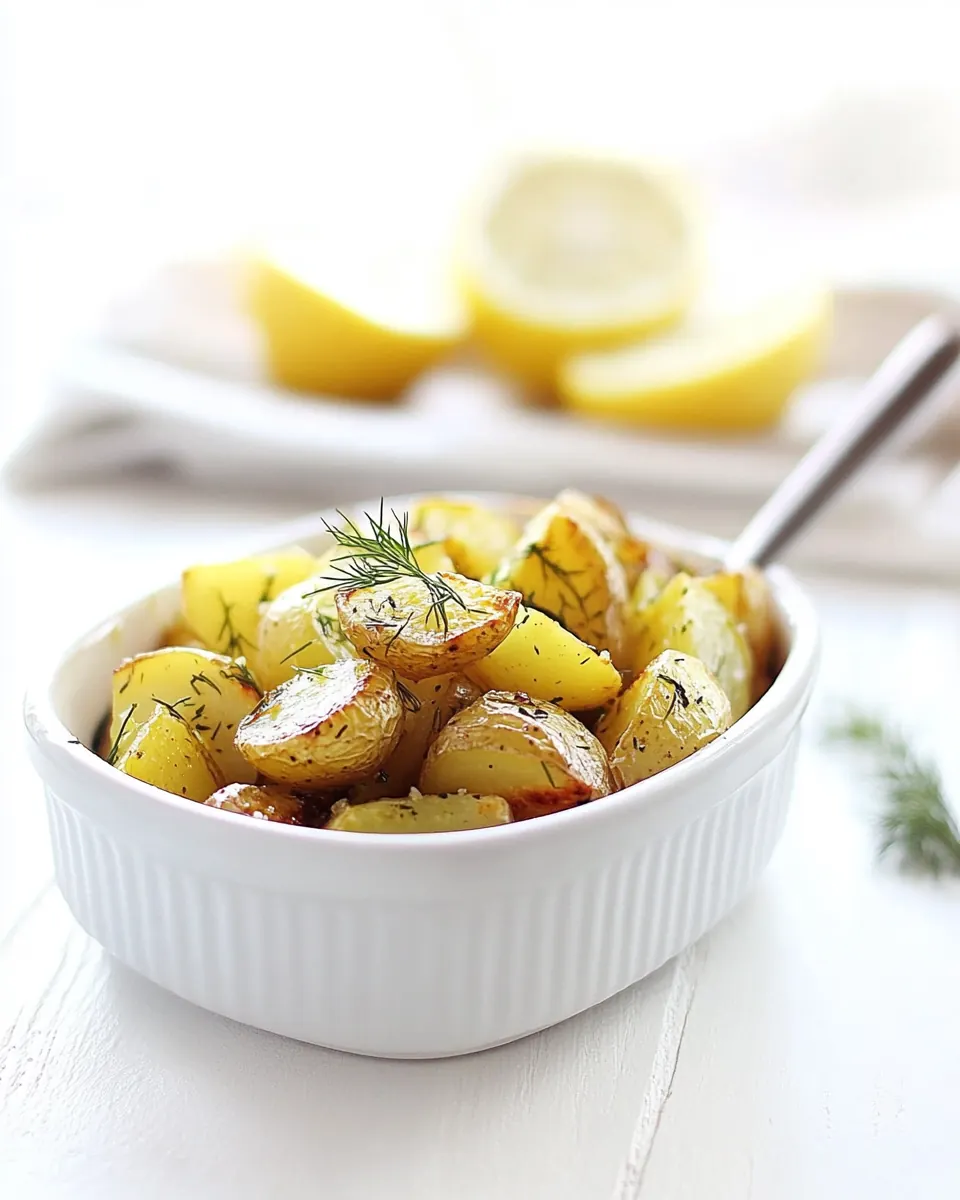
- Enjoy!: This is the moment to taste and share, savoring the contrast between the crisp exterior and the tender interior, accented by butter, lemon , and dill . Serve immediately for the best texture and warmest flavors. A common pitfall is letting the dish sit too long, leading to softened edges, so plate promptly to preserve the crispness.
Variations to Try
These variations let you tailor the dish to different moods and menus while keeping the core technique intact. Below are ideas to experiment with that respect the original ingredient list.
- Extra lemon brightness: Squeeze an additional teaspoon of fresh lemon juice at the end for a punchier finish that lifts the butteriness.
- Butter forward: Increase to four tablespoons of butter for a richer mouthfeel, but watch the pan heat to avoid browning the butter too quickly.
- Dill at the end: Stir in most of the snipped dill just before serving to keep its aromatic herbaceousness vivid.
- Double batch method: Cook in two batches if your skillet is not large enough, which ensures every potato gets contact with the hot pan for even browning.
- Last minute gloss: Finish with a small knob of extra butter off heat and a final drizzle of lemon for sheen and aromatic lift.
Serve This 10 Minute Pan Roasted Lemon Potatoes with Dill With
These serving notes explore occasions and pairings that elevate the potatoes. Whether you are plating a family dinner or a casual lunch, these ideas help the dish integrate seamlessly into many menus.
- Simple weeknight mains: Serve these potatoes alongside roasted vegetables or a grilled protein for an easy weeknight dinner where the bright lemon cuts through richer mains.
- Springtime gatherings: The fresh dill and citrus notes make this ideal for spring luncheons, brunches, or outdoor meals when lighter flavors are desired.
- Ramadan iftar: These can be part of an iftar spread, offering comfort and quick preparation when you need a dependable side after fasting.
- Storage tips: Keep leftovers refrigerated in an airtight container for up to three days. Reheat in a skillet to restore crispness rather than using a microwave, which can soften the edges.
- Seasonal pairing: Bright salads with spring greens or steamed asparagus complement the herbal and citrus profile, creating a balanced plate for warmer weather.
FAQ
Conclusion
This recipe stands out because it transforms simple potatoes into a bright, buttery side in very little time. Give it a try when you want something quick yet memorable, the kind of dish that feels both comforting and slightly celebratory. The combination of a tender interior, crisped edges, fresh lemon, and aromatic dill makes it versatile enough for weeknights and special meals alike. I encourage you to make it tonight, paying attention to the pan heat and the final lemon finish, and enjoy how a few thoughtful touches elevate humble ingredients into something you will want to serve again and again.
10 Minute Pan Roasted Lemon Potatoes with Dill
Equipment
- Microwave safe glass bowl
- Plastic Wrap
- Large Cast Iron Skillet
- Knife
- Cutting Board
Ingredients
- 1 lb . yellow potatoes Boil or roast until tender, providing the starchy base and bulk of the dish with a creamy interior and crisp exterior when pan-roasted. Cut into uniform pieces to ensure even cooking and to maximize browning during the quick pan-roast step; their mild flavor soaks up lemon and butter for balanced taste.
- 3 to 4 tbsp. butter Melt and brown to add richness and a silky mouthfeel while promoting golden, caramelized edges on the potatoes. Use measured amounts to control fat and flavor; butter also helps carry and meld the lemon and dill into the finished potatoes for a glossy finish.
- 1 lemon, juice of Squeeze and drizzle to introduce bright acidity that cuts through the butter and lifts the overall flavor profile of the dish. Fresh lemon juice enhances the potatoes’ natural sweetness, balances richness, and adds a subtle tang that complements the herbs.
- 2 tsp snipped dill, I use Gourmet Garden Herbs Snip and sprinkle to contribute a fresh, herbaceous note with delicate anise-like nuances that brighten the potatoes. Use a modest amount to prevent overpowering while providing aromatic complexity and visual appeal; snipped fresh herbs release essential oils that enhance overall aroma.
- Salt and pepper Season generously to amplify and balance all flavors, ensuring the lemon, butter, and dill are highlighted without becoming flat. Adjust to taste—salt brings out natural flavors and pepper adds mild heat and complexity, making the dish well-rounded.
Instructions
- Place the whole potatoes in a shallow, microwave safe glass bowl in a single layer (you may need to do two batches if they don't all fit). Cover the bowl with plastic wrap, making sure the potatoes are not touching the plastic wrap.: You'll notice a faint earthy aroma as the raw whole potatoes sit in the bowl, and arranging them in a single layer ensures each one receives even microwave heat. Glass holds heat uniformly, so the texture inside softens predictably. A frequent error is overcrowding the bowl, which leads to uneven cooking and undercooked centers, so work in batches if needed. Use caution when handling the glass after microwaving because it will be hot to the touch.
- Microwave on high for 4 minutes and 30 seconds. Be careful when removing from microwave, as the dish will be very hot. Uncover and slice each potato in half.: The plastic traps steam and speeds cooking, producing a tender interior without drying the surface. You should hear a quiet hiss as steam accumulates, that hum indicates proper steaming. Avoid letting the plastic touch the potatoes , which can create condensed droplets and lead to soggy spots. Also, use microwave safe wrap and lift carefully to avoid steam burns when removing it.
- Meanwhile heat a large cast iron skillet over medium heat. When the skillet is hot toss in the potatoes, 3 tbsp of butter and 1/2 of the lemon juice, stir to coat the potatoes. Season with salt and pepper, and the dill. Let the potatoes caramelize in the pan, by stirring just twice per minute, until they are golden brown on all sides. Add more butter and more lemon juice if desired. Enjoy!: As the microwave works, you will see the skins slightly tauten and you may smell the subtle starchy sweetness that develops. This timing softens the centers so the later pan time crisps without overcooking. If you skip or shorten this step, the skillet stage takes longer and risks burning the exterior before the inside cooks; conversely, overcooking can make the potatoes too soft to hold their shape.
- Be careful when removing from microwave, as the dish will be very hot: Steam escapes rapidly when you lift the wrap, producing a hot rush. Use oven mitts or a towel and tilt the cover away from you to let steam vent safely. The sensory cue here is a sudden warm vapor and a softer feel when you press the potato gently. One mistake is digging in immediately; allow a breath for the heat to settle so you do not burn your fingers.
- Uncover and slice each potato in half: Once opened, you will see a tender interior with a slightly glossy surface from trapped steam. Slicing exposes the fleshy side that will caramelize in the skillet, creating texture contrast. Use a stable cutting board and a sharp knife to get clean halves that sit flat and sear evenly. Dull knives crush the flesh and can make the potatoes fall apart during the next step.
- Meanwhile heat a large cast iron skillet over medium heat: A properly heated skillet gives a steady sizzle when fat is introduced. I look for a faint shimmer across the surface of the pan before adding ingredients, which signals even heat. Cast iron retains and distributes heat, promoting uniform browning, but it can stay hot for a long time, so be deliberate when adjusting the flame. Using too high heat risks burning the butter , while too low prevents caramelization.
- When the skillet is hot toss in the potatoes, 3 tbsp of butter and 1/2 of the lemon juice, stir to coat the potatoes: The moment the potatoes hit the hot pan they should produce a cheerful sizzle, and the butter will begin to foam and brown slightly. Stirring right away helps distribute the melted butter and the first splash of lemon for balanced flavor. The citrus may hiss on contact, releasing bright aromatics. Avoid constant stirring at this stage, which prevents the formation of an even crust; instead, let them sit to brown, then turn them.
- Season with salt and pepper, and the dill: As the pan heats, the seasoning dissolves into the surface, enhancing the caramelized notes and the herb's freshness. You should smell the anise-like top notes of the dill combining with the citrus. A common misstep is adding all the dill too early; it loses nuance if exposed to prolonged heat, so save most of it for the finishing moments to preserve aroma.
- Let the potatoes caramelize in the pan, by stirring just twice per minute, until they are golden brown on all sides: This is when the magic happens visually and sonically, with crisping edges and a steady, moderate sizzle. The golden color is the key indicator that sugars and proteins are reacting to form complex flavors. Resist the urge to stir constantly, which interrupts browning and yields a pale finish. If you find pieces sticking, that usually means the pan is not hot enough or there is too much moisture; raise the heat slightly and space the pieces out.
- Add more butter and more lemon juice if desired: After the initial browning, adding a touch more butter deepens the richness, and a final splash of fresh lemon brightens everything so flavors pop. You should sense a glossy sheen on the surfaces and a layered perfume of citrus and herb. Be cautious with quantities, as over-buttering can weigh the dish down and too much lemon can overwhelm the delicate balance.
- Enjoy!: This is the moment to taste and share, savoring the contrast between the crisp exterior and the tender interior, accented by butter, lemon , and dill . Serve immediately for the best texture and warmest flavors. A common pitfall is letting the dish sit too long, leading to softened edges, so plate promptly to preserve the crispness.
Notes
- Extra lemon brightness: Squeeze an additional teaspoon of fresh lemon juice at the end for a punchier finish that lifts the butteriness.
- Butter forward: Increase to four tablespoons of butter for a richer mouthfeel, but watch the pan heat to avoid browning the butter too quickly.
- Dill at the end: Stir in most of the snipped dill just before serving to keep its aromatic herbaceousness vivid.
- Double batch method: Cook in two batches if your skillet is not large enough, which ensures every potato gets contact with the hot pan for even browning.
- Last minute gloss: Finish with a small knob of extra butter off heat and a final drizzle of lemon for sheen and aromatic lift.