Yeasted Pumpkin Waffles with Candied Ginger
Yeasted Pumpkin Waffles with Candied Ginger are airy, warmly spiced waffles with a crisp edge and pockets of chewy crystallized ginger. The yeasted batter gives a subtle tang and exceptional texture, making them perfect for cozy fall breakfasts or an easy holiday brunch. Make ahead the night before for deeper flavor and effortless morning serving.
Equipment
- Waffle Iron
- Mixing Bowls
- Whisk
- Measuring Cups
Ingredients
- 1/2 cup warm water (between 105°F and 110°F) Provide warm liquid to activate yeast and help dissolve sugars; monitor temperature between 105°F and 110°F to avoid killing yeast. Serve as part of the initial proofing step to ensure a light, airy waffle batter.
- 2 1/4 teaspoons active dry yeast Leaven the batter by producing carbon dioxide during fermentation, creating lift and airy texture. Sprinkle into warm water and allow to proof until foamy to confirm activity.
- 2 1/2 cups all purpose flour Form the structure and bulk of the waffles, giving them chew and body; develop gluten when mixed with liquids for proper rise. Sift or whisk to remove lumps and combine evenly with dry spices for consistent flavor.
- 1/3 cup light brown sugar Add sweetness and a touch of molasses depth to complement pumpkin and spices while aiding browning. Measure and incorporate with dry ingredients to ensure even distribution in the batter.
- 1 tablespoon white sugar Contribute quick, clean sweetness that enhances overall flavor and helps with caramelization on the waffle exterior. Dissolve into wet ingredients so it integrates smoothly with the batter.
- 1/2 teaspoon fine grain sea salt Enhance overall taste balance by bringing a subtle savory note, which intensifies other flavors and strengthens gluten bonds slightly. Sprinkle into dry mix to distribute evenly and control the batter's seasoning.
- 2 teaspoons ground cinnamon Impart warm, aromatic depth typical of pumpkin spice blends while accentuating the pumpkin puree; pair with other spices for layered flavor. Combine with other dry spices to avoid clumping and ensure even coverage.
- 1 teaspoon ground ginger Provide a bright, peppery warmth that complements cinnamon and pumpkin, adding freshness to the spice profile. Measure precisely to prevent overwhelming the batter with heat.
- 1/4 teaspoon ground nutmeg Add sweet, nutty, and slightly woody notes to the blend, enhancing autumnal character; use sparingly for delicate complexity. Mix with other spices to ensure balanced pumpkin spice flavor throughout.
- 1/4 teaspoon ground clove Contribute a deep, warming pungency similar to pepper that rounds out the spice mix; very potent so only a small amount is needed. Incorporate with the dry ingredients to distribute its intense flavor evenly.
- 2 cups whole milk, at room temperature Moisten the dry ingredients, facilitating gluten development and distributing flavors while contributing to batter richness; room temperature prevents butter from solidifying. Gradually mix into dry mix to create a smooth batter consistency.
- 1 cup pumpkin puree Provide signature pumpkin flavor, moisture, and density while adding natural sweetness and color; works with spices to define the recipe. Fold into wet ingredients so pureed texture stays integrated without overmixing.
- 3/4 stick (6 tablespoons) butter, melted and cooled Add richness, fat for tenderness, and contribute to crisp exterior when melted; cooling prevents cooking eggs upon addition. Pour into wet mixture once cooled to room temperature to maintain batter integrity.
- 4 large eggs, lightly beaten Bind ingredients, add lift and richness, and contribute to tender crumb and structure through protein and fat. Lightly beat before incorporation to ensure even distribution and stable emulsion in the batter.
- 1/4 teaspoon baking powder Give a slight extra lift and help maintain lightness by reacting with other leaveners or acidic components; used in small quantity for gentle aeration. Sift into dry mix to avoid clumps and ensure even reaction during cooking.
- Nonstick cooking spray Prevent sticking on the waffle iron and help achieve a crisp exterior by creating a thin barrier between batter and cooking surface. Apply sparingly and evenly just before pouring batter for best release.
- 1/4 cup chopped crystallized ginger plus more for sprinkling Provide concentrated bursts of spicy-sweet chew and intense ginger flavor that contrast the soft waffle interior; also used as a garnish for visual appeal. Chop to uniform size and fold in gently near the end of mixing to distribute evenly without sinking.
Instructions
- Combine water and yeast in a small bowl, stirring to combine. Let sit for 15 minutes.: You will notice the surface turn bubbly and slightly foamy, releasing a faintly sweet, yeasty aroma, which is the first clear sign fermentation is active. This sensory check is important because it confirms your active dry yeast is alive and will leaven the batter, creating airy waffles rather than dense ones. If nothing happens, the yeast may be old or the water temperature might have been off; discard and start over with properly warmed water between 105°F and 110°F. Avoid stirring aggressively after the foam forms, as that can deflate the activity you worked to create.
- Meanwhile, whisk together flour, sugars, salt, cinnamon, ground ginger, nutmeg, and clove in a large bowl. Once the yeast has sat for 15 minutes, whisk the milk into the dry ingredients followed by the yeast (with water), pumpkin and melted butter. Cover the bowl with plastic wrap. At this point, you can let the batter rise in the refrigerator for sweeter waffles or let rise on the countertop for more sour/yeasty waffles.: As you whisk, notice the powdery aroma of the spices lifting from the dry mix, signaling even distribution so every bite carries balanced warmth. This step matters because thoroughly mixed dry ingredients prevent clumps and ensure consistent flavor throughout the batter, which affects both taste and appearance. A common mistake is adding wet ingredients to unmixed dry pockets, producing unevenly flavored waffles; take an extra 20 seconds to whisk until the color is uniform.
- The next morning, uncover the bowl, and stir in the eggs and baking powder until smooth. Preheat a waffle iron and lightly coat the plates with nonstick spray. Scoop 1/2 cup of batter in each well. Sprinkle 1/2 tablespoon of crystallized ginger over each well, close the waffle iron, and cook until golden brown.: When you add the milk , the mixture will darken and smell richer; folding in the foamy yeast, then the pumpkin and cooled butter , creates a batter that looks silky with flecks of spice. The order matters because gradual incorporation prevents shocking the yeast with cold liquids and allows a smooth batter to form. Stir gently to combine; overmixing will tighten gluten and make waffles tougher. If the batter seems lumpy, let it rest briefly so hydration evens out.
- Sprinkle waffles with crystallized ginger and chopped walnuts, and enjoy immediately with maple syrup. If making waffles for a crowd, prepare in batches and keep waffles warm in a 250°F oven until ready to serve.: Once covered, you will notice the batter begin to breathe as tiny bubbles form beneath the surface during the rest period, an encouraging visual cue. Covering protects the batter from drying and from absorbing fridge odors if you refrigerate overnight. Leaving it uncovered can form an unappealing skin and cause moisture loss, so keep it sealed for best texture and flavor development.
- At this point, you can let the batter rise in the refrigerator for sweeter waffles or let rise on the countertop for more sour/yeasty waffles.: The longer, cooler rise in the fridge slows fermentation, building gentle sweetness and deeper autumnal notes; a countertop rise accelerates yeast activity, producing a brighter, tangier character. I prefer the refrigerator method for predictable results and convenience, but choose based on the flavor profile you want. A common error is neglecting to loosely tighten the lid for the countertop rise, causing overflow; use a bowl large enough to allow expansion.
- The next morning, uncover the bowl, and stir in the eggs and baking powder until smooth.: As you stir in the eggs and baking powder , the batter will lighten slightly and become more glossy, signaling readiness for cooking. The baking powder gives a final lift during cooking while the eggs add richness and structure, creating steam that helps rise in the hot iron. Avoid vigorous beating which can deflate the gentle yeast bubbles you developed; use a few smooth strokes until uniform.
- Preheat a waffle iron and lightly coat the plates with nonstick spray.: A properly hot iron is essential, you should hear a faint sizzle when batter hits the plates and smell a hint of buttered crust as the exterior sets. Coating the plates prevents sticking and supports even browning. If the iron is not hot enough the waffles will be pale and gummy, so allow full preheat and test with a tiny dollop of batter first.
- Scoop 1/2 cup of batter in each well.: As the batter settles into the heated wells it will spread and begin to steam, producing a soft hissing noise and rapidly forming a golden crust around the edges. Portioning consistently ensures uniform cooking times and presentation. A too generous scoop can overflow the iron, while too little results in thin waffles, so aim for the specified scoop size.
- Sprinkle 1/2 tablespoon of crystallized ginger over each well, close the waffle iron, and cook until golden brown.: The crystallized ginger will melt slightly and create pockets of chewy, spicy contrast as the waffle browns, releasing a bright aroma that cuts through the sweet spice mix. Watch for a deep golden color and a crisp edge as cues to doneness; open carefully to avoid steam burns. A frequent mistake is opening too early to peek, which can tear the waffle and reduce rise, so resist until you see the color change.
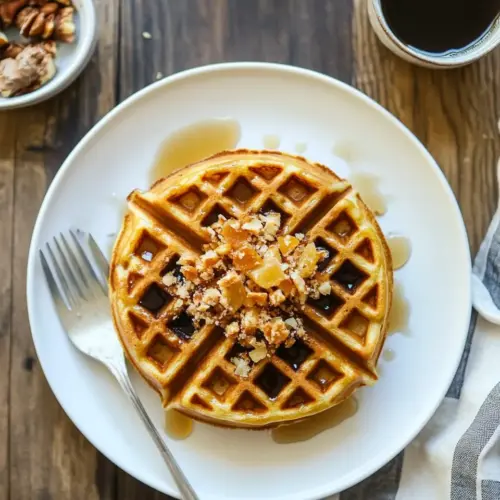
- Sprinkle waffles with crystallized ginger and chopped walnuts, and enjoy immediately with maple syrup.: Fresh from the iron, waffles will steam and smell intensely of cinnamon and ginger , and they absorb syrup in a way that keeps them from becoming soggy right away. Serving immediately preserves crispness, and the textural contrast of crunchy nuts and chewy crystallized ginger elevates every forkful. If you must hold them, use a warm 250°F oven to keep them crisp; stacking hot waffles directly will produce steam and soften the crust.
- If making waffles for a crowd, prepare in batches and keep waffles warm in a 250°F oven until ready to serve.: Kept in a single layer on a wire rack inside a warm oven, waffles maintain their texture and warmth without steaming, making service smooth when guests arrive. I line a sheet pan so each waffle rests evenly and I can reheat them briefly to refresh edges if needed. Avoid stacking on a plate in the oven, which traps moisture and leads to limp waffles.
Notes
- Proof your yeast properly, always check for foam after 15 minutes when mixing active dry yeast with warm water; lack of foam usually means the yeast is inactive and you should start again with fresh yeast and carefully warmed water.
- Control rise time for flavor, refrigerating the batter overnight produces a sweeter, more mellow profile while a countertop rise yields a tangier, more pronounced yeast flavor, so select based on the taste you prefer for brunch or a crowd.
- Use room temperature milk and cooled butter to avoid shocking the yeast or prematurely altering the batter; cold dairy slows fermentation and hot butter can kill yeast activity, both affecting final texture.
- Portion consistently with a 1/2 cup scoop to ensure each waffle cooks evenly; inconsistent portions produce uneven browning and mismatched cooking times when serving multiple waffles.
- Fresh spices matter, using recently ground cinnamon, nutmeg, and clove will dramatically improve aroma and depth; stale spices yield flat, muted flavor that fails to complement the pumpkin.
- Keep waffles crisp for serving by placing them on a wire rack in a 250°F oven in a single layer; stacking traps steam and softens the crust, which reduces the pleasant contrast between crisp exterior and tender interior.