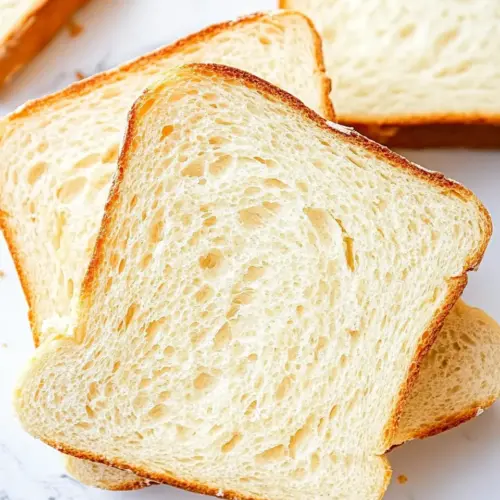
White Sandwich Bread
White Sandwich Bread delivers a soft, tender crumb and a golden crust that toasts beautifully. This easy, comforting loaf combines simple pantry ingredients for an adaptable, bakery style bread perfect for sandwiches or toast. Make it for an easy weeknight baking project that rewards patience with consistent, sliceable results.
Equipment
- Kitchen Scale(optional)
- Stand mixer
- Rolling Pin
- 9×5-inch loaf pan
Ingredients
- 31/2 cups bread flour 420 grams, spooned and leveled Provides structure and body to the loaf; bread flour's higher protein content develops strong gluten for an elastic dough and chewy crumb. Measure by spooning and leveling to avoid excess, and weigh when possible for consistency. Contributes to oven spring and helps the bread hold gas produced during fermentation.
- 2 tablespoons granulated sugar 25 grams Adds sweetness and feeds yeast during fermentation; granulated sugar enhances browning and flavor in the crust. Dissolves easily in the warm water to help kickstart yeast activity. Balances the overall taste and helps achieve a tender crumb.
- 11/2 teaspoons instant yeast 5 grams Leavens the dough quickly and reliably; instant yeast is formulated to be mixed directly with dry ingredients for convenience. Promotes fermentation which produces carbon dioxide and flavor compounds. Ensures predictable rise times at the specified water temperature.
- 11/4 teaspoons kosher salt 4 grams Strengthens flavor and controls fermentation rate; kosher salt regulates yeast activity and enhances the bread's overall taste. Helps tighten gluten structure for better crumb and crust development. Sprinkle evenly to avoid local inhibition of yeast in the dough.
- 11/4 cups warm water 284 grams (105-110°F) Hydrates flour to form gluten and create dough; warm water activates the yeast while dissolving other ingredients for uniform mixing. Temperature specified to rapidly activate yeast without killing it, aiding consistent fermentation. Also influences dough temperature and final crumb texture.
- 1/4 cup unsalted butter 57 grams, room temperature (1/2 stick); plus more for greasing the pan Adds richness and tenderness to the loaf; room-temperature unsalted butter incorporates smoothly into the dough for an enriched crumb. Contributes flavor, extends shelf life, and softens the crust when used in the specified amount. Use additional butter to grease the pan for nonstick and flavor benefits.
Instructions
- In the bowl of a stand mixer fitted with the dough hook, combine the bread flour, sugar, instant yeast, and salt. With the mixer on low speed, gradually add the warm water to the dry ingredients. Let the mixer run until a dough forms.: You will notice the bowl transform from separate dry specks to a shaggy mass that slowly gathers into a cohesive ball, and the sound shifts from a grainy scrape to a quieter, rhythmic thud. I watch for the dough to pull away slightly from the sides, creating a rough rounded shape. The gradual addition of warm water helps ensure even hydration so there are no dry pockets of flour. If you rush and dump all the water at once, parts of the dough can become overhydrated and sloppy, while other bits stay dry. A common mistake here is running the mixer too fast initially, which can prevent proper flour absorption and lead to a sticky mess.
- Add the softened butter gradually while continuing to mix on low speed. Once all the butter is added, increase the mixer speed to medium-high.: As you fold in unsalted butter , the texture will shift to a smoother, silkier dough, and you may hear a softer, lubricated sound from the mixer. The butter should incorporate slowly so it emulsifies into the dough rather than pooling, which gives an even crumb and tender bite. Increasing speed after incorporation helps the gluten align for elasticity. If you add the butter all at once, you risk uneven distribution and greasy pockets. Watch for the dough to look glossy and cohesive, which signals proper mixing.
- Knead the dough in the mixer for approximately 6-7 minutes or until it becomes smooth, elastic, and passes the windowpane test. The dough should stretch thin without tearing when pulled apart.: During this kneading period the dough will change from shaggy to springy; when you press it with a finger it should slowly bounce back. The windowpane test, where you stretch a small piece until it thins without tearing, tells you the gluten is well developed. You will also hear a mellow, consistent rhythm from the mixer and see the dough form a clean ball. Insufficient kneading leaves a tight, dense crumb, while overkneading can make the dough too tight and dry. If the dough seems overly sticky at this stage, give it a minute or two to rest; that often resolves tackiness without adding more flour.
- Transfer the kneaded dough to an oiled bowl, cover it with a clean kitchen towel or plastic wrap, and let it rise at room temperature for 1-2 hours or until it has doubled in size.: As the dough proofs, you will see it expand visibly and feel lighter when lifted. I like to poke the dough gently with a fingertip; if the indentation springs back slowly but still leaves a slight mark, the rise is near perfect. The aroma will become subtly yeasty and slightly sweet, signaling active fermentation. If the dough does not rise, the likely causes are cold room temperature or old yeast. Avoid rushing by increasing heat too much, which can overproof and collapse the dough.
- After the dough has risen, gently deflate it and roll it out into a rectangle about 8 inches wide and 1 inch thick.: The dough should feel airy and springy when you deflate it, releasing built up gas with a soft sigh. Rolling into a rectangle gives you control over final loaf shape and ensures even layering when you roll it up. Use a light dusting of flour on the board if the dough sticks, but avoid overflouring which would dry the surface. A common misstep is rolling too thin, which can create tight layers that do not expand properly during the final rise.
- Roll up the dough tightly, similar to how you would roll a cinnamon roll.: As you roll, aim for a snug spiral that traps small air pockets evenly. The rolling action creates the loaf's structure and determines how the crumb aligns, producing uniform slices. You will feel slight resistance as the layers compact, and the dough should hold its shape when pinched at the seam. If you roll too loosely, the loaf may spread in the pan and become misshapen, while rolling too tight can squeeze out gas needed for a light crumb.
- Place the rolled dough into a buttered loaf pan, seam side down.: The moment the dough slides into the pan you can see how it will rise and form the top. A buttered pan helps the loaf release cleanly after baking and also adds a whisper of flavor to the crust. Ensure the seam is pinched closed and set facing down so it does not open during baking, which would create an irregular top. If the seam is not sealed, the loaf can split unpredictably.
- Cover the loaf pan with a clean kitchen towel or plastic wrap and let the dough rise again until it reaches the top of the pan, about 45 minutes. While the dough rises, preheat the oven to 400°F.: In this second proof, you will see the dough lift to the rim and feel it yield slightly to a fingertip. The kitchen will fill with a warm, yeasty smell that makes the wait worthwhile. Preheating ensures the oven is hot enough to give the loaf a solid oven spring, which creates volume. A common error is underproofing, which yields a tight loaf, or overproofing, which causes collapse when baked. Timing and visual cues are your allies here.
- Place the loaf pan in the preheated oven and bake for 30-35 minutes. After 20 minutes, turn the pan 180 degrees to ensure even baking. The bread is done when it's golden brown and sounds hollow when tapped on the bottom.: As the loaf bakes you will notice the crust deepen to an even golden color and a toasty aroma will fill the kitchen. Rotating the pan helps compensate for hot spots in ovens, promoting even browning. The hollow tap is a classic auditory cue for doneness, and an internal temperature around 190°F confirms it. If you remove the loaf too early it may be gummy inside, while baking too long risks a thick, hard crust.
- Remove the pan from the oven and cover with a clean kitchen towel. This ensures a soft crust. After 20 minutes, remove the bread from the pan and let it cool on a wire rack. Once it's completely cool, slice and enjoy your homemade white sandwich toast bread.: Covering the hot pan traps steam briefly so the crust stays tender rather than cracking hard. After the short rest, unmold the loaf and allow it to cool fully on a wire rack so the crumb sets and slices cleanly. The cooling process is when the interior finishes cooking and firms up, preventing a gummy texture. Cutting too soon crushes the loaf and creates ragged slices, so patience here pays off in neat, even pieces.
Notes
- Room temperature dough handling Keep your kitchen comfortably warm when proofing, because consistent ambient temperature helps the instant yeast work predictably and avoids under or over proofing.
- Measure precisely Spoon and level the bread flour or weigh it for accuracy, since too much flour dries the dough and too little makes it slack and hard to shape.
- Butter incorporation Soften the unsalted butter to room temperature before adding, this ensures it emulsifies smoothly and prevents greasy pockets in the dough.
- Use visual cues Rely on the dough doubling and the windowpane test rather than strict timing alone, ovens and kitchens vary so watching the dough pays off.
- Storage Store slices in an airtight container or bag at room temperature for up to three days, or freeze whole or sliced loaves for up to three months for long term use.