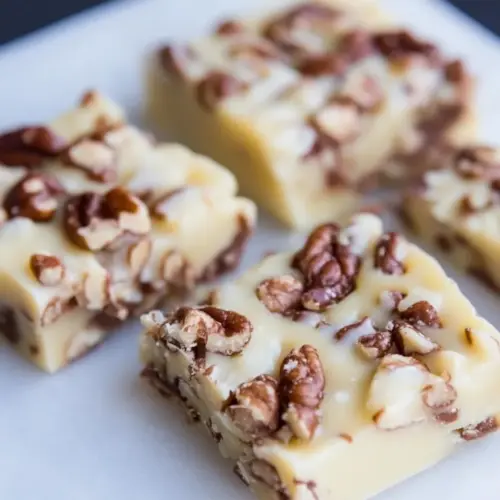
White Chocolate Pecan Candy
White Chocolate Pecan Candy offers creamy, sweet white chocolate paired with toasted, crunchy pecans for an easy to make, crowd pleasing treat. This simple no fuss candy sets firm and slices into elegant squares, perfect for gifting or parties. Try it when you want a quick dessert that feels homemade and festive, a reliable choice to make ahead and share.
Equipment
- Oven
- Large rimmed baking sheet
- 15x10-inch jelly roll pan
- Wax paper or parchment paper
- Large microwave-safe bowl
- Spatula
- Knife
Ingredients
- 3 cups coarsely chopped pecans Provide a crunchy, buttery backbone to the candy and deliver texture contrast; coarsely chopping ensures even distribution and pleasant bite. Toast lightly if desired to deepen flavor and boost aroma, then cool before combining to prevent melting other components.
- 1 1/2 cups vanilla melting wafers Melt smoothly to create a sweet, creamy white chocolate coating that binds and glazes the pecans; use vanilla melting wafers for reliable melting and temper-free work. Stir gently over low heat or in short microwave bursts to avoid scorching and preserve glossy finish.
- 1 (14-ounce) can sweetened condensed milk Add rich sweetness and creamy body that helps form a cohesive, fudgy candy center; its concentrated milk sugars and fat contribute to chew and shelf-stable moisture. Warm slightly and mix thoroughly with other wet ingredients to achieve uniform texture and prevent separation.
- 1 teaspoon vanilla extract Enhance and round the overall sweetness with warm, aromatic notes; vanilla extract elevates the confection's flavor profile and balances the milky elements. Add near the end of mixing to preserve delicate volatile compounds for maximum fragrance.
- 1/4 teaspoon salt Balance and amplify flavors by providing a subtle savory counterpoint to sweetness; a small amount of salt sharpens taste and prevents cloying. Dissolve into the wet mixture so it disperses evenly and brightens the finished candy.
Instructions
- Preheat oven to 350 degrees. Spread pecans out on a large rimmed baking sheet. Bake for 8 minutes, stirring halfway through.: The warm, nutty aroma that comes from toasting pecans is instant feedback that the oven is doing its job, and you will see them darken slightly and become fragrant. This step releases oils in the pecans which deepen the final flavor, creating that toasty backbone for the candy. Watch for quick color changes, because nuts can turn from perfectly toasted to burnt in moments, a common mistake is leaving them unattended which leads to a bitter off note.
- Line a 15×10-inch jelly roll pan with wax paper or parchment paper. Set aside.: As the pecans warm, they should sizzle faintly and emit a toasty scent; spreading them ensures even exposure to heat so no pieces remain raw. Use a rimmed sheet to prevent rolling and to make stirring simple. If you pile them, some will roast faster than others and you will lose uniformity, so avoid overcrowding which causes uneven toasting.
- Place white melting chocolate and sweetened condensed milk in a large microwave-safe bowl. Microwave at 30-second intervals, stirring after each one, until melted.: During baking, you will notice the aroma intensify and the pecans take on a slightly deeper color. Stirring at the midpoint promotes even browning and keeps edges from overcooking. The reason this matters is consistency, every bite should have the same toasted character. A common error is skipping the stir, which results in uneven texture and some burnt bits.
- Quickly stir in pecans, vanilla, and salt.: Lining the pan creates a nonstick surface so the candy releases cleanly, and using parchment minimizes tearing when you cut squares later. The visual cue to look for is smooth coverage without wrinkles so the candy sets evenly; wrinkles can imprint on the surface. Not lining the pan is a frequent oversight that makes removal messy and can break the candy into irregular pieces.
- Transfer mixture to prepared jelly roll pan. Spread it out into an even thickness. You don't have to spread it all the way to the edges. Leave it a little thicker if you like.: As they begin to warm, the white melting wafers will soften and the sweetened condensed milk will become silkier. Combining them gently is key, because even heat preserves smoothness and prevents the chocolate from seizing. Using a microwave safe bowl allows you to monitor progress and stir regularly. Overheating is a typical mistake, which can cause graininess and separation.
- Refrigerate for 1 to 2 hours.: You should see the chocolate soften, then loosen into a glossy pool as you stir, and the mixture will take on a homogeneous sheen. Stirring after each interval spreads residual heat and finishes melting without direct overheat. The why is simple, gradual heat prevents scorching and preserves glossy texture. A pitfall is skipping stirring which concentrates heat and can scorch pockets of chocolate causing a gritty mouthfeel.
- Cut into squares. Can be stored at room temperature.: The moment you fold in the warm pecans , the mixture becomes studded and aromatic; you will sense the toasty scent lift against the sweet white base. Adding vanilla off heat keeps its aroma intact, and the salt accentuates the overall profile. Work quickly so the mixture stays fluid for spreading. If you delay, the mix may thicken and become harder to spread evenly, leading to uneven squares when cut.
- Transfer mixture to prepared jelly roll pan: As you scrape the bowl, you will notice the mixture shining and pliable, spreading into the lined pan allows it to settle and cool evenly. Use a spatula to coax every bit into the pan, smoothing where needed, but you do not need to overwork it. Leaving a thicker center creates a candy with lovely chew. A typical mistake is trying to thin it too much which can make pieces brittle and less satisfying.
- Spread it out into an even thickness: Visual cues to aim for are uniform surface gloss and consistent thickness, which yield tidy squares when sliced. I often leave the edges slightly thinner than the center to create a pleasing bite. This technique matters because consistent thickness ensures even setting and predictable texture. If you leave large lumps or valleys, some pieces will set differently and the experience will be inconsistent.
- Refrigerate for 1 to 2 hours: As the pan chills, the candy will firm up and the surface will lose its tacky sheen, becoming set and sliceable. The cold helps the white chocolate components stabilize, locking in chew and shape. Refrigeration also helps in easier cutting and clean edges. A mistake to avoid is cutting too soon when the candy is still soft, which produces ragged edges and sticky pieces.
- Cut into squares: A sharp knife pressed with steady confidence will produce clean squares, and you will hear a slight, satisfying snap at the edge as you slice through set candy. Cutting into even pieces improves presentation and serving. Wiping the blade between cuts helps maintain tidy edges. Rushing this step or using a dull knife creates crumble and uneven pieces, lowering the visual appeal.
- Can be stored at room temperature: Once set, the candy keeps well and will retain texture and flavor in an airtight container. You will notice the candy stays creamy and not sticky when stored properly, making it excellent for gifting or preparing ahead. Keep away from direct heat which can soften the pieces. A common storage mistake is exposure to warm spots which will soften the candy and alter the texture.
Notes
- Layered finish Try a thin second layer of extra melted white melting wafers poured over once the first layer is half set to create a smoother top and neater squares.
- Extra crunch Gently fold slightly more chopped pecans into the top before chilling to emphasize nutty texture and visual appeal.
- Salted contrast Sprinkle a light dusting of fine sea salt over the top before refrigerating to enhance flavor contrast without overwhelming sweetness.
- Thickness control Spread the mixture thinner for crispier pieces or leave it thicker for a chewier bite depending on personal preference.
- Presentation tips Cut with a warmed, wiped knife for cleaner edges and store squares in parchment layers for a polished gift box.