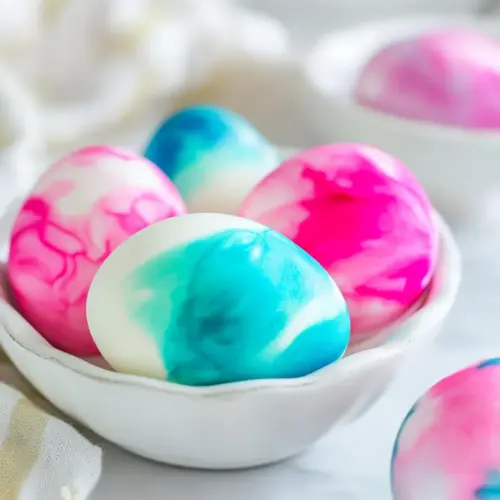
Whipped Cream Dyed Eggs
Whipped Cream Dyed Eggs are a playful, easy technique that yields colorful, marbled hard boiled eggs using airy whipped cream and a few drops of food coloring. This craft style method is perfect for family brunches and Easter gatherings, creating vibrant, edible decorations that store well in the fridge. Try it for a simple way to brighten a meal and enjoy a hands on activity with satisfying results.
Equipment
- 9 x 13-inch baking pan
- Muffin Pan
- spoons
- Toothpicks
- disposable gloves
Ingredients
- large tub of whipped topping, thawed, or homemade whipped cream Provide a light, airy base for dye marbling and gentle coating; use thawed whipped topping or freshly whipped cream to create a smooth, spreadable medium that holds color. Chill briefly if too soft to prevent runoff and use shallow containers for easy dipping.
- 12 hard boiled eggs, cooled completely Allow firm texture and even surface for dye absorption by using fully cooled hard boiled eggs; handle gently to avoid cracking and choose eggs with smooth shells for consistent marbling results. Refrigerate until ready to dye to keep whites set and minimize breakage during manipulation.
- food coloring Deliver concentrated color quickly and controllably; use a few drops of food coloring to tint portions of the whipped topping and experiment with color placement for varied marbling effects. Prefer gel or liquid food coloring depending on intensity desired, and add incrementally to reach the perfect shade.
- toothpicks, spoons, disposable gloves Facilitate application, mixing, and cleanliness during the dyeing process; use toothpicks or spoons to swirl colors and disposable gloves to protect hands from stains. Prepare a workspace with paper towels or trays to catch excess topping and make cleanup easier.
Instructions
- Spoon whipped cream into a 9 x 13-inch baking pan. Alternately, you can partially fill each well of a muffin pan with whipped cream. Use the muffin pan technique if you want to keep the colors separate as shown here. Use the 9 x 13-inch pan if you want to swirl the colors together for a tie-dyed effect.: The pan will hold the whipped cream in an even layer so colors can be dropped and swirled; you will notice the cream hold peaks and soft valleys, almost like snow, which helps suspend the food coloring where you place it. Why this matters, the even bed of cream prevents colors from pooling too heavily in one spot and encourages soft marbling as the hard boiled eggs roll across it. Sense cues include the cool, slightly sweet scent of the cream and the quiet, soft thump of spooning it into the pan. One common mistake is overfilling the pan, which makes it hard to swirl without splashing, so keep a shallow layer for the best results.
- Add drops of food coloring to the whipped cream and use a toothpick to lightly swirl the colors into the whipped cream. Don't swirl too much, or you'll lose the beautiful marbleized look and muddy up the colors.: Choosing a muffin pan keeps colors separate for discrete, controlled palettes; you will see small nests of cream, perfect for single color experiments. The advantage is tidy color control, so each hard boiled egg emerges with distinct hues. Touch the cream gently with the back of a spoon to feel the smooth surface, and avoid packing it too firmly which can mute the marble effect. A frequent slipup is mixing colors directly into one well until muddy, so reserve one well per color when you want clear tones.
- Place the eggs into the whipped cream and gently roll using a spoon so the entire egg is covered.: This method yields crisp edges and clean transitions between hues, and visually you will notice small pools of jewel like color when you add the food coloring . The method matters because it prevents bleeding between shades, producing a compact effect that looks deliberate and graphic. A troubleshooting tip, if colors cling together, gently nudge the cream with a toothpick rather than stirring, to maintain separate streams. People sometimes over swirl, which turns everything muddy, so less movement preserves the pattern.
- Let the eggs sit in the whipped cream for 30-45 minutes depending on how bold you would like the colors.: When you prefer a more freeform appearance, dropping multiple hues into the big pan creates a painterly, blended look; you will see ribbons of color and subtle gradients form as you drag a toothpick through them. This technique produces seamless transitions and soft veins of pigment across each egg. The reward is a more organic aesthetic, but beware of over swirling which will dull the vibrancy, so stop when you still see distinct ribbons of color.
- Put on a pair of disposable gloves, remove eggs from the whipped cream and rinse them with water.: The concentrated food coloring blooms into the white cream in tiny droplets, and you will enjoy watching the pigments sit on the surface like little islands. This step controls intensity, because more drops equal bolder hues, while fewer drops yield pastel whispers. For troubleshooting, remember that gel colors are stronger than liquid, so adjust the drop count accordingly. Avoid placing too many drops in one location, which can make a saturated blotch instead of a pretty vein.
- Allow the eggs to dry on a paper towel, this will help absorb any excess dye.: The toothpick should move gently, drawing color through the cream in thin lines; you will hear a soft scraping sound and see delicate marbling develop. This gentle motion preserves the distinct colors while creating visual interest, and it is the moment you decide whether the look will be subtle or dramatic. A common error is vigorous stirring, which will homogenize the colors into an unattractive brown, so keep movements light and purposeful.
- Store in the refrigerator for up to 7 days.: The caution is sensory and practical, you will notice when the cream starts to lose defined streaks and becomes uniformly tinted, which signals it is time to stop. This restraint maintains clarity between hues and preserves the delicate veins that make each egg unique. If you overwork it, you cannot restore the original contrast, so practice restraint and step back when you still see distinct patterns forming.
- Place the eggs into the whipped cream and gently roll using a spoon so the entire egg is covered: As you roll each hard boiled egg , the cream will cling and transfer color in thin layers, and you may hear a faint sliding sound as the shell glides through the cream. Rolling ensures even coverage without pressing too hard, which could crack the egg. The why here is that even contact distributes pigments for a consistent marbled wrap. A typical mistake is forcing the egg into the cream which risks hairline cracks or uneven dye pickup, so be gentle and steady.
- Let the eggs sit in the whipped cream for 30 to 45 minutes depending on how bold you would like the colors: During this waiting period the dye gently migrates into the outer shell surface, and you will notice the cream around the eggs take on faint halos of color. Longer sits produce deeper saturation, while shorter rests keep the look delicate. The sensory cue is subtle change in the cream color near the shell, indicating dye transfer. Watch out for leaving eggs too long if you used very strong gel colors, which can create overly intense spots, so check at the 30 minute mark and adjust from there.
- Put on a pair of disposable gloves, remove eggs from the whipped cream and rinse them with water: Rinsing removes excess cream and stops the dye migration, and you will feel the shells go from tacky to smooth under running water. This step finishes the look and prevents residual cream from streaking during drying. A troubleshooting tip is to rinse gently to avoid smearing paint like streaks; if the dye seems uneven, a soft brush can help even things out without rubbing too hard.
- Allow the eggs to dry on a paper towel, this will help absorb any excess dye: Laying them on a paper towel also prevents smudges as the color sets, and you will hear the faint rustle of the towel and notice damp rings form where the egg rested. Drying is where the final appearance reveals itself, so allow enough time for shells to feel completely dry to the touch. Common mistakes include stacking eggs while wet, which transfers color, so give them space to rest individually until fully dry.
- Store in the refrigerator for up to 7 days: Once dry, place your decorated hard boiled eggs in a covered container and chill, the cool environment preserves freshness and the delicate color finish. I find a single layer keeps them safest from rubbing against one another. Avoid leaving them at room temperature for long periods, because they are still perishable, and check for any shell cracks which can accelerate spoilage.
Notes
- Keep colors separate when you want clarity, use a muffin pan so each hue stays independent and you avoid muddy blends, especially when working with multiple people.
- Use gloves to protect hands, disposable gloves prevent dye transfer and make cleanup fast, which is especially helpful if you are crafting with kids.
- Start with a light touch on the toothpick, gentle swirling preserves distinct veins of color, and stopping early prevents the colors from blending into an undesirable shade.
- Adjust dwell time for intensity, leave eggs in the cream for 30 minutes for subtle pastels, up to 45 minutes for bolder saturation, and check often if using strong gel dyes.
- Dry individually on paper towels, spacing eggs out prevents smudging and ensures each shell sets without contact marks from its neighbors.