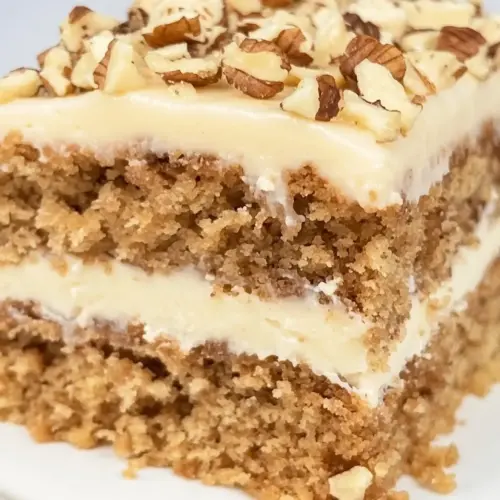
Walnut Cake
Walnut Cake is a moist, warmly spiced layered dessert with a tender crumb and crunchy nut texture, perfect for gatherings or a cozy treat. Its blend of cinnamon, brown sugar, and toasted walnuts pairs beautifully with creamy frosting for an indulgent yet approachable dessert, ideal for an easy weekend bake or special occasion.
Equipment
- Oven
- 3 8-inch cake pans
- Mixing Bowl
- Whisk
- Spatula
- Cooling rack
Ingredients
- 4 1/2 cups all purpose flour Combine to provide structure and bulk to the cake batter; contributes gluten for chew and lift when mixed with liquids and leaveners. Sift or whisk to ensure even distribution of other dry ingredients and prevent lumps for a tender crumb.
- 1 1/2 cups white sugar Sweeten the batter with clean, crystalline sweetness and help with moisture retention; assists in browning through caramelization during baking. Cream with oil for better incorporation and a finer crumb in the finished cake.
- 1 1/2 cups brown sugar Add deeper, molasses-like sweetness and extra moisture; enrich the flavor profile with caramel and toffee notes. Blend with white sugar to balance sweetness and improve overall texture and chew.
- 1 tablespoon cinnamon Introduce warm aromatic spice that enhances the cake’s flavor profile and pairs well with walnuts; adds subtle depth without overpowering. Measure accurately to keep the spice balanced and evenly incorporate with dry ingredients.
- 1 tablespoon baking soda Provide leavening power by reacting with acidic components to release carbon dioxide and lighten the cake; helps achieve a tender, airy texture. Dissolve and mix thoroughly with dry ingredients to activate evenly during baking.
- 1 1/2 teaspoons cream of tartar Stabilize and slightly acidify the batter to support leavening reactions and improve crumb tenderness; helps prevent excessive browning and contributes subtle lift. Whisk with dry ingredients to ensure uniform distribution throughout the mixture.
- 1/2 teaspoons salt Enhance overall flavor by balancing sweetness and supporting leavening reactions; limits overly sweet perception and strengthens the batter. Dissolve into the dry mix to ensure even seasoning and consistent taste.
- 3/4 cup + 3 tablespoons oil Moisten the dry components and carry fat-soluble flavors while contributing to tenderness and mouthfeel; helps create a moist, rich crumb. Combine thoroughly with sugars and liquids to emulsify and distribute fat throughout the batter.
- 1 tablespoon vanilla extract Contribute aromatic flavor and enhance sweetness perception; complements other flavorings and walnuts for a rounded taste. Add with liquids for even dispersion throughout the batter.
- 1 tablespoon vinegar React with baking soda to produce carbon dioxide for leavening and add a mild acidity that balances sweetness; aids in achieving proper rise and tender texture. Mix with the wet ingredients to activate its chemical effect at the right time.
- 3 cups water Provide the primary liquid to hydrate dry ingredients, dissolve sugars, and enable gluten development and leavening reactions; controls batter consistency and bake time. Warm or room temperature water should be mixed in gradually to reach the desired texture.
- 1/2 cup walnuts finely chopped Offer crunchy texture and a nutty, slightly bitter flavor that complements the cake’s sweetness; contribute visual appeal and a toasty aroma when baked. Chop finely to distribute evenly so each bite gains mild walnut presence without overwhelming the crumb.
- 2 cups cream cheese frosting Top and enrich the cake with creamy, tangy sweetness that adds richness and moisture; creates a smooth finish and contrasts the cake’s texture with silky frosting. Spread or pipe after cooling to prevent melting and maintain presentation.
Instructions
- Preheat the oven to 180 C/350 F. Lightly grease three 8-inch cake pans and set aside.: The kitchen fills with a gentle warmth that signals baking has begun, and you should notice the air turning slightly fragrant as the oven reaches temperature. Greasing the pans prevents sticking, and I often dust a light layer of flour after greasing for extra insurance, which also gives the cakes clean edges. One common mistake is not placing racks in the right position, which can cause uneven browning, so I make sure the oven rack is centered. If your pans are slightly different in depth, rotate them halfway through baking for even color development. The goal here is an even heat environment so the cakes rise uniformly and the edges do not overbake.
- In a large mixing bowl, add the flour, white sugar, brown sugar, cinnamon, baking soda, cream of tartar, and salt and mix well. Next, add the oil, vanilla, vinegar, and water and mix until combined and smooth. Fold through the walnuts at the end.: You will feel the dry mixture shift under the whisk, releasing a warm scent of cinnamon and sugar as the ingredients combine, which is always a welcome signal that the flavor base is set. Mixing the dry ingredients thoroughly ensures the leaveners are evenly distributed, preventing pockets of bitter baking soda or uneven rise. A typical error at this point is under mixing, which can leave streaks of sugar or clumps of flour, so I sift or whisk until the color is uniform and there are no visible lumps. The texture should be powdery and light, which helps the wet ingredients incorporate smoothly in the next step.
- Distribute the batter evenly amongst the three pans. Bake the cakes for 25-27 minutes, or until a skewer comes out clean.: As you pour the wet ingredients in, the batter will transform from dry and dusty to glossy and cohesive, and you should hear a soft swoosh as the paddle or whisk folds it together. The oil brings a silky mouthfeel while the water thins the batter to a pourable consistency; together they build moisture that keeps the cake tender after baking. Avoid over mixing here because that can develop gluten and lead to a denser crumb, so stir just until you cannot see streaks of dry flour. If the batter seems too thick, a little extra water is better than overworking the mix. The smell will become more rounded and sweet, and the batter should be smooth with no pockets of dry ingredients.
- Let the cakes cool completely, before spreading frosting on them and layering them up. Refrigerate the cake for 30 minutes to set.: You will notice a pleasing contrast as the flecks of chopped walnuts disappear into the batter, and the nutty aroma will become more pronounced. Folding helps keep the batter light and prevents the nuts from settling to the bottom of the pan during baking, which is why I recommend a gentle motion using a spatula. A typical mistake is vigorously stirring, which can deflate the air incorporated and make the cake heavy, so use slow slices and lifts to combine. Visually, you want an even distribution of nut specks throughout without overworking the batter, and the texture should remain slightly aerated.
- Distribute the batter evenly amongst the three pans.: When you pour the batter, you should hear a soft splash as it lands and see it level out into smooth domes, which indicates even distribution. I weigh the pans when I can, or use a measuring cup to apportion equal amounts, which helps the layers bake at the same rate and stack neatly. Overfilling a pan can cause the cake to spill or dome excessively, while underfilling leaves a thin layer that can overbake, so aim for uniform heights. If one pan looks higher, transfer a little batter to another to balance them. This step matters for presentation because evenly sized layers make for tidy slicing later.
- Bake the cakes for 25 to 27 minutes, or until a skewer comes out clean.: The oven will produce a gentle chorus of tiny pops as moisture escapes and the crumb sets, and the tops will turn a warm, even brown. Use a skewer inserted into the center to test doneness; if it comes out with just a few moist crumbs, the cakes are ready. A usual pitfall is relying solely on color, which can mislead if your oven runs hot or cool, so the skewer test is reliable. Allow the cakes to reach a light golden tone and spring back slightly when touched. If you notice a wet batter trail on the skewer, bake in two to three minute increments and test again until the skewer is mostly clean.
- Let the cakes cool completely, before spreading frosting on them and layering them up.: Cooling is when the crumb firms and the internal steam dissipates, and you will feel relief when the pans come out and the aroma settles into a softer, baked scent. If you frost while the cakes are warm, the frosting will melt and slide off, so patience is important. I usually invert the pans onto racks and let them cool for at least an hour until they are room temperature to the touch. A frequent error is rushing this step, which can lead to a messy assembly, so resist the urge to hurry. Once cooled, the layers will slice cleanly and accept the cream cheese frosting without softening it too much.
- Refrigerate the cake for 30 minutes to set.: After you finish frosting, placing the cake in the fridge helps the frosting firm slightly and the layers to settle, which makes slicing neater and serving easier. You will notice the frosting lose its tacky sheen and become a bit firmer, which is the sign that the cake is ready to present. Common mistakes include leaving it too long, which can dry the cake, or not chilling at all, which can make the frosting slide; thirty minutes is usually the sweet spot. The chill also allows any stray crumbs to meld into the frosting for a polished look.
Notes
- Toast the nuts: Lightly toasting the walnuts in a dry pan for a few minutes brings out deeper flavor and aroma, but cool them before folding into the batter so the heat does not alter the batter texture.
- Room temperature ingredients: Having the oil and water at room temperature helps the batter combine smoothly, preventing lumps and ensuring even rise across the layers.
- Even layers: Use a kitchen scale or measuring cup to divide the batter evenly among pans, which ensures the cakes bake uniformly and stack neatly.
- Frosting consistency: If your cream cheese frosting feels too soft, chill it briefly and stir before spreading to maintain a smooth finish that will set well in the fridge.
- Storage at room temp: Keep the cake covered in an airtight container for 2 to 3 days to maintain moisture, especially if you plan to serve within a short window.
- Freezing portions: Wrap slices tightly and freeze up to 3 months for easy future desserts; thaw in the fridge overnight for best texture.