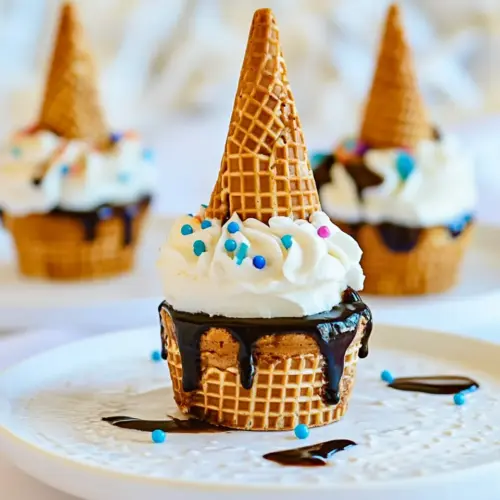
Waffle Cone Cheesecake Minis
Waffle Cone Cheesecake Minis are creamy, crispy, and easy to make. These bite sized cheesecakes combine a toasty waffle cone crust with a silky cream cheese filling, perfect for parties or quick desserts. They chill fast and travel well, making them an ideal easy treat for gatherings and weeknight indulgences. Make them for a crowd pleaser that tastes special with minimal fuss.
Equipment
- Mini Muffin Pan
- Electric Mixer
- Mixing Bowls
- Spoon
Ingredients
- 1/2 cup waffle cone crumbs Provide a crunchy, buttery base by combining into crumbs that bind with butter to form mini crusts; adds texture and a light toasted flavor that complements the creamy filling.
- 1 1/2 tbsp sugar Add sweetness and a touch of caramelization when mixed with the cone crumbs, helping to balance the richness of the cream cheese while enhancing crust structure.
- 2 tbsp melted butter Melt to bind the crumbs and sugar into a cohesive crust; contributes a rich mouthfeel and helps the base hold together during baking and serving.
- 1 -1/2 pkg 8 oz each Cream Cheese (12 oz), softened Soften and beat until smooth to create the primary creamy body of the cheesecake; supplies a tangy, rich flavor and dense texture that defines the minis.
- 1/2 cup granulated sugar Sweeten the filling to balance the cream cheese tang and bring out a mellow, classic cheesecake flavor; also hydrates and helps achieve a smooth consistency when creamed.
- 1 egg Incorporate and beat with the cream cheese mixture to add structure and a slight lift; contributes to a tender, set filling by helping the custard coagulate during baking.
- Optional: Hot Fudge Topping Serve warm or chilled as a finishing drizzle that adds a glossy, indulgent chocolate note; can be used sparingly to complement the cone crust and creamy filling without overpowering them.
Instructions
- Heat oven to 325 degrees F.: The oven should feel warm and steady by the time you re ready to bake, around 325 degrees Fahrenheit, which provides gentle heat that cooks the filling through without overbrowning the edges. You ll notice a faint warm, dry scent as the oven reaches temperature. This moderate oven temp helps the centers set gradually so they stay creamy instead of curdling. A common mistake is putting them into an oven that s too hot, which leads to cracked or rubbery tops, so always allow your oven to preheat fully and use an oven thermometer if your dial is unreliable.
- Combine waffle cone crumbs, 1 and 1/2 tbsp sugar and melted butter. Press into the bottom of 24 mini muffin cups lined with liners or into the bottoms of 12 mini cheesecake cups.: When you mix the crumbs, sugar, and melted butter, you should feel the crumbs turning slightly tacky and smell a warm, toasty sweetness from the cones. The butter should coat the crumbs evenly so they clump when pressed. If the mixture seems too dry, add a tiny drizzle more butter, but avoid making it greasy. Press a small amount between your fingers to check that it holds together. Avoid overmixing, which can turn the crumbs past tacky into mushy bits that won t crisp up properly.
- Combine cream cheese and 1/2 cup sugar in a bowl with electric mixer. Once well blended, add in egg and stir until just blended. Spoon batter over waffle cone crust into pans. Bake for approximately 15 minutes or until the centers of cheesecakes are almost set. Remove from oven and cool completely. Store in fridge. If desired top with hot fudge sauce when serving.: Use the back of a small spoon or a mini measuring cup to press the crumb mix into the bottom of the liners until it s compact and slightly raised at the edges. You should hear a gentle compacting sound and feel resistance as the crumbs firm up. A properly pressed crust will remain intact when baked and provide that satisfying crunch in contrast to the filling. The usual error here is pressing too lightly, which yields a loose crust, or pressing too hard, which can make it overly dense. Aim for firm and even pressure.
- Combine cream cheese and 1/2 cup sugar in a bowl with electric mixer.: As you beat the softened cream cheese with the sugar, watch for the texture to transform from slightly lumpy to smooth and satiny. The sound is a steady, even whir from the mixer without any loud thumping, and the smell is a gentle, tangy dairy aroma. Properly softened cream cheese blends quickly, so start slow to avoid splatter, then increase speed until silky. Overbeating can introduce too much air, which causes the filling to puff and crack, so stop as soon as it s homogeneous.
- Once well blended, add in egg and stir until just blended.: When you add the egg , mix until the batter is uniform in color and texture, with no streaks of yolk or lumps of cheese. The mixture should be smooth and slightly glossy, and you ll notice a creamier aroma. Mix gently to integrate the egg fully; vigorous whipping will trap air and change the bake. The common mistake is overmixing here, which makes the finished cheesecake turn airy and prone to sinking once cooled, so stop when it s just combined.
- Spoon batter over waffle cone crust into pans.: Spoon modest mounds of batter onto each crust until they reach near the top of the liners, leaving a little room as the centers will set but not fully puff. The batter should glide smoothly from the spoon and settle into the crust, producing a clean, slightly domed surface. If the batter is lumpy or thick, it likely needs a touch more mixing to reach the right consistency. Avoid overfilling, which leads to spillover and uneven baking.
- Bake for approximately 15 minutes or until the centers of cheesecakes are almost set.: As they bake, the kitchen fills with the comforting aroma of warm dairy and baked sugar. The edges will firm and the centers will still have a slight jiggle, like a barely wobbly custard. That gentle jiggle is your cue to remove them, because carryover heat will finish the set during cooling. If you bake them until completely firm, they become dry and lose their luscious texture. A typical pitfall is overbaking, so check at the 12 to 15 minute mark and judge by the wobble, not a timer alone.
- Remove from oven and cool completely.: Once out of the oven, the cheesecakes should be placed on a rack to cool so air circulates and they stop cooking from residual heat. The surface cools to a smooth matte finish and the aroma softens. Cooling slowly helps preserve a creamy interior and prevents cracking. A common mistake is placing them in the fridge while they are too hot, which can cause condensation and soggy crusts, so let them reach room temperature before chilling if your timeline allows.
- Store in fridge.: Chilling firms the texture and develops flavor, giving the finished bite its characteristic creaminess. Store them in an airtight container to prevent absorption of other fridge odors, and they ll hold well for several days. If you need to stack, use parchment between layers to protect the crusts. Avoid leaving them at room temperature for long periods, as the dairy filling benefits from being kept cool for both safety and texture.
- If desired top with hot fudge sauce when serving.: Right before serving, warm your topping briefly and drizzle it over the chilled minis so the sauce is warm against the cool filling, creating a delightful contrast. You ll notice steam and a glossy sheen from the sauce, which heightens the aroma and mouthfeel. Be careful not to pour hot sauce directly after chilling without warming slightly, as a scalding topping can melt the crust and soften the structure. A light drizzle is enough for maximum impact.
Notes
- Crust packing matters Press the crumb mixture firmly and evenly into each cup to create a stable base that won�t fall apart when you bite into the mini cheesecake.
- Cream cheese temperature Make sure the cream cheese is fully softened at room temperature to achieve a silky filling without lumps when blended with the sugar and egg.
- Mix gently after the egg Combine the egg until just integrated to avoid trapping air, which can cause the tops to crack or the centers to sink after baking.
- Use liners for easy removal Lined mini pans make serving simpler and protect the delicate crust from tearing when unmolding.
- Chill for flavor Refrigerate the cheesecakes after cooling to let flavors meld and the texture firm up, which improves slicing and presentation.
- Top at the last moment Add hot fudge or other warm toppings just before serving to keep the contrast between warm sauce and cool filling vivid and delicious.