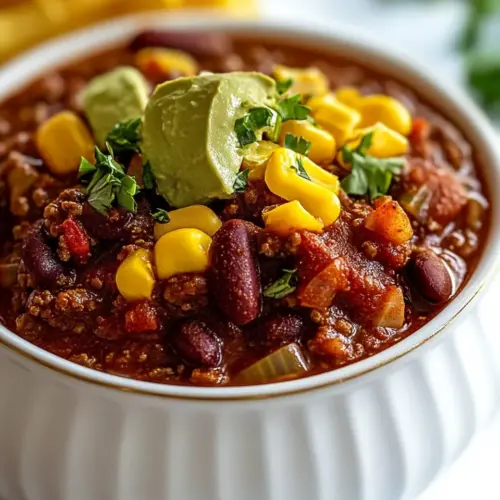
Venison Chili
Venison Chili delivers a warm, savory bowl of lean game meat simmered with aromatic spices and vegetables, perfect for an easy weeknight dinner or cozy winter supper. The combination of venison, smoky paprika, and hearty kidney beans creates a rich, satisfying texture while remaining light on grease. Make a big pot for leftovers that taste even better the next day, and enjoy a flavorful, comforting meal.
Equipment
- Large Pot
- Wooden Spoon
- Cutting Board
- Chef's Knife
Ingredients
- 1 tablespoon olive oil Heat to create a flavorful cooking medium and help brown venison, contributing a smooth mouthfeel; olive oil also carries aromatic spices and prevents sticking during sautéing.
- 2 – 2 1/2 pounds ground venison or finely diced venison Brown or gently simmer to provide the primary protein and rich, gamey flavor; ground or diced venison gives texture and absorbs chili spices for depth.
- 1 large onion peeled and diced Peel and dice to add aromatic sweetness and savory backbone; onion softens during cooking and builds complex flavor through caramelization.
- 2 bell peppers seeded and diced Seed and dice to contribute bright, slightly sweet notes and tender texture; bell peppers add color and balance the spice of chiles.
- 2 celery stalks diced Dice to add subtle vegetal crunch and aromatic celery notes; celery enhances savory depth and pairs well with onion in the base.
- 2 carrots shredded and diced Shred and dice to add natural sweetness, body, and a tender bite; carrots lend color and help round out the chili's flavor profile.
- 6 -8 cloves garlic minced Mince to introduce pungent, savory heat and aromatic richness; garlic amplifies overall flavor and blends with spices during cooking.
- 1/2 cup chopped cilantro Chop to impart fresh herbal brightness and a citrusy finish; cilantro added near the end lifts flavors and adds contrast to the rich chili.
- 1 -2 jalapenos seeded and diced (optional) Seed and dice (optional) to contribute sharp, fresh heat and varying spice levels; jalapenos can be adjusted for desired chili spiciness.
- 4 tablespoons chili powder Measure and add to deliver core chili heat, color, and a warm, earthy backbone; chili powder melds spices and defines the dish's character.
- 2 tablespoons ground cumin Measure and stir in to provide warm, nutty, slightly bitter undertones; ground cumin deepens savory complexity and complements chili powder.
- 1 tablespoon smoked paprika Add to introduce smoky, slightly sweet complexity; smoked paprika enhances depth and complements the venison's gaminess.
- 1 tablespoon dried oregano Sprinkle to supply herbal, slightly bitter notes and Mediterranean warmth; dried oregano supports savory layers and blends with other spices.
- 2 teaspoons salt Season to balance and enhance all flavors; salt brings out sweetness, reduces bitterness, and heightens aroma in the chili.
- 1/2 teaspoon ground cinnamon Measure to add subtle sweet warmth and an exotic aromatic lift; ground cinnamon harmonizes spices and deepens the chili's complexity.
- 2 – 28 ounce cans crushed tomatoes Pour to provide a rich, tangy tomato base and body; crushed tomatoes form the sauce that carries spices and melds ingredients together.
- 2 – 15 ounce cans kidney beans drained Drain and add to supply creamy texture, protein, and earthy tones; kidney beans add bite and help make the chili more filling.
- 2 cups water Measure and add to adjust consistency and help simmer flavors together; water thins the sauce as needed and facilitates even cooking.
Instructions
- Set a large 6-8 quart pot over medium-high heat. Add the oil to the pot. Once hot, add the ground (or finely chopped) venison. Stir and brown the meat, breaking it into pieces with a wooden spoon.: When the pot first hits the heat you will hear a gentle shimmer from the olive oil , then the venison will sizzle as it meets the surface. Listen for a steady sear rather than a staccato spit, and watch the meat darken from pink to a rich brown which signals Maillard flavor development. As you break it up with a wooden spoon you will notice little caramelized bits forming on the pot that smell deeply savory; these bits are flavor gold. If the meat releases a lot of liquid, increase the heat briefly to evaporate it, otherwise the meat will steam instead of browning. A common mistake here is crowding the pot, which causes steaming and prevents that desirable browning, so work in batches if needed.
- Meanwhile, prep and dice all the fresh vegetables and herbs.: While the venison is browning, the kitchen fills with a fresh, green aroma from the sliced onion and diced bell peppers . Your hands will move quickly through chopping, and the sound of the knife on the board keeps a steady rhythm. Keeping the pieces relatively uniform helps them cook evenly; uneven pieces mean some will be raw while others collapse. A common oversight is leaving garlic in large chunks which can burn and go bitter, so mince it finely. Organizing the mise en place now speeds the later steps and reduces the chance of overcooking anything.
- Once the venison is cooked through, add the diced onion, bell pepper, celery, carrot, garlic, cilantro, and jalapeños to the pot. Stir and sauté the vegetables for 3-5 minutes.: As the vegetables hit the hot pot you'll hear a lively sizzle and smell a sweet, savory lift as the onion and carrot begin to soften. Stirring keeps everything coated in those browned bits, which releases flavor into the vegetables. The goal is to soften but not fully collapse the vegetables, so they maintain a bit of texture; watch the color change to translucent for the onion and brighter for the peppers. One pitfall is cooking at too high a heat and burning the garlic, which turns bitter, so keep the heat moderate and stir frequently.
- Add the ground chili powder, cumin, smoked paprika, oregano, salt, and cinnamon to the pot. Stir well. Then pour in the crushed tomatoes, drained kidney beans, and water.: When you sprinkle the spices into the pot you will immediately smell a warm, aromatic burst as their oils wake up in the residual heat. Stirring releases those oils and helps coat the vegetables and venison , which deepens the flavor base. Adding the crushed tomatoes and drained beans introduces acidity and body, changing the pan from a sauté to a saucy mixture. Water adjusts the consistency, so pay attention to the thickness you prefer. Avoid adding too much liquid at once, as an overly thin chili will take longer to concentrate; you can always thin later if needed.
- Stir and bring to boil. Once boiling, lower the heat to keep the chili at a simmer. Partially cover the pot and simmer for 30 minutes, stirring regularly, so the venison and beans don’t stick to the bottom of the pot.: The initial boil will create an energetic bubbling sound and steam that carries the spice aromas through the kitchen. Once at a boil, reduce to a gentle simmer where small, steady bubbles rise and the surface churns softly. This is when flavors marry, acids mellow, and the beans absorb seasoning. Partially covering the pot keeps in heat while allowing steam to escape, preventing a watery finish. Stirring regularly prevents the beans and meat from clinging and developing burnt spots. A frequent error is setting the heat too low so the chili barely bubbles, which slows flavor extraction and can leave an underdeveloped taste.
- Once the chili has cooked, it’s a good idea to allow the chili to rest for at least one hour before serving. This allows the flavors to deepen. When ready to serve reheat the chili and serve warm.: After cooking, turning off the heat releases a softer, integrated aroma as the components relax into each other. Resting lets the spices continue to meld with the liquids and solids, producing a rounder, more harmonious flavor. When reheating, warm slowly until the chili is steaming, stirring occasionally to redistribute settled spices and juices. A common mistake is serving immediately from the pot without resting, which results in a less cohesive flavor where individual elements feel separate rather than unified. If you have time, overnight resting in the fridge often yields the best results.
Notes
- Brown in batches. When the pot holds too much meat at once it steams instead of browning, so dividing the venison helps achieve those caramelized bits that add depth.
- Warm the spices. Toasting the spice mix briefly in the pot before adding tomatoes unlocks essential oils and intensifies the aroma without any extra steps.
- Control liquid gradually. Add water a little at a time while simmering, because you can always thin the chili later but you cannot easily thicken an over diluted pot.
- Rinse the beans. Draining and rinsing the canned kidney beans reduces starchy brine and helps the chili keep a cleaner texture and better flavor balance.
- Finish with fresh herbs. Stirring in chopped cilantro at the end brightens the bowl and provides a fresh contrast to the smoky spices.