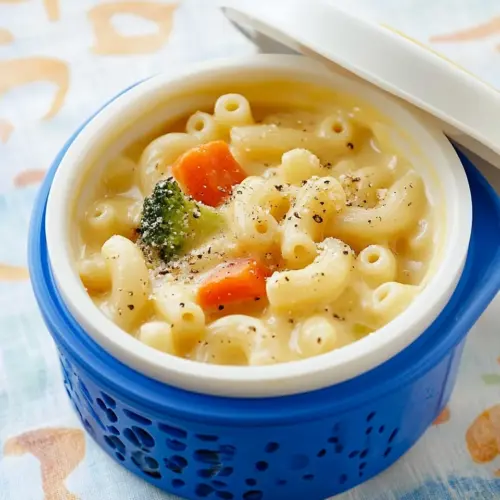
Veggie Mac and Cheese Soup
Veggie Mac and Cheese Soup is a creamy, comforting thermos friendly lunch that blends cheesy richness with tender frozen vegetables and hearty macaroni for an easy weeknight dinner or packed lunch. The broth melts the cheese into a silky sauce, while the pasta and veggie mix deliver satisfying texture. Make it for busy winter days when you want warm, filling comfort with minimal fuss.
Equipment
- Thermos
- Wide Opening Thermos
Ingredients
- 1 1/2 cups dry macaroni pasta, or other Provide pasta shape and starch body to the soup, offering chewy texture and absorbing flavors while thickening the broth as it cooks; can be swapped with similar small pastas for ease.
- 32 -ounce carton reduced-sodium chicken broth/stock Supply a savory, seasoned liquid base that builds depth and salt control for the soup, contributing to overall volume and warmth while allowing other ingredients to meld.
- 16 -ounce bag frozen broccoli, cauliflower, and carrot blend Add frozen mixed vegetables for color, fiber, and nutrients, contributing bite and balance to the creamy, cheesy profile while simplifying prep and cooking time.
- 1/4 cup whole milk or half and half Enrich the broth with fat and creaminess, smoothing the texture and creating a richer mouthfeel that helps cheese melt evenly and coats the pasta and vegetables.
- 1 1/2 cups shredded Cheddar cheese Contribute sharp, melty cheese flavor and body, providing savory richness and emulsifying into the soup to create a creamy, cohesive sauce.
- 6 -ounce box macaroni and cheese Provide pre-seasoned cheesy powder and pasta components that boost cheesy flavor and convenience; the pouch can be used to intensify taste and thicken the soup.
- 32 -ounce carton reduced-sodium chicken broth/stock Reinforce the soup's liquid foundation with additional savory stock, increasing batch size and ensuring there is sufficient broth to cook pasta and blend ingredients harmoniously.
- 16 -ounce bag frozen broccoli, cauliflower, and carrot blend Introduce more frozen vegetable medley to maintain a balanced vegetable-to-pasta ratio, adding extra nutrients, texture, and visual appeal without fresh chopping.
- 1/4 cup whole milk or half and half Enhance creaminess and mouthfeel with added dairy fat, helping to mellow sharp flavors and assist in achieving a smooth, velvety soup consistency.
- 1 cup shredded Cheddar cheese Provide additional shredded cheese to boost cheesiness, supply melting texture, and create a richer, more pronounced cheddar flavor throughout the finished soup.
Instructions
- Cook the pasta according to the package directions.: The kitchen fills with a gentle boiling scent and you will hear the steady rolling bubble as the water cooks the macaroni pasta . When the pasta is al dente it will resist slightly between your teeth, offering a springy texture that holds up in the thermos. Why this matters, the pasta will absorb some broth as it rests so starting al dente prevents a mushy outcome. A common mistake is over boiling, which produces a gluey texture, so start checking a few minutes before the lowest time on the package. Drain promptly and give it a quick shake to remove excess water, which helps the final soup avoid becoming watered down.
- In a large saucepan, bring the broth to a boil over high heat. Add the vegetables, and cook until tender, about 5 minutes. Reduce the heat to medium.: You will notice the aroma of warm stock as it reaches a rolling boil, and adding the frozen vegetable blend produces a hiss and gentle sputter as ice meets hot liquid. The vegetables will turn a brighter green and the carrots will sweeten as they soften. This technique ensures the veggies cook evenly and maintain structure for texture contrast in the soup. Avoid leaving them in the high boil too long or they will become limp and lose that pleasant bite people expect in this dish. Reduce to medium to keep the broth simmering without breaking down the vegetables further.
- Add the cooked macaroni, shredded cheese (or powdered cheese), and milk to the veggies and broth. Stir to combine until the cheese is completely melted. Remove from heat.: As you stir, the soup will thicken and the surface will glisten from melted Cheddar cheese . The aroma shifts to a warm, cheesy perfume that signals comfort. Stirring encourages even melting and prevents clumps, while removing from heat right after melting avoids separation of the dairy. A frequent pitfall is adding cold milk or cheese to a lukewarm pot which can cause the cheese to seize, so make sure the broth is hot and add dairy gradually while stirring to achieve a smooth emulsion.
- Preheat the thermos container with boiling water. This step is optional, but it helps.: Pouring boiling water into the thermos warms the metal or glass walls so when you add the soup it will stay hot longer, and you will feel the residual heat when you close the lid. The preheating ritual reduces temperature loss during transfer, which means your lunch will be pleasantly hot hours later. One common oversight is skipping this step on cold days, which can leave the soup lukewarm by lunchtime, so take the minute to preheat for better results. Dump the water just before adding the soup so the interior remains steamy.
- Heat the soup in the microwave or stovetop to a piping-hot temperature.: You should see the surface shimmer and small bubbles form at the edges when the soup is properly hot, and the scent will heighten as steam rises. Heating thoroughly ensures the cheese is fully melted and the broth has the right viscosity to hold heat in the thermos. A trap here is overheating which can cause the dairy to separate, so heat steadily and stir to check for uniform temperature. If using a microwave, stir halfway through to eliminate cold pockets and to maintain a consistent texture throughout.
- Drain the water from the thermos.: After preheating, tipping out the warming water should reveal a steamy interior ready for the soup. This quick move prevents dilution and readies the container for filling without losing the warmth you created. Forgetting to drain will water down the soup and change the desired creamy texture, so be sure to fully remove the preheating water before you add food. A paper towel wiped inside briefly can remove lingering droplets for an ideal transfer.
- Fill the thermos with the very hot soup.: Pour slowly so the liquid settles without splashing, and seal promptly to trap the steam. The sound is a soft pour and you may see vapor escape briefly before the lid goes on, which is okay because it shows the soup is hot. Packing while piping hot preserves temperature and helps the pasta finish gently in the warm environment. A typical mistake is waiting until the soup cools somewhat, which leads to a cooler lunch; fill immediately for the best retained heat.
- Close the thermos container and pack it inside a lunch bag.: Securing the lid and placing the thermos in an insulated bag helps sustain warmth and protects against spills. I like tucking a napkin or small ice pack alongside depending on other items in the bag so nothing tips or makes a mess. Packing it snugly avoids rattling that could agitate the contents during transit. A simple error is tossing the thermos loosely into a bag with sharp objects that can dent the lid, so organize thoughtfully for safe travel.
Notes
- Cheesy boost Add extra shredded Cheddar cheese at the end for a richer, silkier finish; fold it in off heat so it melts evenly and does not separate.
- Pasta swap Use a short tube or small shell if you prefer more nooks for the broth to cling to, which increases the satisfying spoonfuls you get in each bite.
- Make it faster Use the powdered mix from the boxed macaroni and cheese alongside real shredded cheese to speed up thickening while keeping a homemade flavor profile.
- Thermos ritual Always preheat the thermos and fill it with piping hot soup to hold temperature longer, especially on cold days when heat loss is greater.
- Vegetable first Briefly sauté any thawed vegetables before adding broth if you want a slightly caramelized depth without changing the overall method, but keep it light to retain the quick prep nature.