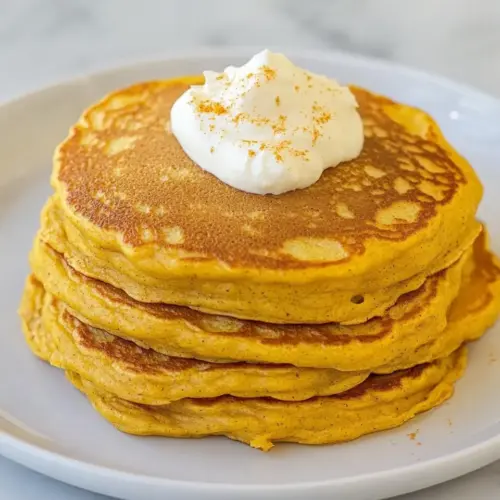
Vegan Pumpkin Pancakes
Vegan Pumpkin Pancakes are fluffy, seasonal, and warmly spiced, offering a creamy texture from pumpkin and plant milk with crispy golden edges. This easy breakfast is perfect for an easy weeknight dinner or a relaxed holiday brunch, delivering cozy fall flavors and simple pantry ingredients. Try them for a quick, comforting meal that reheats and freezes well.
Equipment
- Griddle
- Large saute pan
- Mixing Bowls
- Whisk
- Measuring Cups
Ingredients
- 1 cup all purpose flour Provides the primary structure and gluten needed for fluffy pancakes; sifts or measures to ensure light texture and even mixing. Balances with whole wheat flour for a tender crumb while allowing leaveners to work effectively. Works well at room temperature and absorbs wet ingredients for cohesive batter.
- 1/2 cup whole wheat flour Adds heartier texture, nuttier flavor, and additional fiber to the batter while slightly reducing overall gluten strength. Complements all-purpose flour to create a more wholesome pancake with subtle chew. Helps retain moisture and adds nutritional value.
- 2 teaspoons baking powder Leavens the batter by producing air bubbles when combined with wet ingredients and heat, contributing to rise and softness. Works in tandem with baking soda to ensure proper lift and lighter pancakes. Should be evenly distributed in the dry mix to avoid uneven pockets.
- 1 teaspoon baking soda Enhances lift by reacting with acidic components in the batter to produce carbon dioxide, improving tenderness and rise. Balances the effect of baking powder for optimal fluffiness and slightly contributes to browning. Use measured amount to prevent soapy or metallic taste.
- 1/2 teaspoon cinnamon Provides warm, aromatic flavor typical of pumpkin dishes and enhances the overall fall-inspired profile of the pancakes. Works in small amounts to complement pumpkin puree without overpowering other flavors. Pairs well with maple syrup and warming spices.
- 1/2 teaspoon kosher salt Balances sweetness and enhances overall flavor while also helping control fermentation and leavening reactions by moderating taste. Supports other flavors and contributes to the savory balance in batter. Use measured amount to avoid overly salty profile.
- 1 1/4 cups almond, oat, soy or other plant based milk of choice Moistens and binds the dry ingredients while providing a dairy-free base that influences batter thickness and final pancake tenderness. Can be chosen for neutral flavor or specific taste notes depending on type (almond, oat, soy). Adjust quantity slightly if using thicker or thinner plant milks.
- 1 tablespoon maple syrup, plus more for serving Adds a touch of sweetness and helps with browning on the griddle; can be adjusted for taste and served additionally at the table. Also contributes a subtle viscosity that aids in blending wet ingredients uniformly. Pairs exceptionally well with pumpkin and warm spices.
- 1 tablespoon vegetable oil, plus more for greasing Adds fat to tenderize the crumb and helps prevent sticking when cooking; a little extra is useful for greasing the pan. Contributes to browning and a pleasant mouthfeel without using animal products. Can be substituted with other neutral oils if needed.
- 1/2 cup pumpkin puree Provides moisture, rich pumpkin flavor, and seasonal sweetness while adding body and color to the batter; helps create a tender, slightly dense crumb. Works with spices and sweetener to deliver classic pumpkin pancake taste. Use pure canned pumpkin puree for best consistency.
Instructions
- Mix the dry ingredients in a bowl.: A rich aroma of baking powder and cinnamon will not be noticeable yet, but your hands will feel the fine texture of the combined all purpose flour and whole wheat flour . Whisking these components together ensures the 2 teaspoons baking powder , 1 teaspoon baking soda , 1/2 teaspoon cinnamon , and 1/2 teaspoon kosher salt are evenly distributed so every pancake gets the same lift and flavor. If you skip this step, you risk pockets of leavening that can make some pancakes rise too quickly then collapse. When the mixture is well combined it should look uniform in color and slightly aerated, and you should not feel large clumps of baking powder or soda. A common mistake is measuring flour by scooping the cup directly which packs it down; spoon into the cup and level for an accurate amount.
- Mix the wet ingredients in a separate bowl.: As you combine the 1 1/4 cups almond, oat, soy or other plant based milk of choice , 1 tablespoon maple syrup , 1 tablespoon vegetable oil , and 1/2 cup pumpkin puree , you will notice the batter takes on a silky, homogenous look with the pumpkin streaks blending in. Stirring by hand gives you control over texture; the batter should feel slightly thick yet pourable. This separate bowl prevents overworking the dry ingredients and ensures the wet elements are evenly flavored before meeting the flour. A wet mixture that is not smooth can create lumps in the final batter, so whisk until the pumpkin is fully incorporated. Avoid vigorous beating, which can create air bubbles that collapse during cooking.
- Add the wet ingredients to the dry ingredients and whisk to combine (don’t over mix, some lumps are fine).: When these come together, you will see small pockets of unincorporated flour, which is desirable because over mixing develops gluten and leads to toughness. The batter should be just cohesive enough to hold its shape on the griddle, with a slightly thick, ribbon like fall from the spoon. You should smell the warm cinnamon and the faint nuttiness from the flours. If you stir until perfectly smooth, the pancakes may become dense, so embrace a few lumps. A frequent error is trying to achieve a perfectly smooth batter, which sacrifices tenderness for uniformity.
- Heat a griddle or large saute pan over medium heat and lightly: The pan must reach an even medium temperature so the pancakes brown without burning. Heat until a few drops of water sizzle and dance across the surface. This step creates the Maillard reaction that yields golden color and caramelized edges. If the pan is too cool, the pancakes will spread and stay pale; too hot, and the exterior will burn before the center cooks. Use a reliable pan and test a small drop of batter if unsure. Many cooks rush this step, resulting in uneven browning.
- grease with oil.: A thin sheen of vegetable oil on the cooking surface prevents sticking and encourages crisp edges while keeping centers tender. I use an oiled paper towel to spread a light film rather than pouring oil directly, which avoids pools that cause uneven frying. The oil should shimmer but not smoke. Apply more oil between batches if the surface looks dry, otherwise pancakes can grip and tear on flip. Over greasing can make the underside too slick and prevent proper browning, so less is more.
- Ladle as many pancakes as possible (about 2 tbsp of batter for each one) on the griddle and cook 2 minutes or until bubbles start forming on the surface and the bottom is golden brown.: As the batter hits the hot surface you will hear a gentle sizzle and see the perimeter set quickly. Tiny bubbles will form and pop on the surface, signaling it is nearly ready to flip. The underside will develop a warm golden tone with slightly crisp borders. Resist the urge to flip early; if the bubbles have not formed and the bottom is not golden, the center will be undercooked. A misstep here is flipping too soon which results in pancakes splitting or collapsing.
- Flip the pancakes and cook another 2 minutes.: After flipping, the second side will cook faster, and you should notice a faint nutty aroma and an even golden brown color. The center should spring back slightly to the touch. This finishing step locks in moisture and completes caramelization. If the pancake still feels very wet in the center after cooking, the heat may be too low and you should increase it slightly. Flipping multiple times or pressing down will squeeze out steam and yield a drier pancake, so avoid that.
- Repeat the process until you run out of batter (you can hold the finished pancakes in a 250 degree oven while you finish making the pancakes).: Stacking warm pancakes in a low oven keeps them tender and reheats gently without overcooking. The oven acts like a holding drawer, preserving texture while you finish the batch. Place them in a single layer or loosely covered on a baking sheet to prevent condensation. A common error is piling pancakes in a deep stack immediately, which traps steam and makes them soggy. If you need to stretch the batch, lower the oven temperature slightly to avoid drying them out.
- Serve with maple syrup and enjoy.: The final sensory joy arrives when you drizzle warm maple syrup over the stack, releasing sweet, woody aromas and glossy shine on the surface. The contrast of slightly crisp edges and fluffy centers is most satisfying, and the maple reinforces the seasonal flavor of pumpkin . Serve immediately for best texture. Letting them sit too long uncovered will cool and lose tenderness, so plan plating just before serving.
Notes
- Swap plant milks: Try oat milk for creamier batter, or almond milk for a lighter, nuttier note that pairs well with pumpkin.
- Boost spice: Add a pinch of nutmeg or ginger to deepen the warm spice profile if you want a more autumnal pancake.
- Whole grain forward: Increase whole wheat flour by an additional two tablespoons for extra fiber and a heartier texture without sacrificing too much lift.
- Maple glaze: Warm a little extra maple syrup to pour over pancakes, it enhances caramelization and provides a glossy finish.
- Freezing method: Cool completely, layer with parchment, and freeze in a sealed bag; reheat in a toaster oven to restore crisp edges and tender centers.