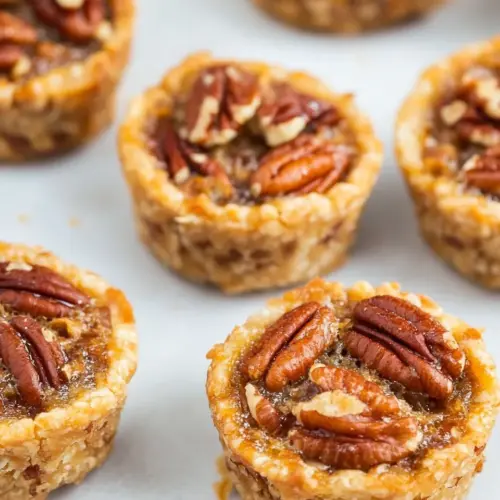
Vegan Pecan Tassies
Vegan Pecan Tassies are tiny, nutty tarts with a crisp or tender crust and a chewy, caramel like pecan filling. These easy to make cookies deliver toasted pecan flavor and rich sweetness in a shareable bite, perfect for holiday baking or easy weeknight treats. Make a batch to freeze for last minute guests or for a crowd pleasing cookie plate.
Equipment
- Mini Muffin Tin
- Food Processor
- Mixing Bowls
- Rolling Pin
Ingredients
- 1/2 cup raw pecans, chopped fine (50 g) Provide a crunchy, toasty texture and rich nutty flavor while adding body; chop finely to distribute evenly through the filling and create pleasant bite-sized pecan pieces in each tassie.
- 1 tbsp water Add moisture to hydrate flaxmeal and help bind the filling ingredients together; use sparingly to achieve the right consistency without making the filling too wet.
- 1 tbsp ground flaxmeal Act as an egg replacer and binder when mixed with water, forming a gel that helps hold the filling and crust together in this vegan recipe.
- 1 1/2 tbsp agave or pure maple syrup Impart sweetness and a mild floral note while contributing to the syrupy texture of the filling; adjust slightly to taste to balance sweetness with pecan richness.
- 2 tsp molasses Deepen flavor with robust, slightly bitter, and caramel-like notes that mimic traditional molasses components, enhancing the overall complexity of the filling.
- 1/8 tsp salt Enhance and balance sweetness while lifting and intensifying other flavors; include in both filling and crust to maintain consistent seasoning throughout the recipe.
- optional 2 tsp vegan butter or oil Optional: contribute creaminess, richness, and flakiness to the crust or filling; use vegan butter for buttery flavor or oil for a lighter, more neutral result.
- 3/4 cups pelt, white, or ap gf flour Provide the structural base for the crust and a neutral canvas for flavors; use all-purpose or gluten-free alternatives as specified to achieve desired texture.
- 1/4 cups ugar, unrefined if desired Add sweetness and a hint of caramel complexity while slightly affecting dough tenderness; choose unrefined sugar for deeper flavor and color if preferred.
- 1/4 tsp baking powder Leaven the crust slightly, improving tenderness and creating a lighter bite; ensure even distribution in the dry ingredients for consistent rise.
- 1/8 tsp salt Season the dough to balance flavors and enhance sweetness; include a small pinch in the crust mix to prevent blandness and brighten other ingredients.
- 3 1/2 tbsp cold vegan butter (or oil, see note below) Create richness and flakiness in the crust while keeping it cold to produce tender layers; use cold vegan butter or oil to ensure optimal texture in the pastry.
Instructions
- Using oil will yield a crispier crust, while using butter will yield a softer crust. To break up the pecans, I like to either use a food processor or place the nuts in a bag and then smash the bag with a rolling pin or side of a can until nuts are finely chopped. Preheat oven to 350 F. Grease a mini muffin tin. For easier removal, you can put a thin strip of parchment paper inside each tin if desired (see photo). Whisk together the first six ingredients (and 2 tsp spread or oil, if using for a richer flavor). Refrigerate at least fifteen minutes to thicken. Meanwhile, combine crust ingredients in a new bowl, completely breaking up the butter until fine crumbles form. Press 1 1/2 tbsp dough into the bottom of each mini muffin tin, using a spoon or your fingers to make a shallow well in each center. Add about 1/2 tbsp of the refrigerated filling to each well. Bake on the center rack, 12 minutes. Let cool before removing from the tins.: The moment you begin, note how the choice of fat changes the final textural profile, oil creating a leaner, crisper shell while vegan butter yields a tender, almost shortbread like crumb. As the dough bakes you will see the edges take on a light golden hue if using oil, and remain paler and more tender with butter. Listen for a slight crisping sound when removing from the tin with the crisper version. A common mistake is substituting liquids incorrectly which can make the dough too greasy, so keep measurements exact.
- To break up the pecans, I like to either use a food processor or place the nuts in a bag and then smash the bag with a rolling pin or side of a can until nuts are finely chopped: Chopping directionally affects the texture and release of oil; the aroma intensifies as you pulse or crush the nuts, and you will notice small particles and a few larger bits, which is ideal for body in the filling. If you use a food processor pulse gently to avoid turning nuts into a paste, watching for a sandy texture. The smell of toasted pecans will become more pronounced as the oils release. Over processing is the most common error here, which leads to a greasy, paste like filling rather than a pleasantly textured one.
- Preheat oven to 350 F: A properly preheated oven ensures even bake and consistent setting of the filling, producing a glossy top and edged crust without under baking. When you slide the tins in the oven the immediate heat jump starts the crust setting and helps the filling thicken. I always wait for the oven to reach the full temperature before baking because a cooler start can make the filling weep. One frequent oversight is opening the oven early to peek which can lower the temperature and affect texture, so avoid opening for the first two thirds of baking time.
- Grease a mini muffin tin: Greasing helps with easy removal and prevents sticking on the tin walls, letting you pop out the tarts cleanly once cooled. You can also press a thin strip of parchment into each cavity for extra insurance, which I do when I plan to display them. As you press the dough and fill the tins, greasing ensures edges do not tear when unmolding. A mistake people often make is under greasing, especially in older tins that have rough spots, which leads to stuck corners and broken shells.
- For easier removal, you can put a thin strip of parchment paper inside each tin if desired (see photo): Lining with small parchment strips creates a lift point to raise the tarts without inverting the tin, preserving delicate edges. The paper will brown slightly at the edges in the oven and help you slide them out without breaking. If you skip this, be prepared to nudge gently with a small offset spatula. The error to watch for is folding the paper too thickly, which distorts the tart shape, so use thin strips only.
- Whisk together the first six ingredients (and 2 tsp spread or oil, if using for a richer flavor): Combining the chopped pecans, water, ground flaxmeal, agave, molasses, and salt creates the filling base, and whisking helps the flax hydrate evenly producing a glossy, cohesive batter. As you whisk you will notice the mixture thicken and darken slightly, and it should hold together when you lift the whisk. The molasses will add a deeper hue and the agave keeps the surface glossy when baked. A common pitfall is under whisking, leaving the flaxmeal clumpy and causing uneven pockets in the filling.
- Refrigerate at least fifteen minutes to thicken: Chilling firms the filling so it stays put in the shells and helps flavors meld, producing a more stable, spoonable consistency that bakes into a chewy center. After refrigeration the mixture should be notably thicker and easier to portion into the crust wells. If you skip chilling the filling it may run during baking and not set, resulting in flat, overly sticky tarts. A frequent mistake is refrigerating too long and allowing the filling to become rock hard, so check it after the minimum time.
- Meanwhile, combine crust ingredients in a new bowl, completely breaking up the butter until fine crumbles form: Working cold vegan butter into the flour and sugar until it resembles coarse crumbs is crucial to a tender shell, as the discrete bits of butter steam in the oven creating flakiness. As you rub or cut the butter, you will see the mixture go from shaggy to uniformly crumbly. The texture should be sandy and not pasty, which ensures a delicate crust. Overworking the dough so the butter melts will create a dense, greasy shell, so handle it quickly and with chilled tools.
- Press 1 1/2 tbsp dough into the bottom of each mini muffin tin, using a spoon or your fingers to make a shallow well in each center: When pressing the dough, aim for an even thickness around each cup, and press a shallow indentation to receive the filling, which ensures uniform baking and consistent ratios of crust to filling. The dough should hold its shape and have a slightly cool feel from the butter. If you press too thin the crust can burn or become brittle; too thick and the tart becomes heavy. An easy mistake is uneven pressing which leads to some shells cooking faster than others, so rotate the tin mid assembly for evenness.
- Add about 1/2 tbsp of the refrigerated filling to each well: Portion the chilled filling so each tart gets the same amount, leaving a bit of room for gentle bubbling as it bakes. The filling should sit in the well without overflowing; you may see it glossy and slightly domed before baking. If the filling is still too soft, return it to the fridge briefly to firm up. Avoid overfilling, which will cause spillover and uneven baking.
- Bake on the center rack, 12 minutes: Placing the tins on the center rack promotes even heat circulation, helping the crust brown lightly while the filling sets and becomes pleasantly tacky. During baking you will notice the aroma of toasted pecans and a slight bubbling sound as the filling cooks. The edges of the crust should become faintly golden while the filling looks glossy and set. Opening the oven early can cause the filling to collapse, so resist peeking until close to the end of the time.
- Let cool before removing from the tins: Cooling allows the filling to finish setting and prevents the shell from breaking when unmolded, leading to clean, intact tarts. Once cooled the edges will firm and the filling will hold shape when you lift them out. If you try to remove them warm they are likely to slump and lose definition, so patience here preserves presentation. A common misstep is forcing removal too soon, which tears the crust.
Notes
- Cold butter is your friend Keep the vegan butter chilled and break it into small pieces before cutting into the flour so you end up with pea sized crumbs that bake into a flaky shell.
- Pulse don't puree the pecans Use short pulses in a food processor to get an even chop without releasing too much oil, which would make the filling greasy.
- Measure syrups carefully Use a spoon for agave and molasses to avoid over sweetening, which keeps the filling from becoming too loose.
- Chill the filling briefly Refrigerate for the minimum fifteen minutes to firm the filling so it stays put in the shell while baking, preventing spill over.
- Line the tin for easy removal Small parchment strips let you lift the tarts out without damaging delicate edges, ideal for gifting or transport.
- Watch your oven timing Twelve minutes is a guideline; ovens vary so look for lightly golden edges and a set filling rather than relying only on the clock.