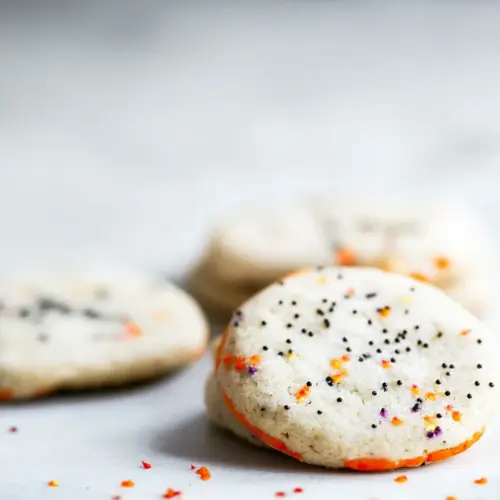
Vegan Halloween Cookies
Vegan Halloween Cookies are soft, slightly chewy cookies with a buttery plant based mouthfeel and festive sprinkles, perfect for fall gatherings. These easy to make treats use a flax egg for binding, yielding consistently tender results ideal for cookie swaps and kid friendly parties, making them a must bake this season.
Equipment
- Electric Mixer
- Mixing Bowls
- Baking Sheet
- Parchment Paper
- Cooling rack
Ingredients
- 1 cup vegan butter slightly softened (see note below) Creamy and slightly softened to help cream with sugar; provides fat for tender texture and rich flavor. Use at room temperature to ensure even incorporation and proper creaming with sugar, which helps create a light cookie structure.
- 1 cup granulated sugar Sweet and granulated to help aerate when creamed with butter; balances flavors and aids in browning. Measure accurately to maintain texture — too much will make cookies too crisp or overly sweet.
- 1 flax egg (1 tbsp ground flaxseed + 3 tbsp water) Bind with a gel-like consistency formed from ground flaxseed and water; replaces eggs while adding structure and moisture. Mix and let sit until thickened so it can effectively help hold the dough together during baking.
- 1 teaspoon pure vanilla extract Aromatic liquid used to enhance overall flavor and add warm, familiar notes. Stir in with wet ingredients to distribute flavor evenly throughout the dough.
- 2.5 cups all-purpose flour Primary dry component providing bulk and structure through gluten formation when mixed; determines cookie density and chewiness. Sift or whisk to remove lumps and ensure even blending with leavening agents.
- 2 teaspoons baking powder Leavening powder that helps dough rise and creates a lighter, tender crumb by releasing gas during baking. Blend thoroughly with the flour to ensure even lift and consistent texture in every cookie.
- Pinch of salt Small amount used to enhance and balance sweetness while strengthening flavors; controls taste and can influence dough behavior slightly. Dissolve evenly through dry ingredients to avoid pockets of salt.
- 2 -3 tablespoons sprinkles Colorful decorative element added in small quantity to provide festive appearance and a slight crunch; typically added at the end to avoid color bleed. Gently fold in to preserve sprinkle shape and bright colors on cookies.
Instructions
- Make your flax egg by mixing the ground flax and water in a small bowl. Set it aside, and prep the rest of your ingredients so it has the chance to sit for 10 minutes or so.: You will notice the mixture turn from a grainy suspension into a slightly thickened gel as it rests, with a glossy sheen that indicates the flaxseed has hydrated. The gel will feel a bit sticky and tacky between your fingers, which is what gives the dough structure in the absence of an animal egg. The reason this matters is that a properly gelled flax egg binds crumbs and prevents the cookies from falling apart while still keeping them tender. A common mistake is skipping the rest time, which results in a watery binder that will not hold the dough, so be patient and set it aside for about 10 minutes.
- Preheat oven to 400 F and move the rack to the middle position. Line a baking sheet with a Silpat non-stick mat or parchment paper.: The oven should feel reliably hot, and the middle rack gives the most even heat for cookies so edges do not brown too fast. Line a baking sheet with a Silpat or parchment paper to prevent sticking and to promote gentle browning. You will hear a soft hiss as the tray goes in if the oven is properly preheated, and within minutes you may smell a faint warm scent as butter begins to soften in the dough. If you skip preheating, cookies can spread unevenly, so allow the oven to reach temperature before baking.
- Cream the vegan butter and sugar together in a large mixing bowl using an electric mixer on a low speed.: As you cream, watch the mixture transform from a dull paste into a lighter, smoother blend with tiny air pockets that make it look paler. The texture should be silky to the touch and not greasy, which indicates proper incorporation. This step incorporates air that contributes to a lighter crumb, and doing it too briefly will make the cookies dense, while over creaming can produce overly thin, cakey cookies. A common misstep is using excessively warm butter, which can lead to a greasy, over spread dough.
- Add the flax egg and vanilla extract to the bowl. Mix on low.: When you fold these in, note how the mixture becomes a bit looser and more cohesive, with the vanilla releasing a gentle aroma that lifts the scent profile. The dough should come together smoothly without visible streaks of unmixed ingredients. The flax provides binding while the vanilla adds aromatic depth, and insufficient mixing here can leave pockets of dry flour later on. Avoid vigorous mixing which can incorporate too much air and change the texture.
- Whisk the flour, baking powder, and salt together in a medium bowl.: The dry mixture will look uniform and powdery, with the leavening evenly dispersed so each cookie rises consistently. Whisking helps prevent clumps and ensures even distribution, which is why I always check the bottom of the bowl for any unmixed pockets. If the baking powder is old, you may notice the mixture stays flat when baked, so it is worth testing freshness if results are disappointing. A common error is dumping flour in without whisking, which creates inconsistent texture and pockets of dense dough.
- Gradually add the flour mixture to the butter/sugar mixture, mixing it on a low speed until all the flour is incorporated.: As you incorporate the dry ingredients on low speed, you will observe the dough approach a cohesive mass that holds together without being sticky. The gradual addition prevents flour clouds and ensures uniform hydration, creating a pleasant, slightly tacky dough that is easy to shape. This technique matters because rushing the incorporation can create streaks of dry flour or overworked dough, leading to tougher cookies. If the dough looks crumbly, pause and press a handful together to gauge moisture before adding anything else.
- Fold in the Halloween sprinkles.: The sprinkles add a burst of color and a tiny textural contrast, and you should fold them gently to avoid smashing them into paste. Visually, the dough will speckle with bright flecks, and the process should be quick to keep the sprinkles intact. This matters because aggressive mixing can cause color bleed and change the look, and some varieties may melt or discolor if overworked. One mistake is using too many sprinkles which can affect dough cohesion and cause extra spreading.
- Gently roll the dough into 1.5" balls. Place the balls at least a couple of inches apart (cookies will spread) on the baking sheet. I bake two batches. Bake for 11-12 minutes.: When shaping, the dough should feel soft and pliable rather than sticky, and rolling will smooth the surface to produce evenly shaped cookies that bake uniformly. Place the balls a couple of inches apart because the cookies will spread and develop thin edges while keeping a soft center. You will notice a slight sheen on the surface from the butter as they warm in the oven. Avoid packing the dough too tightly when rolling, as that can produce dense spots rather than an even crumb. A common tip is to chill briefly if the dough is overly soft, which helps control spread.
- Transfer cookies to a cooling rack and then transfer them to an airtight container as soon as they've cooled a bit so they remain nice and soft.: During baking you should see the edges take on a hint of pale gold while the centers remain soft and set, and the tops may develop tiny cracks which is a good visual cue that they are done. The smell will shift from sugary to warm and toasty, and the cookies will feel slightly springy when tapped. Baking for the proper time ensures a tender interior and a slightly firm exterior, while underbaking leaves doughy centers and overbaking yields dry, hard cookies. If the oven runs hot, reduce the time slightly and rotate the tray halfway through to prevent uneven browning.
- Transfer cookies to a cooling rack and then transfer them to an airtight container as soon as they have cooled a bit: As the cookies cool, they will set and firm up slightly while retaining a soft interior, and moving them to a rack prevents sogginess from trapped steam. Once they are warm but not hot, placing them in an airtight container locks in moisture and keeps them tender for days. This step matters because trapped heat can cause condensation and make the bottoms soft, while leaving them out too long risks drying. A common oversight is stacking hot cookies which creates steam and softens textures, so allow a brief cool period first.
Notes
- Use vegan buttery sticks — I prefer vegan buttery sticks because they soften uniformly on the counter and cream reliably with sugar, giving a consistent texture; if you only have tub style vegan spreads the water content can vary and affect spread.
- Let the vegan butter rest — Allowing the butter to sit for 10 to 15 minutes yields the ideal softened state, too cold and it will not cream properly, too warm and the dough will be greasy and over spread in the oven.
- Choose vegan friendly sprinkles — Not all sprinkles are vegan, so check labels carefully to keep the cookie fully plant based, and fold them in gently to avoid color bleed into the dough.
- Make the flax egg ahead — Prepare the flax mixture first and let it gel while you measure other ingredients, this ensures strong binding and a smoother workflow during mixing.
- Bake on middle rack — The middle rack promotes even heat distribution so edges do not brown too quickly while the centers set, rotate sheets if your oven has hot spots.